Hi guys, I just installed a set of Firestone Coil-Rite 'helper' air-bags in my WH.
I've been procrastinating about it for a while, as I wasn't confident with the "instructions", and couldn't find any good photos of the same combination.
It seems like most the US guys use the Air Lift brand ones, which look very different.
Anyway, so I finally decided on a route for the air hoses which I'm happy with, so I took the plunge

Here's some photos and details, which can hopefully save someone else from procrastinating like I did

The main question everyone seems to have is how to route the air lines.
Basically I drilled a hole up through the center of the upper spring locator & through the body/chassis rail. Drilled another hole in the rail a short distance away, and fed the air hose up through the holes.
So I'm finished with the air hoses running vertically (through some plastic conduit.) into the body rails, with a good ~10-15cm of free movement, which should mean the hoses can never kink, and are completely enclosed until they're in a safe location (away from stone spray, etc.).
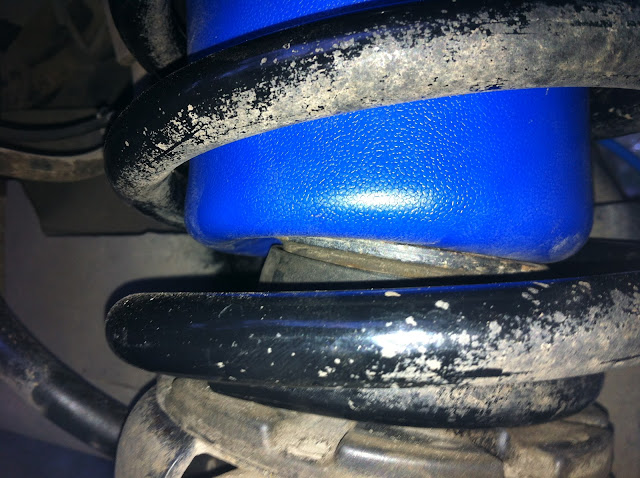
The bags in springs;
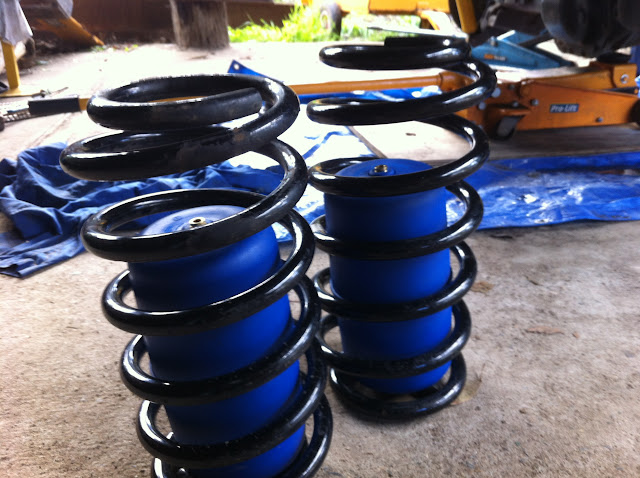
These are OME +2" medium-duty springs.
I ordered the bags from a local guy who I trust and just asked for "Air bags for a 2" lifted WH", so I'm not sure what model code they are... I'll find out if someone's interested.
Getting access;

I considered using spring compressors to avoid dropping the axle down too far... but honestly it's much easier to do it 'properly'.
Here's what I did;
- Jacked up under diff and supported chassis with stands.
- Removed wheels.
- Lowered diff, stopping before sway bar links are fully extended.
- On both sides; disconnected shocks at top mounts (just because the bolt is easier to access than the bottom one.), disconnected sway bar links, disconnected brake line junction/bracket thing (so the brake lines have a bit more slack.), disconnected ELSD.
- On the passenger/fuel tank side, I disconnected the upper suspension arm (at the axle.), since it will hit the tank guard with everything fully extended... I guess some of you may already have that guard trimmed down.
- Then I just dropped the axle down further. You'll have plenty of room to lift the springs out, and (more importantly) fit a cordless drill in there.
- I also gave everything a quick wash while stuff is easy to get to, looked for damage or rust, etc.
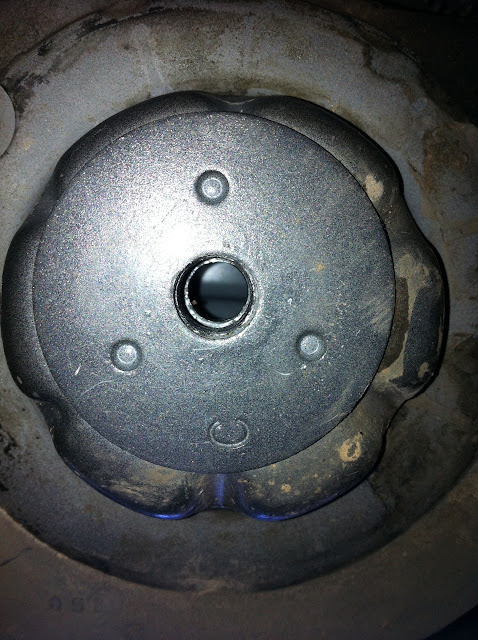
The upper bumper cup + spring locator;

The upper bumpers are just jammed into these cups. They yank out easily.
Then the cups are easily removed with that one bolt.
With the cup removed, I drilled a 13mm hole (incrementally... that's a LOT of hard steel to drill through.) through the thread which held the cup, then through the body/chassis rail.
Then drilled another hole near where the brake line junction is;

I used this location because it'd be easy to feed the hose through, and should be one of the more well-protected areas for the hose to run (the brake lines are there after-all.).
IMPORTANT: If you're going to drill holes like this, don't cheap out of the rust protection! What I do is; magnetise the drill bit to attract as much metal as possible, after drilling I stick a magnet up the hole (and anywhere near-by) to get out as much metal as possible, then blast all the holes out with air (also using a magnet to help grab bits as the fly around.).
Theen I shoot high-zinc primer as I can in the area. Even where you haven't drilled/cut, if you think some metal shaving might still be stuck somewhere, it's a good idea to try to shoot some primer onto it.
Then after the primer has dried I shoot some penetrol in the area to soak into any tiny pores, and repeat again just before doing any work (putting hoses through, etc.), so that any scratches are filled in by the penetrol as it settles and cures.
I pulled the hose through with bricklayers line, which was feed through using one coat-hanger wire to 'push' the line through the chassis rail, until it ran over the hole I'd drilled through the spring locator.
I used a borescope aimed through the hole, so I could see when the line was running over it. Oh I also double the line, so there's double the chance of it crossing over the hole haha.
Then I fish the line out using a wire with a hook, and the borescope aimed up so I could see what the hook's doing.
Borescope in action;

If you do this method, definitely double-up (or even triple... or quad haha.) the line to increase your chances of catching it

. This would still be a real PITA without a borescope though.
Once the hoses are fed through, it's all pretty easy;
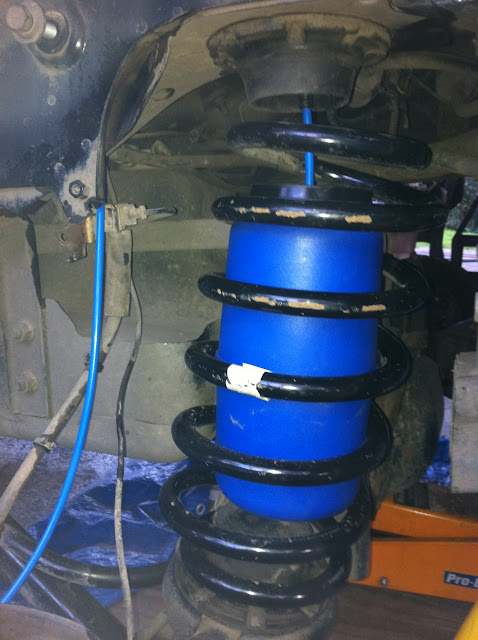
I used the supplied conduit stuff to protect the hose running through each hole. This also allows the hose to slide smoothly through the holes.
Since the hose is running vertically into the rail, you end up with ~10-15cm of smooth vertical movement, which makes handling the bangs easy, and should eliminate the chance of kinking or damaging the hose.
The top of the bag is protected by the supplied spacer;
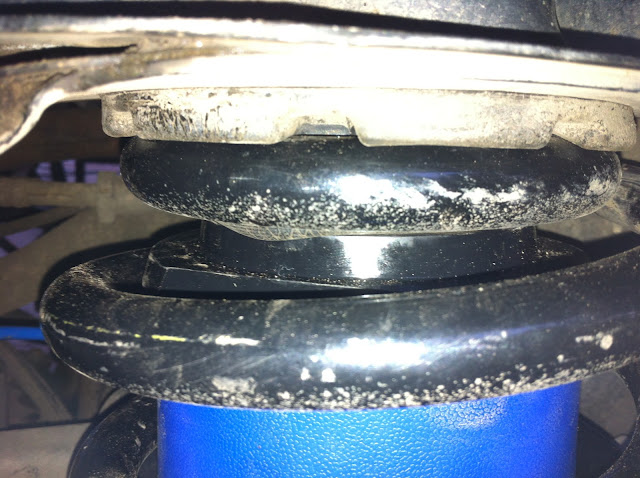
I guess the spacer's main job is to provide a large soft surface area to spread the load of the bag, but it probably also helps locate the bag and hose when the spring deforms & changes location slightly at articulation... I hope.
The rubber spring seat silencer has a lip which covers the bumper cup.
Since the cup bumper and cup are removed, the bag protect squashes up against that lip. Since it's only thin rubber, it just squishes down flat without much problem, so I've left it as-is for now. I plan it trim it down when I give everything a check-over after a bit of driving. Again, the movement in the hose will make this easy, since I can just jack the car up and get a few cm of space above the bag.
The bottom of the bag is (apparently, from what I've seem of the instructions and other installs.) left unprotected;
This is definitely a bad idea! From what I've seen off-road, the springs change position and angle significantly more at the axle than at the upper locator, so the air-bag will get slammed rubbing on that steel flat all the time.
For now I've stuck some neoprene rubber over the steel base (using auto sikaflex) to at-least protect the bags from the corners;

I'll try to find some protectors of the same material and diameter as the top ones, only as thin as possible while still being stiff.
The goal is to have a solid base to spread the load just like the top protectors, while not being too thick, since the bags fit perfectly as-is.
On the exhaust side, I covered the hose with a few layers of aluminium tape (I get it from jaycar, very handy stuff.) so I could run it neatly around the pipe with some existing wiring.

For now I've just run the hoses over the LRA tank and secured them inside the rear bumper with separate valves, nothing exciting.
I plan to do some cool things with all that once the bags have settled in (and I've done something about protecting the bottom of them.).
Cheers