My alternator was killed by sloppy oil change (previous owner)
Intermittently the red battery light would turn on, but if I hit the gas it would go away. Finally it wouldn't go away even after 10 min of spirited driving and I figured it's time to address this.
The alternator is a Valeo 04801250:
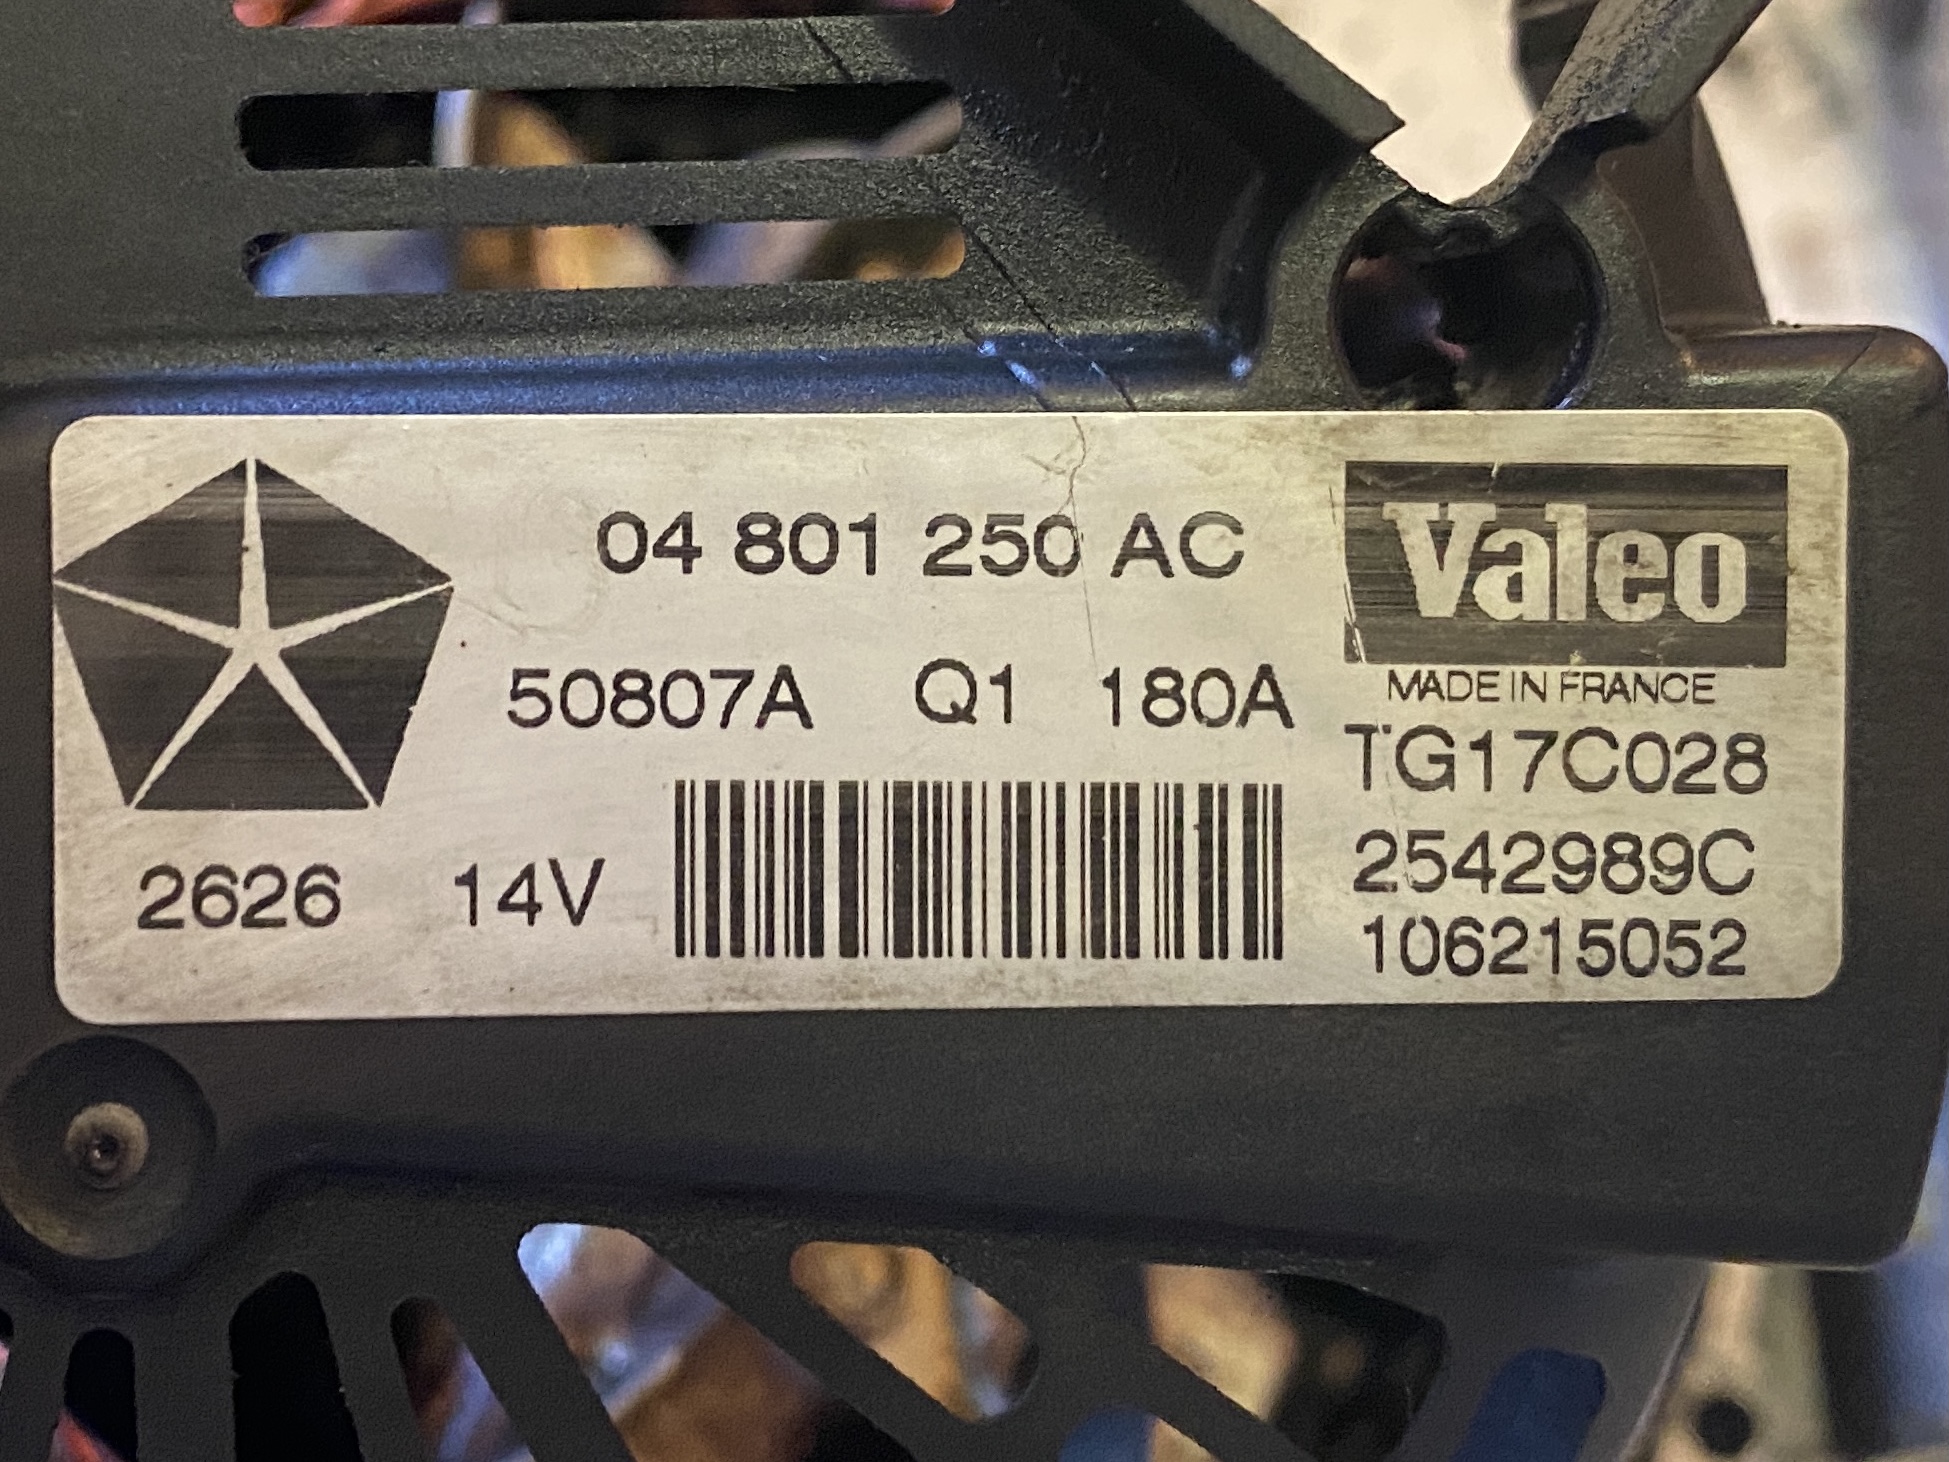
These instructions will be generally the right direction for other makes of alternator but no promises if it's not a Valeo
I successfully rebuilt it myself instead of buying a new or rebuilt one, tools needed:
- Sockets per Chirpz' guide to get it out and dismantle the alternator
- Dremel with cutting wheel and a grinding bit
- Some small screwdrivers or nails or chisels
- Soldering iron
- Two-part epoxy, probably better to use the 5 min set kind and not the 60 second

- Small wire cutters and a set of chunkier ones
- Razor blade/exacto knife
- Hair dryer or compressor or patience and a fan
Parts needed:
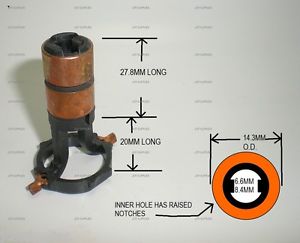
Valeo slip ring
I think this is a standard for all valeo alternators. I paid $25 to a local auto elec shop who ordered it for me via JAS Oceanic, a parts distributor. couldn't find it in australia otherwise.
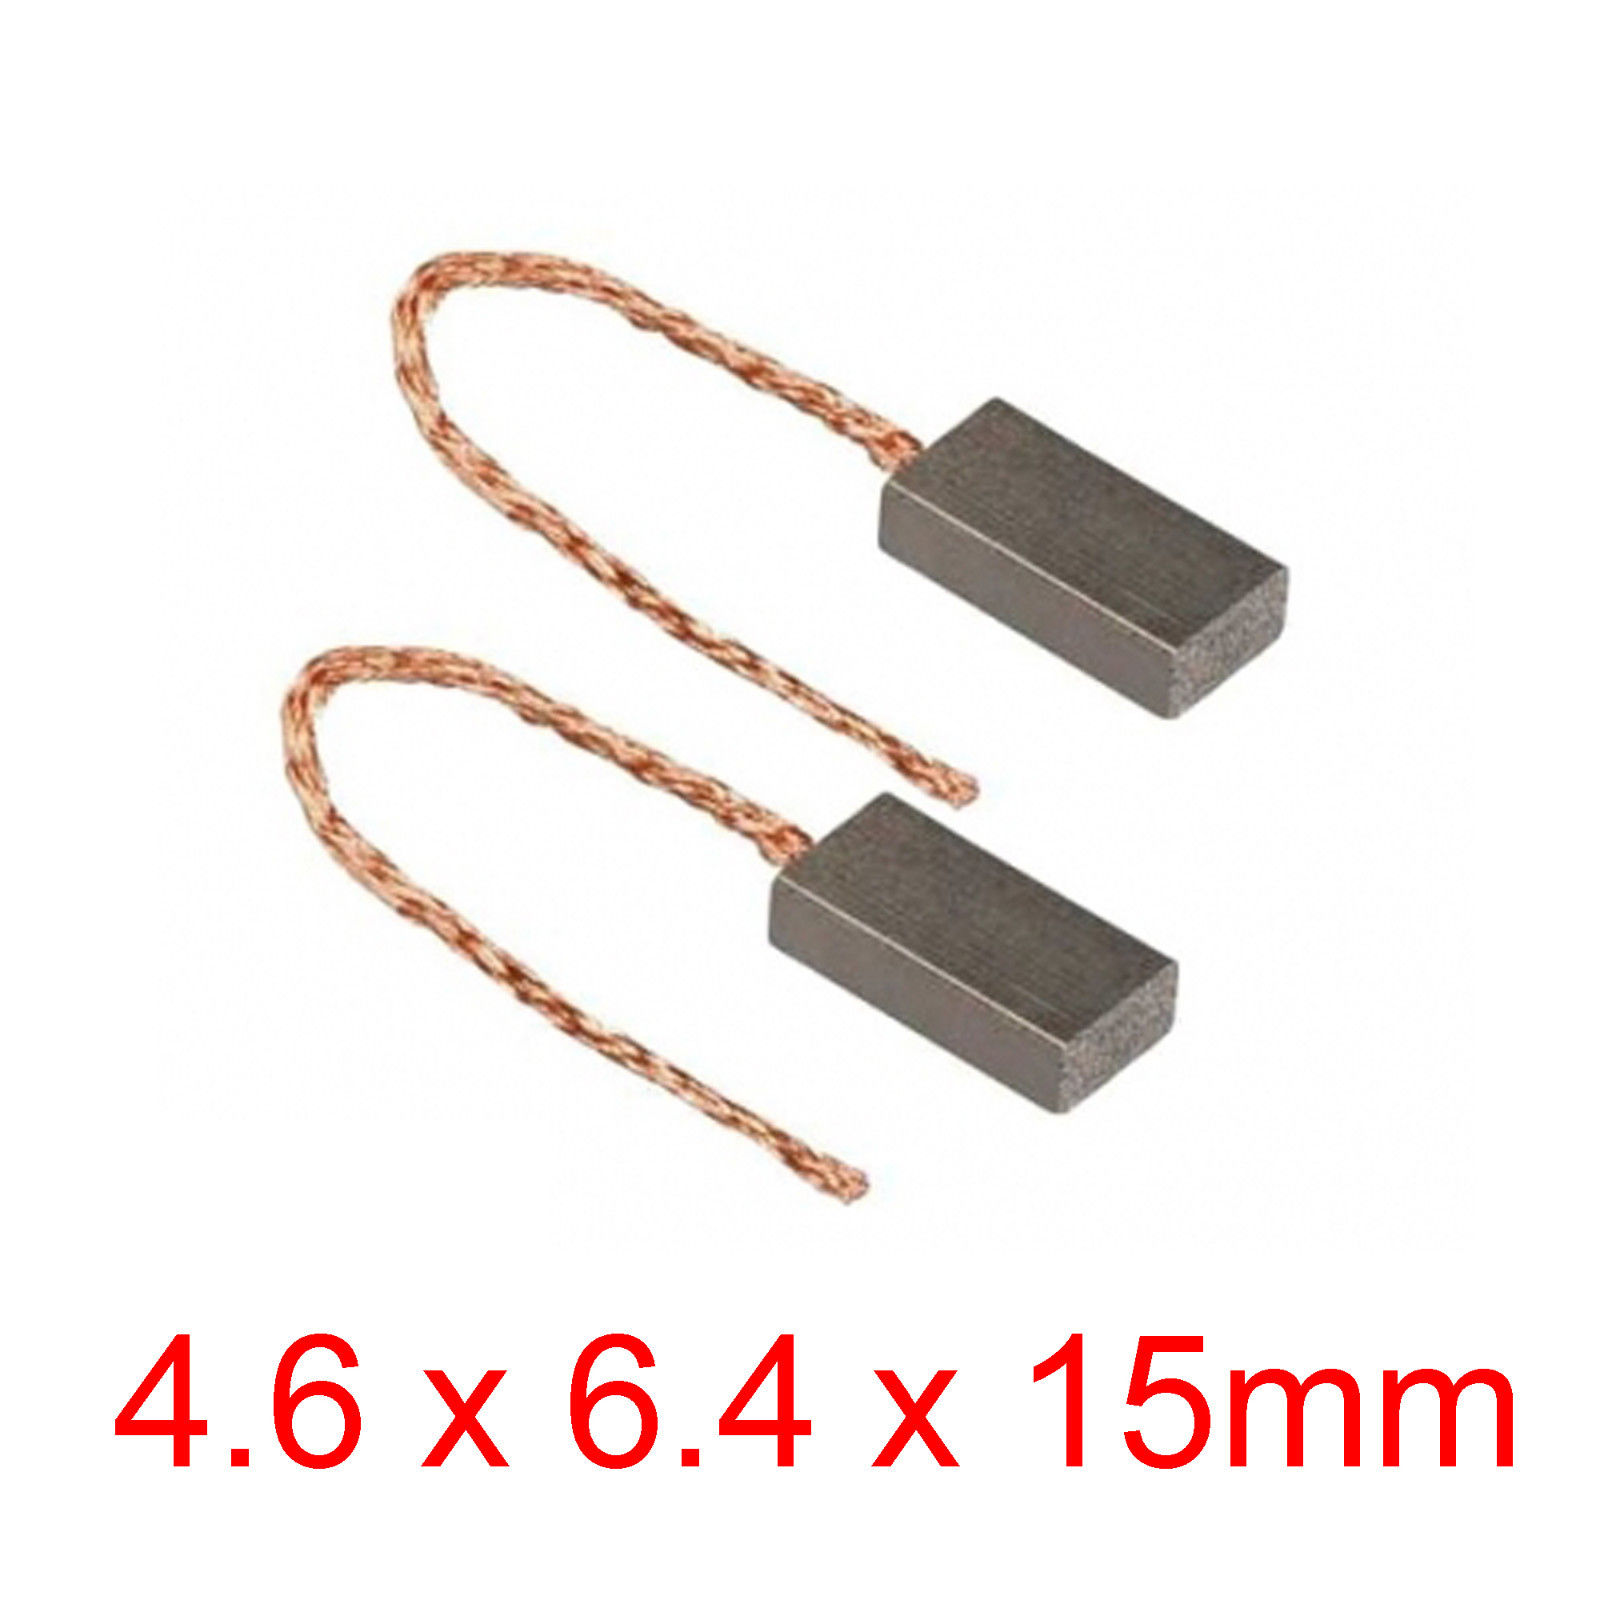
 Brushes
This is the size the Valeo needs. If you can't get these easily, a Bosch set worked for me - $35 locally, much cheaper online. I sanded down the sides and end to fit.
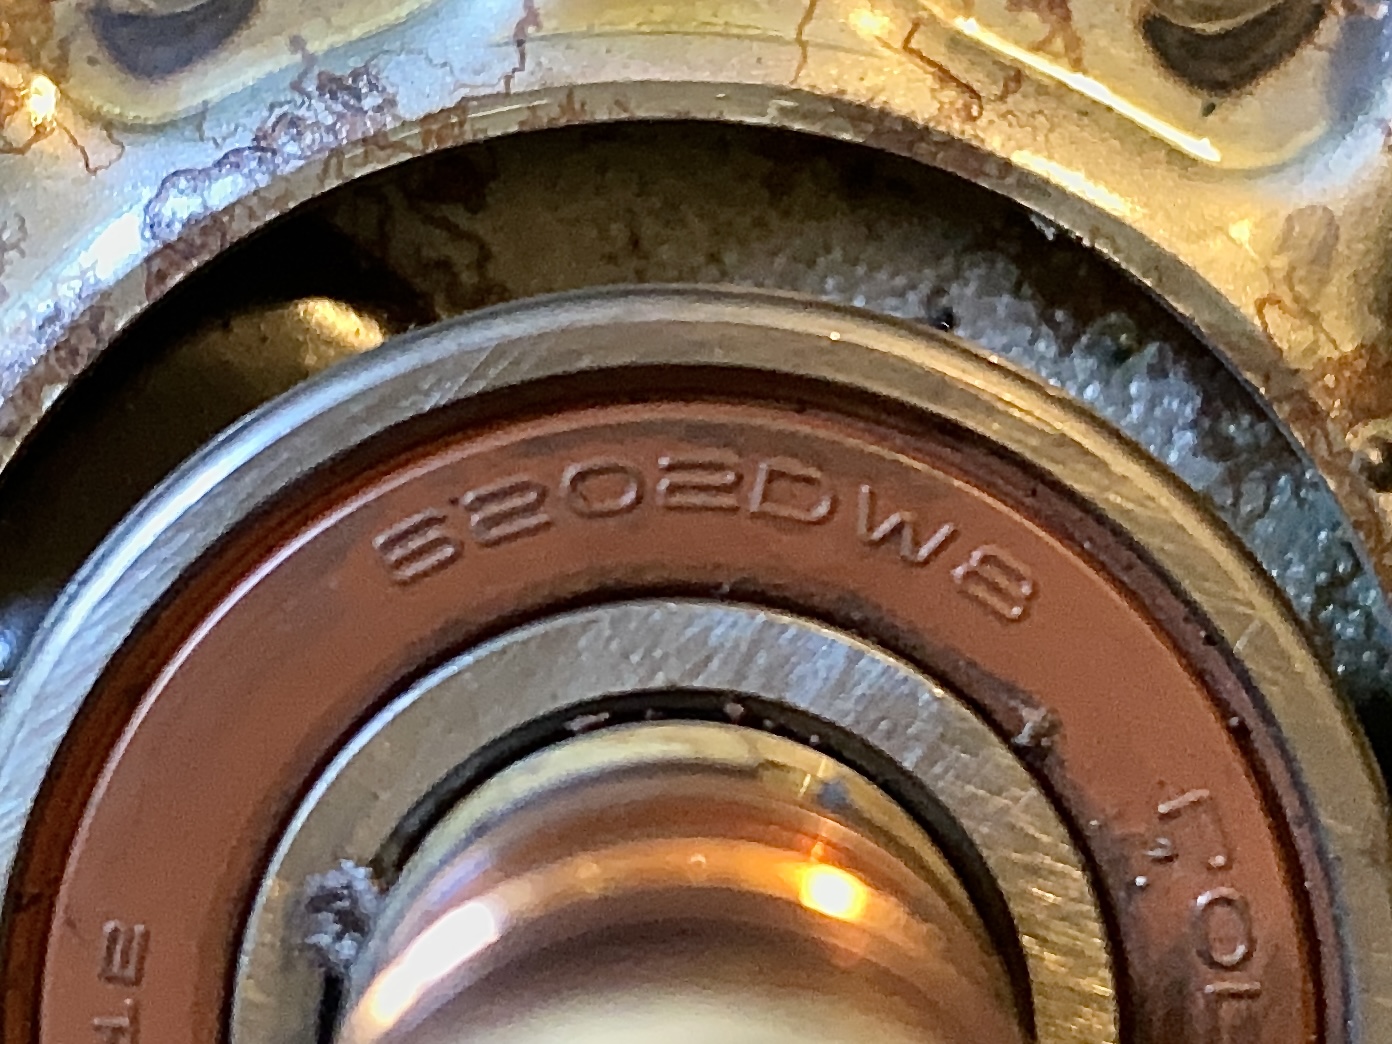
 Rear bearing
It's a 6202 bearing, standard size, $5 locally
 Little brass rings for resolderign the 3 phase wires to rectifier
I didn't have brass rings. I used some thick-ish single core copper wire and wrapped it around these contacts before soldering, worked fine and feels plenty secure.
You can find kits that have all these parts for cheap on ebay. I paid $75 in parts total and had them all in 48 hours, not bad.
Followed Chirpz' guide (see previous post in this thread) to remove the alt. I used some bungee cords to hold the serpentine belt and some of the hoses that were near the throttle body out of the way.
I wrapped the throttle body sensor with a piece of cloth and rubber band, then zip tied it to something to keep it safe. as Chirpz noted it looks both fragile and expensive so yeah.
These three videos are great and explain the 3 stages of rebuilding Valeo alternators which are all put together the same way. The vids describe what I found exactly, very helpful. You can service/replace the brushes (or replace the whole voltage regulator, which is what the brushes live in), slip ring, rear bearing and front bearing. if something else isn't working it's not really serviceable.
Stage 1, easiest - replacing the brushes (or entire voltage regulator)
Stage 2, a bit trickier - replacing the slip ring and rear bearing - if you are going to replace the slip ring may as well just replace the bearing as they are cheap
Stage 3, a lot can go wrong - replacing the front bearing
Do you need to replace this bearing? stand the alt on the pulley. Use a stethoscope or a short length of hose to listen carefully around the pulley area when you spin the alt. If it grinds, maybe you need to do this part. Mine was smooth and no abnormal noise so I didn't need to replace this.
After removing the cover and voltage regulator (which you could replace entirely with only some hand tools, no soldering), I found this lovely mess:

that's engine oil, graphite dust (from brushes) and copper dust (from slip ring). no wonder it didn't work so great!
I followed the videos almost exactly, with a couple deviations
Getting the bearing off
I bought a 75mm bearing puller, smallest I could find, but it couldn't get underneath the rear bearing. The feet were too chunky. Maybe if I ground away at the feet it would have fit.
I ended up dismantling the bearing by popping the plastic shield off, taking out the plastic spacer ring, moving the balls to one side and popping the outer ring off.
be careful to not lose the balls inside the alt! I lost one and it was a pain to get out!!!
Look at the slip ring, there are two legs that run down the rotor shaft. you can safely cut the inner ring along the legs (which are underneath it). when you cut thru the bearing you'll just hit the plastic of the legs. carefully cut both sides of the inner ring with dremel, along those legs, and pop the inner ring off.
Chiseling the epoxy away
I used a nail and small hammer to chisel away at the epoxy. Go very carefully. You don't need to get all of it off, just enough to free up the slip ring and the copper wires coming off the rotor on either side off it.
DO NOT FIDDLE WITH THE COPPER WIRES they will break and make things harder. I tried cutting the slip ring copper contacts off at the bases of the legs but even just doing this with fine cutters was too much and snapepd the copper wires. if you just have a nub left you'll be able to finish the job.
Removing the slip ring
If you have a vice then follow the video. I didn't so I used the dremel to cut away at the slip ring
The inner part of the slip ring is plastic. Surrounding that plastic, hollow shaft, which fits onto the rotor shaft, is the copper contact. Inside the two plastic legs is copper wire, which connects to the cylinder of copper surrounding the plastic hollow shaft.
You can cut thru this copper with dremel, then use fine wire cutters to cut away at the plastic until you can pry it off the shaft.
You can use a small flathead screwdriver to gently chisel the legs out of the channel they are running down in the rotor shaft
I did not have an additional plastic ring like in the video to remove
Use a small screwdriver to chip all the residual gunk off the shaft.
Use a razor blade to get the gunk out of the thin vertical channels that run up the shaft, the new slip ring will get anchored by these thin channel things.
Cleaning everything
Degreaser won't hurt anything except the bearing at the front of the alt. I sprayed everything with degreaser and used a toothbrush to clean up the metal alternator shell. Do not spray degreaser up the pulley else you risk degreasing the bearing, which makes it a very crappy bearing.
After degreasing everything, including the plastic parts, I used a hair dryer to thoroughly dry everything.
Reassembly
My brushes were too big to fit in the voltage regulator so I slowly sanded them down until they fit well and moved without resistance. They were too long to fit onto the alternator when I was finished so i had to sand down the ends as well until it was snug.
I ground away at the 3 phase wires and rectifier contacts per the video. if you don't do this, there's no way your solder is going to make a good joint as all of the surfaces will be very oxidized.
I used copper wire like a twist-tie thing (like what ccomes on bread loaf bags) to keep the rectifier contacts in place, and then generously soldered them up.
Reinstallation
I got the alt out and back in pretty easily by myself thanks to Chirpz' guide. The A/C lines were bent a little bit.
Getting the bolts back in was difficult and I asked my partner to get the top two started while I held it in place. An extra hand at this part really makes a difference!
End notes
There are Mercedes splash guards for the alternator and also for the oil filler cap. you may want to fit these if you think a sloppy oil change is in your future, but I couldn't find them anywhere. I will just be careful and use a funnel
buying a wreckers alternator you risk getting one that has this process of gunking up started. it takes time for it to die so it may work will for some time. the problem is, once the oil gets up into the slip ring area, it will quickly pick up the abraded dust from the moving parts and stay in that area - it is stucck in that little plastic cap. i think once there is some oil in there, the alt's days are numbered. you can easily have a look and clean it up though and prevent it from dying if it isn't too far gone
a rebuilt alt from Rockauto.com will run around $300 AUD shipped. wreckers are usually around this price anyways so if you have time and don't want to rebuild, just buy it from rockauto and it will be good as new. there is not much that can go wrong with an alt's non-serviceable parts, so no real reason to go with new over rebuilt.
good luck with your rebuild, happy to answer any questions