Grand Willys Project - Page 15 - AUSJEEPOFFROAD.COM Jeep News Australia and New Zealand

Go Back   AUSJEEPOFFROAD.COM Jeep News Australia and New Zealand > JEEP GARAGE > Jeep build up
Register Forums Trading Your Jeep My Garage Mark All Read

Post New Thread  Reply
 
Thread Tools Search this Thread
  #99  
Old 30-04-2011
Gojeep's Avatar
Gojeep  Gojeep is offline
LokRinger
 
Join Date: Jul 2002
Location: Victoria
Posts: 6,873
Likes: 790
Liked 1,761 Times in 558 Posts
Default

Sorry mate for the delay but have been away for Easter.
The large oval unit behind left wheel well is the carcoal canister for cleaning up the fuel venting system before releasing to the atmosphere.
Fuel pump on most injected vehicles are inside the tank. Filters also for most at least since 97 on the OBDII systems.
TCM is located under the back seat on the passenger side.
Not sure what you are talking about on the last one? Only black boxes I can remember are at the rear of both front wheel wells and one rear and is for picking up the signals for the TPMS?
__________________
Cheers, Marcus.

My web site:
http://willyshotrod.com Over 5'000 Club
  #100  
Old 05-05-2011
Gojeep's Avatar
Gojeep  Gojeep is offline
LokRinger
 
Join Date: Jul 2002
Location: Victoria
Posts: 6,873
Likes: 790
Liked 1,761 Times in 558 Posts
Default


As I will be using the firewall and floor, I had to repair the damage from the Harley that hit the side at 100 mph according to police estimates.
Thought it would be easier while still up on the rotisserie for a good working height. Also much easier to flip it up either way depending on which side I am working on.
The ruler gives you an idea how much it needs to be straightened.


This crease is pretty sharp. This photo shows how much the force moved it. You are looking at the firewall upside down and this is where it goes from vertical to curving into the floor section.


Looking a lot straighter now. Need to work the upper section some more but will do that later once off the frame as some buckling still under that section.
__________________
Cheers, Marcus.

My web site:
http://willyshotrod.com Over 5'000 Club

Last edited by Gojeep; 01-08-2017 at 02:25 PM.
  #101  
Old 06-05-2011
Gojeep's Avatar
Gojeep  Gojeep is offline
LokRinger
 
Join Date: Jul 2002
Location: Victoria
Posts: 6,873
Likes: 790
Liked 1,761 Times in 558 Posts
Default


Still busy drilling out all the spot welds to remove the floor from the uni-body frame


I have ground the drill bit into what called a pilot point. These only work once a pilot hole has been drilled first. Then the centre part of the drill sits in this to locate the bit and then the cutting edges are almost flat to give a very shallow cut. The angle is less than what shows on this angle of shot.


You can see that all the drill holes on the lower part of the picture is what is left after only drilling the large hole through the top layer of the spot welded metal only. Much easier to just weld the small pilot hole up then the whole spot weld size.


But as you can see there is an awful lot of them to be done!
__________________
Cheers, Marcus.

My web site:
http://willyshotrod.com Over 5'000 Club

Last edited by Gojeep; 01-08-2017 at 02:26 PM.
  #102  
Old 06-05-2011
whollsee's Avatar
whollsee  whollsee is offline
AJOR Gold
 
Join Date: Dec 2006
Location: Canberra
Posts: 645
What Jeep do I drive?: CJ
Likes: 0
Liked 43 Times in 32 Posts
Default

Damn those robots!
__________________
"Whenever I hear the word 'Jeep' I reach for my wallet."
CJ7 1982
  #103  
Old 12-05-2011
Gojeep's Avatar
Gojeep  Gojeep is offline
LokRinger
 
Join Date: Jul 2002
Location: Victoria
Posts: 6,873
Likes: 790
Liked 1,761 Times in 558 Posts
Default


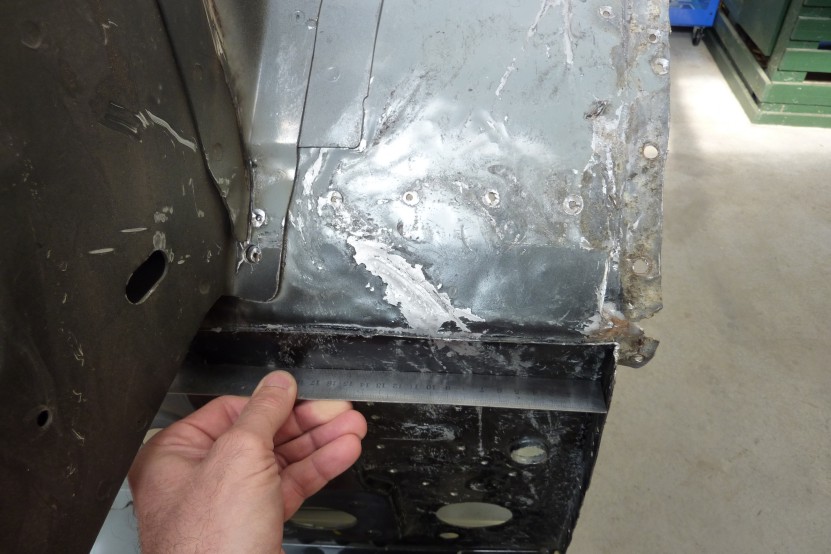
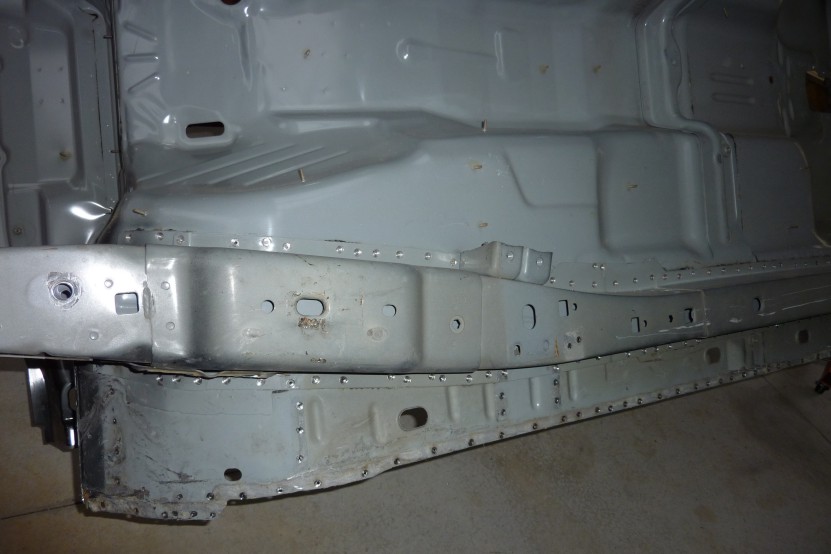
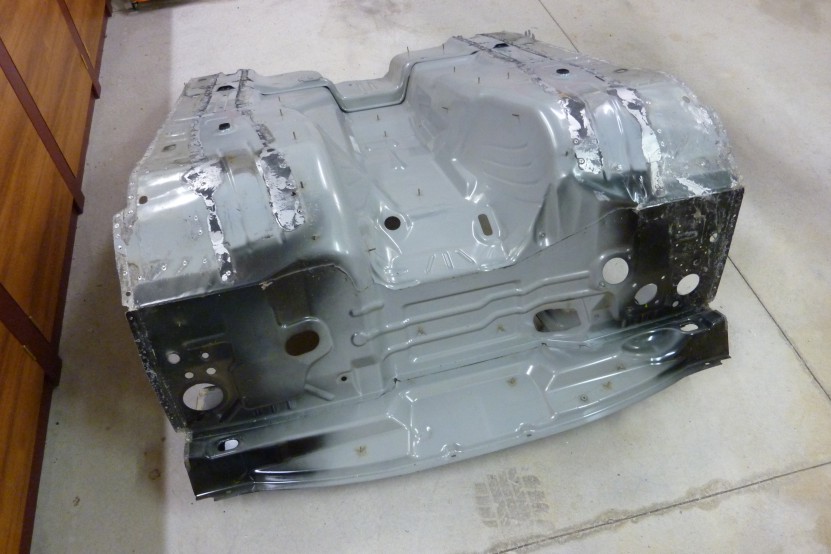
Finally after 400 odd spot welds drilled out, the floor and firewall is separated from the uni-frame.
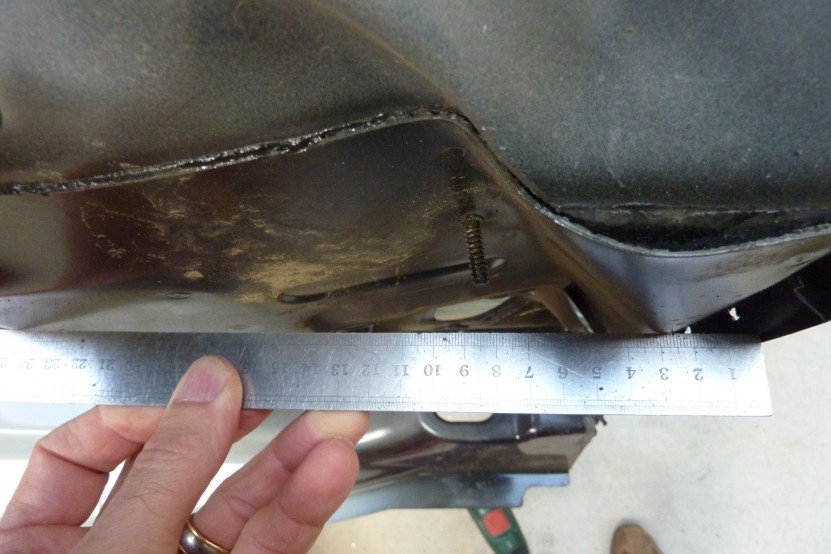
Quite substantial as 4" deep and further reinforced with another hat section inside of that as well.
Good to see how well all the galvanized steel is coated through and through. Was even between each layer of steel also.


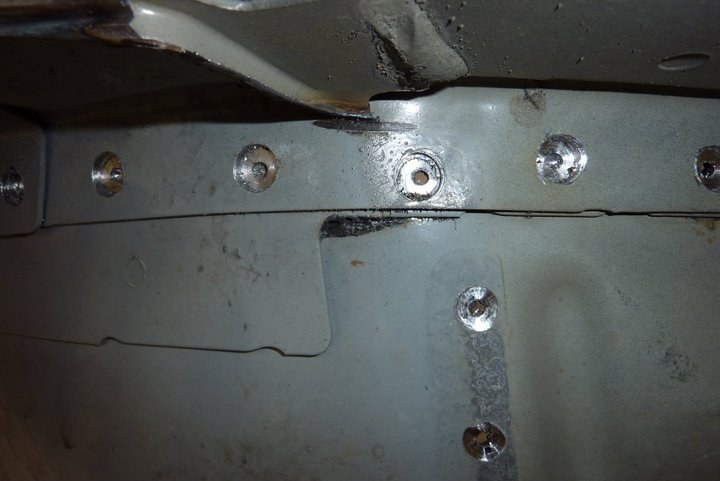
Will be leaving the floor stiffener in place as it is the rear mount for the seats and seat belts.
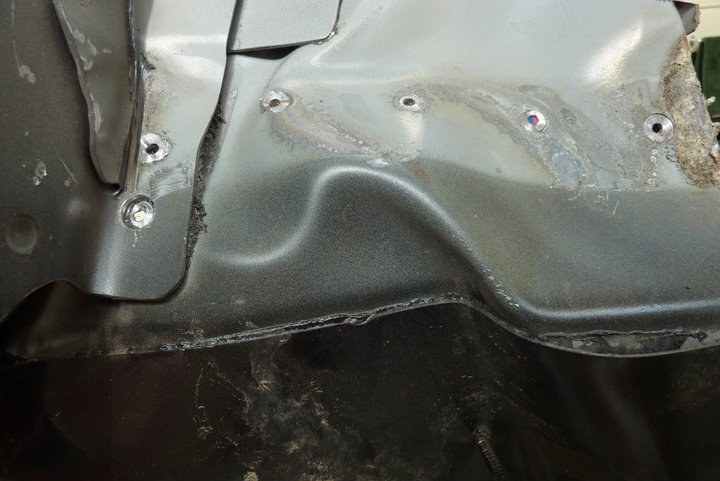
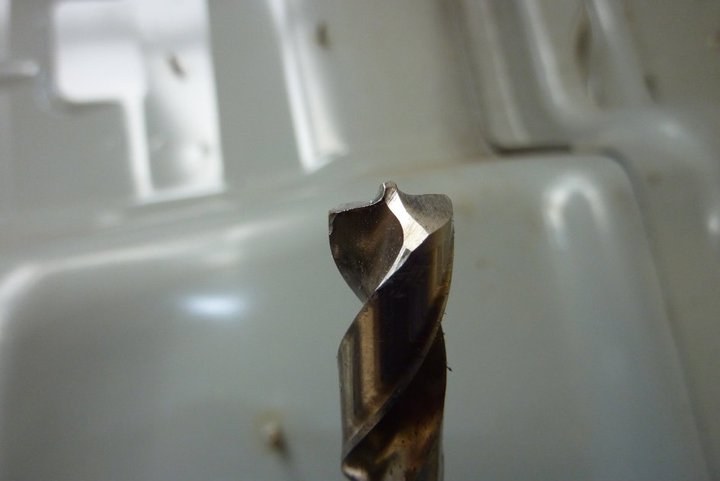
I did quite well on drilling out all the spot welds too with one or two one breaking right through the floor panel that I wanted left undrilled apart from the pilot hole. There was a few others when a bracket had to be removed from the top side as well so had to be drilled from both sides, but not bad going when you have to stop the drill bit each time only 1.2mm short of drilling through. Learnt a trick right near the end of tapping in a cold chisel into the joint and then you would here a crack just as the spot weld broke from the floor. Of coarse only discovered this with less than a dozen to go!


Not sure if I can keep where the cowl juts out or not. It was for the air intake for the heater and A/C and where the wiper motor and linkages sit. Not useful for either as they are needed under the cowl in the Willys and not the bonnet where this sits in the Grand.


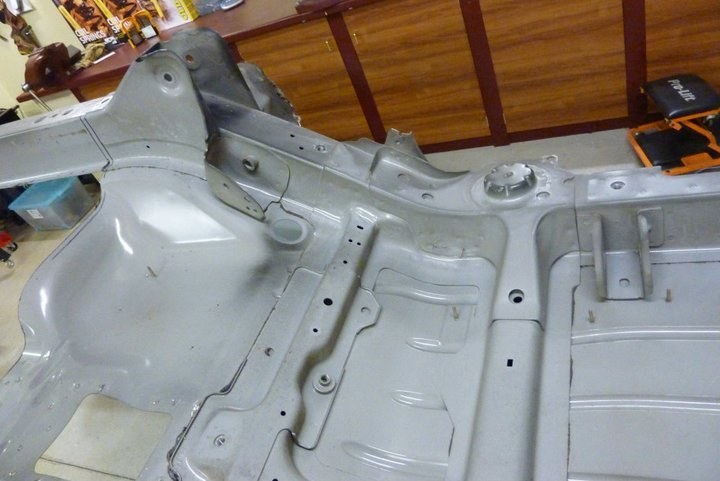
Still undecided on how to best use the rear suspension mounts. At the width it sits, the rails with upper and lower control arm and coil mounts would nearly fit between the Willys chassis whole. So could leave them mounted to the rails and weld this to the inside of the Willys chassis.
I will keep this section as one piece until I know how to use it best. Want to use the mounts either way and they are made from HSLC ( High Strength Low Carbon ) steel and is 30-40% stronger than normal steel and has a higher corrosion resistance as well.
__________________
Cheers, Marcus.

My web site:
http://willyshotrod.com Over 5'000 Club

Last edited by Gojeep; 01-08-2017 at 02:29 PM.
  #104  
Old 14-05-2011
Gojeep's Avatar
Gojeep  Gojeep is offline
LokRinger
 
Join Date: Jul 2002
Location: Victoria
Posts: 6,873
Likes: 790
Liked 1,761 Times in 558 Posts
Default


Well that is the last of the Grand Cherokee cut up and carried out of the workshop.
Next phase will be bringing the Willys back in and doing lots of comparative measurements to workout how best marry the two!
__________________
Cheers, Marcus.

My web site:
http://willyshotrod.com Over 5'000 Club

Last edited by Gojeep; 01-08-2017 at 02:31 PM.
  #105  
Old 15-05-2011
Gojeep's Avatar
Gojeep  Gojeep is offline
LokRinger
 
Join Date: Jul 2002
Location: Victoria
Posts: 6,873
Likes: 790
Liked 1,761 Times in 558 Posts
Default


The poor little shed is busting at the seams! Managed to fit nearly the whole Grand in there apart the rear quarters, roof and rear floor plus the front sub assembly. Cant wait to start taking things back out of there as means I am actually putting things back together or sold some parts I don't need.


Been a while since there has been a clear floor.


Willys going into the workshop. This is why I made my benches fold down easily. Tight, but it fits.


Hard to believe that that engine will one day sit in the Willys.


Ready to be set at the height where I will take the measurements I need before pulling it apart.
__________________
Cheers, Marcus.

My web site:
http://willyshotrod.com Over 5'000 Club

Last edited by Gojeep; 01-08-2017 at 02:32 PM.
Post New Thread  Reply


Posting Rules
You may not post new threads
You may not post replies
You may not post attachments
You may not edit your posts

BB code is On
Smilies are On
[IMG] code is On
HTML code is On


All times are GMT +10. The time now is 11:02 AM.


Advertisements


AJOR does not vouch for or warrant the accuracy, completeness or usefulness of any message, and are not responsible for the contents of any message. The messages express the views of the author of the message, not necessarily the views of AJOR or any entity associated with AJOR, nor should any advice be substituted as technical advice replacing that of a mechanic. You agree, through your use of this service, that you will not use AJOR to post any material which is knowingly false and/or defamatory, inaccurate, abusive, vulgar, hateful, harassing, obscene, profane, sexually oriented, threatening, invasive of a person's privacy, religious, political or otherwise violative of any law. You agree not to post any copyrighted material unless the copyright is owned by you or by AJOR. The owner, administrators and moderators of AJOR reserve the right to delete any message or members for any or no reason whatsoever. You remain solely responsible for the content of your messages, and you agree to indemnify and hold harmless AJOR, the administrators, moderators, and their agents with respect to any claim based upon transmission of your message(s). The use of profile signatures to intentionally mislead or misdirect any member on this forum is not acceptable and may result in your account being suspended. Any trip that is organised through the AJOR forum is participated at your own risk. If you or your vehicle is damaged it is your responsibility, not that of the person that posted the thread, message or topic initiating the trip, nor the organisers of AJOR or moderators of any specific forum. This forum and associated website is the property of AJOR. No user data is harvested and no information supplied in your registration will be sold for profit.


Powered by vBulletin® Version 3.8.7
Copyright ©2000 - 2024, vBulletin Solutions, Inc.

AJOR © 2002 - 2024 AUSJEEPOFFROAD.COM. All corporate trademarked names and logos are property of their respective owners. Ausjeepoffroad is in no way associated with DaimlerChrysler Corporation or Fiat Jeep.
www.ausjeep.com www.ausjeep.com.au www.midlifemate.com ausjeepforum.com www.r9kustoms.com
vB Ad Management by =RedTyger=