Grand Willys Project - Page 187 - AUSJEEPOFFROAD.COM Jeep News Australia and New Zealand

Go Back   AUSJEEPOFFROAD.COM Jeep News Australia and New Zealand > JEEP GARAGE > Jeep build up
Register Forums Trading Your Jeep My Garage Mark All Read

Post New Thread  Reply
 
Thread Tools Search this Thread
  #1303  
Old 26-03-2017
Tyvokka's Avatar
Tyvokka  Tyvokka is offline
Jedi Master
 
Join Date: Jan 2011
Location: WJ JK Jeep Trailer Jeep R/C Sydney
Age: 79
Posts: 2,550
What Jeep do I drive?: WJ
Likes: 1,088
Liked 919 Times in 625 Posts
Check out my Ride(s)
Default

Speeeeeeeeeeechless...every time.
__________________
Grand Wookie Jedi
Rrrrrrrr-aghhhh!
http://youtu.be/e8aEDaeBMyI
Likes: (1)
  #1304  
Old 01-04-2017
Gojeep's Avatar
Gojeep  Gojeep is offline
LokRinger
 
Join Date: Jul 2002
Location: Victoria
Posts: 6,878
Likes: 792
Liked 1,769 Times in 560 Posts
Default


Time to get back into the metal work and finish the last major piece of the whole cab build. If you look closely you can see it does not follow the gutter that it needs too after these panels were pancaked. Along the front edge it bulges out and it doesn't go into the corner either. The side needs some work also.


To get rid of the bulge in the front I lightly ran in through the shrinker. To pull the panel into the corner it needed to be stretched. There is a bit of play back and forth so that the overall angle still follows the gutter.


After all four panels followed the gutter line exactly, which I had already spent many hours getting it the same width all the way around and the lip the same height, I can start on the shape of the panels. The rear corner on the right side sits too low.


The rear panel on the left side though sits too high. As soon as the roof panel was cut into the fours pieces originally, the rear sprung into the differences left to right. There were a lot of dents in the roof I had to taken out before cutting them apart and obviously some tension must have been left in them.


From the rear you can really see the difference left to right. Remember also that from stock after rolling a new flange around the bottom, I had taken 2" of height out of the middle and 1.5" from the corners.


The front panels are sitting nicely and is 1" lower than stock right across. Looks even lower with the cab now being 9" wider than stock.


I cut out the centre of each panel as planned to fit the new centre roof infill, leaving a bit under an inch extra for trimming later. This will make it easier to correct the rear panel too.


So one needs to come down overall and the other to come up so it flows into the front panels as I laid out nearly a year and a half ago now! Good to see no rust had formed in the mean time sitting in bare metal with just a coat of lanolin oil over them.


To bring the low one up I shrank along the inside edge and then had to stretch the outside corner a bit to get the overall angle back again. The high one I stretched along the inside edge and shrank the outside corner to correct the angle.


Sitting much better now.
__________________
Cheers, Marcus.

My web site:
http://willyshotrod.com Over 5'000 Club
Likes: (11)

Last edited by Gojeep; 14-08-2017 at 07:09 PM.
  #1305  
Old 08-04-2017
Gojeep's Avatar
Gojeep  Gojeep is offline
LokRinger
 
Join Date: Jul 2002
Location: Victoria
Posts: 6,878
Likes: 792
Liked 1,769 Times in 560 Posts
Default


Just done tig welding the rear section of the roof together.


I think it looks acceptable after the pancaking. Remembering that a bit more crown still to come from the roof infill panel.


Hard to believe that over stock, the centre of the roof to the floor is now 100mm/4" lower than stock! 2" sectioned out below the window and 2" above the gutter.


I wheeled more shape into it as lost a lot of the early vertical part of the roof line when the bottom section was cut off. So I increased the radius so it was steeper near the gutter like stock again.


I am trying out different techniques for putting a crease line in some scrap to go on the filler panel at the front of the roof above where the V meets in the middle.


Just using a rounded cold chisel.


Doesn't look to bad for 2 minutes of work.


Next I thought I would try using my bead roller. It is just a hardened washer from a Range Rover trailing arm from memory over one of my skateboard wheels from my youth.


Just ran along the line and then slowly increased the pressure while doing a shorter run each time.


The one closest to the camera is the bead rolled one.


Liked it so thought I would do it on the filler panel. Made it bolder to match the crease line that runs up the centre of the bonnet.


I made it peak at the top front and then taper off to nothing towards the back and a bit more left at the other end so it follows the V of the gutter. Hope it will look alright but can always smooth it out if I don't like it.
__________________
Cheers, Marcus.

My web site:
http://willyshotrod.com Over 5'000 Club
Likes: (7)

Last edited by Gojeep; 14-08-2017 at 07:13 PM.
  #1306  
Old 08-04-2017
Tyvokka's Avatar
Tyvokka  Tyvokka is offline
Jedi Master
 
Join Date: Jan 2011
Location: WJ JK Jeep Trailer Jeep R/C Sydney
Age: 79
Posts: 2,550
What Jeep do I drive?: WJ
Likes: 1,088
Liked 919 Times in 625 Posts
Check out my Ride(s)
Default

Noice work mate, very schmickerrhausen!
__________________
Grand Wookie Jedi
Rrrrrrrr-aghhhh!
http://youtu.be/e8aEDaeBMyI
Likes: (1)
  #1307  
Old 17-04-2017
Gojeep's Avatar
Gojeep  Gojeep is offline
LokRinger
 
Join Date: Jul 2002
Location: Victoria
Posts: 6,878
Likes: 792
Liked 1,769 Times in 560 Posts
Default


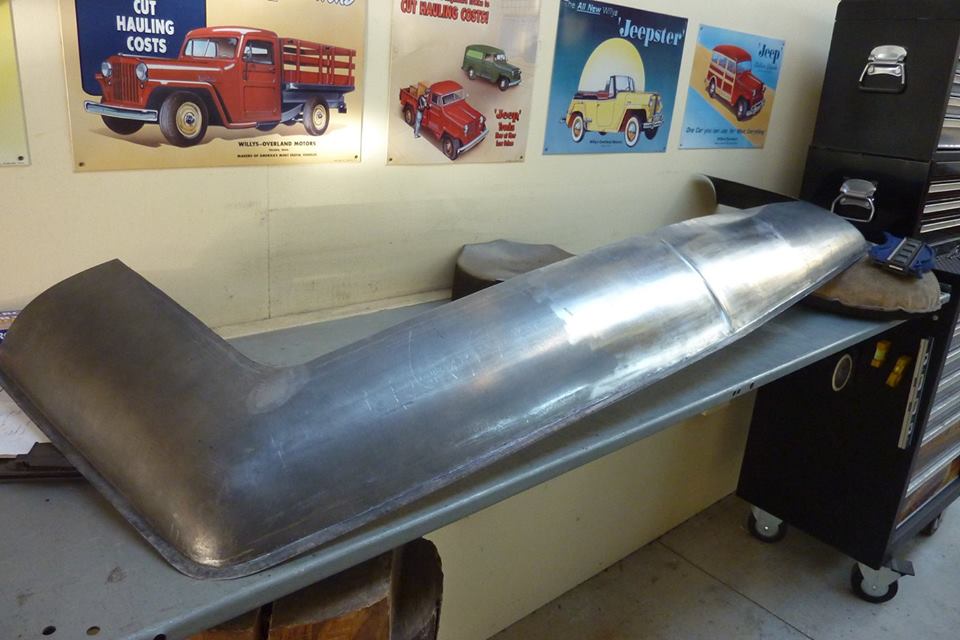
Welded the three pieces that make up the front together and was quite happy with the look.
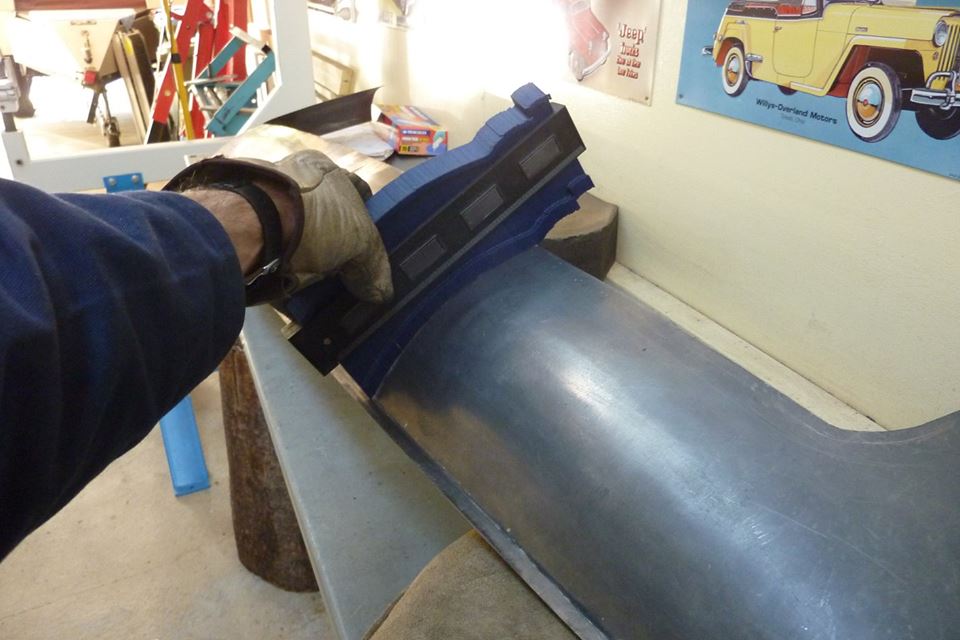

As always, I checked the profile at the same points on each side to make sure it was even.
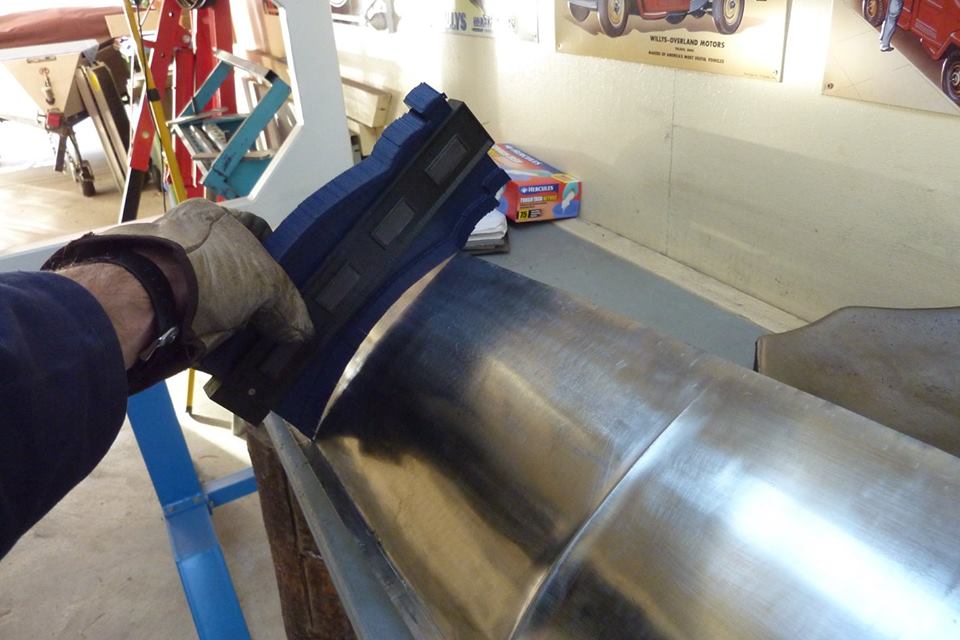

Well it is nowhere near the same this time!
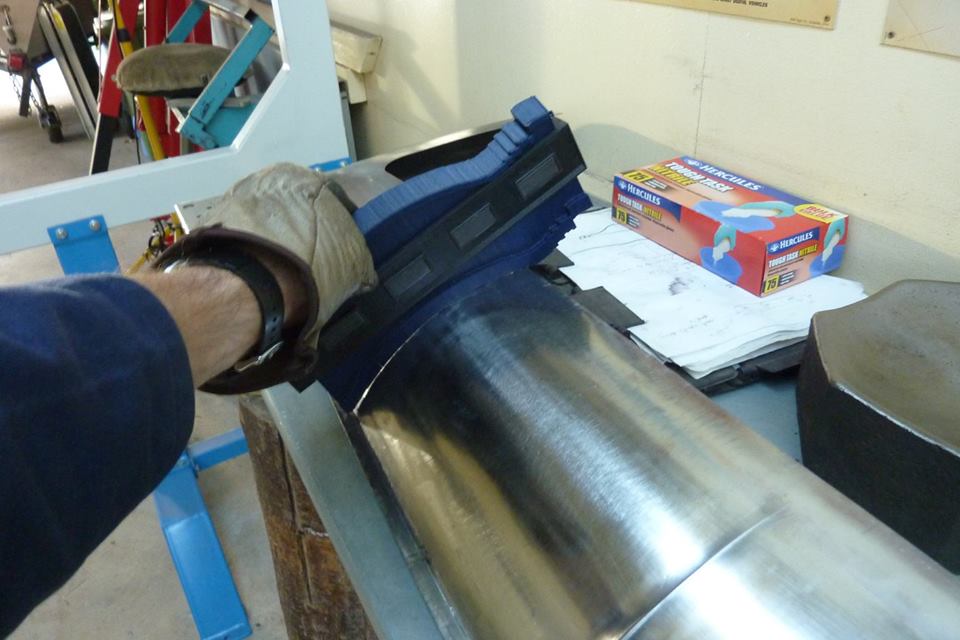

I wheeled it to match the other side using a rubber band on the upper wheel to make it go quicker. Looked good matching many points left to right.
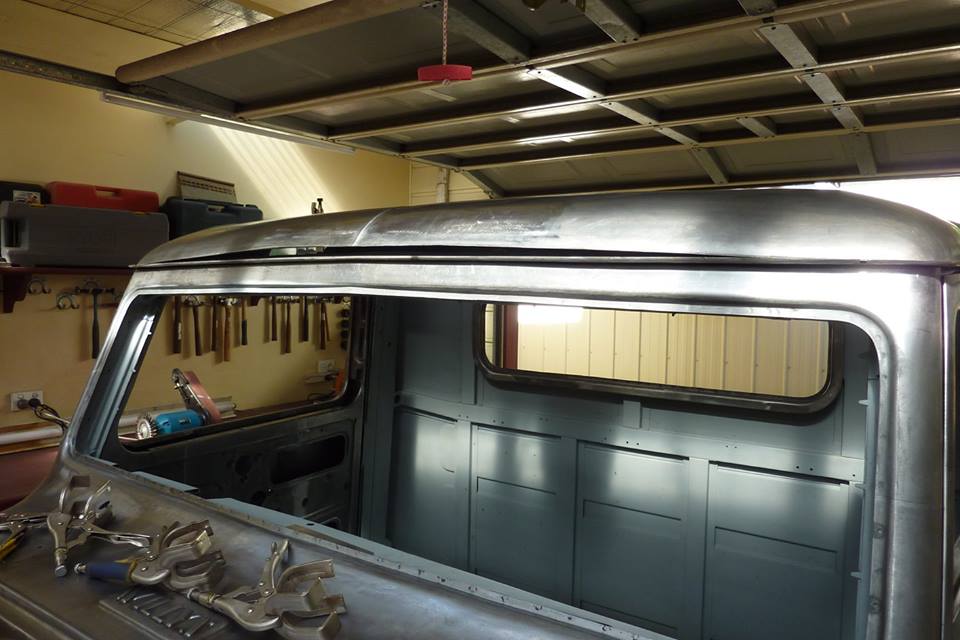

But all was not well when I placed it back on the cab to check fitment!
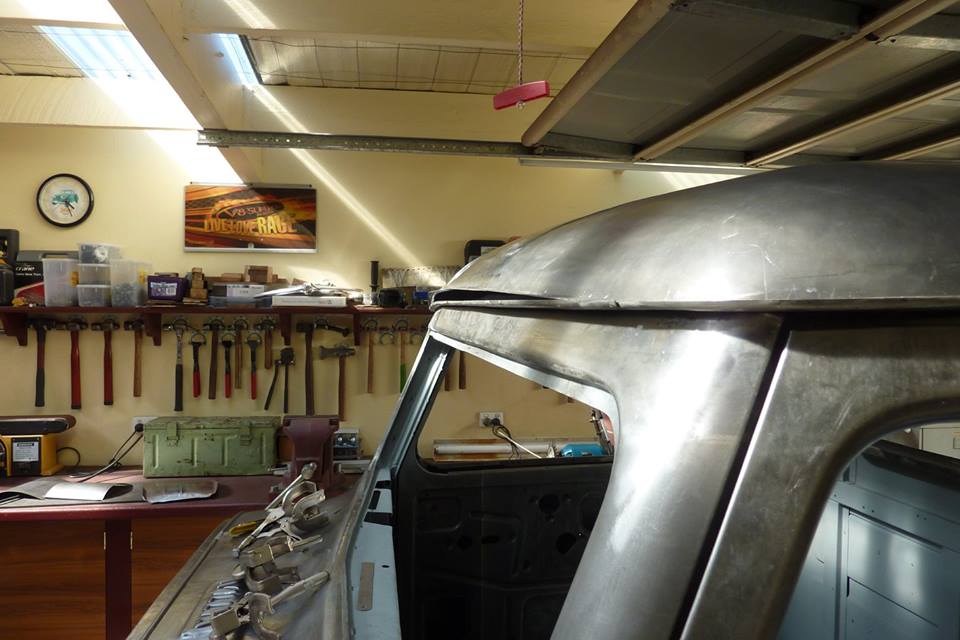

Not sure if it was because I used the rubber band when wheeling as it only bends rather than stretching to change shape?
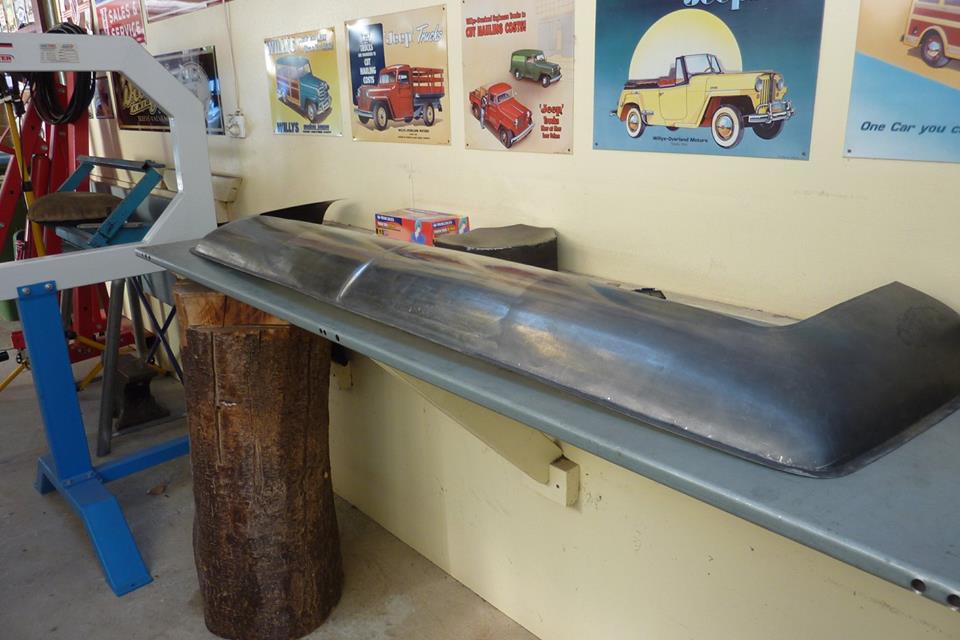

Sits up a lot as should only have a slight rise. Tried wheeling more without the rubber but was having some trouble on my own with it this long and keeping it level when running it through.
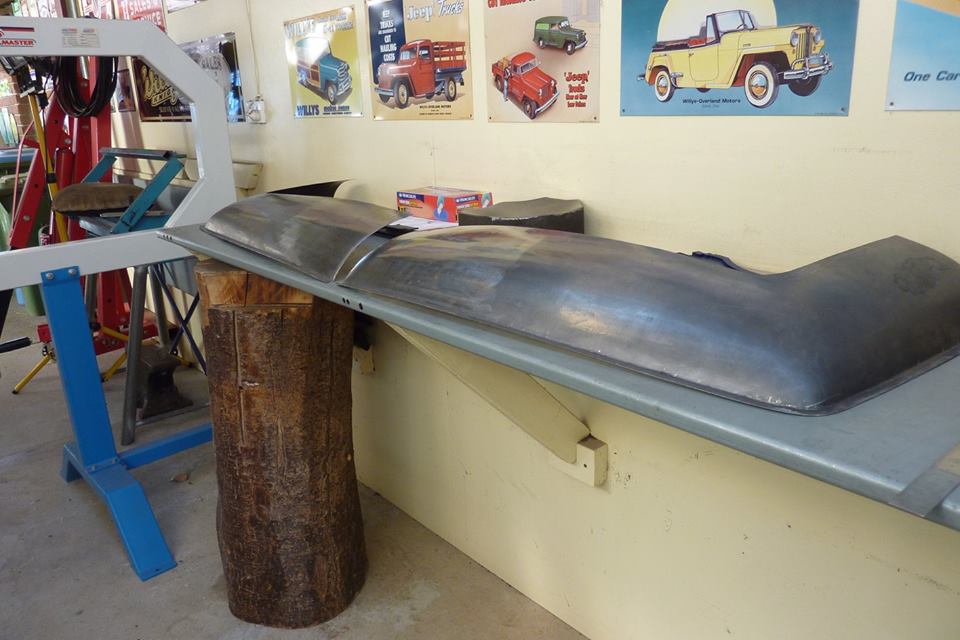

Cut it right in half down the middle of my nice centre crease. Even in half you can see how much curve it has. To my mind it needs to be stretched along the bottom to pull it down.
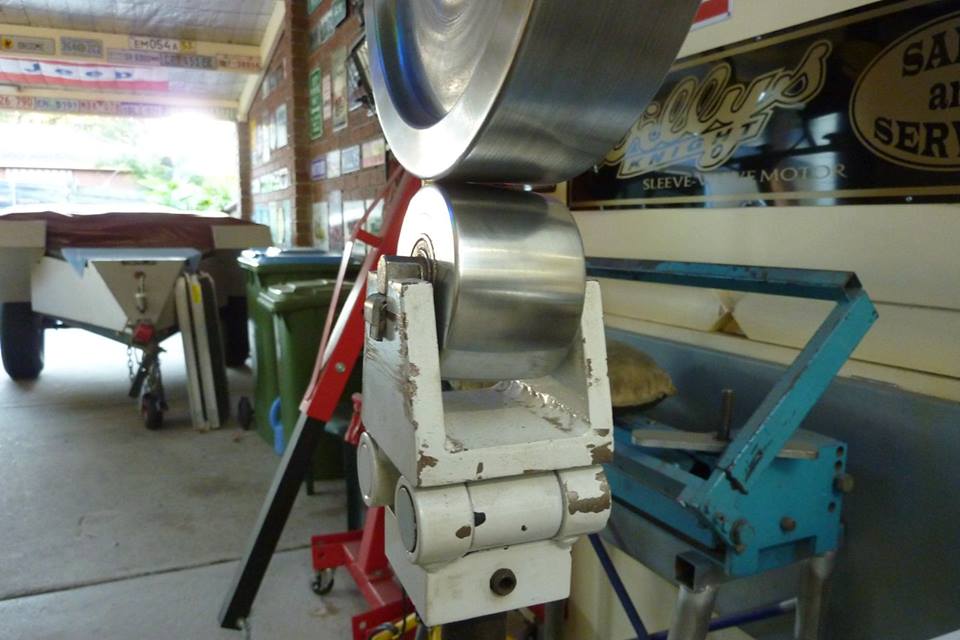

I hadn't been able to wheel right up to the flange as the centre of the lower anvil/wheel is away from it. So tilted the lower so I could get up to the edge to stretch that area to see if that would help.
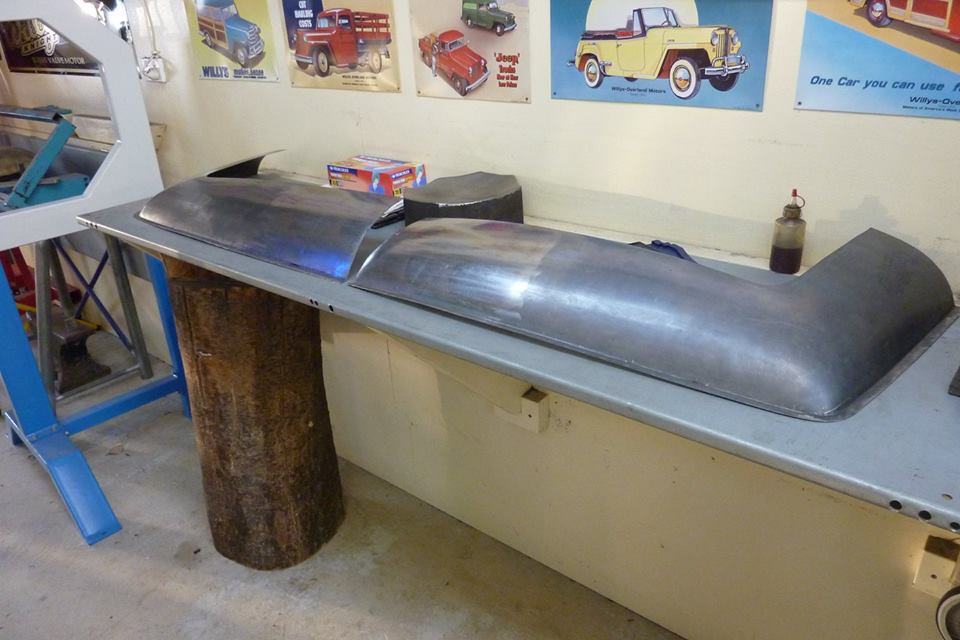

I did some hammering along the edge over the welding bench as well and it is getting the desired result. The left one in the picture is the one worked.
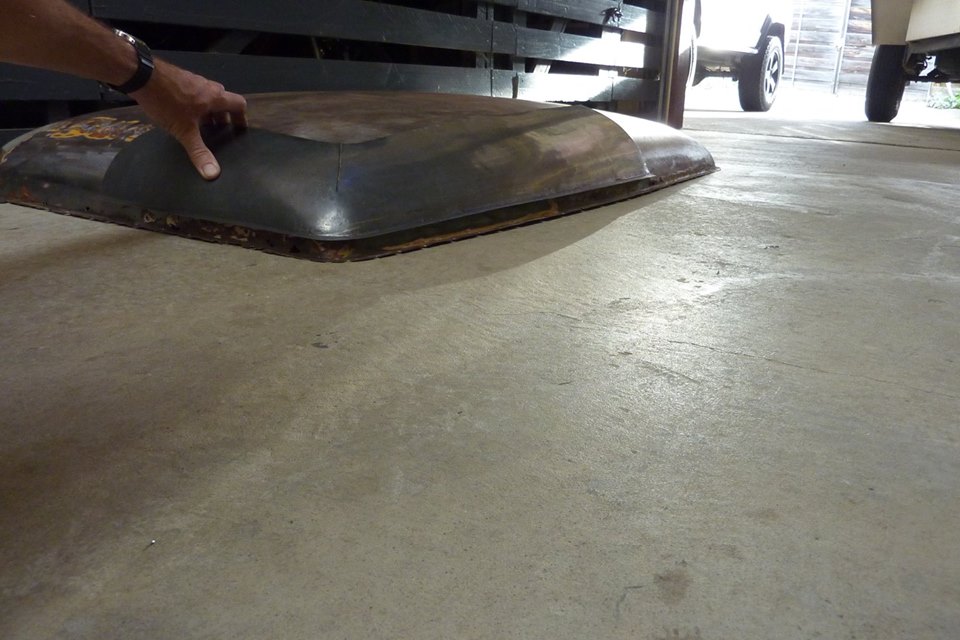

Placed it also over an original roof panel to see the difference. I have left out the more vertical section at the gutter line as think at the front the softer slope looks better.
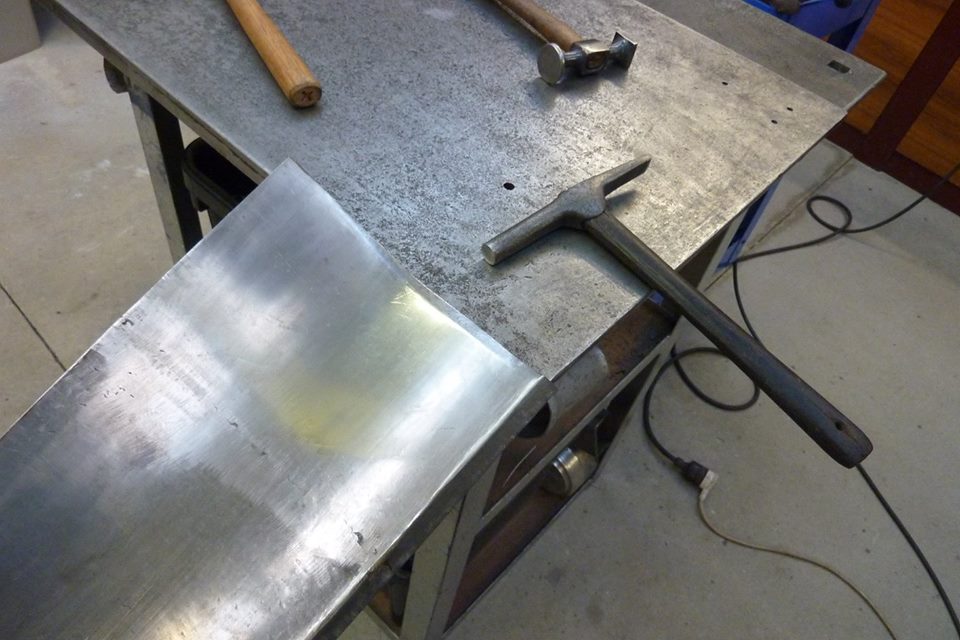

Was not sure what I would do with my crease as it was completely wheeled out and would fit in my bead roller anymore either. I didn't want to cut off the overlap, weld it, and then stretch it once again to put the crease back by hand. So just put the shape back in by hand over the edge of the bench while still in two halves.
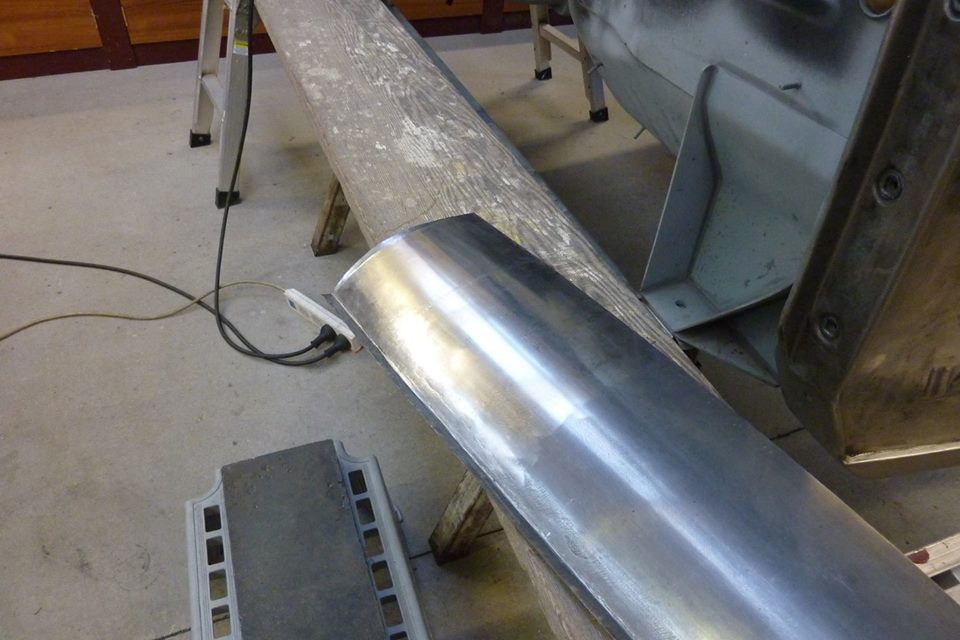

Got the shape back and did the other side as well which had to match exactly.
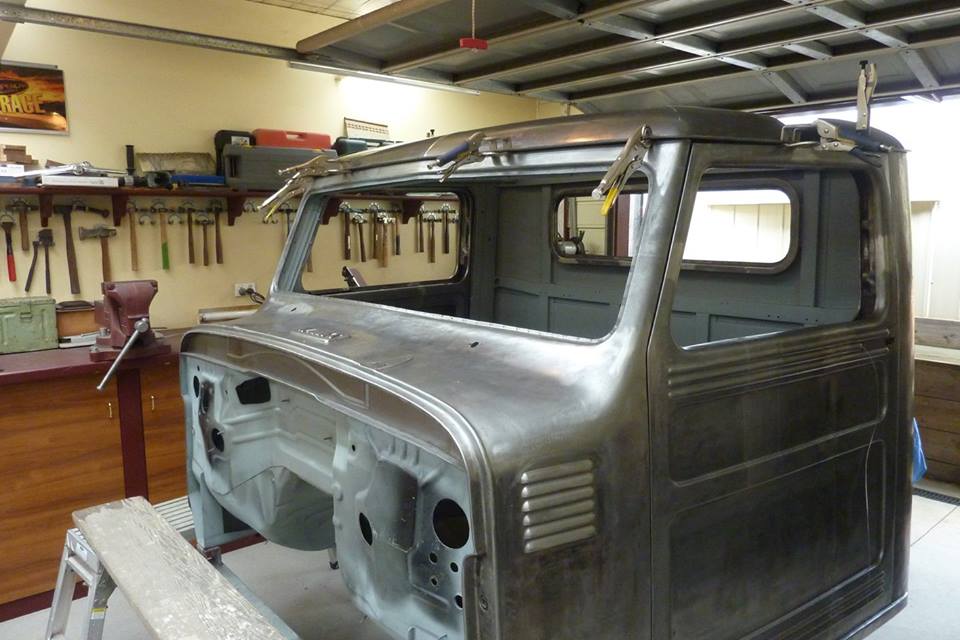

So welded it together again while clamped down to the gutter and then took it off to planish the panel.
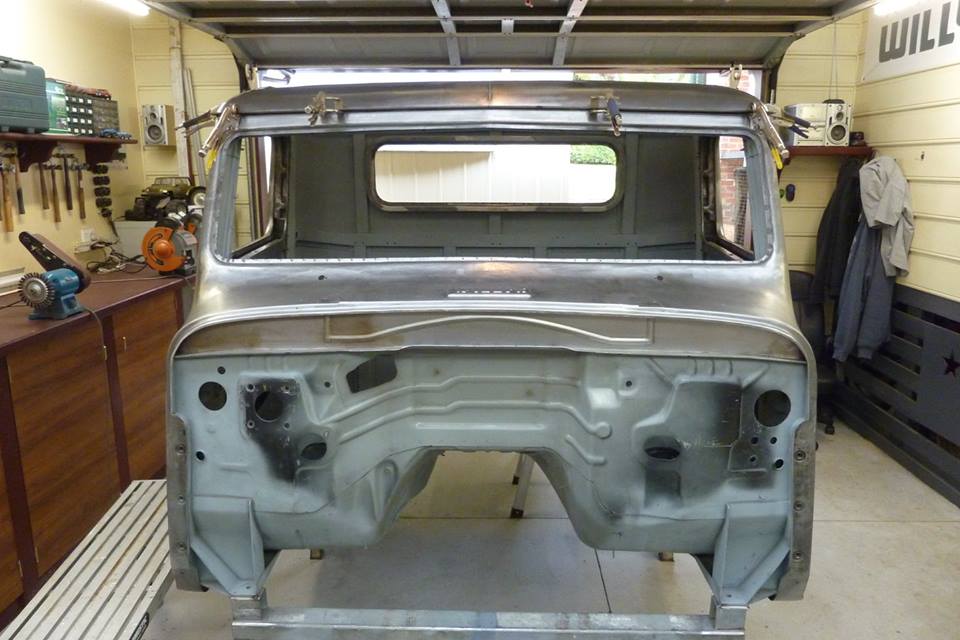

So the height is one inch shorter across the front and a softer curve to it.
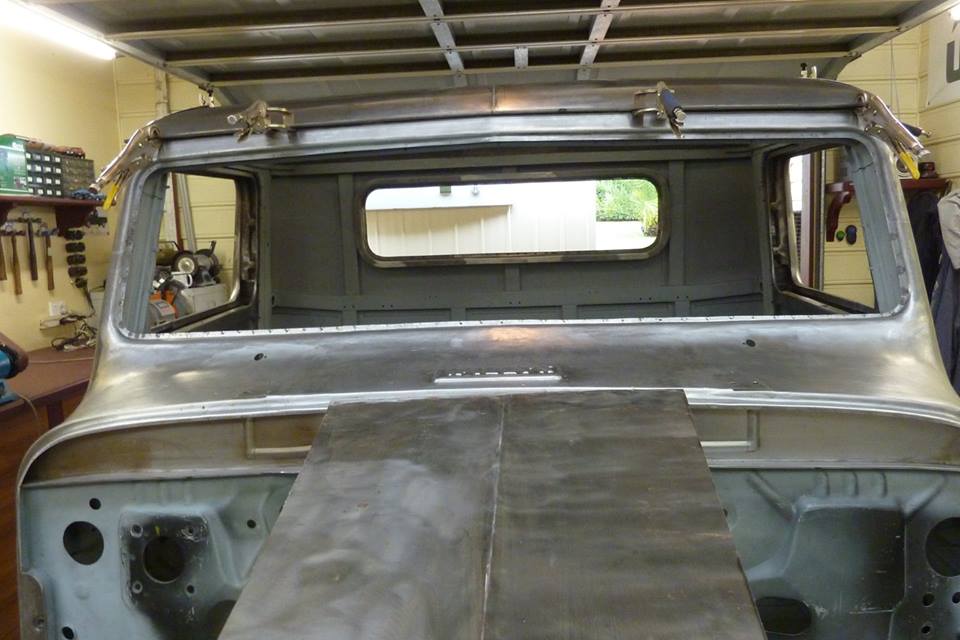

Here is a scrap piece of bonnet with its centre crease to get an idea of how it will look together.
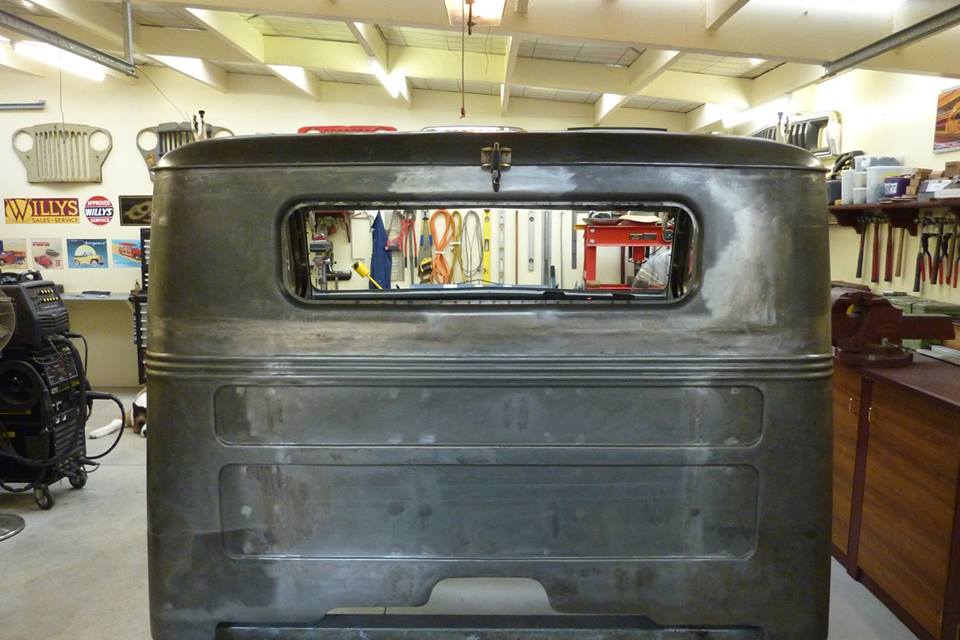

I also wheeled a bit more crown into the rear as thought it was a little too flat and now matches the front as well. Still 1.5" less than stock in height overall at the sides and 2" lower in the middle.
__________________
Cheers, Marcus.

My web site:
http://willyshotrod.com Over 5'000 Club
Likes: (9)

Last edited by Gojeep; 14-08-2017 at 07:18 PM.
  #1308  
Old 17-04-2017
SeaComms's Avatar
SeaComms  SeaComms is offline
MonsterMoose
 
Join Date: Jun 2010
Location: Noosa QLD.
Age: 59
Posts: 7,940
What Jeep do I drive?: WK2
Likes: 1,432
Liked 809 Times in 466 Posts
Check out my Ride(s)
Default

Mesmorised as usual!

Sent from my SM-G930F using Tapatalk
__________________
Cheers, Dave :)

2010 JK, then a 2015 KL Trailhawk, now a 2017 GC Trailhawk!

Over 5000 Club
Likes: (1)
  #1309  
Old 18-04-2017
CJ6np435's Avatar
CJ6np435  CJ6np435 is offline
Lowranger Shocker
 
Join Date: Oct 2003
Location: Hobart TAS
Age: 62
Posts: 1,679
What Jeep do I drive?: CJ
Likes: 41
Liked 133 Times in 100 Posts
Default

cab is really taking shape! looks fantastic, always look forward to the updates!
__________________
Not another V8!
Likes: (1)
Post New Thread  Reply


Posting Rules
You may not post new threads
You may not post replies
You may not post attachments
You may not edit your posts

BB code is On
Smilies are On
[IMG] code is On
HTML code is On


All times are GMT +10. The time now is 04:31 AM.


Advertisements


AJOR does not vouch for or warrant the accuracy, completeness or usefulness of any message, and are not responsible for the contents of any message. The messages express the views of the author of the message, not necessarily the views of AJOR or any entity associated with AJOR, nor should any advice be substituted as technical advice replacing that of a mechanic. You agree, through your use of this service, that you will not use AJOR to post any material which is knowingly false and/or defamatory, inaccurate, abusive, vulgar, hateful, harassing, obscene, profane, sexually oriented, threatening, invasive of a person's privacy, religious, political or otherwise violative of any law. You agree not to post any copyrighted material unless the copyright is owned by you or by AJOR. The owner, administrators and moderators of AJOR reserve the right to delete any message or members for any or no reason whatsoever. You remain solely responsible for the content of your messages, and you agree to indemnify and hold harmless AJOR, the administrators, moderators, and their agents with respect to any claim based upon transmission of your message(s). The use of profile signatures to intentionally mislead or misdirect any member on this forum is not acceptable and may result in your account being suspended. Any trip that is organised through the AJOR forum is participated at your own risk. If you or your vehicle is damaged it is your responsibility, not that of the person that posted the thread, message or topic initiating the trip, nor the organisers of AJOR or moderators of any specific forum. This forum and associated website is the property of AJOR. No user data is harvested and no information supplied in your registration will be sold for profit.


Powered by vBulletin® Version 3.8.7
Copyright ©2000 - 2024, vBulletin Solutions, Inc.

AJOR © 2002 - 2024 AUSJEEPOFFROAD.COM. All corporate trademarked names and logos are property of their respective owners. Ausjeepoffroad is in no way associated with DaimlerChrysler Corporation or Fiat Jeep.
www.ausjeep.com www.ausjeep.com.au www.midlifemate.com ausjeepforum.com www.r9kustoms.com
vB Ad Management by =RedTyger=