Grand Willys Project - Page 220 - AUSJEEPOFFROAD.COM Jeep News Australia and New Zealand

Go Back   AUSJEEPOFFROAD.COM Jeep News Australia and New Zealand > JEEP GARAGE > Jeep build up
Register Forums Trading Your Jeep My Garage Mark All Read

Post New Thread  Reply
 
Thread Tools Search this Thread
  #1534  
Old 29-07-2019
Freetripper's Avatar
Freetripper  Freetripper is offline
I just registered
 
Join Date: Jan 2014
Location: South-East Melbourne
Age: 48
Posts: 258
What Jeep do I drive?: JK
Likes: 81
Liked 95 Times in 68 Posts
Default

Which ever way you decide to finally go with will look amazing, but for my 2 cents I prefer the look with the front part aligning with the front guards, just my humble opinion.
Have you ever thought about getting some Jeep sponsorship/assistance of some sort?? Not quite the right word I was looking for but you get my idea?
Maybe they could throw you some sort of goodies for your Wllys and your love of Jeeps and innovation in keeping/giving an old Jeep a new lease on life?
Just a thought.
As always, reading in awe and looking forward to the next installment.

Sent from my GT-N8020 using Aussie Jeep Offroad mobile app
__________________
08 JK CRD
Locked F+R, 2 1/2" 33's
AEV F+R bars

"Dr. says I need a backiotomy!"
Likes: (1)

Last edited by Freetripper; 29-07-2019 at 08:19 PM.
  #1535  
Old 29-07-2019
Gojeep's Avatar
Gojeep  Gojeep is offline
LokRinger
 
Join Date: Jul 2002
Location: Victoria
Posts: 6,878
Likes: 792
Liked 1,769 Times in 560 Posts
Default

Quote:
Originally Posted by Edz View Post
G,Day Marcus .Found you after action shut down ... For what its worth, maybe make the top tub fold over lip with the same pressings as the cab to continue the lines and seeing as the tub will have smooth side walls swage in outward pressings to continue the cab door style .
Glad you found your way across. I had thought about the swag lines around the panel like the door. Hadn't thought about the ribs above and below. Least something that can be added later if needed but don't want it too fussy either.

Quote:
Originally Posted by Freetripper View Post
Which ever way you decide to finally go with will look amazing, but for my 2 cents I prefer the look with the front part aligning with the front guards, just my humble opinion.
Have you ever thought about getting some Jeep sponsorship/assistance of some sort?? Not quite the right word I was looking for but you get my idea?
Maybe they could throw you some sort of goodies for your Willys and your love of Jeeps and innovation in keeping/giving an old Jeep a new lease on life?
Just a thought.
As always, reading in awe and looking forward to the next installment.

Sent from my GT-N8020 using Aussie Jeep Offroad mobile app
Many thanks.
Be nice to get some assistance but don't think I have ever heard of Jeep here doing anything like that.
__________________
Cheers, Marcus.

My web site:
http://willyshotrod.com Over 5'000 Club
  #1536  
Old 03-08-2019
Edz  Edz is offline
I just registered
 
Join Date: Jul 2019
Posts: 2
Likes: 0
Liked 2 Times in 2 Posts
Default

For me the main reason would be to ad a balance / continuance to the original look . The cab forwards is lines / pressed panels ...Having a smooth sheeted tray it kinder looks mismatched / To modern of a style, dare I say two different cars joined together at the cab .
Likes: (1)
  #1537  
Old 03-08-2019
Gojeep's Avatar
Gojeep  Gojeep is offline
LokRinger
 
Join Date: Jul 2002
Location: Victoria
Posts: 6,878
Likes: 792
Liked 1,769 Times in 560 Posts
Default

Quote:
Originally Posted by Edz View Post
For me the main reason would be to ad a balance / continuance to the original look . The cab forwards is lines / pressed panels ...Having a smooth sheeted tray it kinder looks mismatched / To modern of a style, dare I say two different cars joined together at the cab .
I had been thinking of adding a step around the edges like the door has to tie the two together more than stock had. Might be some other things too, but depends if it needs it or not.
__________________
Cheers, Marcus.

My web site:
http://willyshotrod.com Over 5'000 Club
  #1538  
Old 03-08-2019
Gojeep's Avatar
Gojeep  Gojeep is offline
LokRinger
 
Join Date: Jul 2002
Location: Victoria
Posts: 6,878
Likes: 792
Liked 1,769 Times in 560 Posts
Default


Decided to extend the chassis to take the spare wheel. I had to add what was lost with the 100mm-4" step I put in as well. I turned the heat up to get good penetration.


Crossmember welded back in place.


I cut out a spare wheel carrier with a cable winch on it. Even though the winch just unbolts, I took the whole cross member to use. It was however setup for an offset wheel so the exhaust could run down one side of it.


This setup came from a 2001-2006 Hyundai Santa Fe 4wd. I cut the ends off the cross member, with one side longer than the other, and swapped ends to centre the winch cable.


I also recessed the tyre supports an extra 13mm-1/2" to get the wheel up as much as possible. From two Santa Fe's I cut the short tyre supports as well.


All welded into place


I chose a cable tyre winch over the chain type as the latter rattle the excess chain around. The donor Grand Cherokee had a cable one as well, but the winding point was accessed through the floor and I didn't want that.


This is a 235/80R17 tyre which is 31.5" tall. I only left 5mm-3/16" each side to spare to get it in easier. I still need to get a matching Hyundai jack handle, or make one, to operate it. The wrecking yard throws them away so no one can use jacks in the yard.


It tucks up nicely out of the way and won't be seen from the side once the frame skirts go on. You can see I have raised it 50mm-2" higher than the top of the chassis. I did this for extra ground clearance when offroading and that the crank handle doesn't have to pass right through the rear cross member. This is also the height of the floor supports for the bed, so it doesn't take any extra space.
__________________
Cheers, Marcus.

My web site:
http://willyshotrod.com Over 5'000 Club
Likes: (8)
  #1539  
Old 09-08-2019
Gojeep's Avatar
Gojeep  Gojeep is offline
LokRinger
 
Join Date: Jul 2002
Location: Victoria
Posts: 6,878
Likes: 792
Liked 1,769 Times in 560 Posts
Default


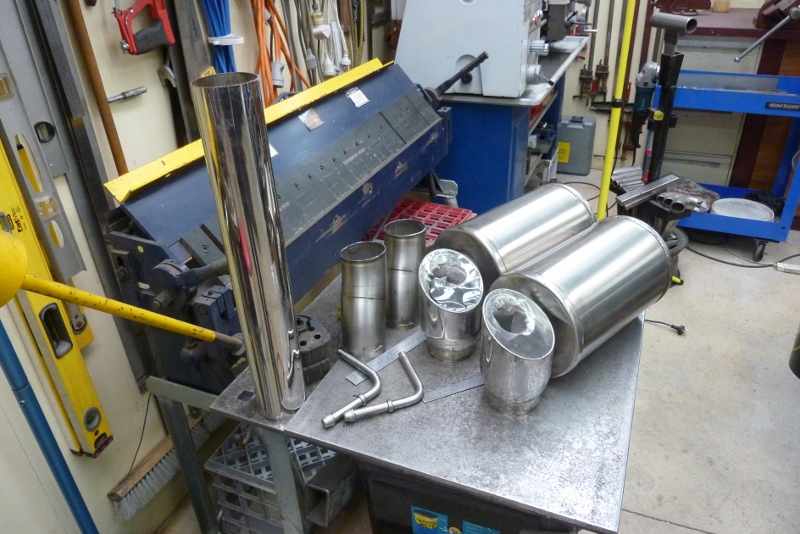
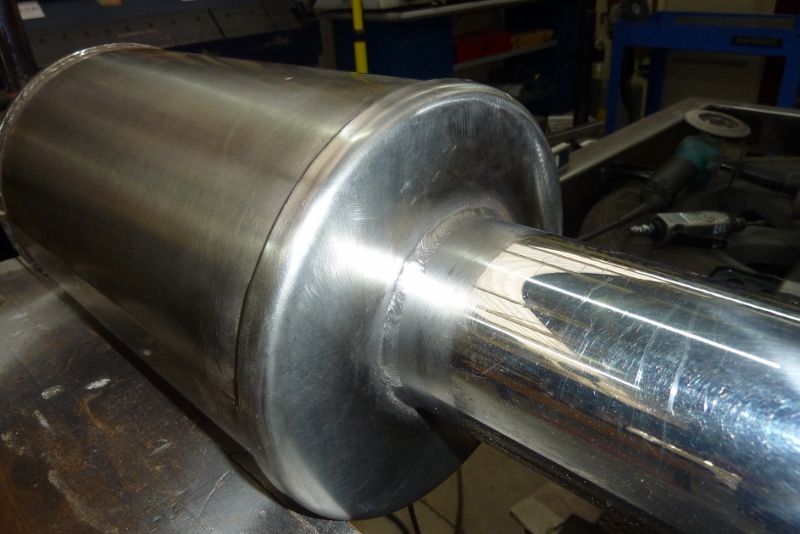
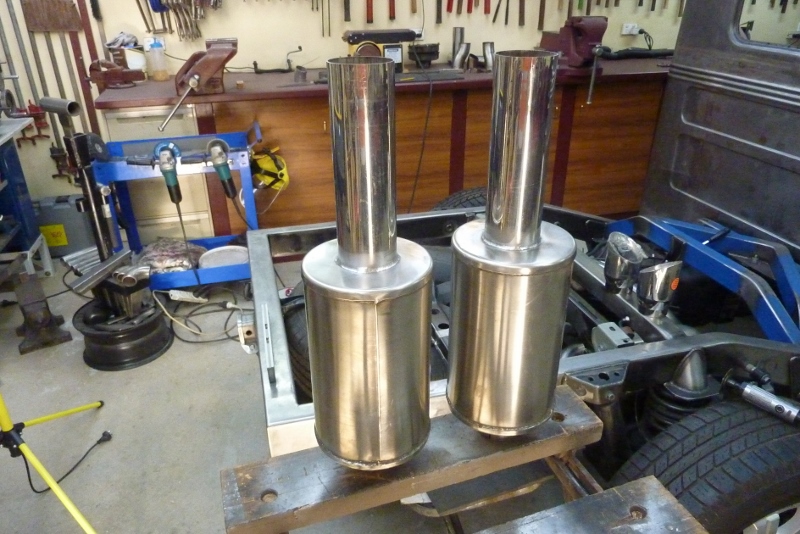
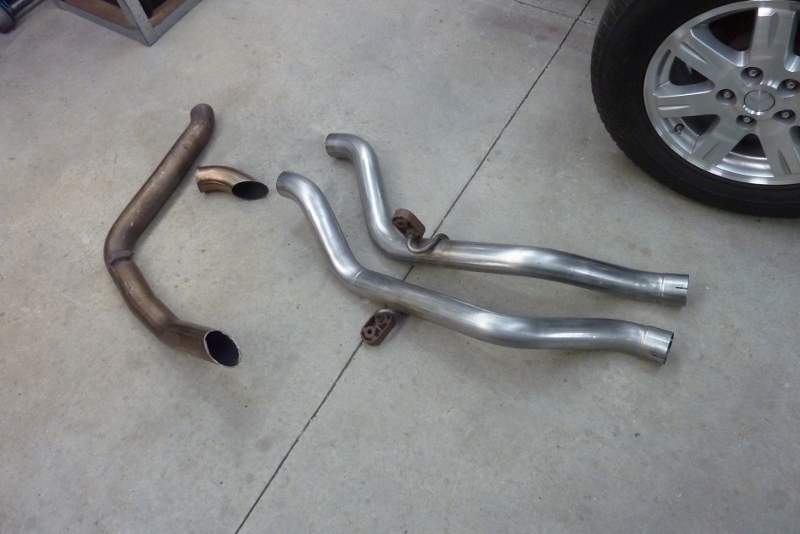
Well, the exhaust cannot run out the middle as per the factory centre outlets of the SRT model that the system was made for. I still had the factory single stainless system which is the same diameter, 70mm-2.75", as just one of the new pipes.


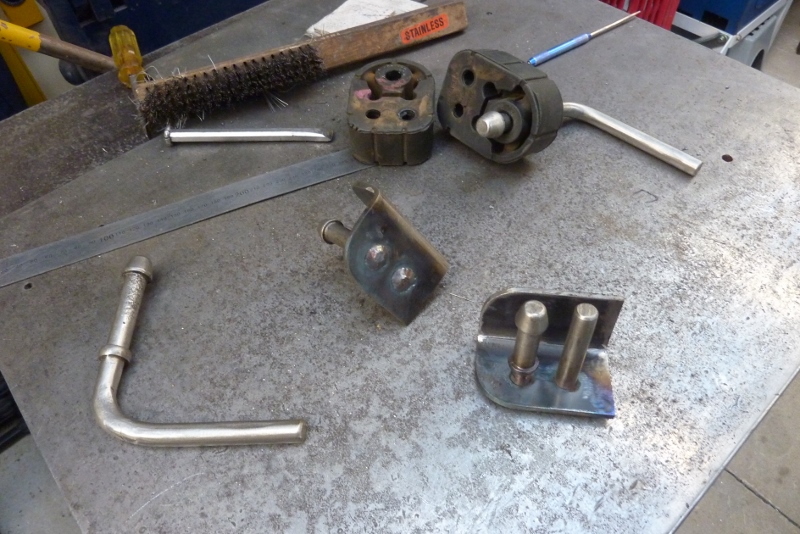
Re-routing the right side was easy as I only had to cut and flip the exhaust over. I used the left side dogleg instead as it reached over further to where I wanted it.


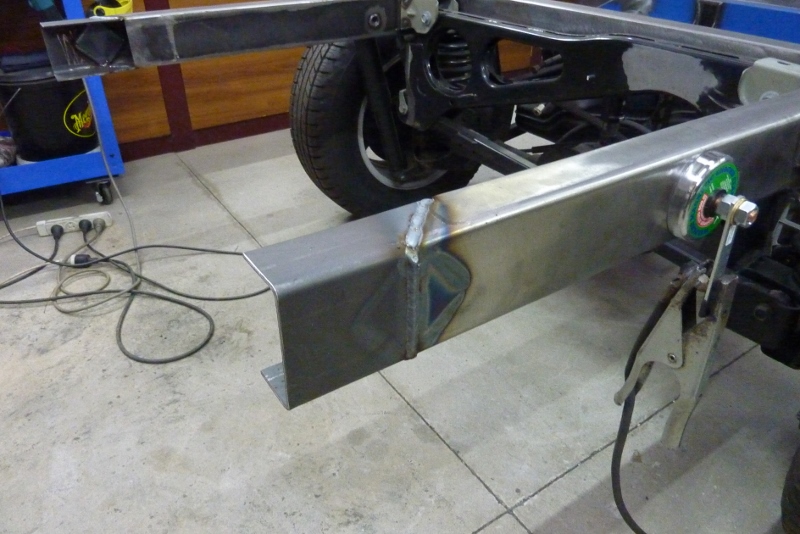
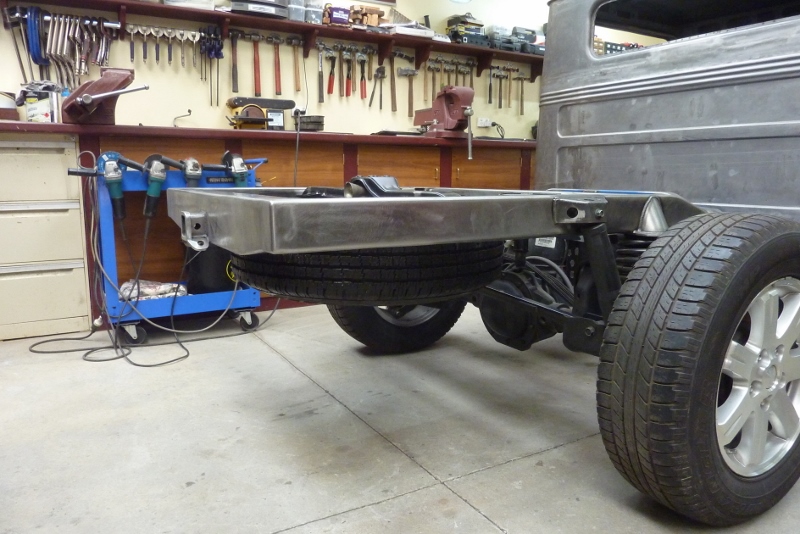
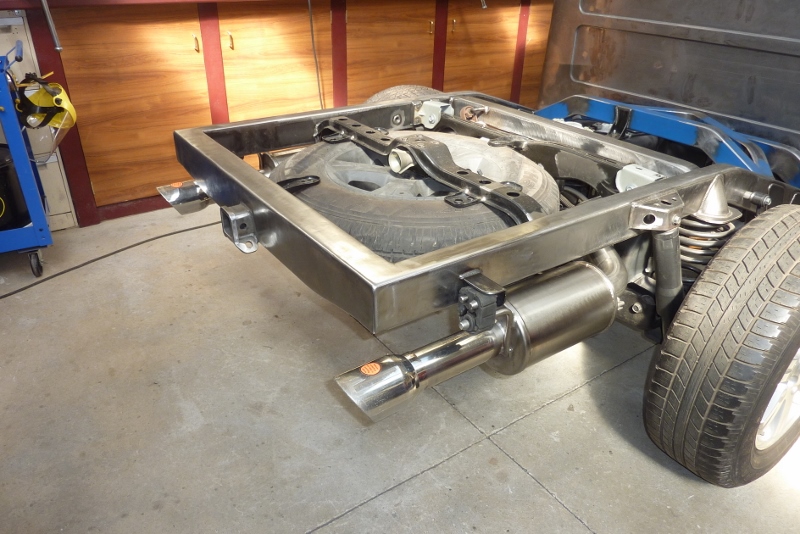
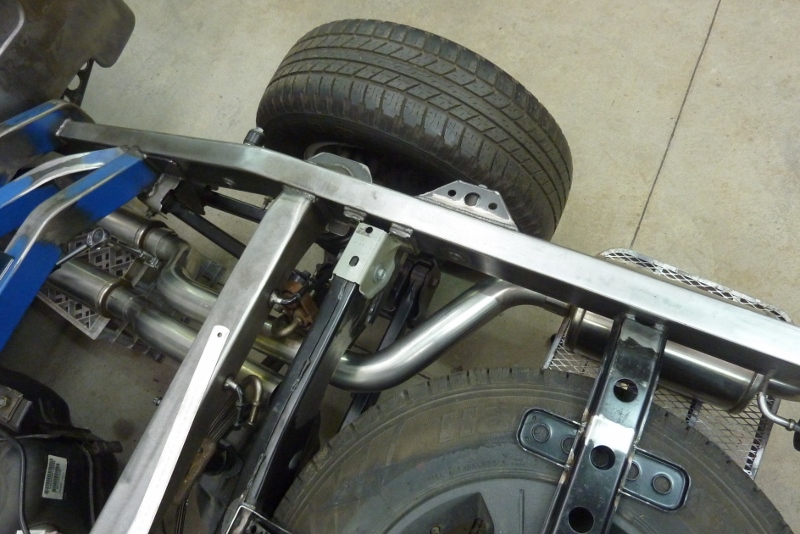
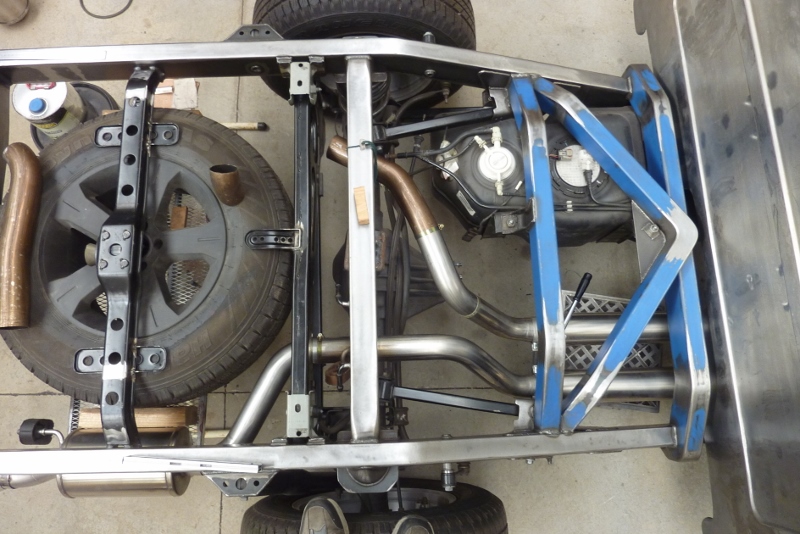
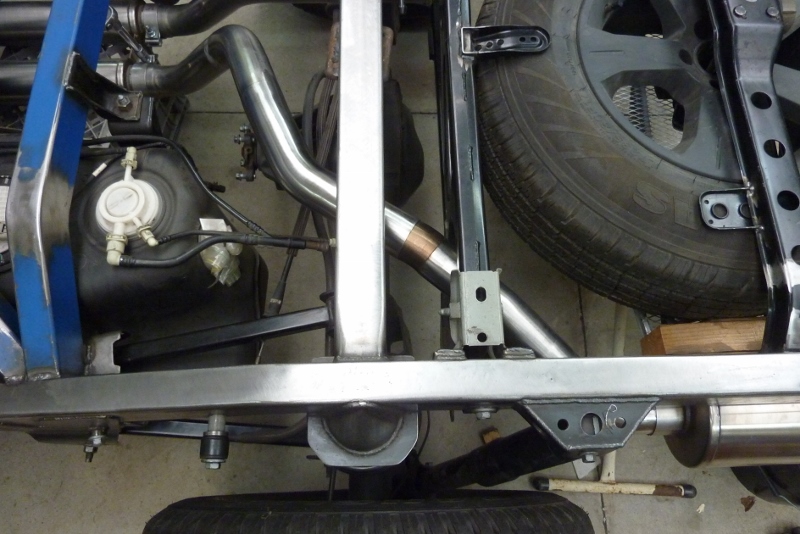
It looks odd sitting out that far at the moment, but the chassis had been narrowed to fit the donor suspension in the right place. The bed will actually be wider than stock and cover the rear muffler and will be behind the frame skirts.


So with the muffler on the left placed to match the other side, I just have to get it across. First have to clear the pinion flange, top of the diff and sway bar at full suspension compression. Then turn before hitting the left side upper control arm bracket, under the cross member before going through a hole in the next, miss the shock absorber and then line up with the back of the muffler!


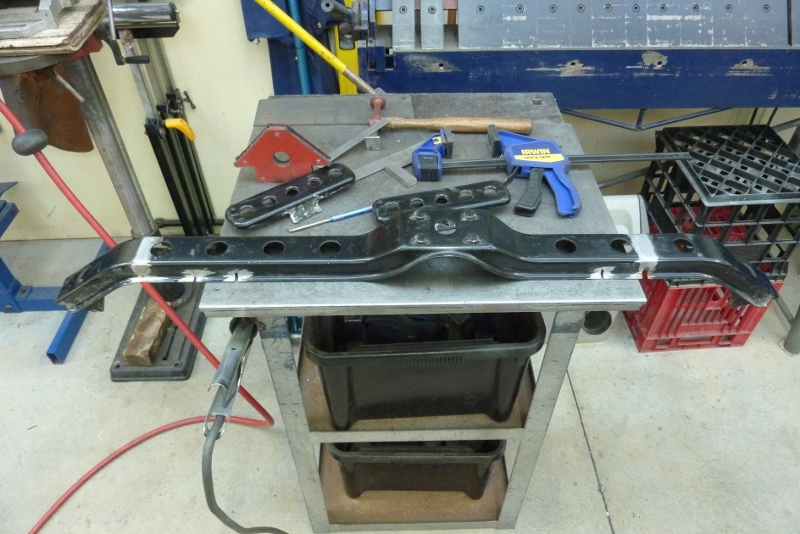
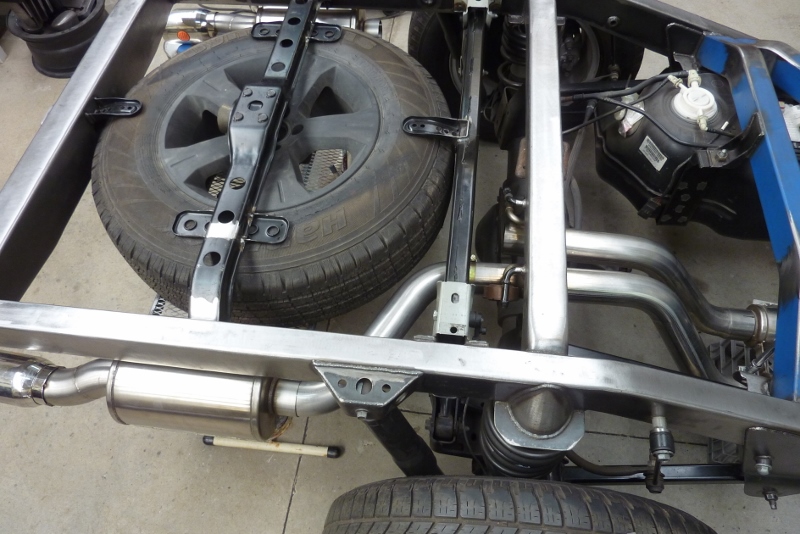
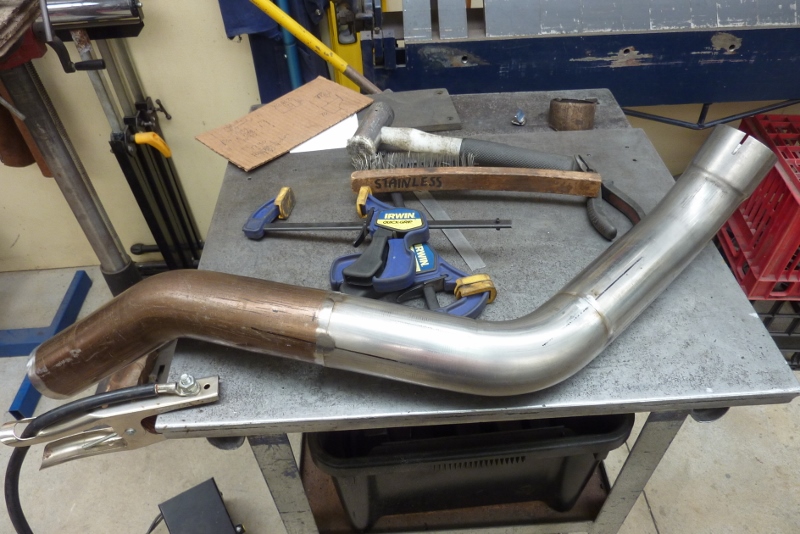
I cut the exhaust off just before the last bend and also found a section from the original system that lines up with a hole in the panhard bar support cross member and the muffler. Just have these bends left to complete the system.


Using one of the bends from the right side dogleg and the rest of the original system gets me pretty close. I am just using hose clamps to keep things in place while mocking up.


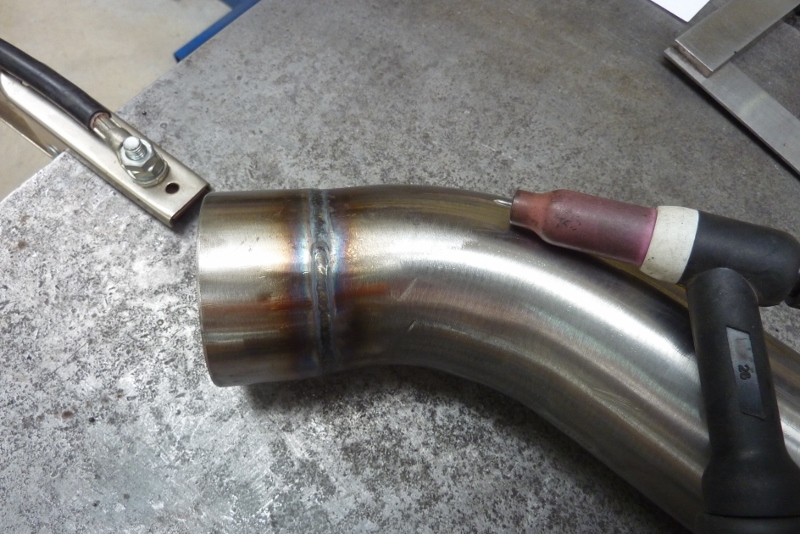
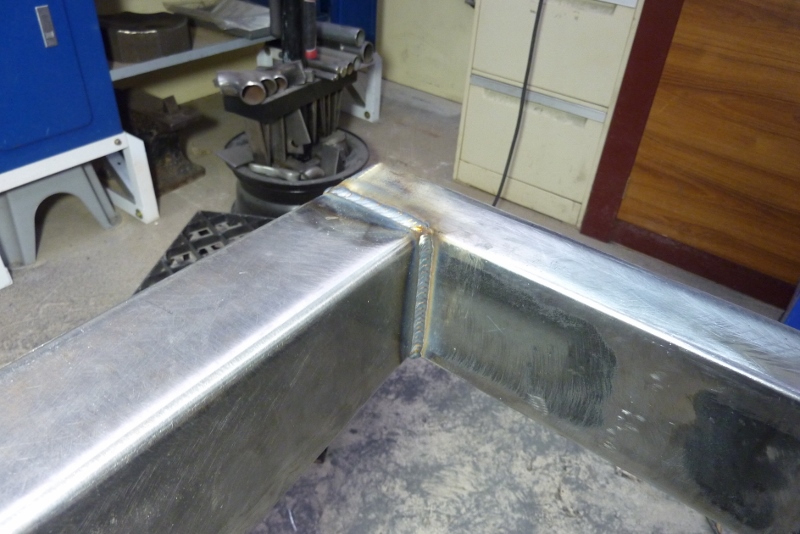
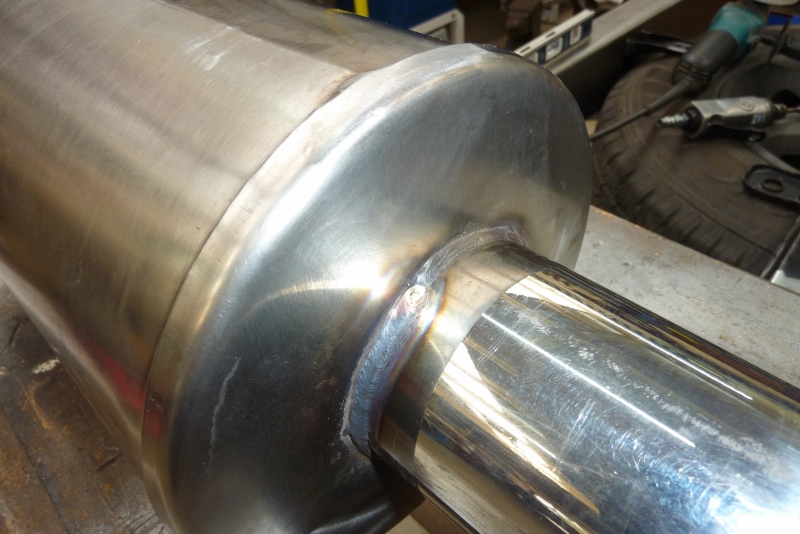
I am just going to fuse weld the system together using the tig. 1.6mm-16 gauge lanthanated tungsten to match the same gauge tubing wall thickness.


I just draw a straight line using a ruler over the hose clamps before disassembly. Better than small marks as you can make sure the line is still straight after tacking in case it wasn't butted up square.


I have used a paint strip disc to clean the old stainless and also the welds. If you don't clean the welds, either mechanically or with acid to pacify them, it will rust there.


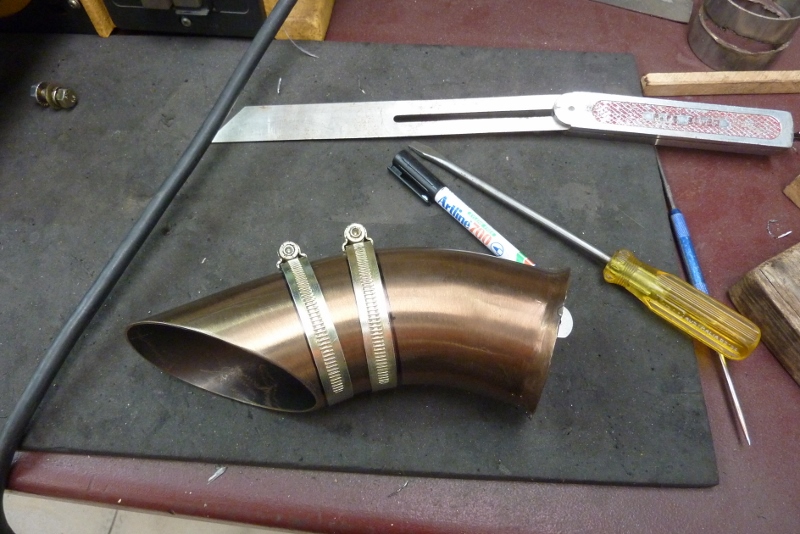
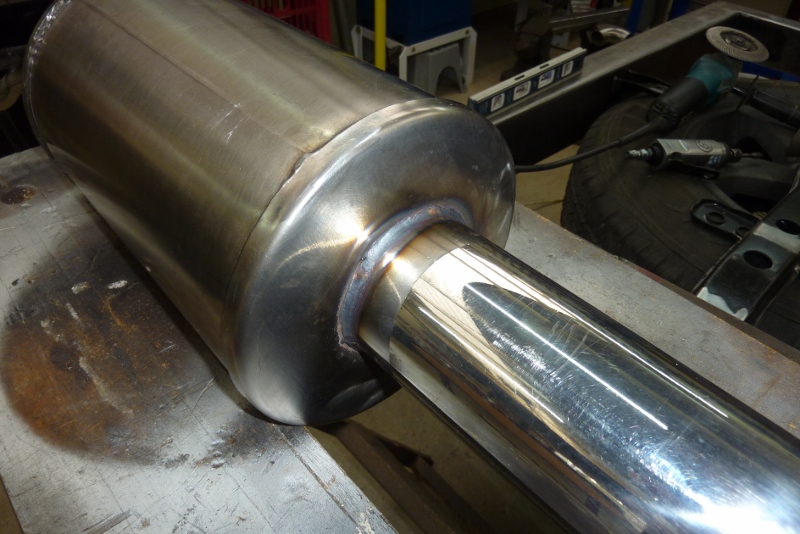
Just had to meet the two sections together between the cross members. Needed a slight bend. I measured the furthest and narrowest side of the gap and found a bend that would match it. I used hose clamps as a guide to draw my cut lines around making sure they match the smallest and largest measurements.


The bend lined up first go using this method so will tack it in place in situ to make sure it all lines up after welding.


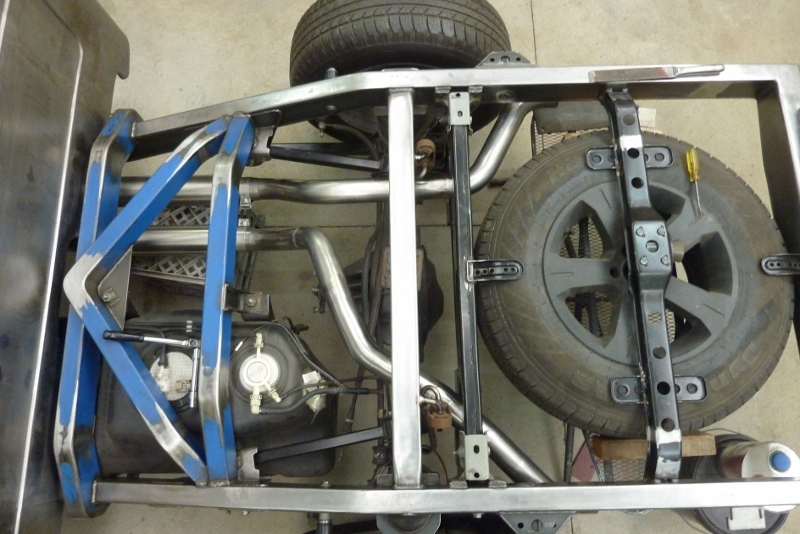
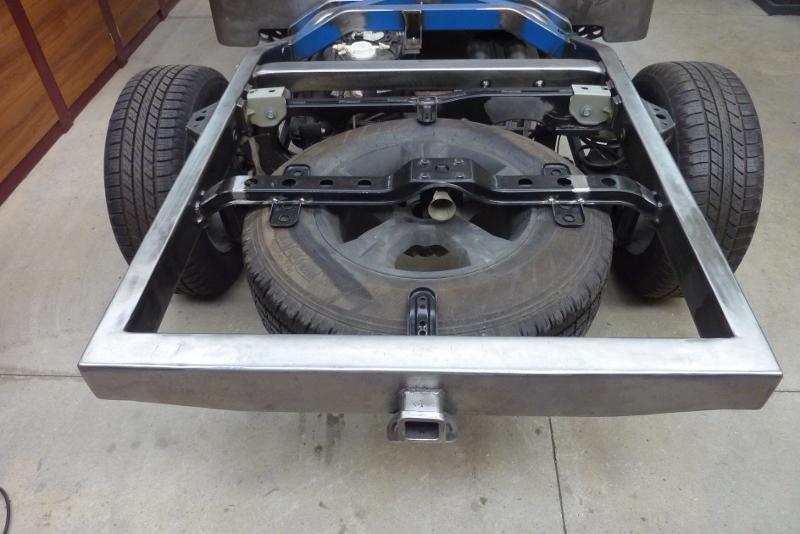
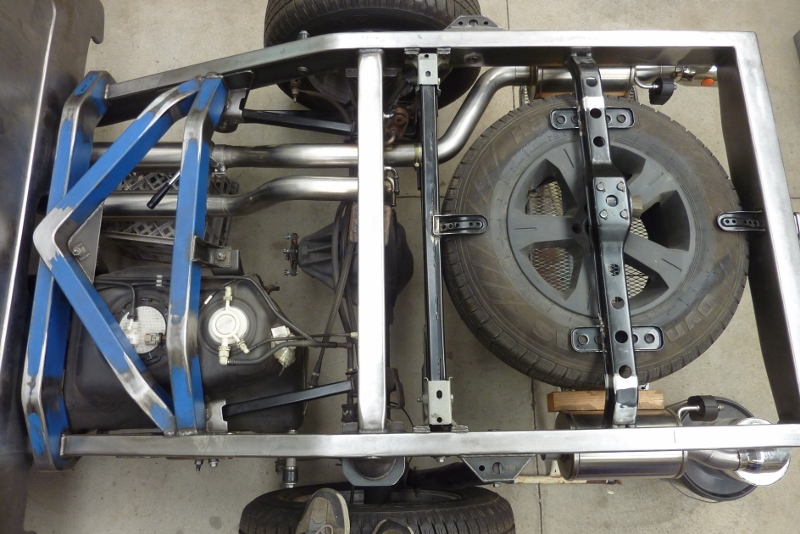
Have the two hangers in place with two more to go after the mufflers. It worked out better than I expected actually as was going to buy new bends, but actually had to use every little factory bend to clear everything and was the only routing that I could have taken. From this view it looks like I could have just taken a 90* bend after the cross member and then run in front of the tyre before going down the the muffler on the other side. But there just isn't the room as the diff would have hit it at full compression and the panhard cross member is deep on the left side.
__________________
Cheers, Marcus.

My web site:
http://willyshotrod.com Over 5'000 Club
Likes: (6)
  #1540  
Old 22-09-2019
Gojeep's Avatar
Gojeep  Gojeep is offline
LokRinger
 
Join Date: Jul 2002
Location: Victoria
Posts: 6,878
Likes: 792
Liked 1,769 Times in 560 Posts
Default

Back from 5 weeks country and island hopping around the Mediterranean Sea. Ticked of bucket list items like diving inside a ship wreck off the coast of Cyprus, to climbing up and exploring the ancient ruins of Masada in Israel!


Now to fit up the resonators. They had 3" S shaped bends welded on to get the tips down and closer together. I didn't need that so cut them, the tips and the hangers off. I had some 3" stainless steel tubing left over from the nudge bar from my other Jeep. I had used the rest of its bends to make a new tailpipe for it too!


When I cut the bends off I left the original factory mig welds in place. I have just sat the straight piece of tubing straight on top, so not welded yet in this shot.


To weld the new tailpipes on I used the tig to heat the mig weld and wash over the join. The side is done and you might be able to make out the join still on the untouched weld across the top in front of the mig weld.


Tigged the join all the way around.


Hit it with a stainless steel hand brush to stop it oxidising.


Both done. I also welded up the drain hole so I could rotate the seam to the top and re-drilled the hole at the bottom.


Using the original hanger hardware and just folded up a bracket which I drilled for the isolator posts and then tigged them into place.


Bracket welded on and all the weight is now on the hangers only. The bed floor is wider than the rails and will cover the exhaust and the frame skirts will hide them from the side.


The tips are just sitting there as I don't know exactly how long I need the tailpipe to be yet.
__________________
Cheers, Marcus.

My web site:
http://willyshotrod.com Over 5'000 Club
Likes: (5)
Post New Thread  Reply


Posting Rules
You may not post new threads
You may not post replies
You may not post attachments
You may not edit your posts

BB code is On
Smilies are On
[IMG] code is On
HTML code is On


All times are GMT +10. The time now is 07:51 PM.


Advertisements


AJOR does not vouch for or warrant the accuracy, completeness or usefulness of any message, and are not responsible for the contents of any message. The messages express the views of the author of the message, not necessarily the views of AJOR or any entity associated with AJOR, nor should any advice be substituted as technical advice replacing that of a mechanic. You agree, through your use of this service, that you will not use AJOR to post any material which is knowingly false and/or defamatory, inaccurate, abusive, vulgar, hateful, harassing, obscene, profane, sexually oriented, threatening, invasive of a person's privacy, religious, political or otherwise violative of any law. You agree not to post any copyrighted material unless the copyright is owned by you or by AJOR. The owner, administrators and moderators of AJOR reserve the right to delete any message or members for any or no reason whatsoever. You remain solely responsible for the content of your messages, and you agree to indemnify and hold harmless AJOR, the administrators, moderators, and their agents with respect to any claim based upon transmission of your message(s). The use of profile signatures to intentionally mislead or misdirect any member on this forum is not acceptable and may result in your account being suspended. Any trip that is organised through the AJOR forum is participated at your own risk. If you or your vehicle is damaged it is your responsibility, not that of the person that posted the thread, message or topic initiating the trip, nor the organisers of AJOR or moderators of any specific forum. This forum and associated website is the property of AJOR. No user data is harvested and no information supplied in your registration will be sold for profit.


Powered by vBulletin® Version 3.8.7
Copyright ©2000 - 2024, vBulletin Solutions, Inc.

AJOR © 2002 - 2024 AUSJEEPOFFROAD.COM. All corporate trademarked names and logos are property of their respective owners. Ausjeepoffroad is in no way associated with DaimlerChrysler Corporation or Fiat Jeep.
www.ausjeep.com www.ausjeep.com.au www.midlifemate.com ausjeepforum.com www.r9kustoms.com
vB Ad Management by =RedTyger=