Grand Willys Project - Page 272 - AUSJEEPOFFROAD.COM Jeep News Australia and New Zealand

Go Back   AUSJEEPOFFROAD.COM Jeep News Australia and New Zealand > JEEP GARAGE > Jeep build up
Register Forums Trading Your Jeep My Garage Mark All Read

Post New Thread  Reply
 
Thread Tools Search this Thread
  #1898  
Old 14-01-2022
bodgie's Avatar
bodgie  bodgie is offline
Rock Munki
 
Join Date: Aug 2009
Location: Castle Hill, NSW
Posts: 2,137
What Jeep do I drive?: WG
Likes: 11
Liked 300 Times in 245 Posts
Default

Sometimes you need to know when to hold 'em, know when to fold 'em, and know when to walk away from some jobs.

No shame it getting a job done by a "professional".
Likes: (3)
  #1899  
Old 14-01-2022
Gojeep's Avatar
Gojeep  Gojeep is offline
LokRinger
 
Join Date: Jul 2002
Location: Victoria
Posts: 6,878
Likes: 792
Liked 1,769 Times in 560 Posts
Default

Quote:
Originally Posted by bodgie View Post
Sometimes you need to know when to hold 'em, know when to fold 'em, and know when to walk away from some jobs.

No shame it getting a job done by a "professional".
Very true. I didn't want my hard work making the headliner look bad because of my amateur upholstery skills.
He said it would be a difficult one to do even though he does around 3 a week, so we'll see what it turns out like.
__________________
Cheers, Marcus.

My web site:
http://willyshotrod.com Over 5'000 Club
Likes: (1)
  #1900  
Old 15-01-2022
Gojeep's Avatar
Gojeep  Gojeep is offline
LokRinger
 
Join Date: Jul 2002
Location: Victoria
Posts: 6,878
Likes: 792
Liked 1,769 Times in 560 Posts
Default


Finally getting back to the arm rests I made earlier. I was after some high density foam that was not thick or left imprints when resting your arm on the top of the arm rest. Thought neoprene would be perfect. Wife wouldn't let me cut up one of my wetsuits, so went to the op shop and got a spring suit.


Carefully trimming around the seam on the back gave me just enough to cut the tops out of it.


Glued on the neoprene and now covering it with the material. Just marked out where I cut to show it up better before folding the edges over. Notice on the inside corners I cut a wedge that is the width of the radius of the corner, All cuts stop short a little over the thickness of the whole arm rest.


Pulling the wedges over gives a smoother result to the inside corners.


I had a bit more puckering than normal on the outside corners as didn't want to pull it too tight and thin the padding along the edge. So came up with the idea of using some T profile rubber instead of piping for a more modern look to hide that some and the join when the top piece is fitted.


With the top piece pressed into place with the x-mas tree trim clips holding it, the rubber gives a more finished look to it.


The top piece came just be popped back off so I can get to the hidden fasteners which attaches it to the door. Also to be able to plug in the window switches.


Gives you a bit of an idea how it will all sit once on the door. I added the map pockets that were once on my XJ Jeep Cherokee.


To give a tie into the brass Willys employer badge fitted to the rear wall, I fitted these plates that are normally on the bottom of the cowl on the outside on the early Willys Trucks.
__________________
Cheers, Marcus.

My web site:
http://willyshotrod.com Over 5'000 Club
Likes: (7)

Last edited by Gojeep; 16-01-2022 at 06:22 PM.
  #1901  
Old 03-02-2022
Gojeep's Avatar
Gojeep  Gojeep is offline
LokRinger
 
Join Date: Jul 2002
Location: Victoria
Posts: 6,878
Likes: 792
Liked 1,769 Times in 560 Posts
Default


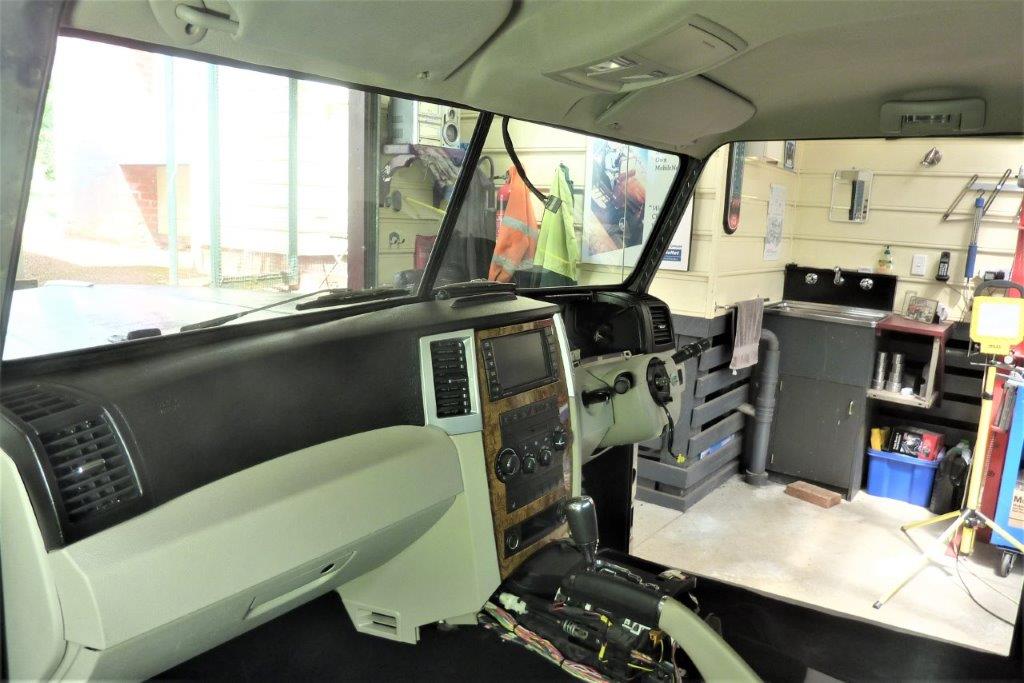
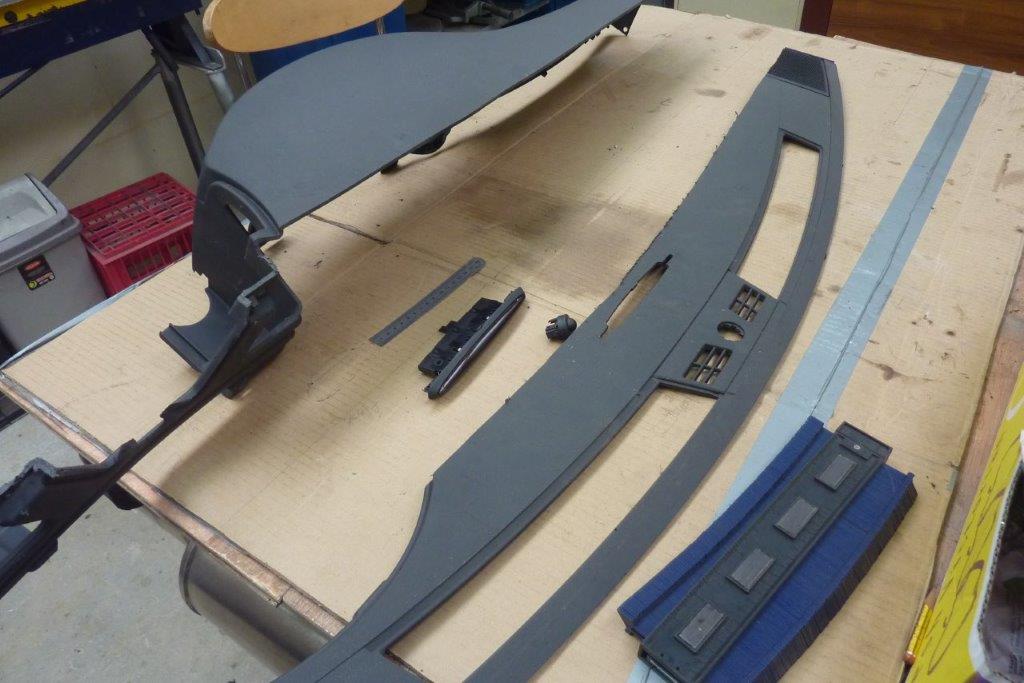
Back working on the dash again. This is a throw back to show how much had to be cut off the depth to fit it into the Willys.


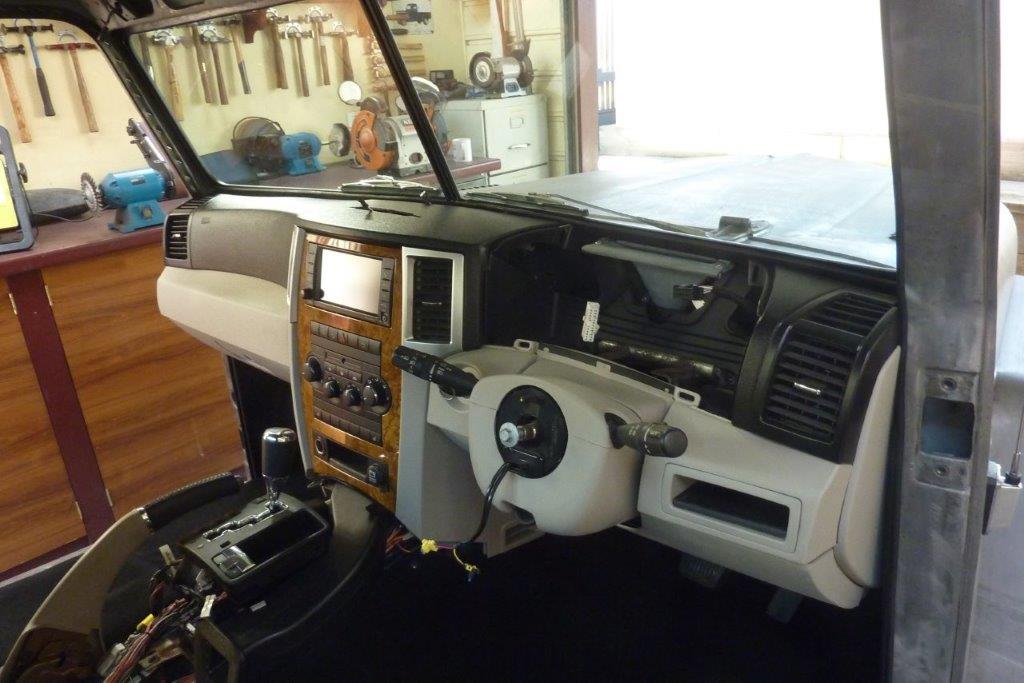
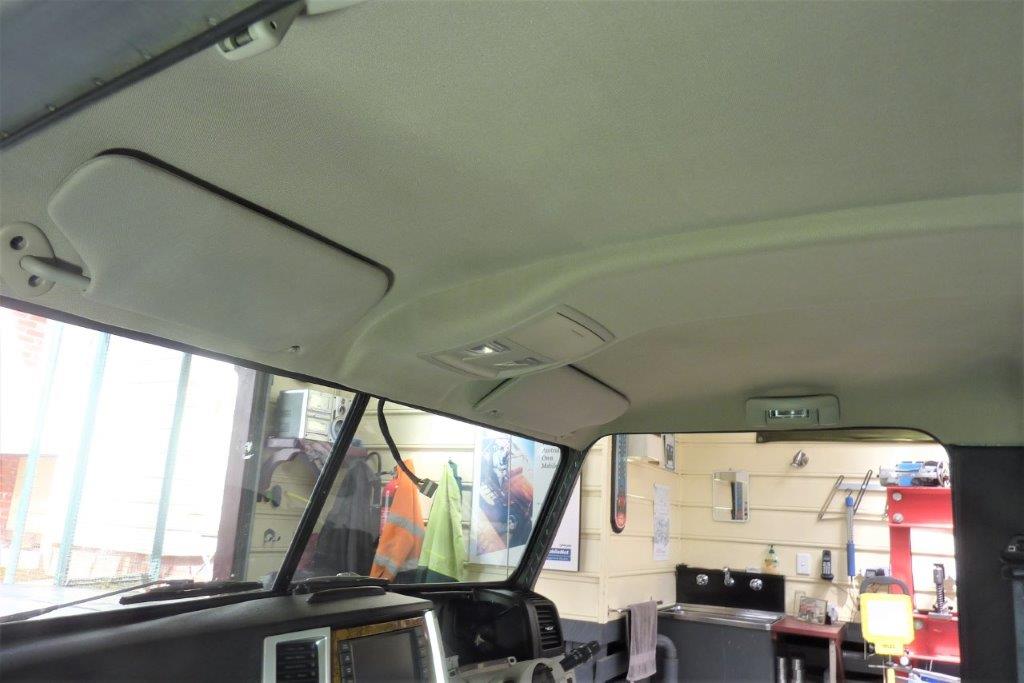
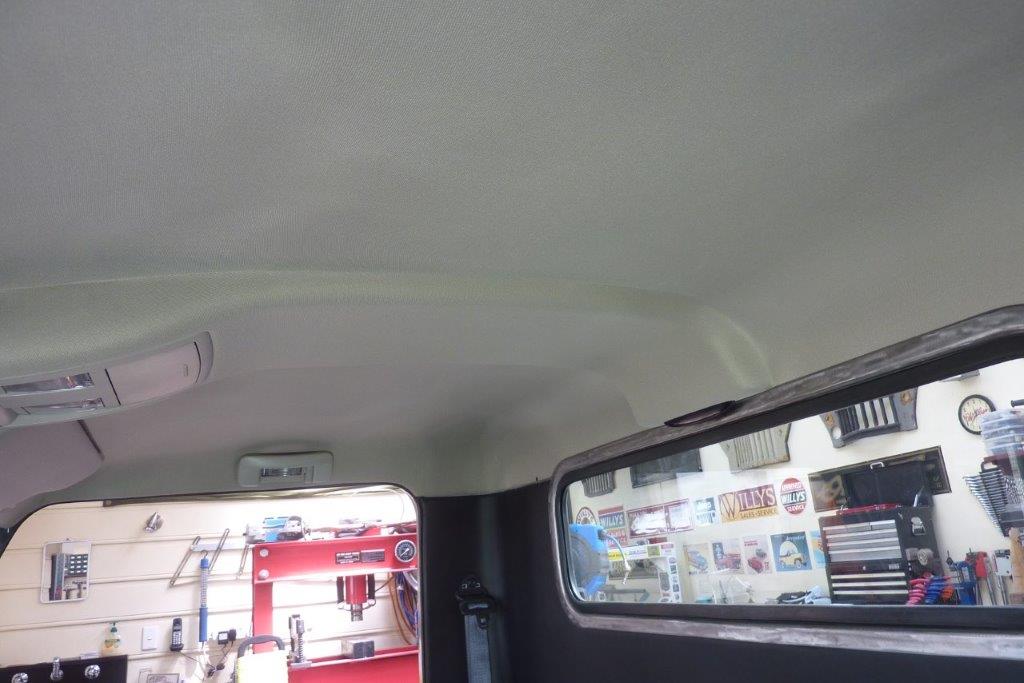
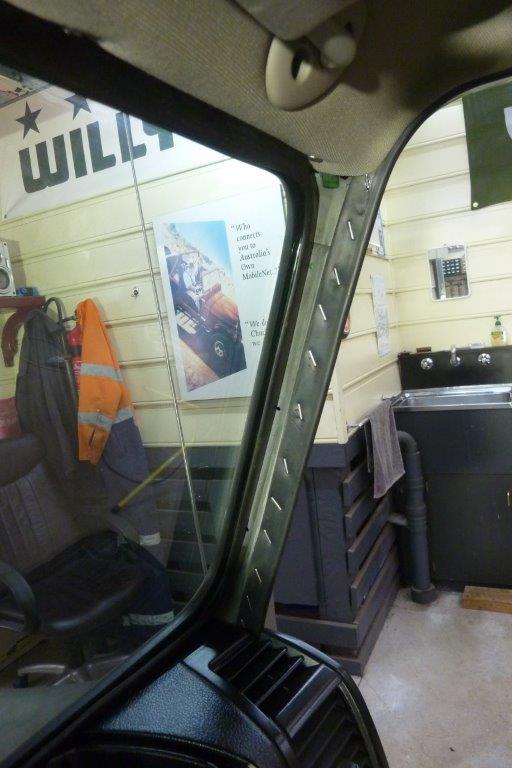
Was great to get it fitted with the windscreen in place for the first time.


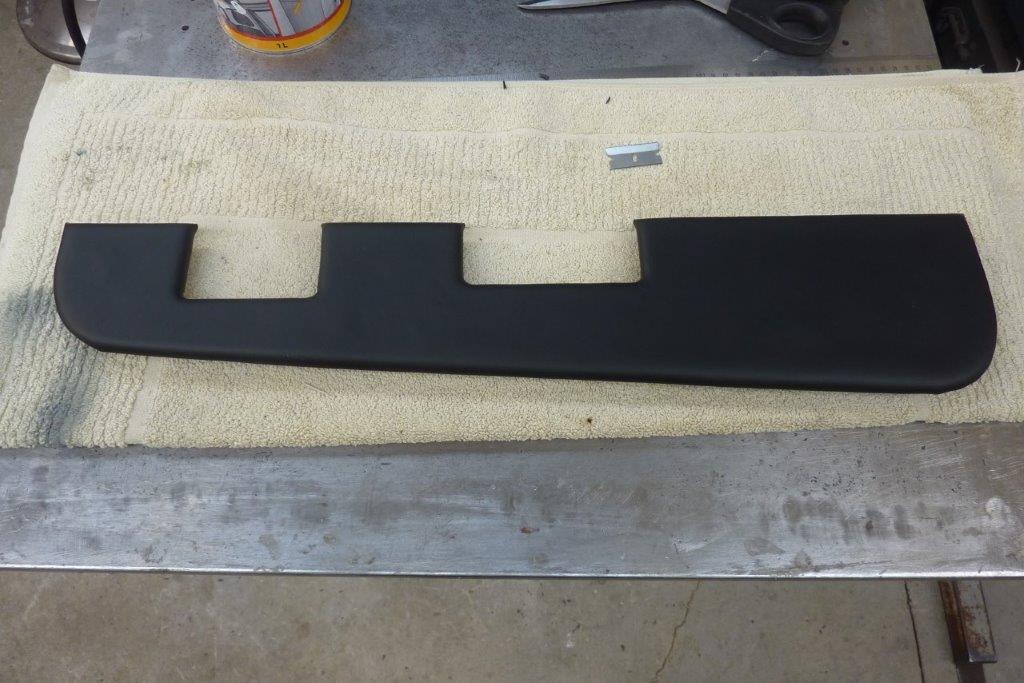
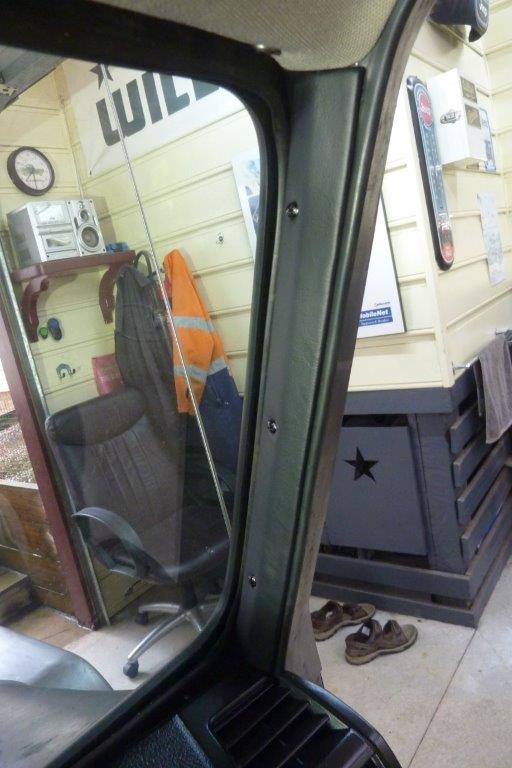
I also changed the colour from dark slate grey to black. Thought there were too many colours with the grey, tan, black plus the fake wood. Also the exterior colour will be seen around the perimeter of the doors as well later on.


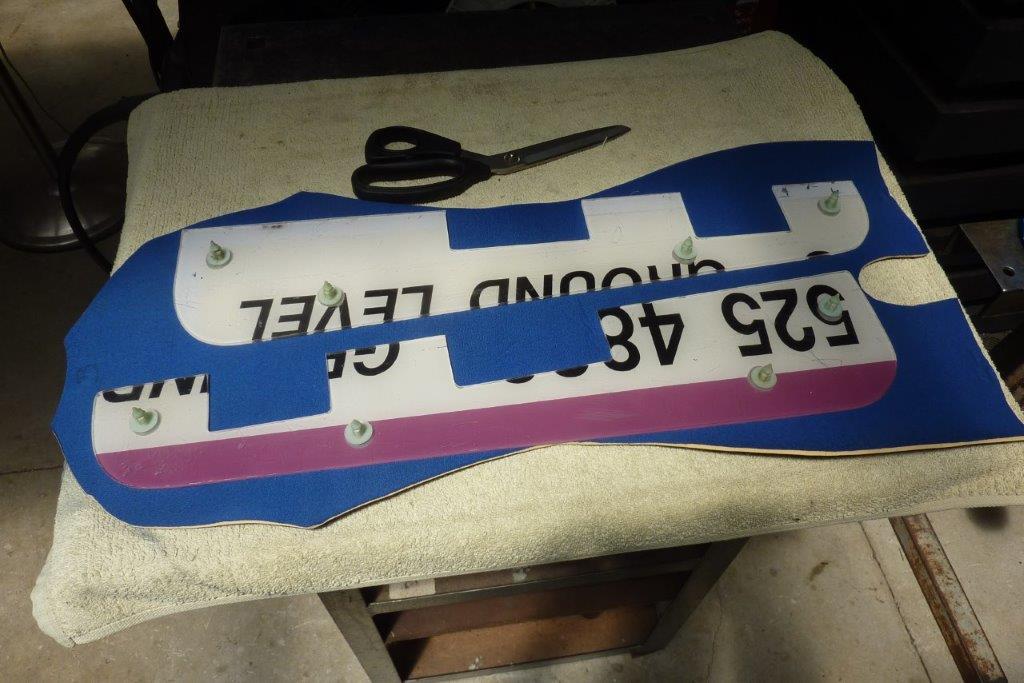
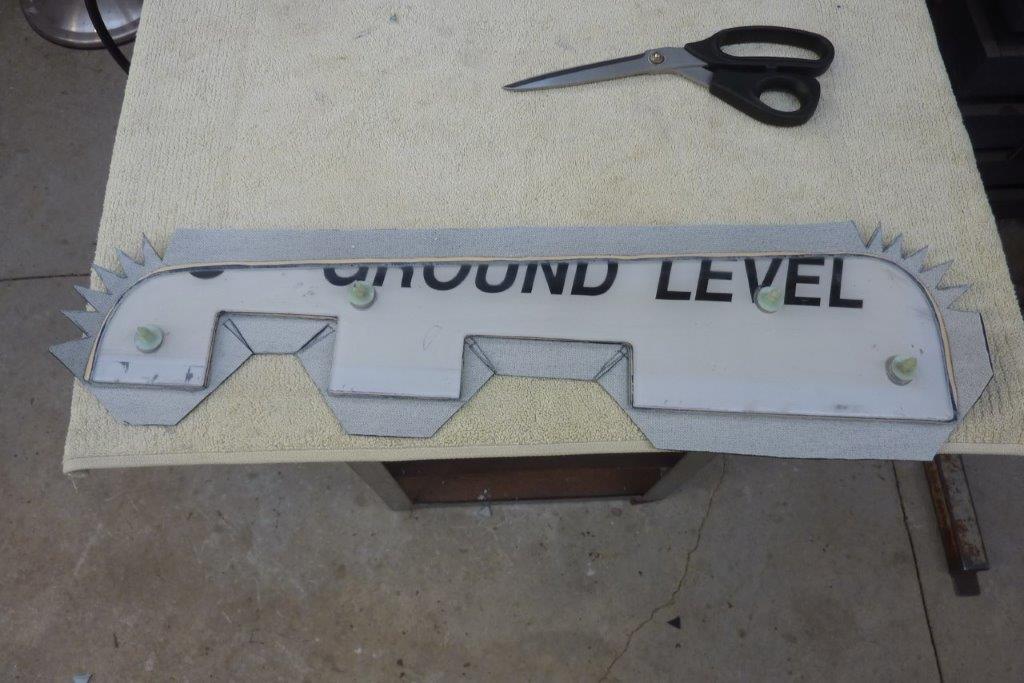
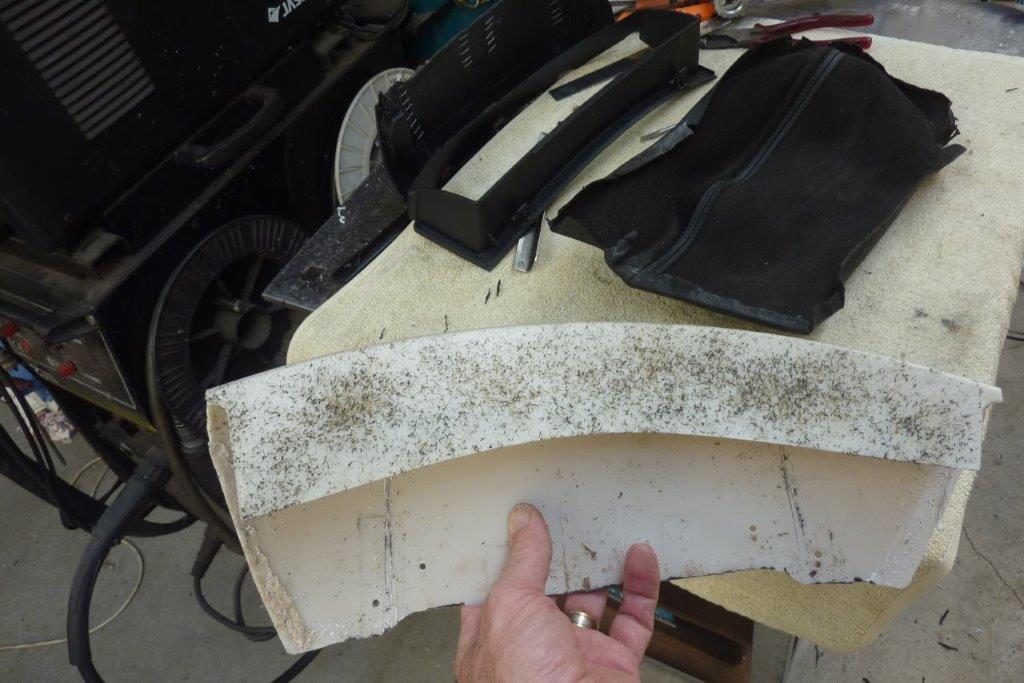
Next thing to deal with was the instrument cowl. It also had a large piece cut off it to fit and glad I worked that out before the glass was fitted. Still had to get rid on that arch though so less would be seen through the glass.


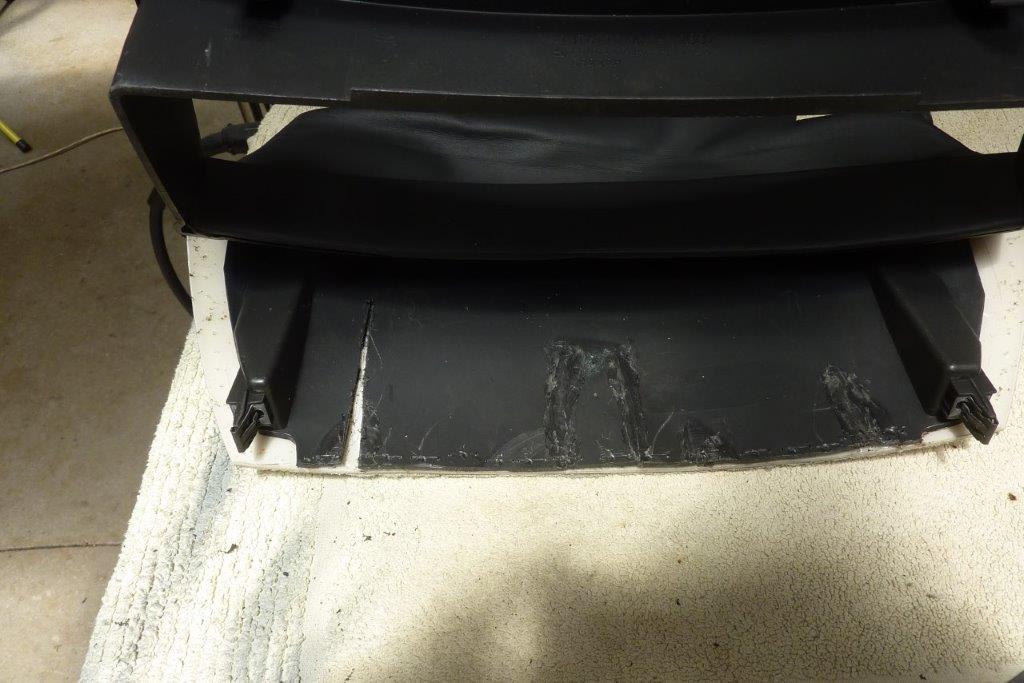
I cut the ribs out it had and welded the plastic back up. But as you flatten the arch it moved the mounts further apart.


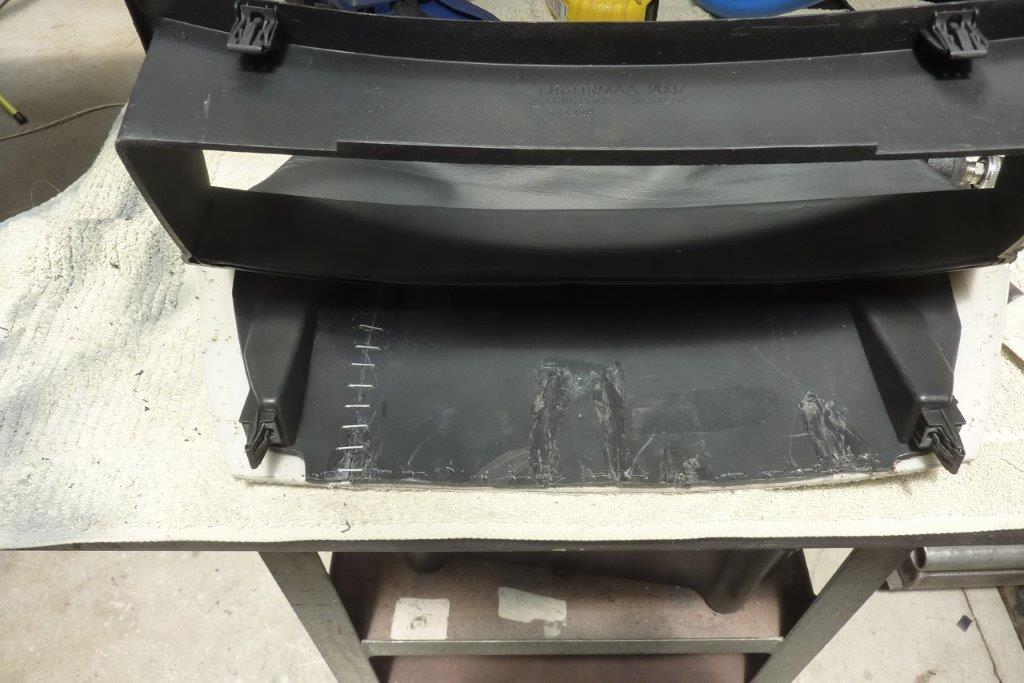
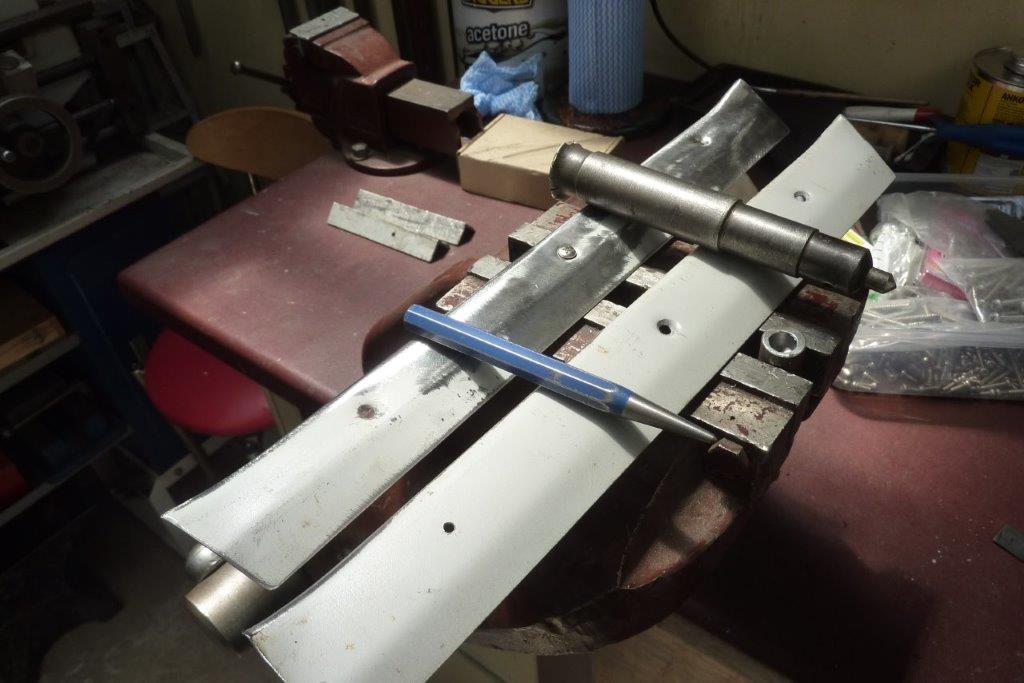
Cut the wedge out to move the mount over and just stapled it together for now to test fit it before welding. Ended up stapling over the welded seams as well for extra reinforcement.


To keep it flat I folded up some stainless to the shape I wanted and used counter sunk screws from the top to hold it in place.


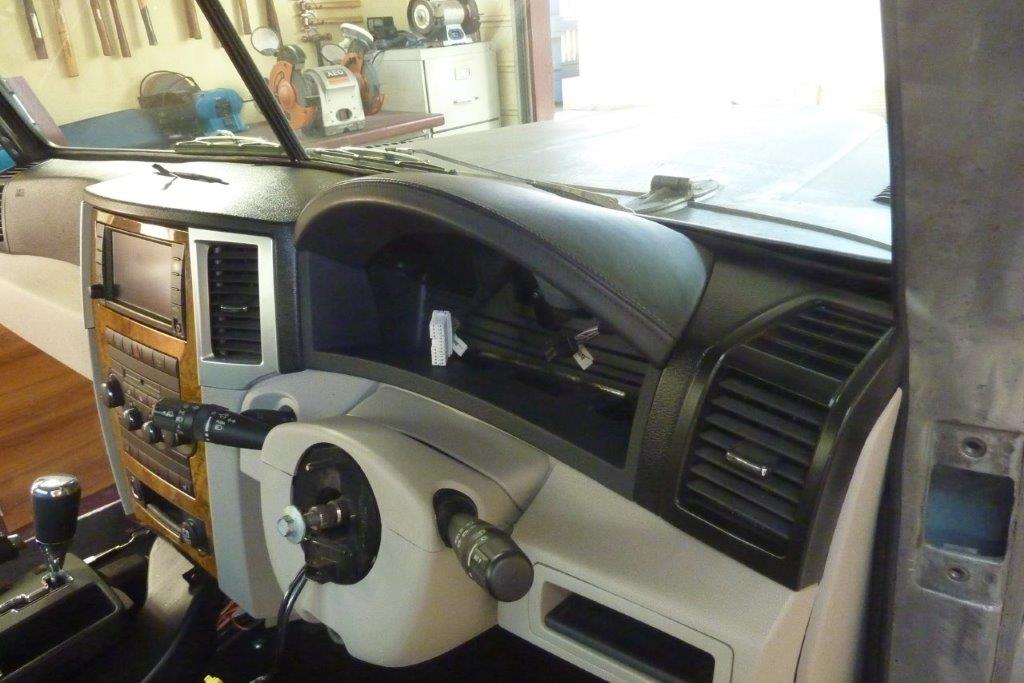
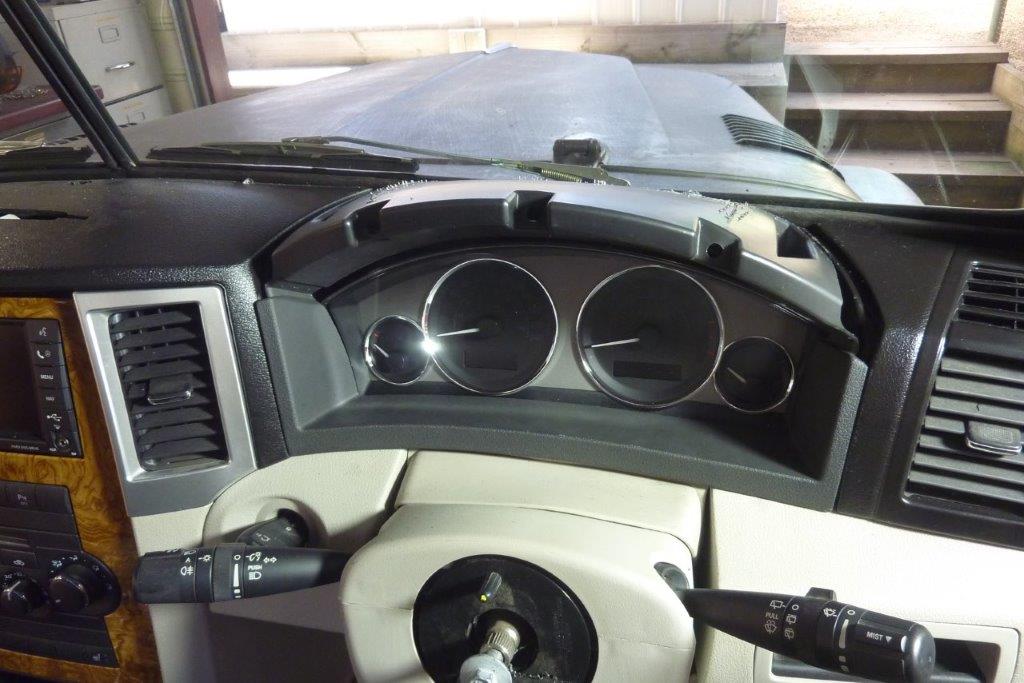
Test fit looks alright but don't like how the factory had the cowl top slightly forward of the front face.


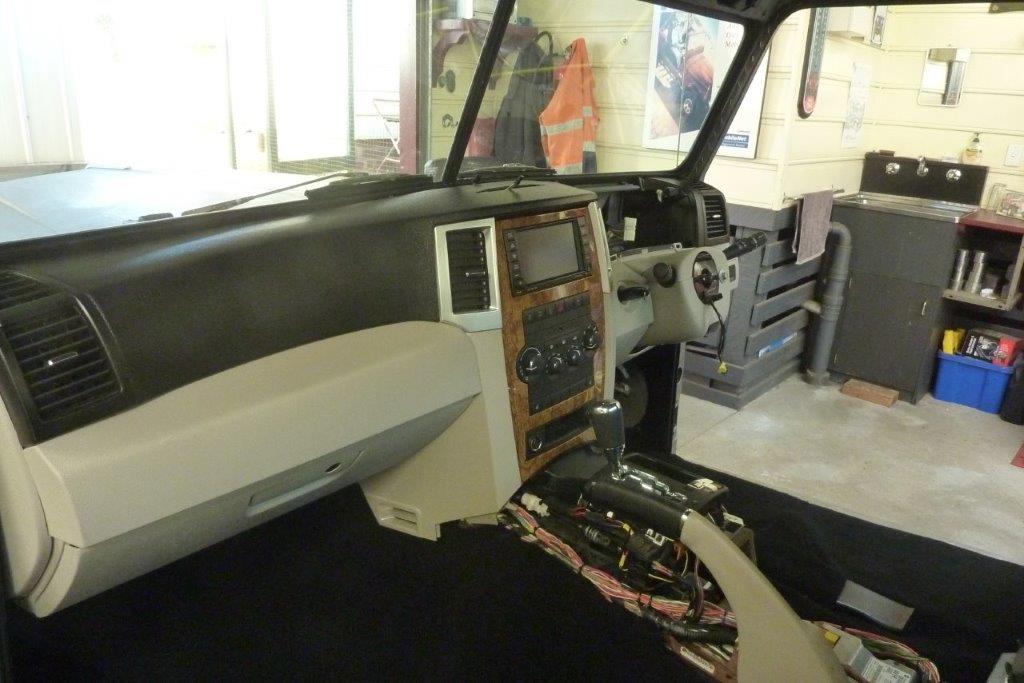
Now to see if the instrument cluster still fits in front of the defrost ducting I made to fit in there.


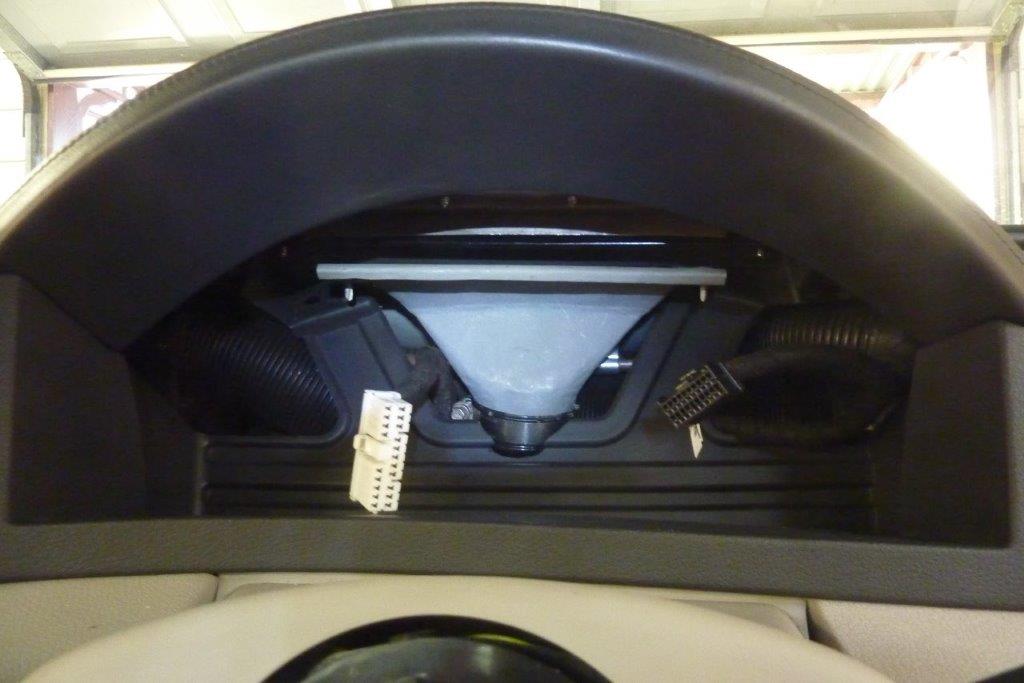
After trying everything I could, the cowl would not go back in front of the cluster as the vent pushed it forward and there was no room left to push that back. So pulled the cowl completely apart.


I just kept trimming the back of the cowl where it sits against the face of the cluster until it fitted. Was only 10mm in the end to make it all fit.


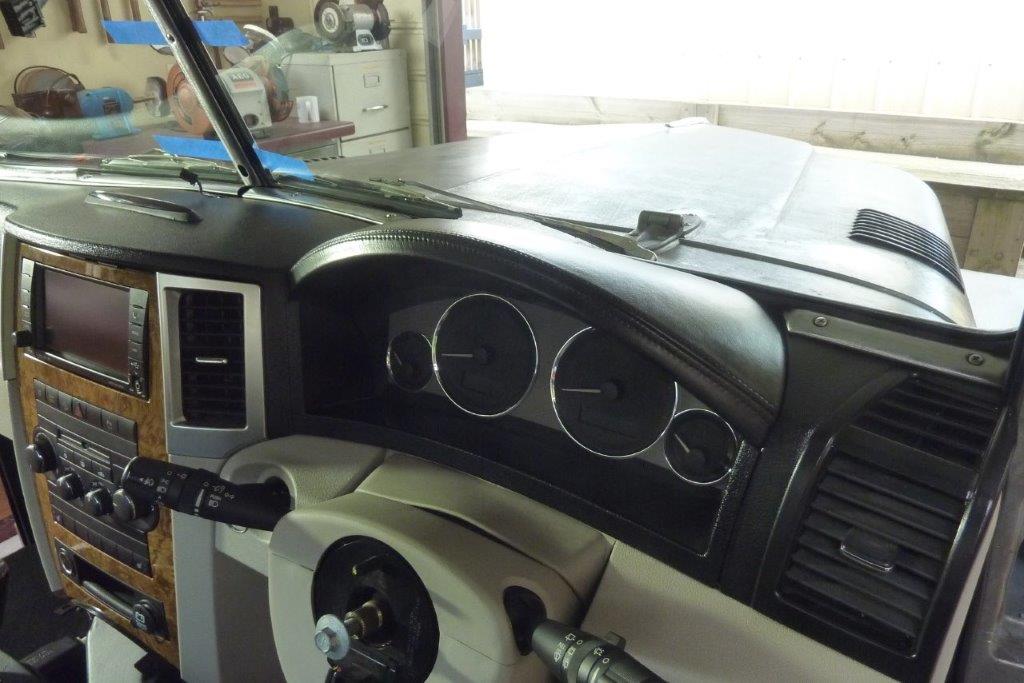
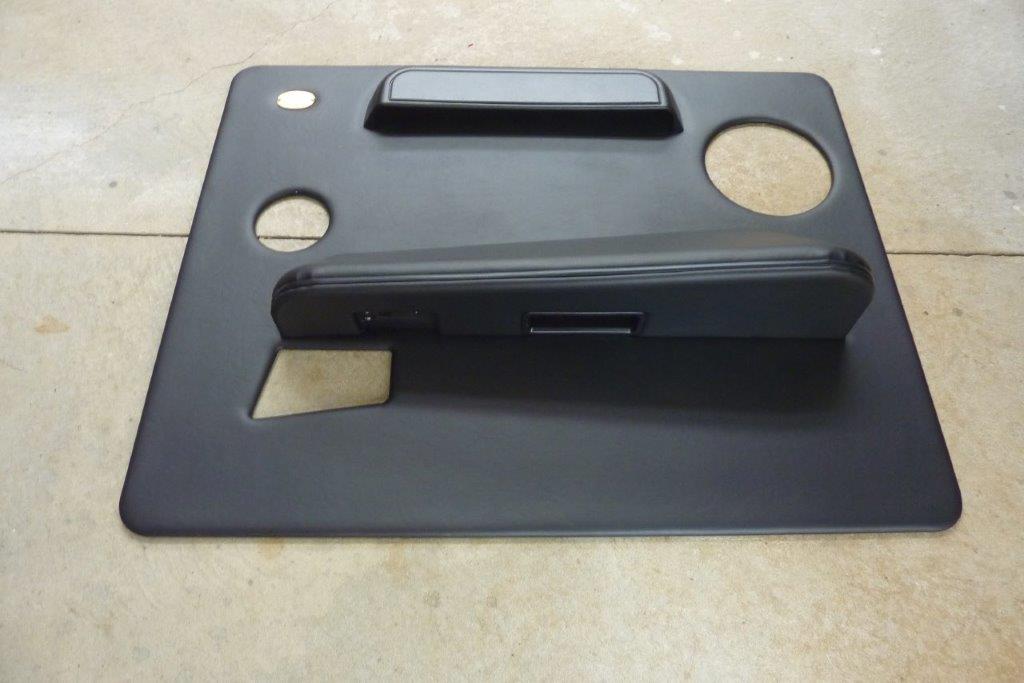
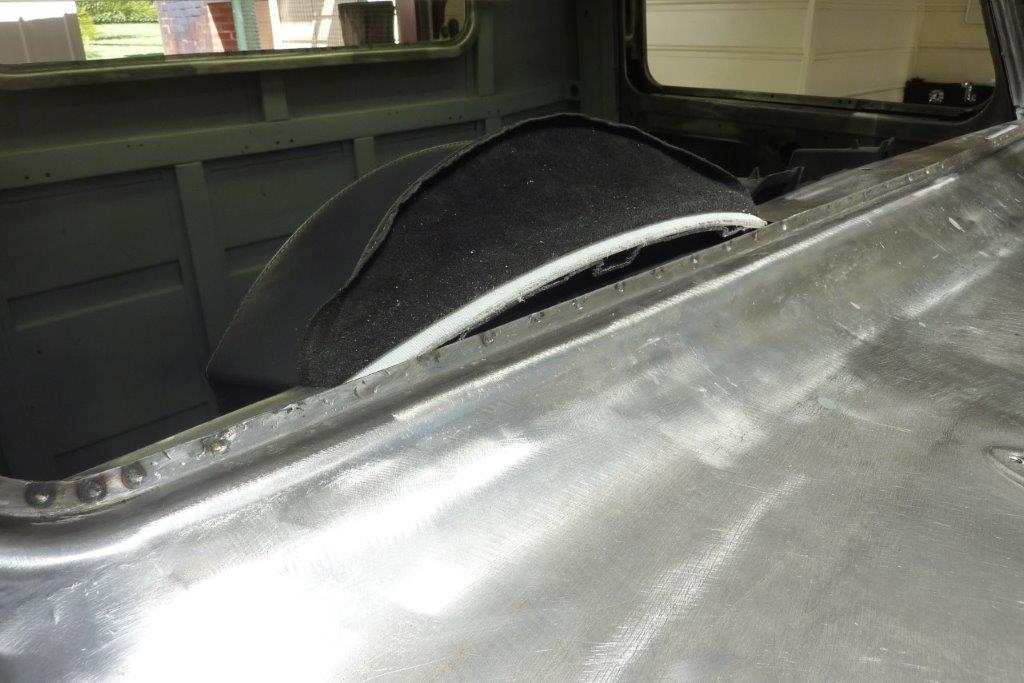
Took the opportunity to to cut and weld the plastic cowl frame further back and retrim everything so the top part fitted back flush as well. Used a plastic primer and vinyl die to change the leather and plastic to black to match the factory leather seats etc.
__________________
Cheers, Marcus.

My web site:
http://willyshotrod.com Over 5'000 Club
Likes: (5)
  #1902  
Old 03-02-2022
Gojeep's Avatar
Gojeep  Gojeep is offline
LokRinger
 
Join Date: Jul 2002
Location: Victoria
Posts: 6,878
Likes: 792
Liked 1,769 Times in 560 Posts
Default


I got my one piece headliner back that I made from the upholsterers! https://designautointerior.wixsite.com/designauto The fabric they had was an even better match to the donor sunvisors.


They did a great job and the boss said they had to wait until they had three of them in the shop to get it done!


Can now see how it is tying into the dash and the rest of the interior once it is fitted.


I have never liked the section of the the stock trim that goes up the A pillars as is it didn't cover the windlace. It tucked in behind the tack strip and then angled towards the edge of the windscreen seal.


So using some offcuts from the office shelving, I set about making some new A pillar trims. Showing here how I dimple the face to take a counter sunk screw. Drill a 1/8" hole which then gets enlarged with the blue centre punch while sitting over the bar stock in the vice that has been drilled. Then follow up with the large punch that has a chamfer the same as the screw head.


Decided to cover them in matching vinyl. It is actually left over stock from the local Holden plant after it closed down and was used in the Commodores. The only thing I could find to match the grain in the Jeep factory leather seats.


I think this looks neater and still does the job of supporting the windscreen seal right along its edge.
__________________
Cheers, Marcus.

My web site:
http://willyshotrod.com Over 5'000 Club
Likes: (3)
  #1903  
Old 03-02-2022
bodgie's Avatar
bodgie  bodgie is offline
Rock Munki
 
Join Date: Aug 2009
Location: Castle Hill, NSW
Posts: 2,137
What Jeep do I drive?: WG
Likes: 11
Liked 300 Times in 245 Posts
Default

Looking good Marcus. The headliner looks like it should from the pics, I’m quite amazed you managed to get the dash looking so good. It looked like it was going to be a pretty big challenge to get right.

Another step closer.
Likes: (2)
  #1904  
Old 04-02-2022
Gojeep's Avatar
Gojeep  Gojeep is offline
LokRinger
 
Join Date: Jul 2002
Location: Victoria
Posts: 6,878
Likes: 792
Liked 1,769 Times in 560 Posts
Default

Quote:
Originally Posted by bodgie View Post
Looking good Marcus. The headliner looks like it should from the pics, I’m quite amazed you managed to get the dash looking so good. It looked like it was going to be a pretty big challenge to get right.

Another step closer.
Many thanks mate. Sure has been a challenge doing the dash. I look at my KK dash and that sure would have been a lot simpler, but it is not connected to a HEMI!
__________________
Cheers, Marcus.

My web site:
http://willyshotrod.com Over 5'000 Club
Post New Thread  Reply


Posting Rules
You may not post new threads
You may not post replies
You may not post attachments
You may not edit your posts

BB code is On
Smilies are On
[IMG] code is On
HTML code is On


All times are GMT +10. The time now is 12:05 PM.


Advertisements


AJOR does not vouch for or warrant the accuracy, completeness or usefulness of any message, and are not responsible for the contents of any message. The messages express the views of the author of the message, not necessarily the views of AJOR or any entity associated with AJOR, nor should any advice be substituted as technical advice replacing that of a mechanic. You agree, through your use of this service, that you will not use AJOR to post any material which is knowingly false and/or defamatory, inaccurate, abusive, vulgar, hateful, harassing, obscene, profane, sexually oriented, threatening, invasive of a person's privacy, religious, political or otherwise violative of any law. You agree not to post any copyrighted material unless the copyright is owned by you or by AJOR. The owner, administrators and moderators of AJOR reserve the right to delete any message or members for any or no reason whatsoever. You remain solely responsible for the content of your messages, and you agree to indemnify and hold harmless AJOR, the administrators, moderators, and their agents with respect to any claim based upon transmission of your message(s). The use of profile signatures to intentionally mislead or misdirect any member on this forum is not acceptable and may result in your account being suspended. Any trip that is organised through the AJOR forum is participated at your own risk. If you or your vehicle is damaged it is your responsibility, not that of the person that posted the thread, message or topic initiating the trip, nor the organisers of AJOR or moderators of any specific forum. This forum and associated website is the property of AJOR. No user data is harvested and no information supplied in your registration will be sold for profit.


Powered by vBulletin® Version 3.8.7
Copyright ©2000 - 2024, vBulletin Solutions, Inc.

AJOR © 2002 - 2024 AUSJEEPOFFROAD.COM. All corporate trademarked names and logos are property of their respective owners. Ausjeepoffroad is in no way associated with DaimlerChrysler Corporation or Fiat Jeep.
www.ausjeep.com www.ausjeep.com.au www.midlifemate.com ausjeepforum.com www.r9kustoms.com
vB Ad Management by =RedTyger=