Grand Willys Project - Page 228 - AUSJEEPOFFROAD.COM Jeep News Australia and New Zealand

Go Back   AUSJEEPOFFROAD.COM Jeep News Australia and New Zealand > JEEP GARAGE > Jeep build up
Register Forums Trading Your Jeep My Garage Mark All Read

Post New Thread  Reply
 
Thread Tools Search this Thread
  #1590  
Old 24-03-2020
Gojeep's Avatar
Gojeep  Gojeep is offline
LokRinger
 
Join Date: Jul 2002
Location: Victoria
Posts: 6,870
Likes: 789
Liked 1,754 Times in 556 Posts
Default

Thanks for the posts guys.
__________________
Cheers, Marcus.

My web site:
http://willyshotrod.com Over 5'000 Club
Likes: (1)
  #1591  
Old 29-03-2020
Gojeep's Avatar
Gojeep  Gojeep is offline
LokRinger
 
Join Date: Jul 2002
Location: Victoria
Posts: 6,870
Likes: 789
Liked 1,754 Times in 556 Posts
Default


I need to have somewhere to put some recovery hooks and thought using the mounting bolt dimples could work once modified.


To get the hooks to sit completely level I had a steel block clamped underneath right on the edge of where I wanted the crease to form. Then hammered down with the brick bolster.


Directly under the tray will be a heavy bracket going back to the frame and also for mounting the bumper too.


Next I finished off making the tray wider to match the grille. Normally I would have added a single wider piece at the V to flat transition, but knew it would have moved the place I wanted the tow hooks to line up with the bracket. So added a strip on the outside of the dimple area. This was welded with the MIG in one pass but manually pulsing the trigger, never allowing the orange colour to disappear from the weld before adding more.


I always check the penetration on the back to see if any spots need to be added to before any grinding has taken place. This way you have more weld thickness on the front side to protect against a blowout. Can see where it was colder at the start of the weld and I had to add some. If you do the slow spaced tack technique you are facing this along the whole weld. I never have my welds crack when planishing as I believe this technique largely removes the problem of the MIG where rapid heating from cold causes brittleness.


For the first time I thought I would try the automatic pulse, or spot timer, on my MIG to see how that would compare. I just held the trigger and had the timer set to 0.5 second intervals.


Full penetration but way too much weld even though it was the identical setting to the last weld where I did it manually. Good news that it didn't blow through anywhere though. I will try a lower setting next time. Steel is 1.2mm or 18 gauge.


Width now correct across the grille.
__________________
Cheers, Marcus.

My web site:
http://willyshotrod.com Over 5'000 Club
Likes: (7)

Last edited by Gojeep; 01-04-2020 at 07:47 PM.
  #1592  
Old 04-04-2020
Gojeep's Avatar
Gojeep  Gojeep is offline
LokRinger
 
Join Date: Jul 2002
Location: Victoria
Posts: 6,870
Likes: 789
Liked 1,754 Times in 556 Posts
Default


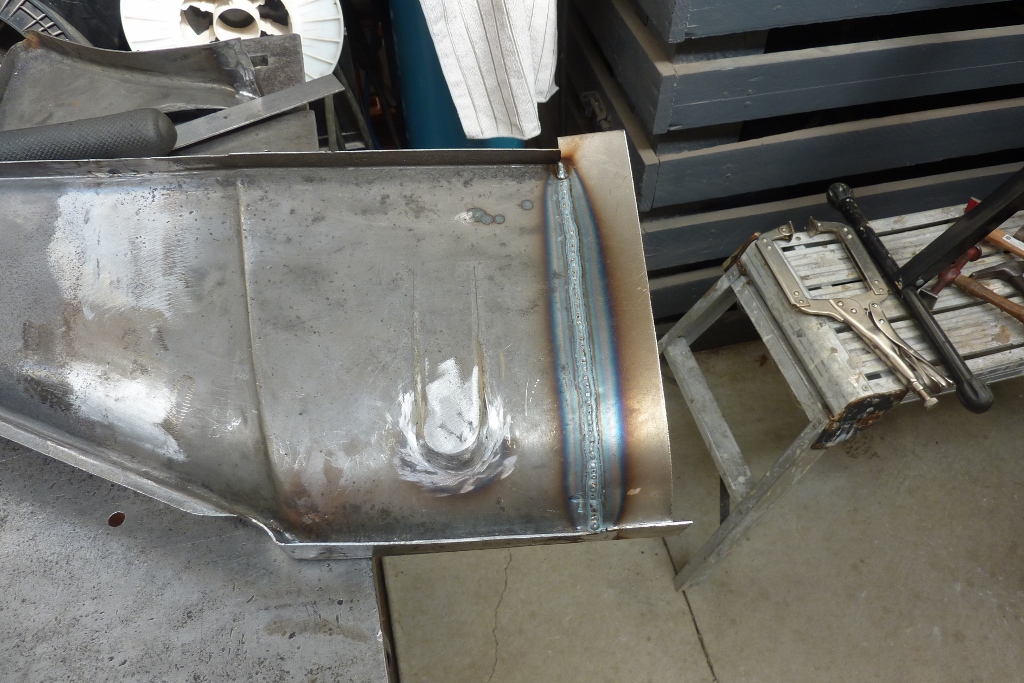
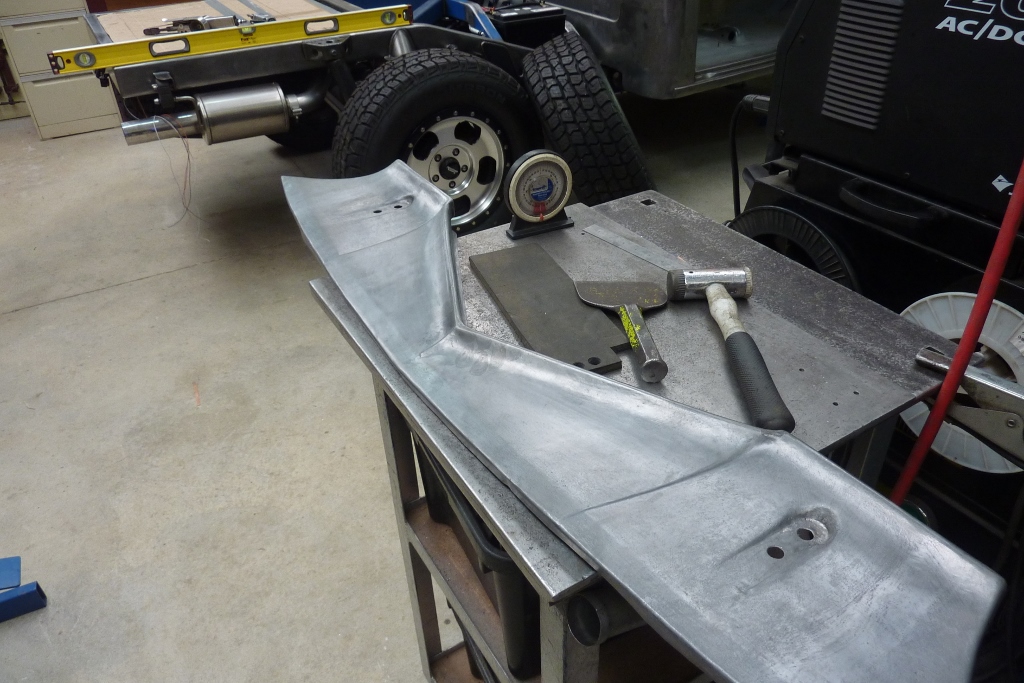
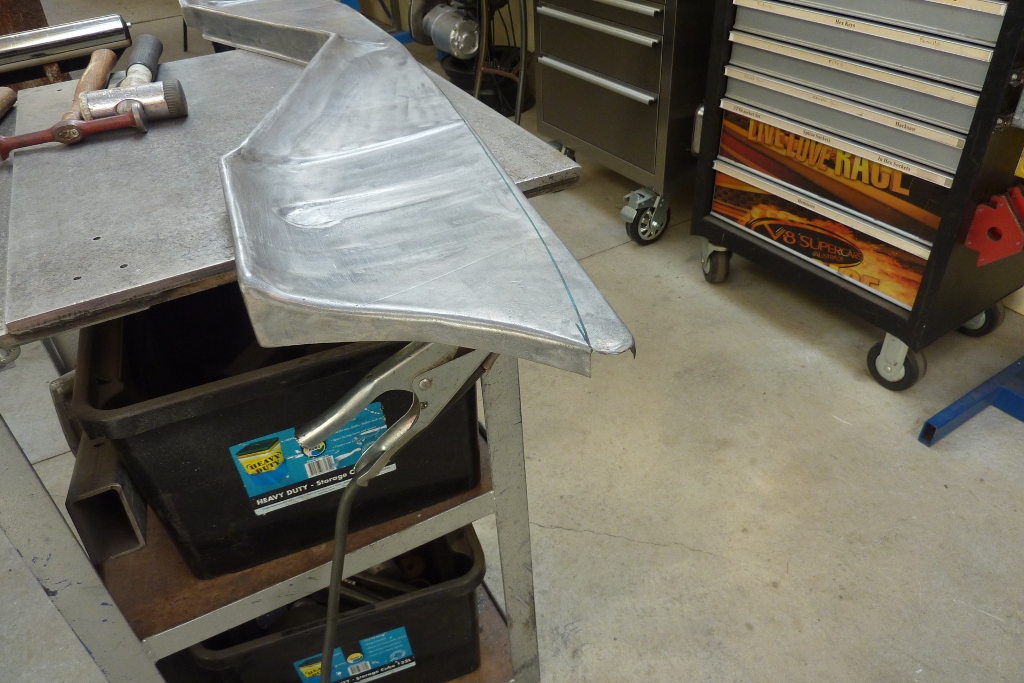
Because the tray is now wider, the curve doesn't match the stock width bumper, especially as the bumper curve tightens towards the ends. I have notched out the flange back to the new bend line.


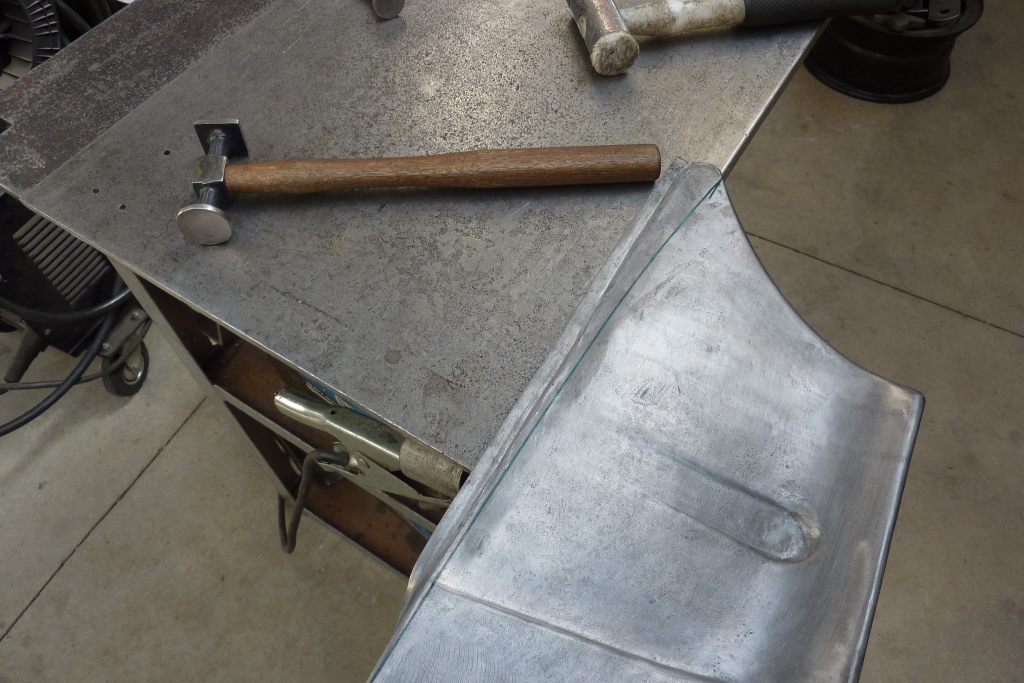
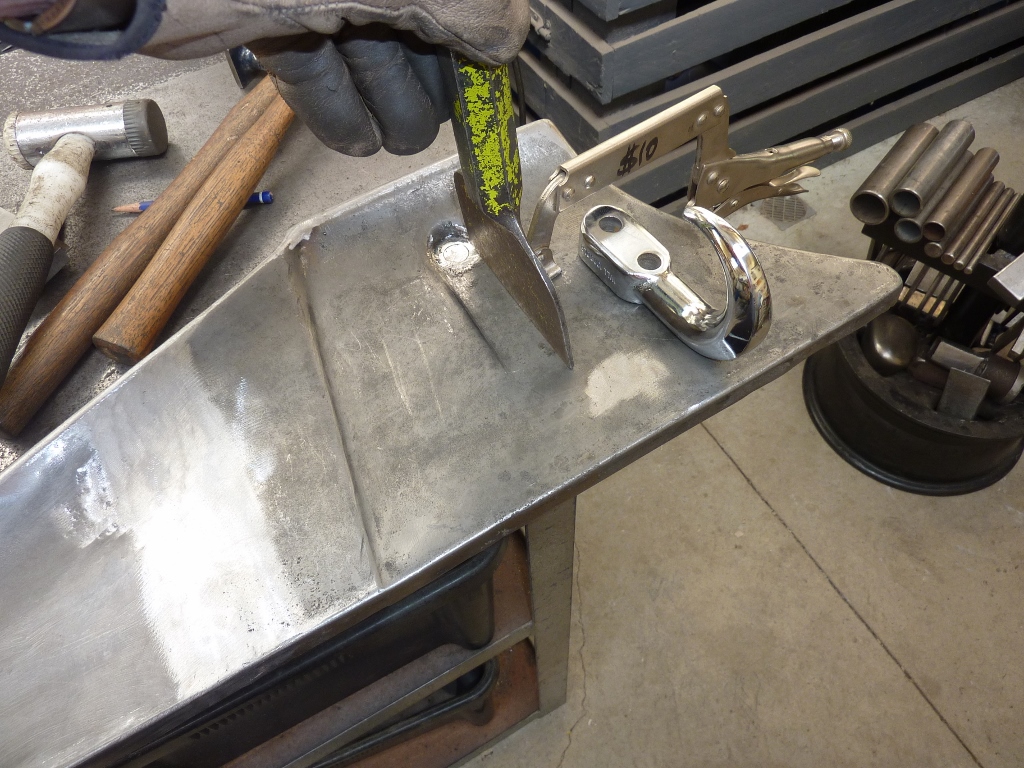
I start bending the flange flat using the mallet and then a panel hammer.


I also hammer from the back hitting directly on the old bend line to force the ridge on the opposite side up into the crease.


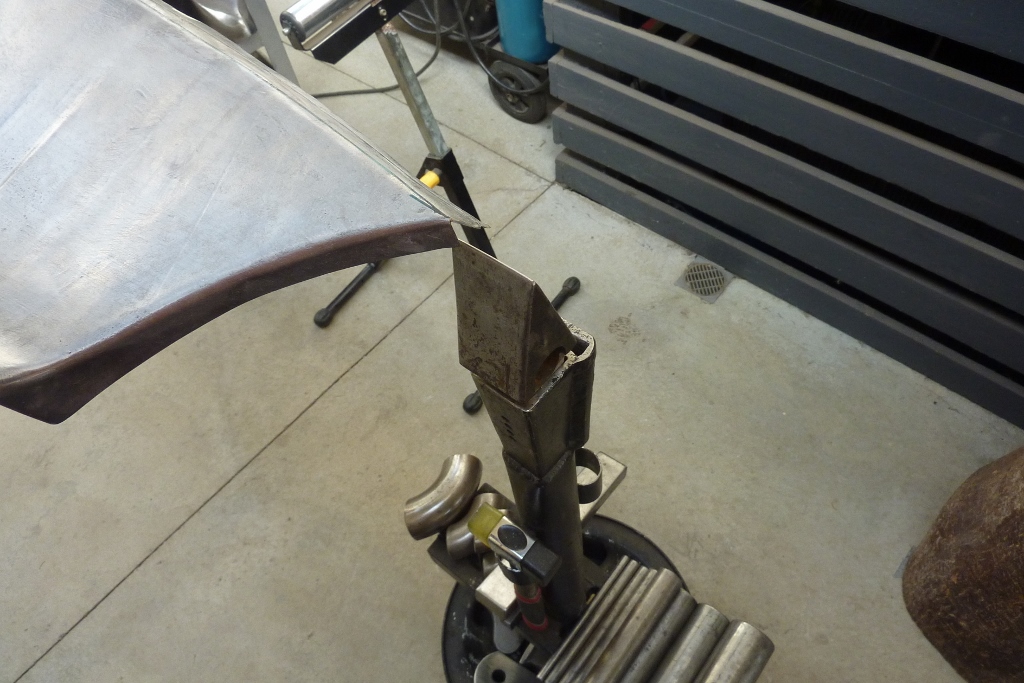
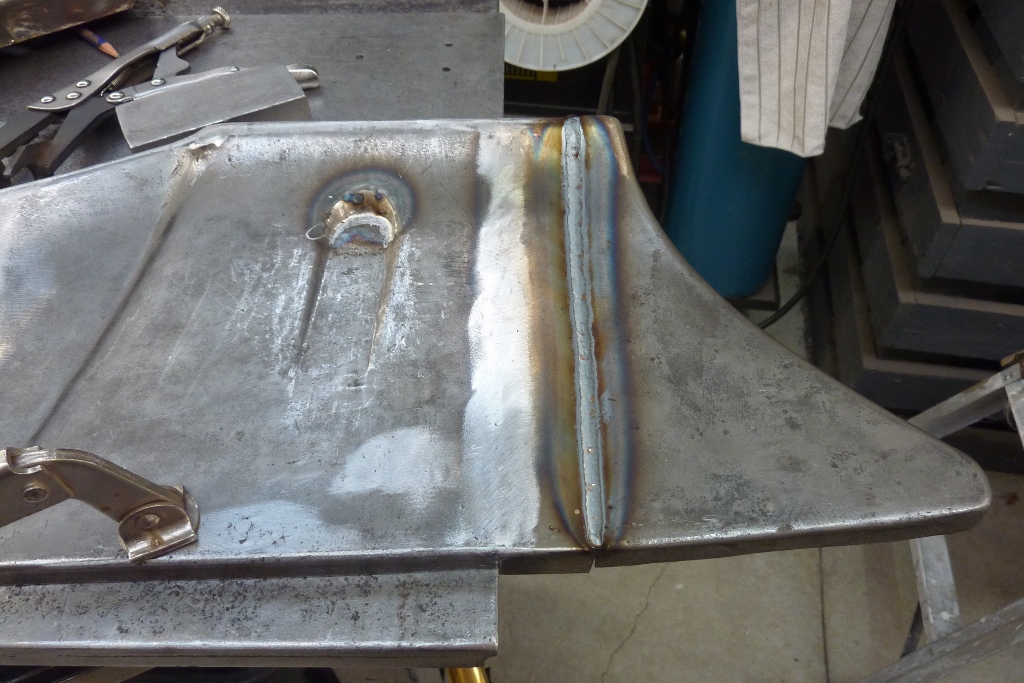
Using nothing more than an old wood splitter head I turned into a stake, I slowly bend the flange along the new line. Even though I cannot see where it is once I move away from the edge, I watch the reflection which shows exactly where it is bending. Doing light taps to start with means it is easy to adjust where it is bending.


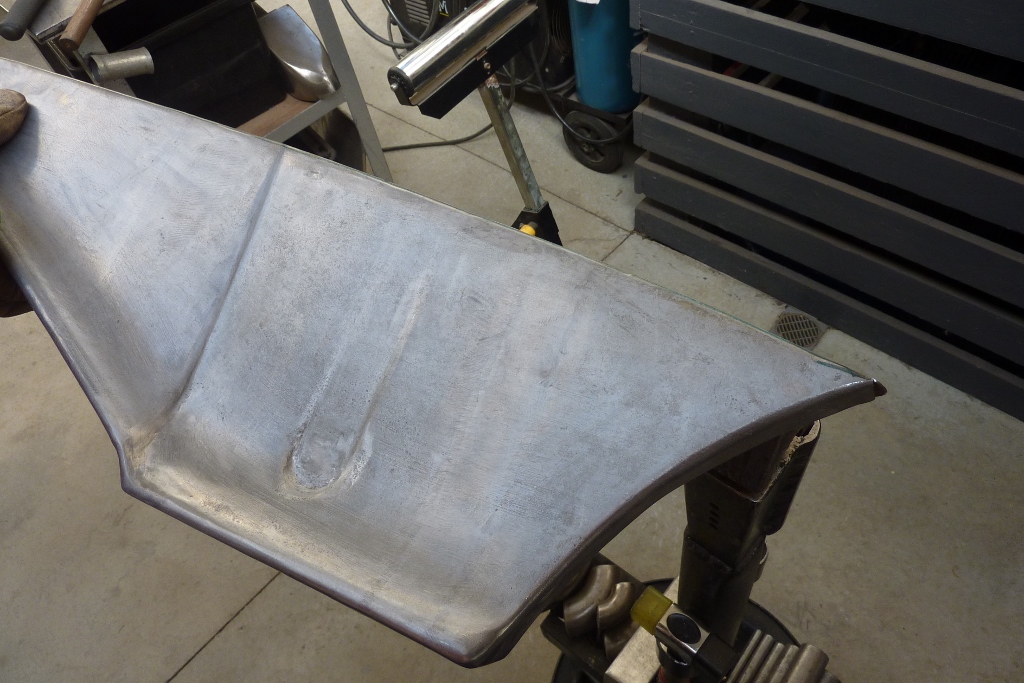
Even bending over a wide straight edge, I can still produce a shallow curve.


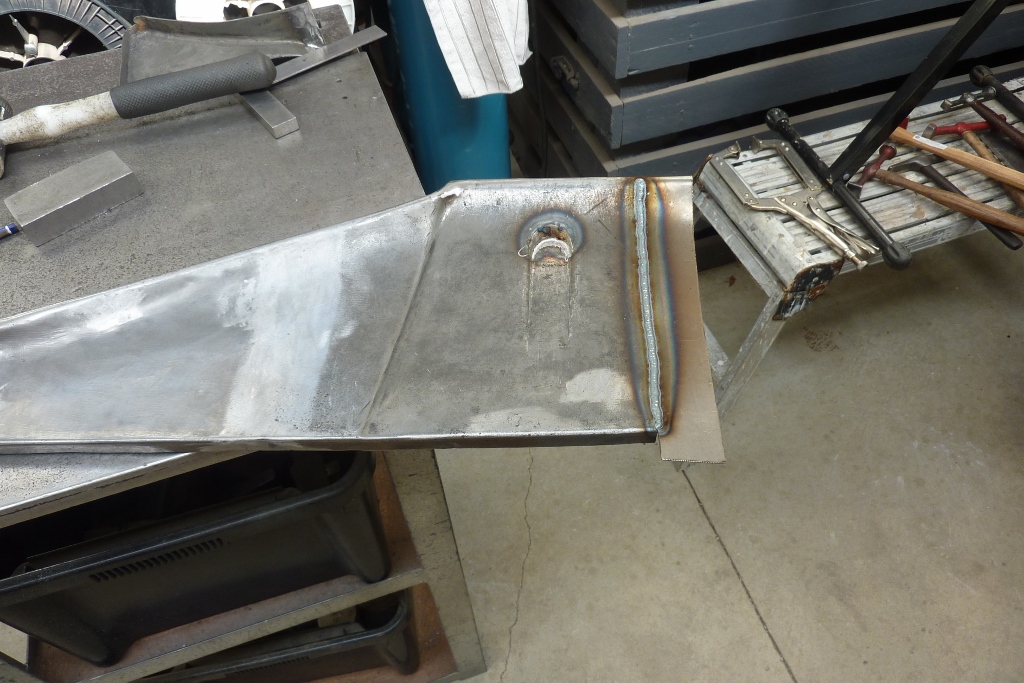
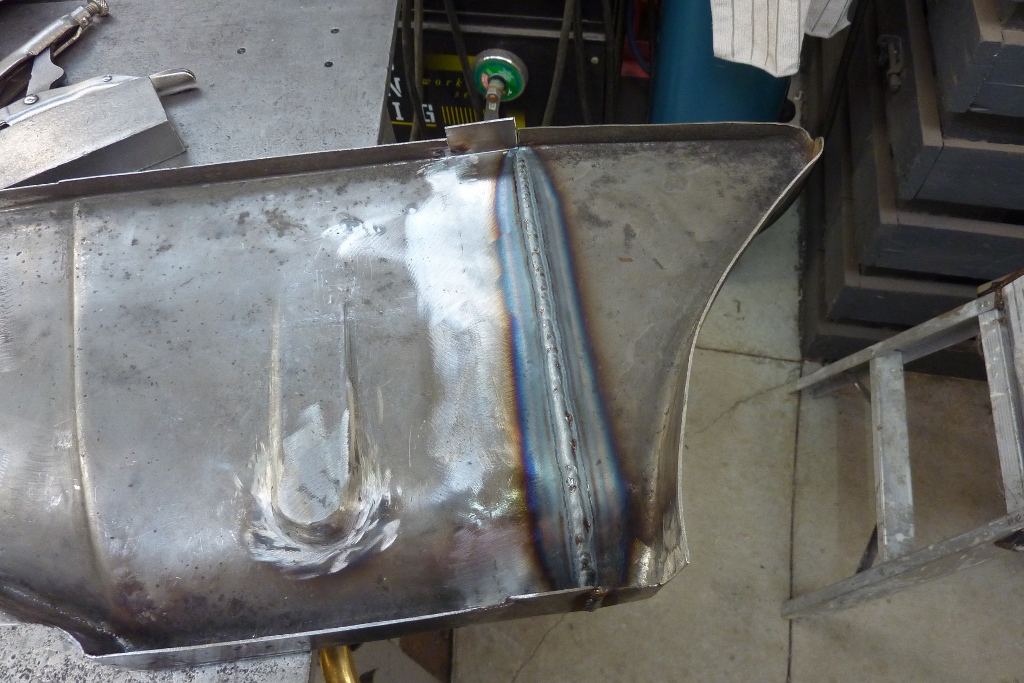
Previous tension in the panel and the tighter curve towards the end, has made it bend. Some of this will straighten once I cut the excess material away using a cutoff wheel due to its heat shrinking it.


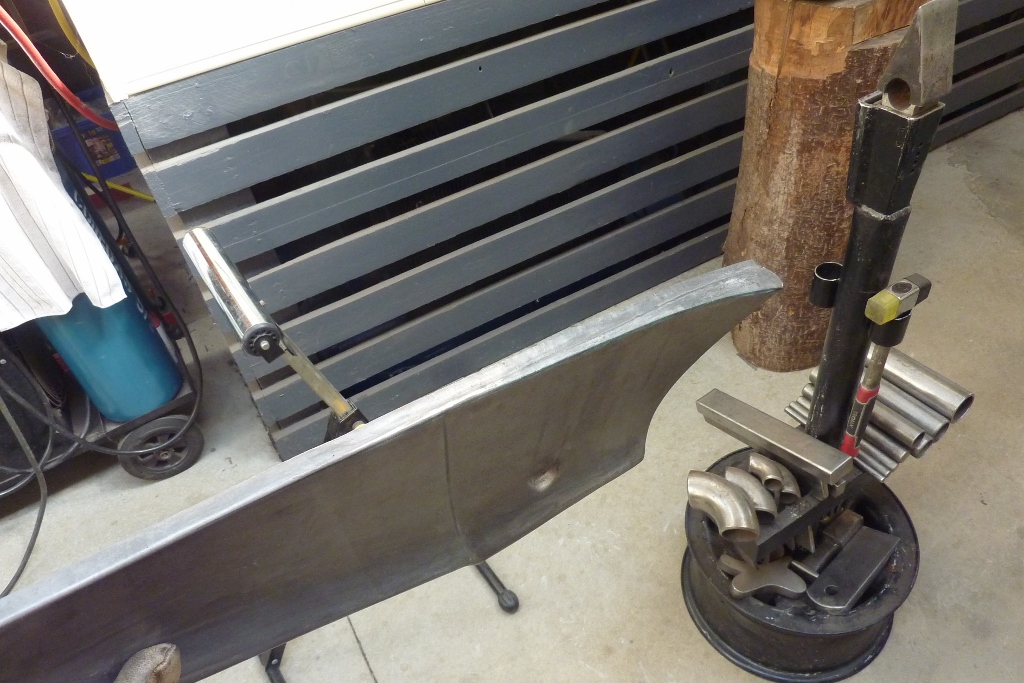
Once I cut the flange to an even width again, I used a chaser to hammer along the bend line to crisp up the fold. This also causes some stretching to further straighten the flange. Using a shrinker on the edge rather than the fold line will also straighten it. For straightening this flange, stretching at the fold does the same thing as shrinking along the edge.


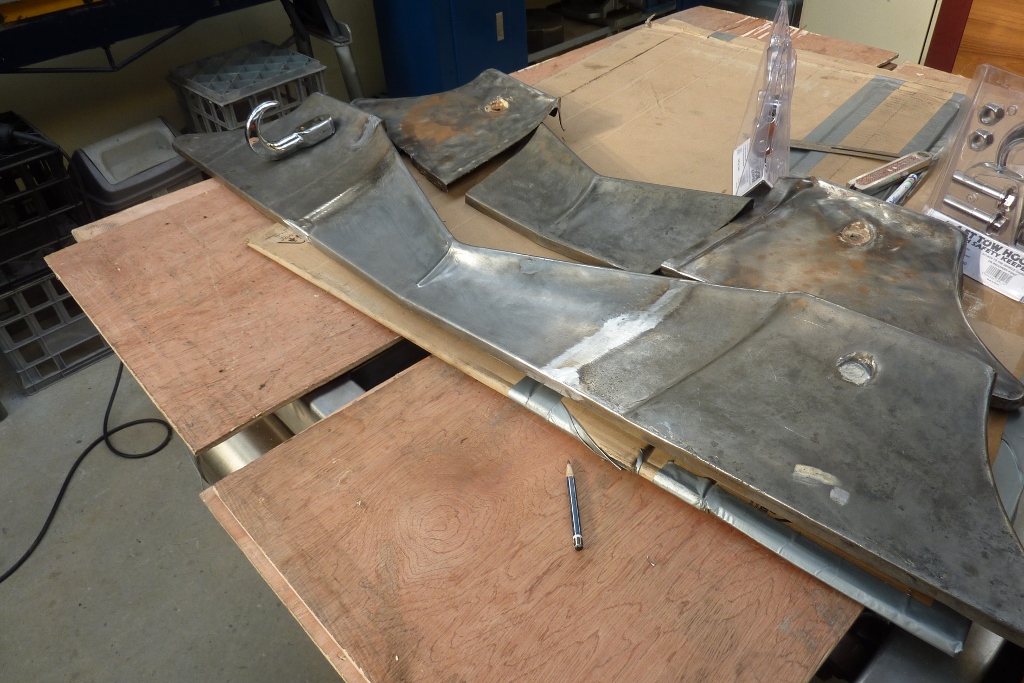
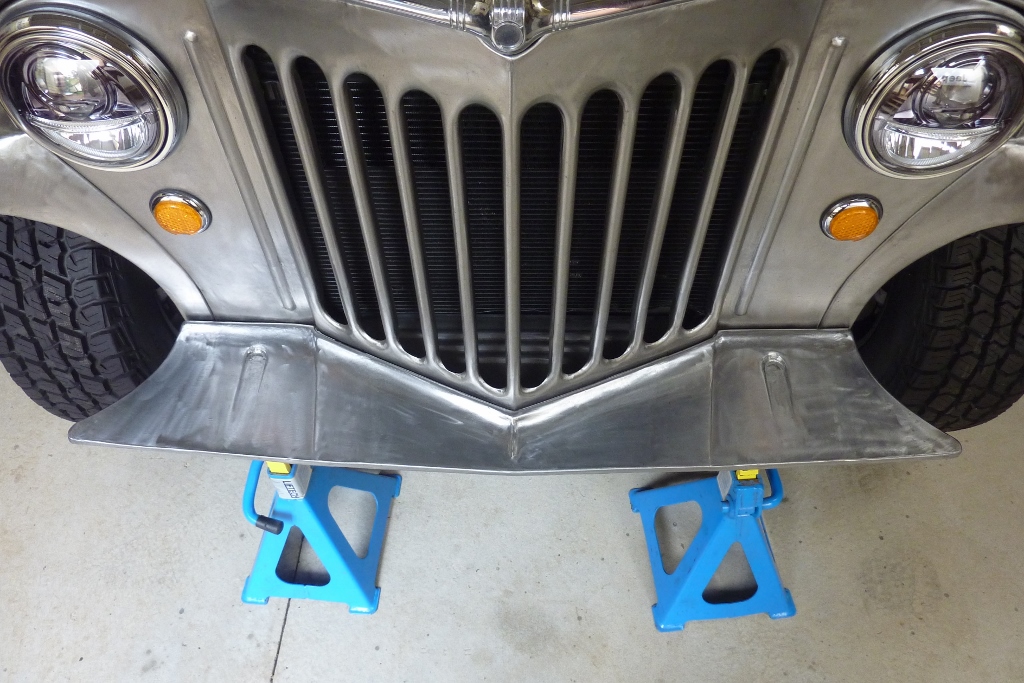
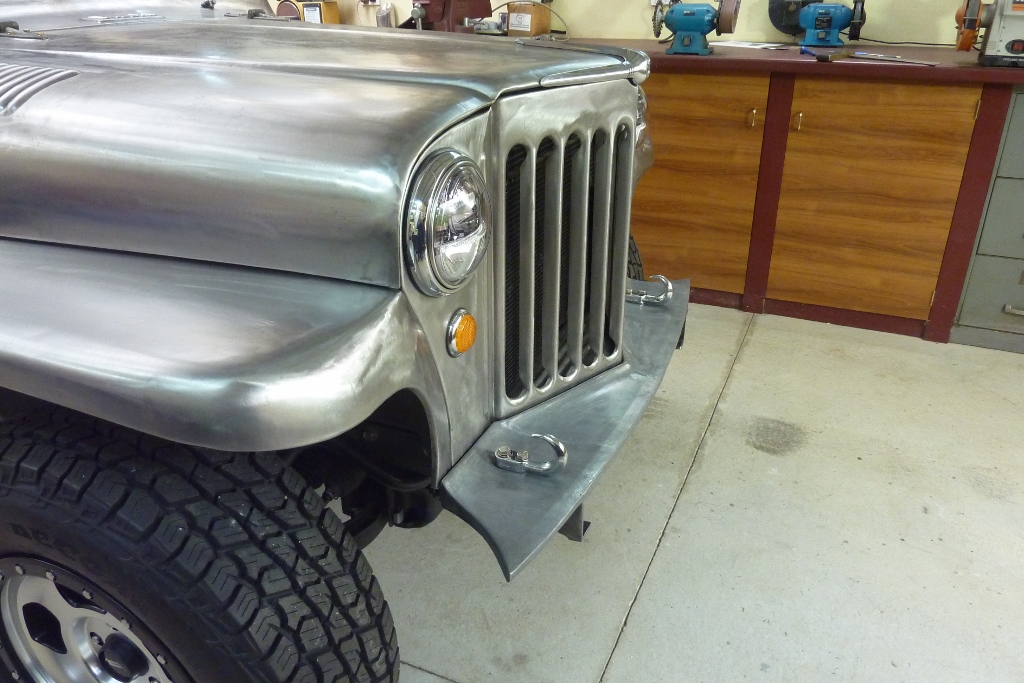
Overall the tray is narrower than stock by 20mm-3/4" to compensate for the extra depth of the grille and width of the tray.


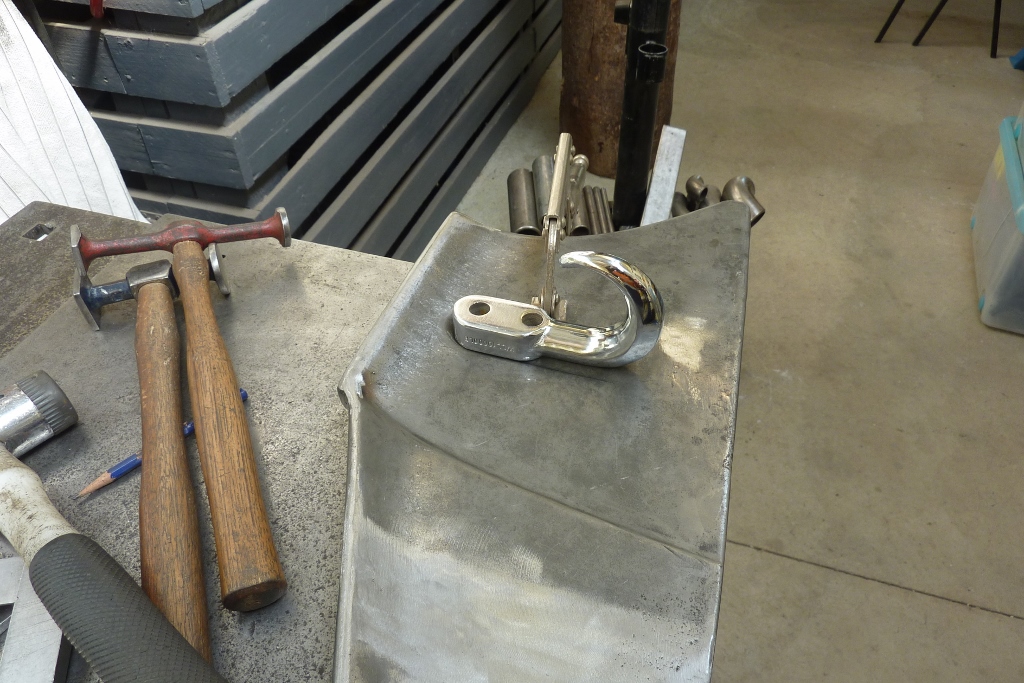
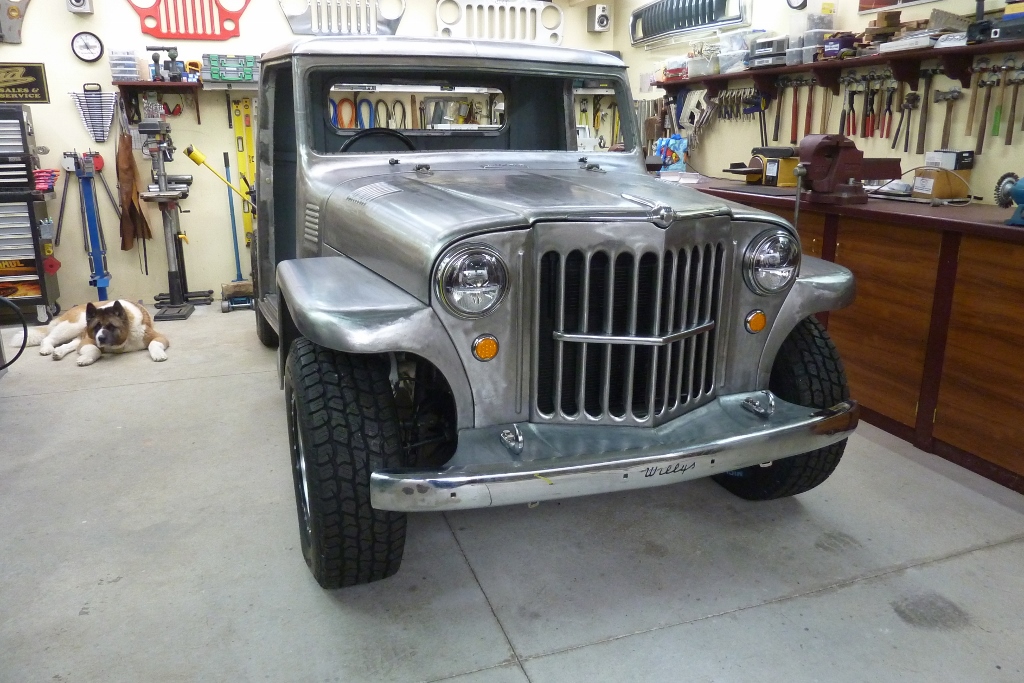
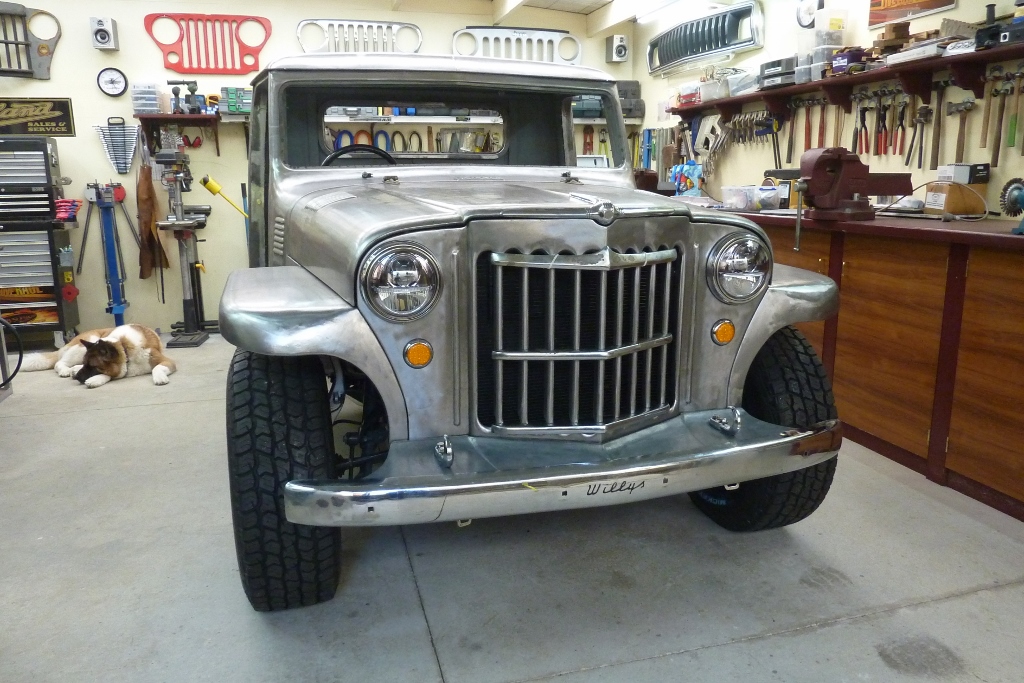
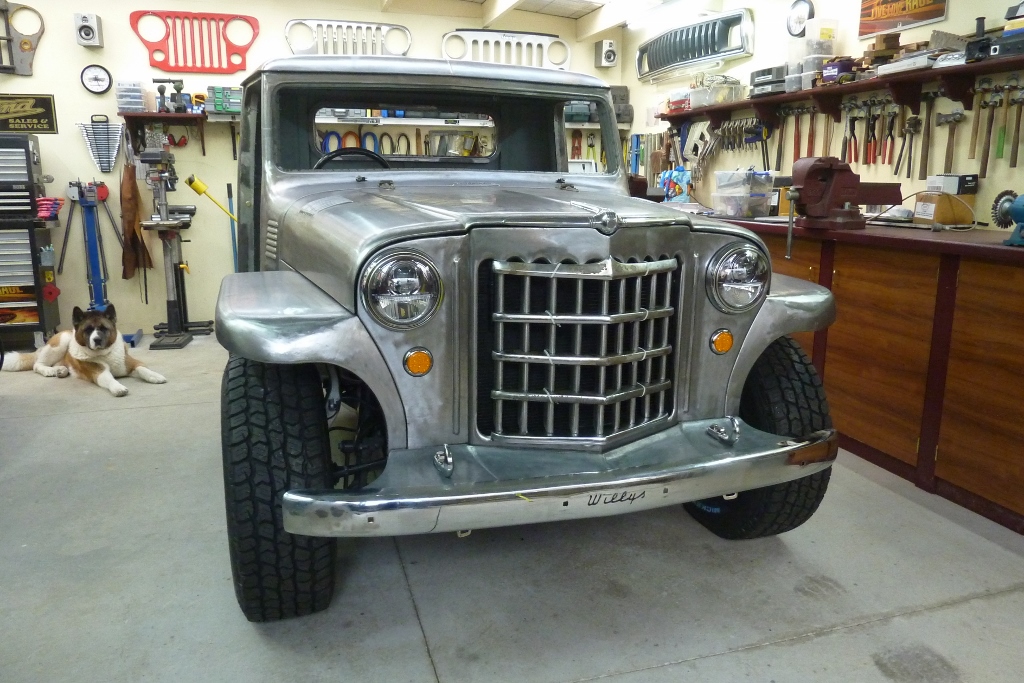
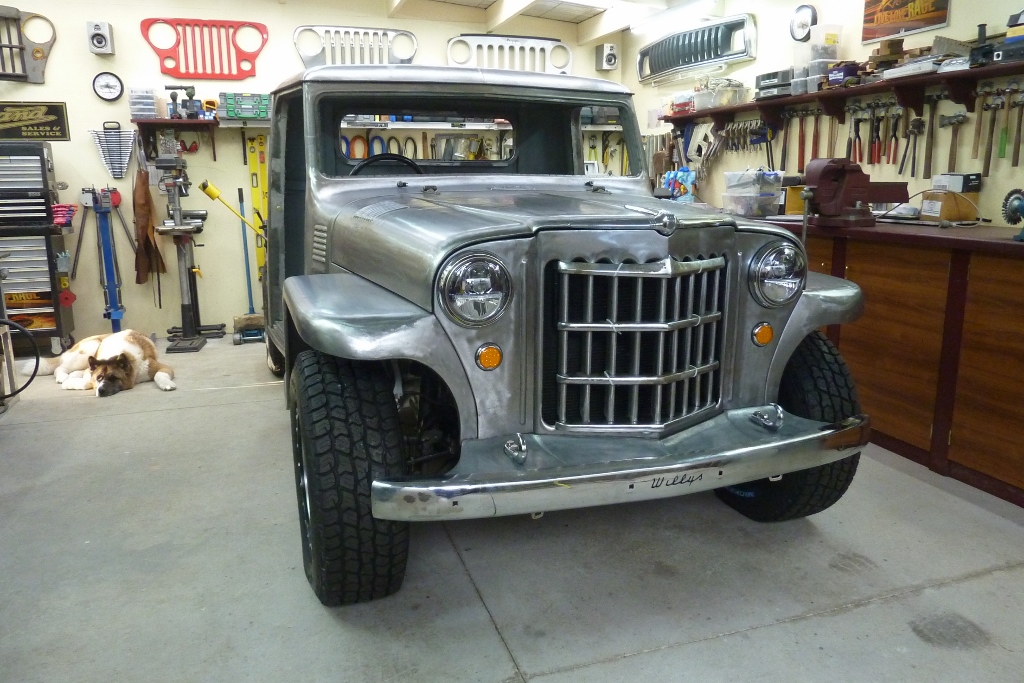
Mockup with the hooks in place in front of the grille.
__________________
Cheers, Marcus.

My web site:
http://willyshotrod.com Over 5'000 Club
Likes: (3)
  #1593  
Old 05-04-2020
Gojeep's Avatar
Gojeep  Gojeep is offline
LokRinger
 
Join Date: Jul 2002
Location: Victoria
Posts: 6,870
Likes: 789
Liked 1,754 Times in 556 Posts
Default


Now to make some brackets to support the tray, recovery hooks and bumper. I bought some 100x50mm-4"x2" C channel. I prefer C channel over U channel as the flanges are parallel rather than tapered. I couldn't have any bolts through it without making a levelling wedge first with U channel.


I could not buy angle in the size I wanted and got the bonus of thicker flanges too. The very ends have been tapered to 6* to match the bumper flange angles as they will be bolted through them. I left the flange as long as I could to give lateral support from any off centre pulling on the hooks.


Back in 2012, before boxing the chassis, I had welded some 10mm-3/8" thick bar in place ready to accept drilling and tapping of the bumper brackets! There is a total of three M12 10.9 bolts holding each bracket onto the chassis.


As I have made the tray level so the hooks are not on a downward 6* angle, I needed to bend down the tray edge where it tucks under the bumper flange. After shrinking the tray flanges at each end, I hammered with the bolster along the line with the tray upside down and over the rubber mat.


All bolted in place for the first time.


Technically the bumper is 40mm-1.5" further forward than stock as that is how much I moved the grille forward. But I think it looks just right at that distance.


Bumper is just clamped in place at the moment and still have to drill and bolt it on.
__________________
Cheers, Marcus.

My web site:
http://willyshotrod.com Over 5'000 Club
Likes: (1)
  #1594  
Old 05-04-2020
bodgie's Avatar
bodgie  bodgie is offline
Rock Munki
 
Join Date: Aug 2009
Location: Castle Hill, NSW
Posts: 2,136
What Jeep do I drive?: WG
Likes: 11
Liked 300 Times in 245 Posts
Default

Looks like a bought one, nice job.
Likes: (2)
  #1595  
Old 05-04-2020
Gojeep's Avatar
Gojeep  Gojeep is offline
LokRinger
 
Join Date: Jul 2002
Location: Victoria
Posts: 6,870
Likes: 789
Liked 1,754 Times in 556 Posts
Default


I don't think I like the way it is looking! The grille slots maybe too tall and Kenworth Truck like? Looks a little vacant or naked?


Even one doesn't help even once extended to across all slots like stock.


Three is what came on my 58 donor Willys. Obviously the top bar sits a bit higher than this.


Five is what the 52 grille that makes up part of the panels had. Maybe too busy?


Maybe I should be different and do four which none of the models had? It is Lisa's favorite and don't mind it myself. All bars would be made to cover all the grille slots and the spacing would end up slightly wider once the top is in its correct position. Thoughts?

Or I am now thinking of cutting up the grille and reducing the height of the slots back to stock height and adding the 50mm-2" instead below the slots so it matches the distance between the slots and the top of the grille!
__________________
Cheers, Marcus.

My web site:
http://willyshotrod.com Over 5'000 Club
  #1596  
Old 05-04-2020
jjgc's Avatar
jjgc  jjgc is offline
Established Member
 
Join Date: Jan 2012
Location: bundoora vic
Posts: 200
What Jeep do I drive?: None
Likes: 294
Liked 11 Times in 11 Posts
Default

The one with 3 is my choice
__________________
Jeep WK2 My12 Laredo diesel Mineral Grey. Jayco sterling 21 65 3
Likes: (1)
Post New Thread  Reply


Posting Rules
You may not post new threads
You may not post replies
You may not post attachments
You may not edit your posts

BB code is On
Smilies are On
[IMG] code is On
HTML code is On


All times are GMT +10. The time now is 07:36 AM.


Advertisements


AJOR does not vouch for or warrant the accuracy, completeness or usefulness of any message, and are not responsible for the contents of any message. The messages express the views of the author of the message, not necessarily the views of AJOR or any entity associated with AJOR, nor should any advice be substituted as technical advice replacing that of a mechanic. You agree, through your use of this service, that you will not use AJOR to post any material which is knowingly false and/or defamatory, inaccurate, abusive, vulgar, hateful, harassing, obscene, profane, sexually oriented, threatening, invasive of a person's privacy, religious, political or otherwise violative of any law. You agree not to post any copyrighted material unless the copyright is owned by you or by AJOR. The owner, administrators and moderators of AJOR reserve the right to delete any message or members for any or no reason whatsoever. You remain solely responsible for the content of your messages, and you agree to indemnify and hold harmless AJOR, the administrators, moderators, and their agents with respect to any claim based upon transmission of your message(s). The use of profile signatures to intentionally mislead or misdirect any member on this forum is not acceptable and may result in your account being suspended. Any trip that is organised through the AJOR forum is participated at your own risk. If you or your vehicle is damaged it is your responsibility, not that of the person that posted the thread, message or topic initiating the trip, nor the organisers of AJOR or moderators of any specific forum. This forum and associated website is the property of AJOR. No user data is harvested and no information supplied in your registration will be sold for profit.


Powered by vBulletin® Version 3.8.7
Copyright ©2000 - 2024, vBulletin Solutions, Inc.

AJOR © 2002 - 2024 AUSJEEPOFFROAD.COM. All corporate trademarked names and logos are property of their respective owners. Ausjeepoffroad is in no way associated with DaimlerChrysler Corporation or Fiat Jeep.
www.ausjeep.com www.ausjeep.com.au www.midlifemate.com ausjeepforum.com www.r9kustoms.com
vB Ad Management by =RedTyger=