Willys Truck Ratrod - AUSJEEPOFFROAD.COM Jeep News Australia and New Zealand

Go Back   AUSJEEPOFFROAD.COM Jeep News Australia and New Zealand > JEEP GARAGE > Jeep build up
Register Forums Trading Your Jeep My Garage Mark All Read

Post New Thread  Reply
 
Thread Tools Search this Thread
  #1  
Old 13-11-2017
Gojeep's Avatar
Gojeep  Gojeep is offline
LokRinger
 
Join Date: Jul 2002
Location: Victoria
Posts: 6,869
Likes: 788
Liked 1,754 Times in 556 Posts
Default Willys Truck Ratrod

Taking on a half done project is never fun but got help a mate out so he can get back to driving this beast.


This is a friend of mine, Christos's Ratrod project that he has built from a 1948 Willys Truck cab with a 1950-53 front clip. 2wd with a Holden independent front end. The easy fun part of a 5.5" roof chop has been half done by a panel shop


Very nice blown mouse motor.


Ogre looking like he is trying to get out of jail! Some looking closely will see no radiator and think it does run yet. But it does as the radiator is behind the cab.


Ogre looking like he is trying to get out of jail! Roof has been pancaked 1", 1/2" less than mine but done in a completely different way. Rather than removing the roof skin, it has just been cut above the gutter, a strip cut out, and then put back down. Corners have had relief cuts to bend them in and then rewelded.


Concerns me that the roof is bowing downwards rather than upwards like the factory so the water spills off to both corners and out the slots that you can see one of. Window flange may no longer be at the same angle all the way along.


None of the pillars have been welded or fully aligned.


The rear wall caves inwards. Should be flush along the edge of the ruler. Just pulling the upper section out to meet the lower won't be enough.


Other side shows how the cut edge was not stretched back out before being tacked. It would have shrunk with the heat of the cutting.


For some strange reason the window was not kept whole and lowered with a step down cutout? Also not cut through the vertical section either.


There is not enough panel under the window flange to remove the 4", so some will have to come out of the back wall as well.


Problem is that the rear wall support could get in the way of the weld line and then access to hammer it out afterwards.


Maybe the panel shop left the word 'not' out in front of what they wrote!


Will weld up the old mirror holes.


Guard will need to be fixed.


The guard flapping around has caused another fatigue crack to occur


Old aerial holes need to be filled.


Centerpiece needs to be aligned and fully welded in.


Big gaps left.


Join does not look sound.


Other side the same.


Only 1/3 of the perimeter weld has been done.

So this is some of what I am starting with and will do my best to makes them right without taking too much time on it.
__________________
Cheers, Marcus.

My web site:
http://willyshotrod.com Over 5'000 Club
Likes: (5)

Last edited by Gojeep; 25-11-2017 at 06:43 PM.
  #2  
Old 13-11-2017
Jimmyb's Avatar
Jimmyb  Jimmyb is offline
Head Honcho
 
Join Date: Jul 2002
Location: Australia
Posts: 12,762
What Jeep do I drive?: XJ
Likes: 1,060
Liked 1,173 Times in 708 Posts
Check out my Ride(s)
Default

Watching all these custom car shows from the USA Marcus, the roof chop fix should take you less than 30 minutes
__________________

www.ausjeepoffroad.com
Likes: (1)
  #3  
Old 13-11-2017
Snort's Avatar
Snort  Snort is offline
Full Flexer
 
Join Date: Apr 2014
Posts: 701
What Jeep do I drive?: JK
Likes: 70
Liked 172 Times in 124 Posts
Default

It's a "ratrod", if it drives its finished.......
Likes: (2)
  #4  
Old 13-11-2017
jzp's Avatar
jzp  jzp is offline
Full Flexer
 
Join Date: Aug 2004
Location: In the flame zone
Posts: 522
What Jeep do I drive?: WK2
Likes: 0
Liked 20 Times in 14 Posts
Default

How the yanks get away with that stuff they do amazes me.

Your friend is in good hands Marcus!
__________________
_______________________________________
JZP
Likes: (1)
  #5  
Old 14-11-2017
Gojeep's Avatar
Gojeep  Gojeep is offline
LokRinger
 
Join Date: Jul 2002
Location: Victoria
Posts: 6,869
Likes: 788
Liked 1,754 Times in 556 Posts
Default

Got a start on it the last 3 afternoons and trying to tick some things of the list.


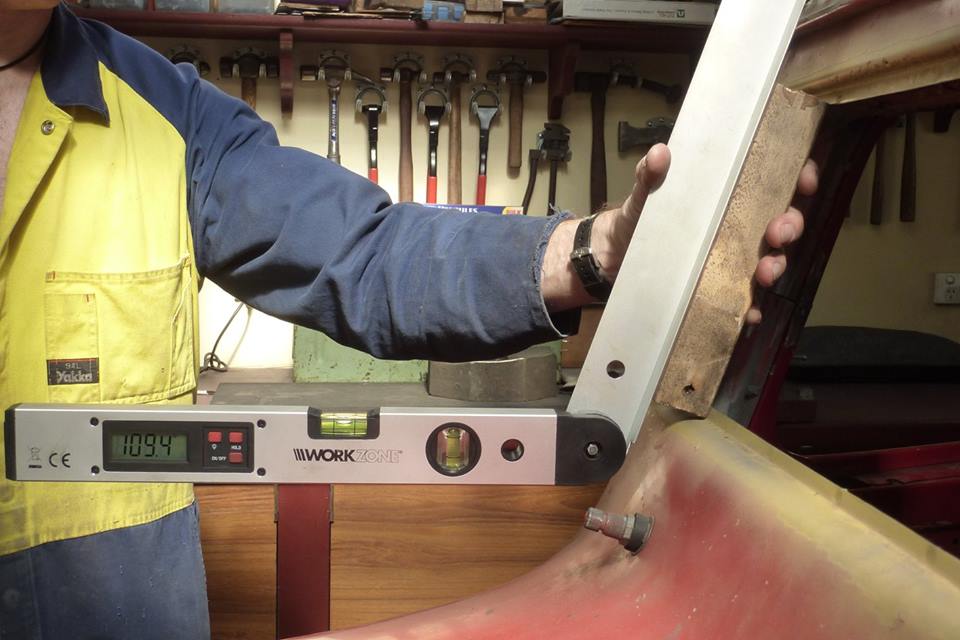
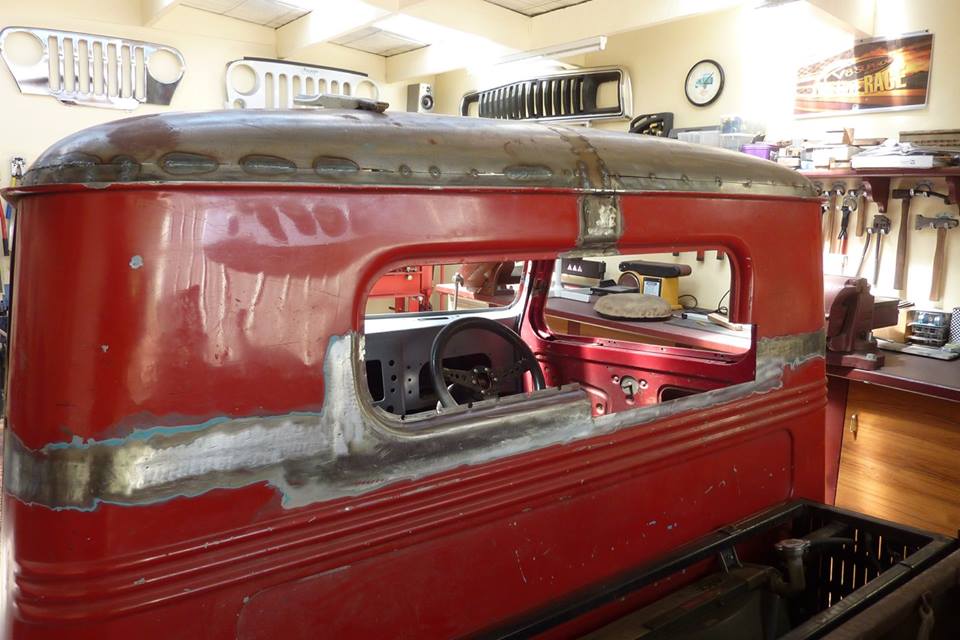
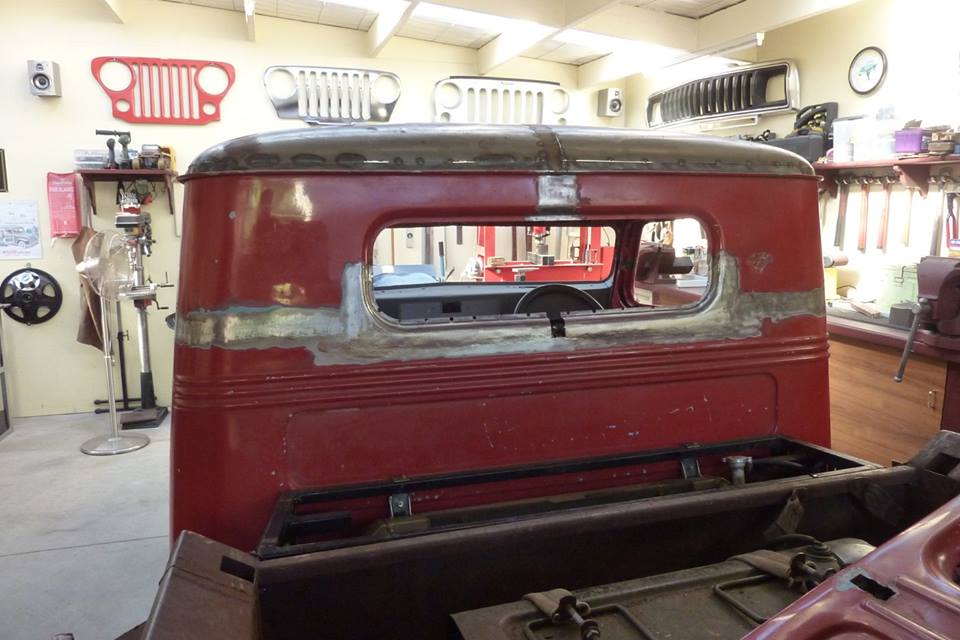
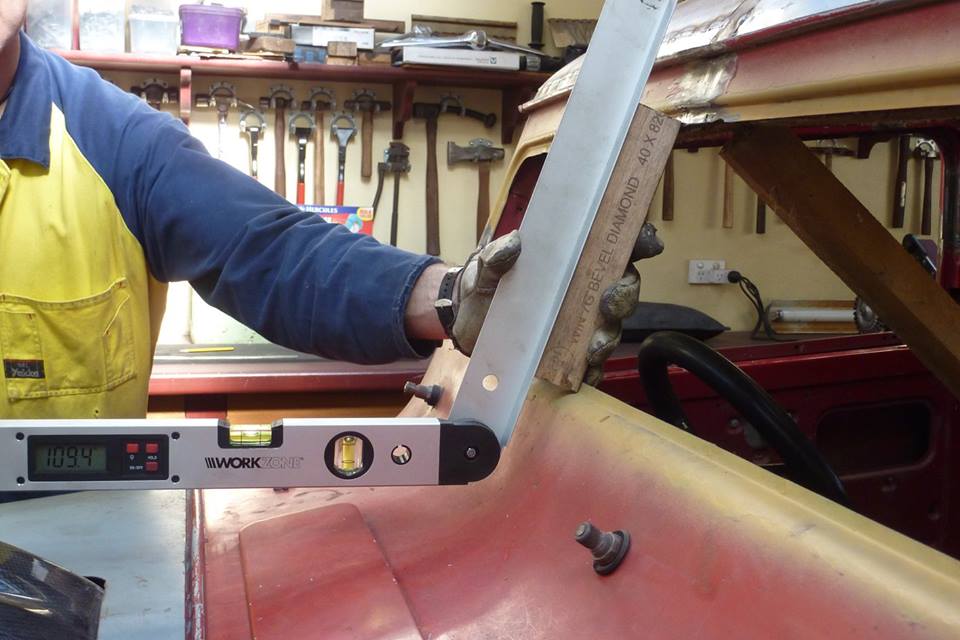
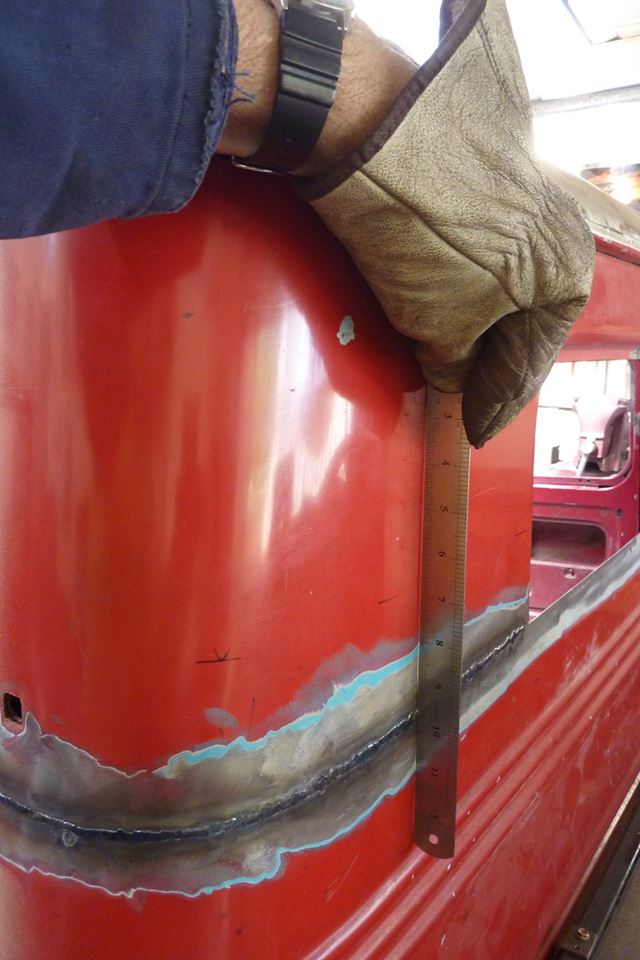
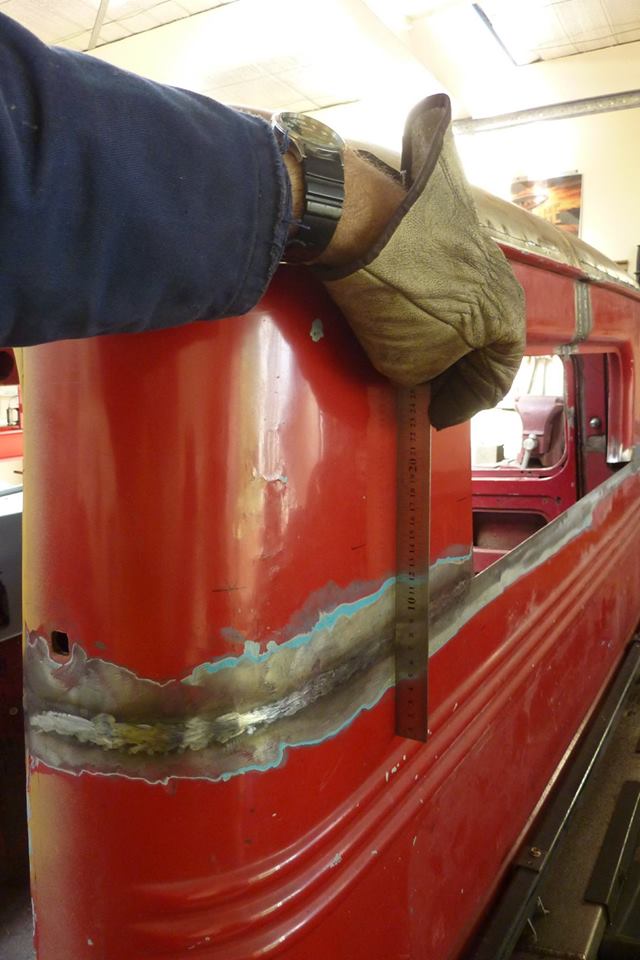
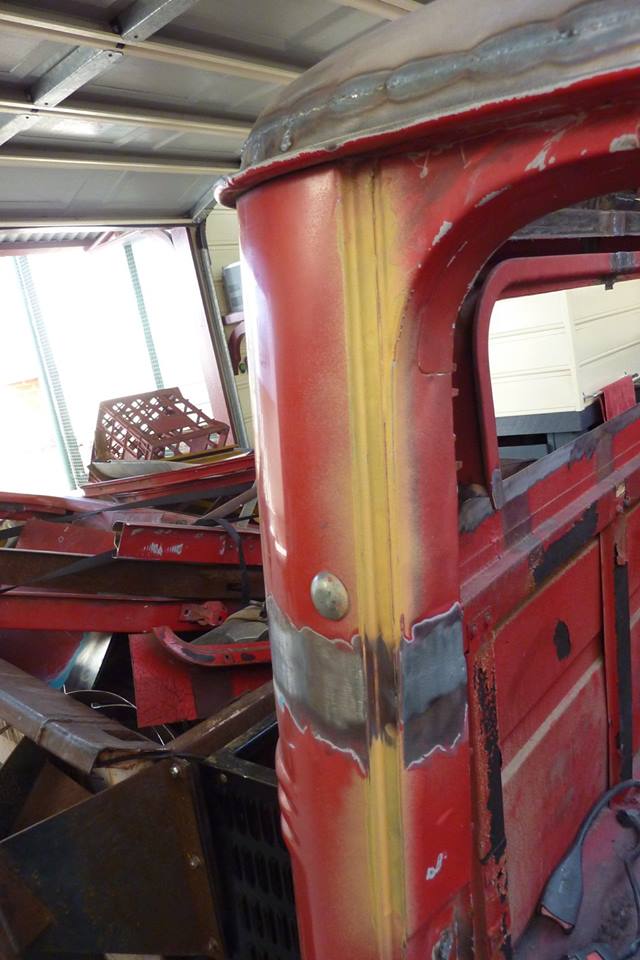
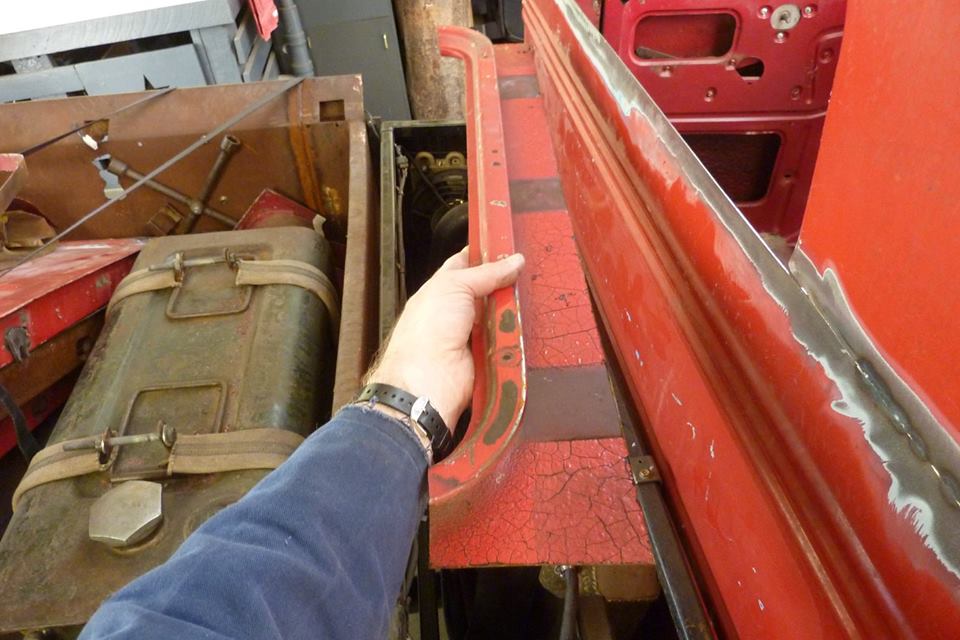
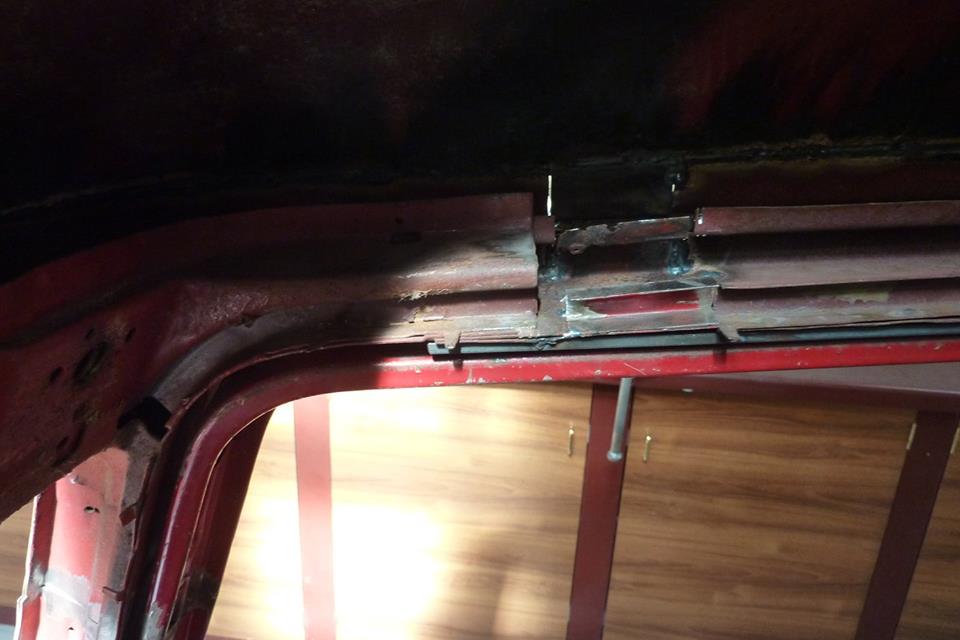
After levelling the cab left to right, I checked the angle of the window opening. Reads 109.4*


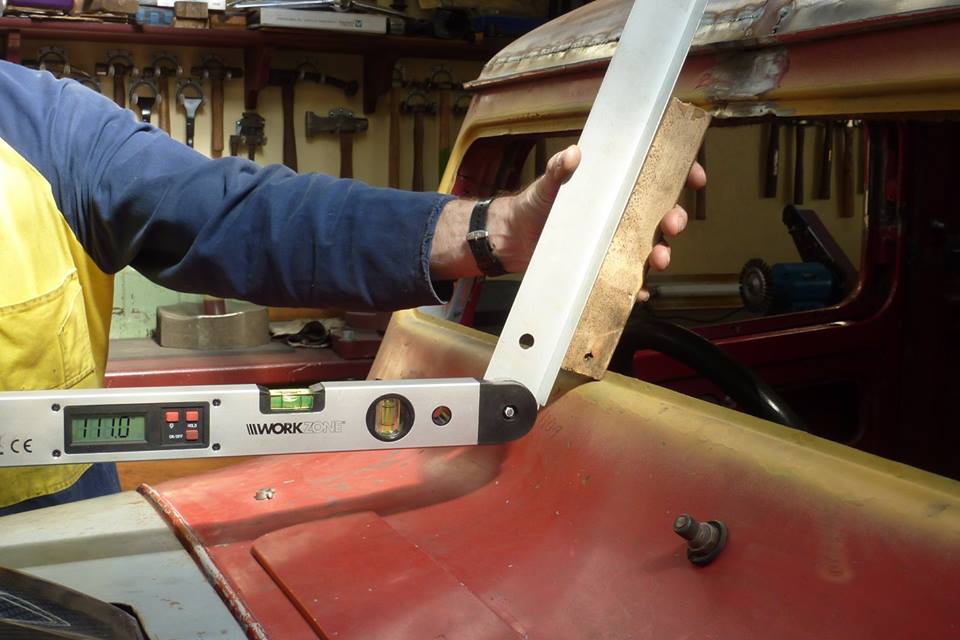
The middle is 111.0* so it is out just over 1.5*.


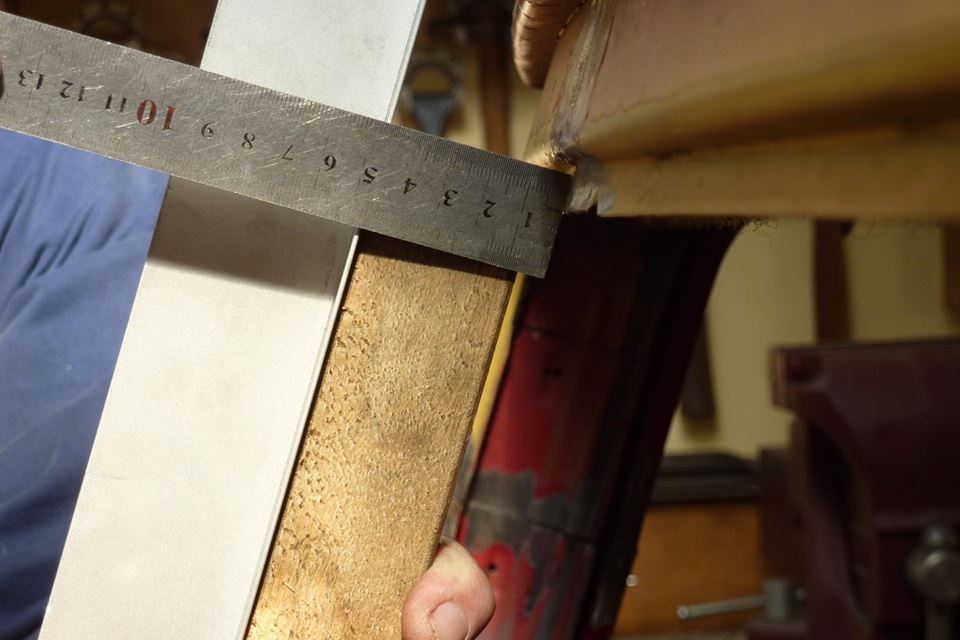
Now 1.5* does not sound like much but this shows it translates into 7mm, or just over 1/4". Now flat glass will not like bending at all, let alone that much! If the gasket tries to take it up, it will cause leaks.


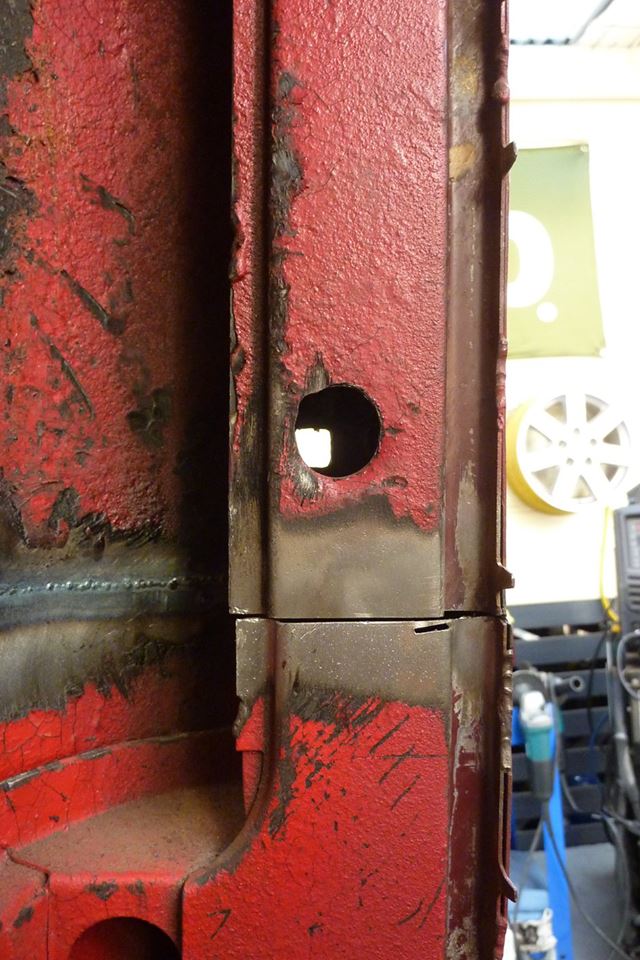
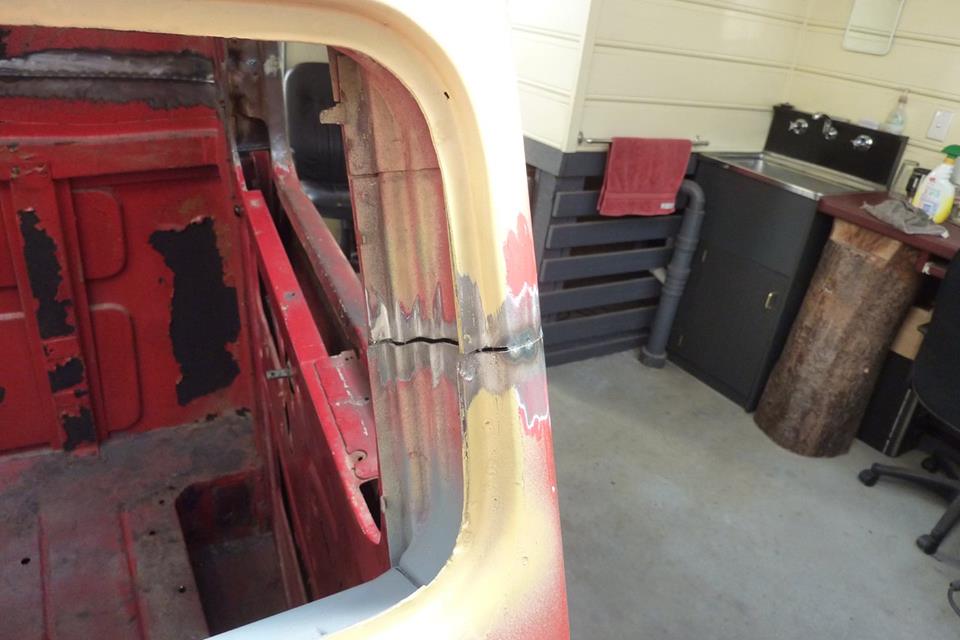
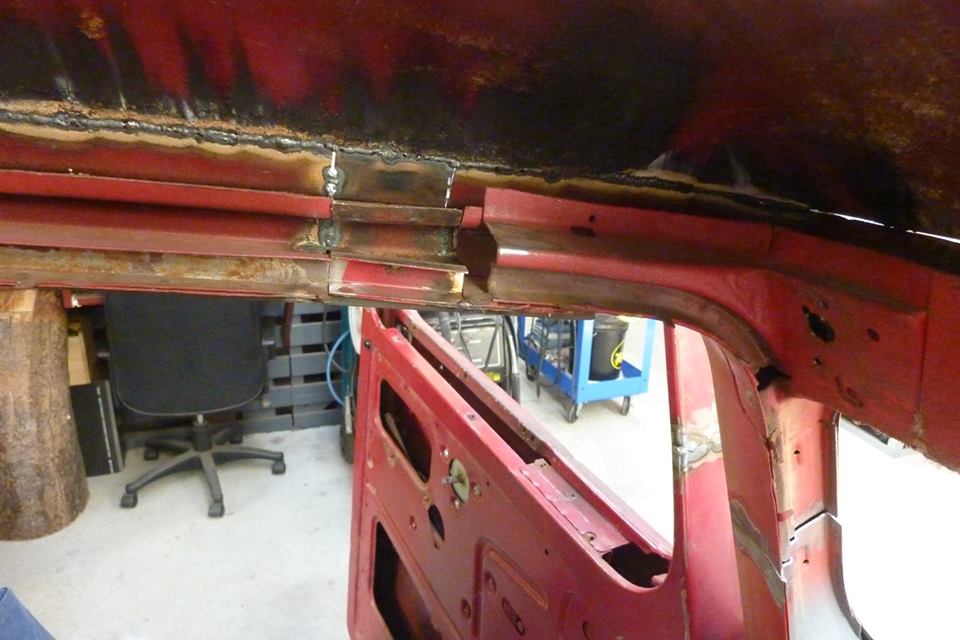
So thought i would start fixing this chop there. I cut through one of the centre welds just leaving the front intact. Jacked it forward and up which closed the cut back up again.


Checked the degrees and have it perfectly spot on! I left the pressure of the jack on there while I fully welded the cut back up. Normally you might push a little further so it is still right when you take the pressure off, but I didn't in this case. Reason why is that the weld shrinkage would cause it to move forward and hoped it would balance it out. Glad to say it was still spot on after welding and the jack removed.


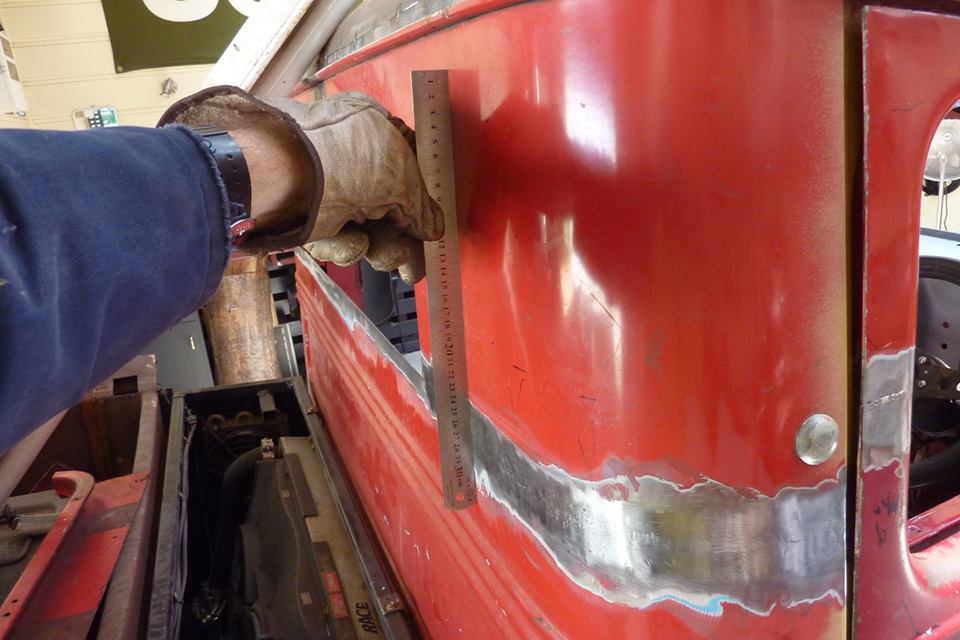
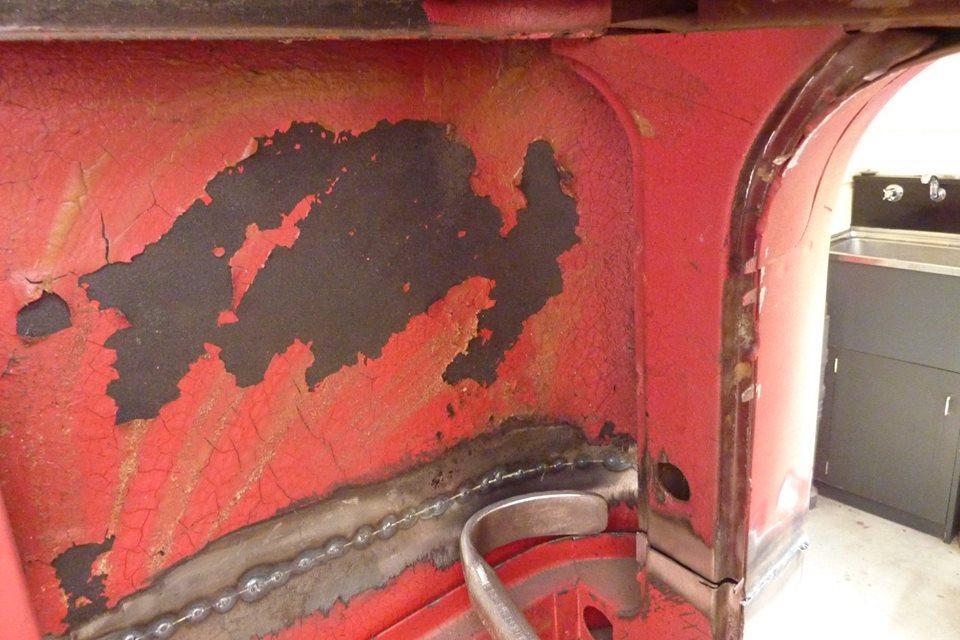
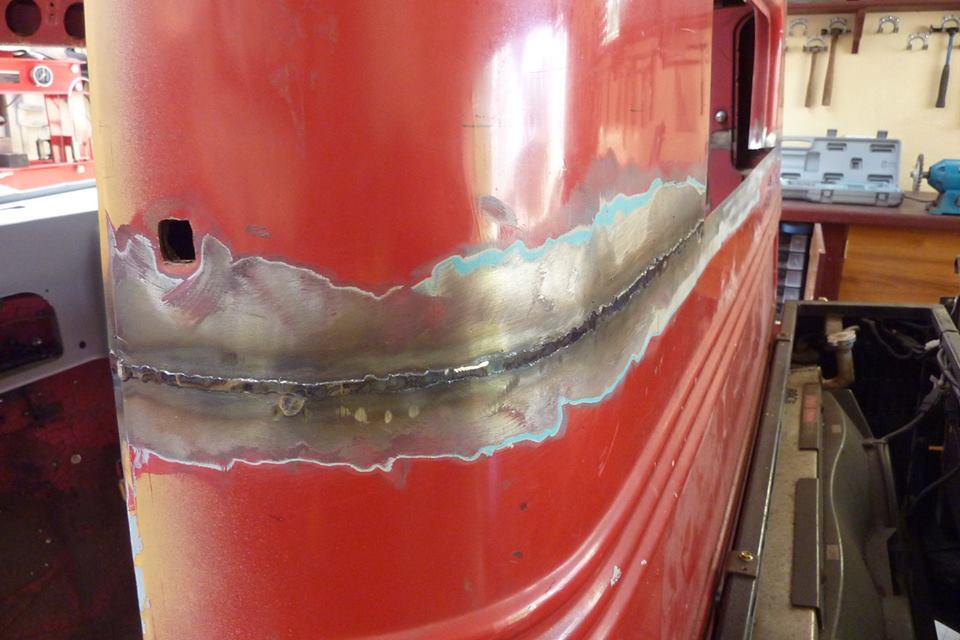
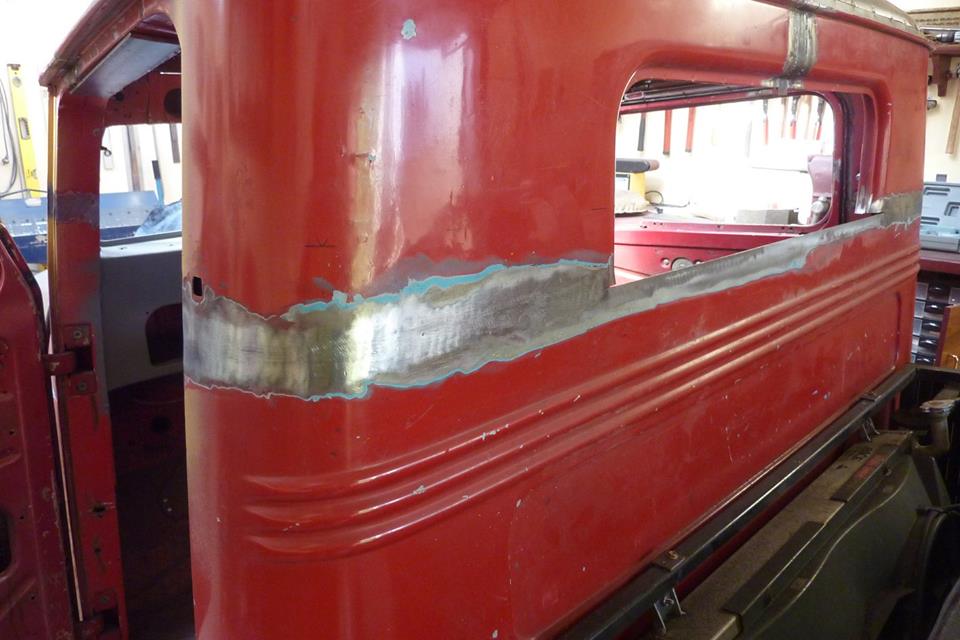
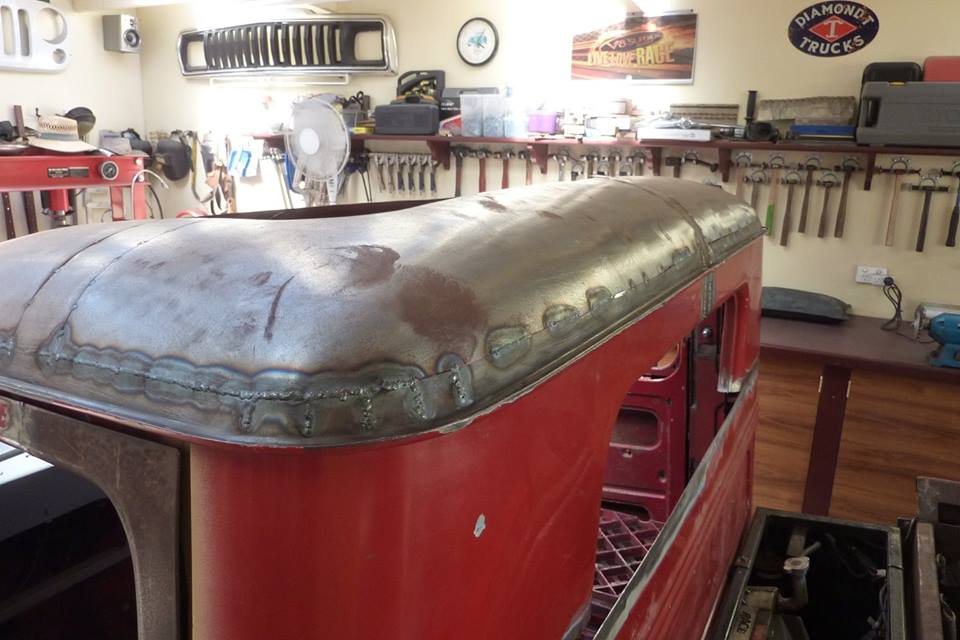
Finished fully welding in the right corner on the back wall. Got it all nice and flat.


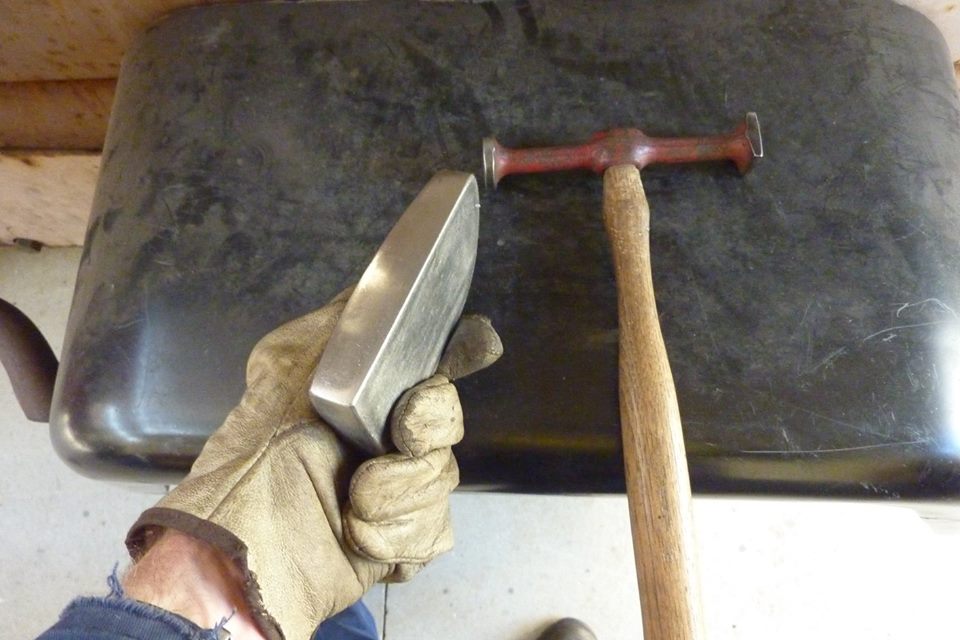
Will show how I went about it on this side. Sitting inside, I hammered onto this flat dolly face to stretch the edge outwards.


Also had to bend the wall from lower down. I had the dolly on edge, and on the inside again, hammered off dolly near the top to get it to bend outwards.


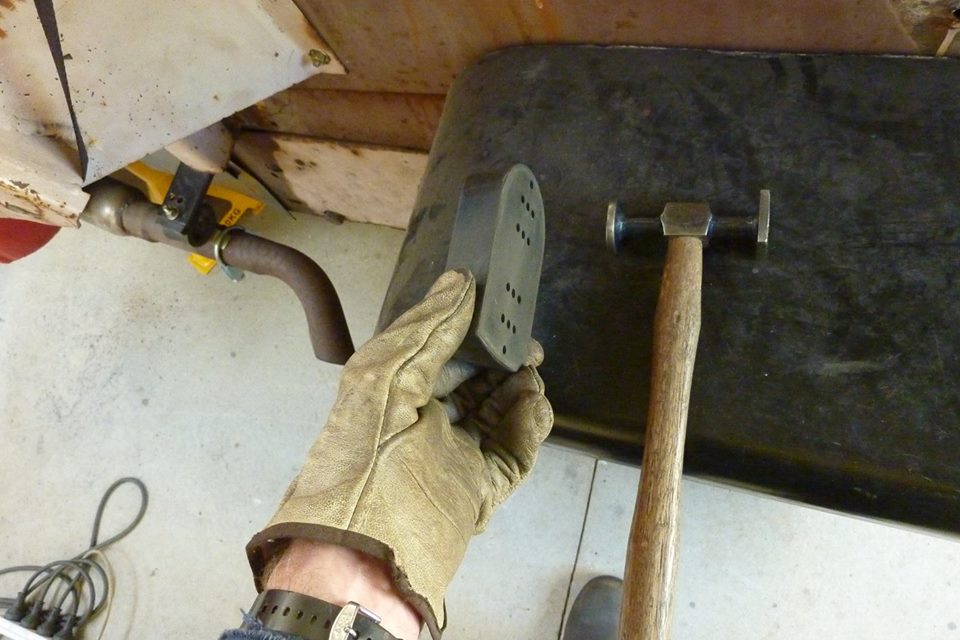
The corners behind the pillars are tricky and used this spoon to lever on pushing outwards while hammering on the outside on it.


This is that single curved hammer face I made years ago. Using it in the corners to hammer outwards onto a flat faced dolly to stretch it outwards.


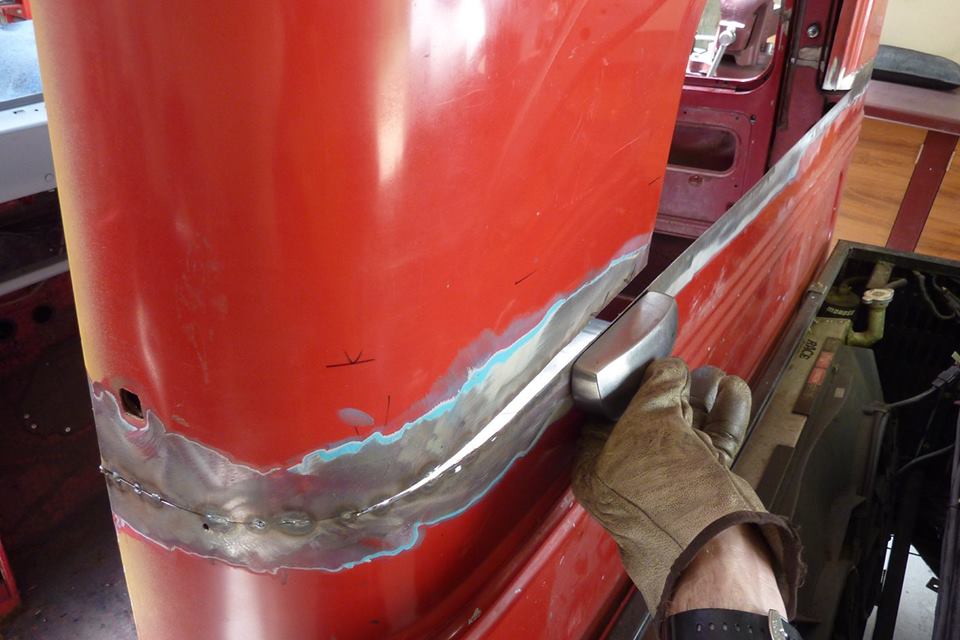
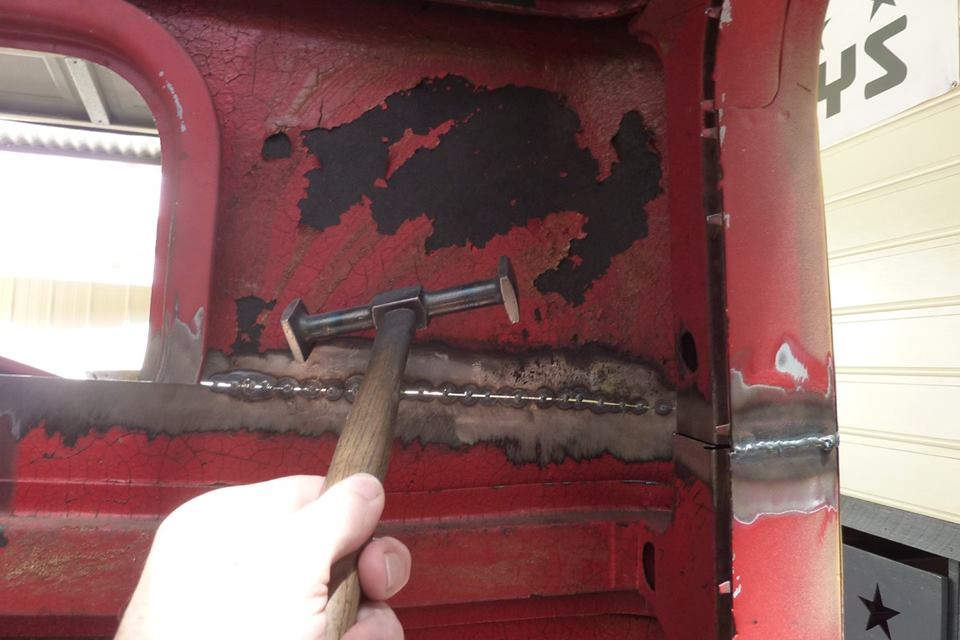
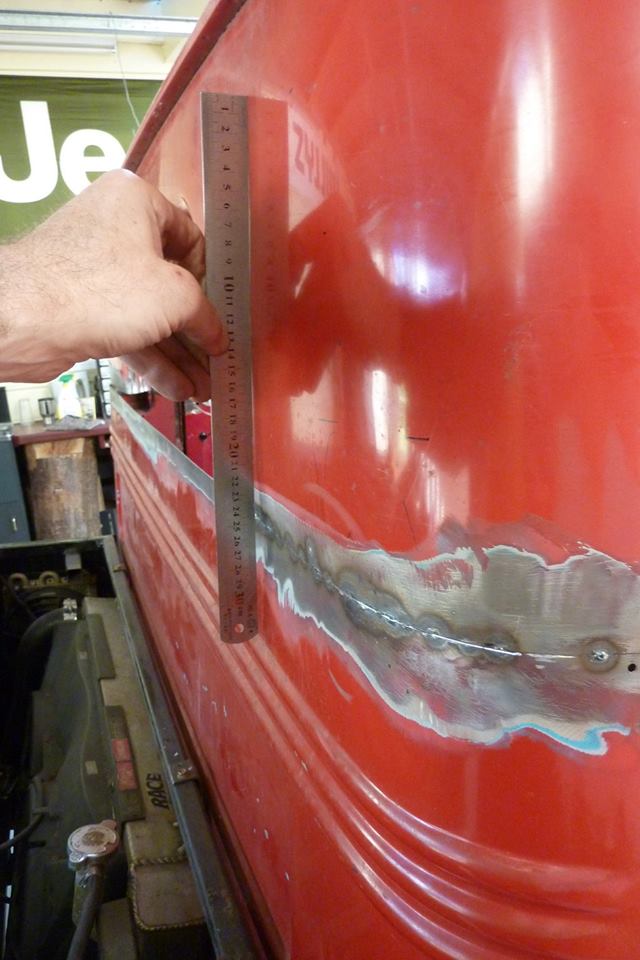
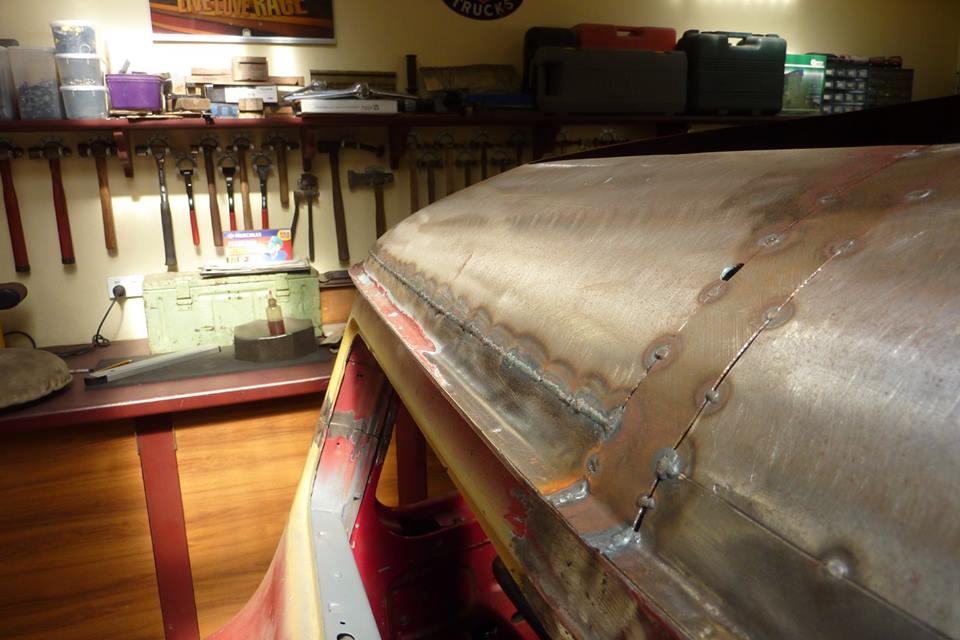
Due to the gap I was left with, the quickest way to weld this up was using the mig with 0.6mm-0.23" wire. This was welded non stop from one end to the other putting one tack on the next while it was still red.


Hasn't pulled in much at all. This straight after welding and no hammering.


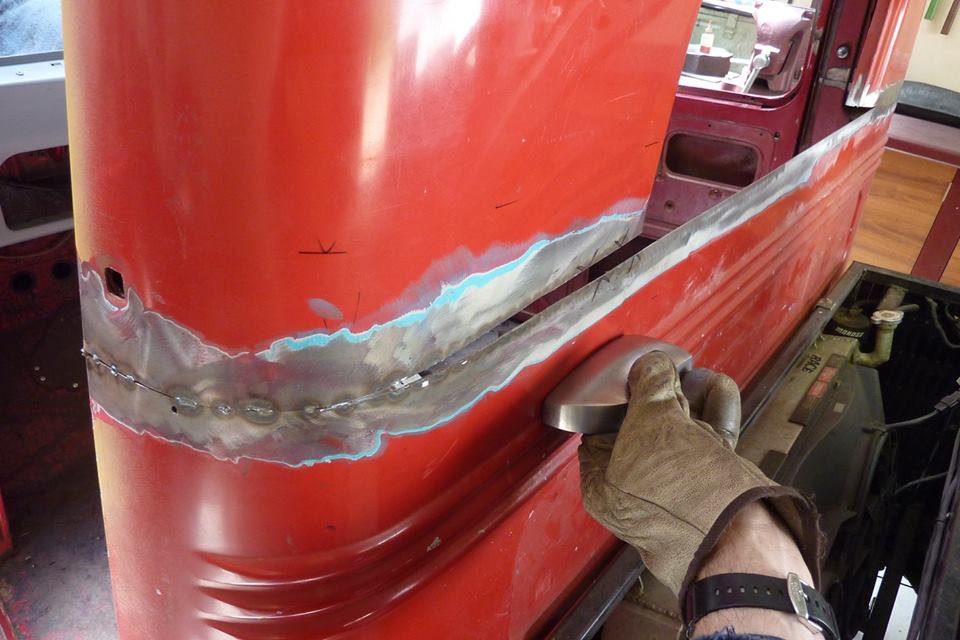
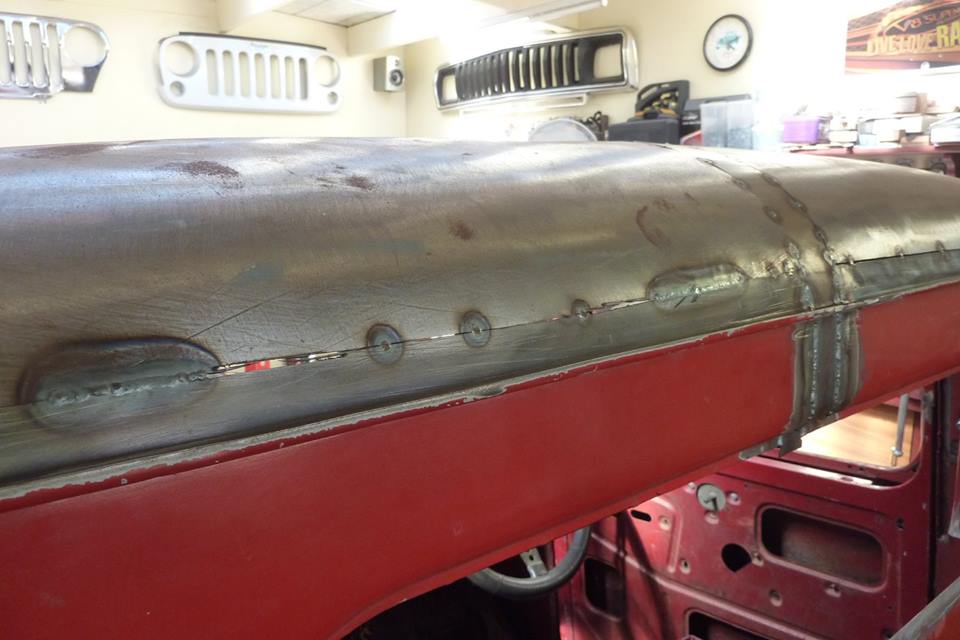
Just took the top off the weld but leaving about a razor blade thickness left. You want some extra thickness to stretch the weld area back out. If you go flush this early you end up with thinner metal all the way along the weld seam which could lead to cracking. I really get into it with the grinder heating it up until blue. I find this softens the weld ready for planishing. Do the same on the inside if you need to.


Hammering from the inside out with my arm through the window holding the flat face of the dolly against the weld and heat affected area. Doesn't need much if you have kept your weld size down with the thinner mig wire. Don't use flux core!


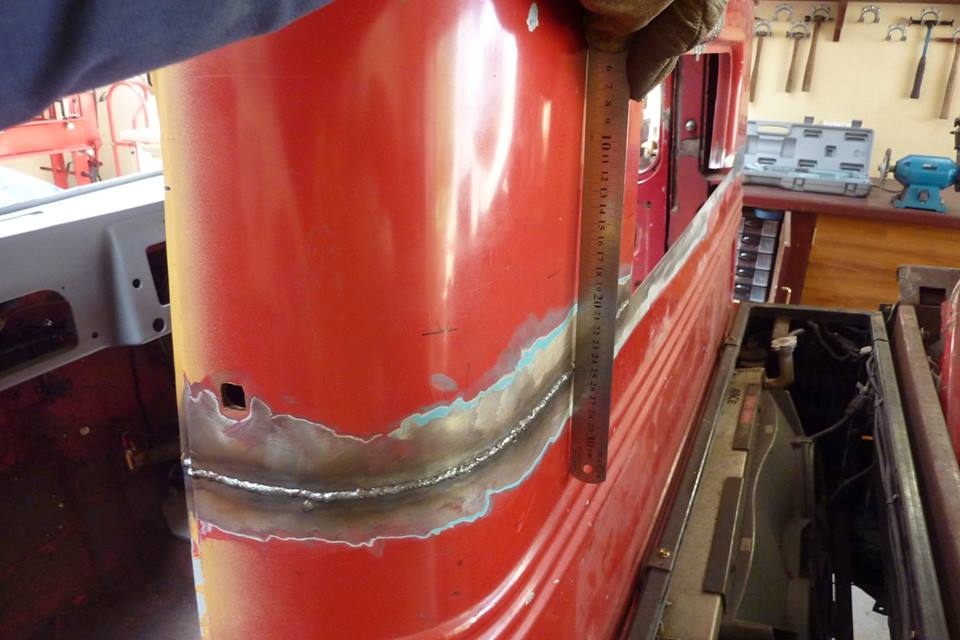
Can see the weld is at the right height but a little dip above it. That was there before welding too so will hammer out that area


I check the tightness of the panel as I go along and as soon as I can feel some movement in it, I switch to hammering against this lead filled rubber dolly. What this allows is still moving the panel but without stretching it. If you keep hammering on a steel dolly you will end up with an oil can or loose panel. Working off dolly I also do at this stage with a steel one. Just depends on how much and where it needs to move. If I see a high spot near by, I will press the steel dolly with a slight dome shape to it, against that high spot while hammering the low spot on the opposite side.


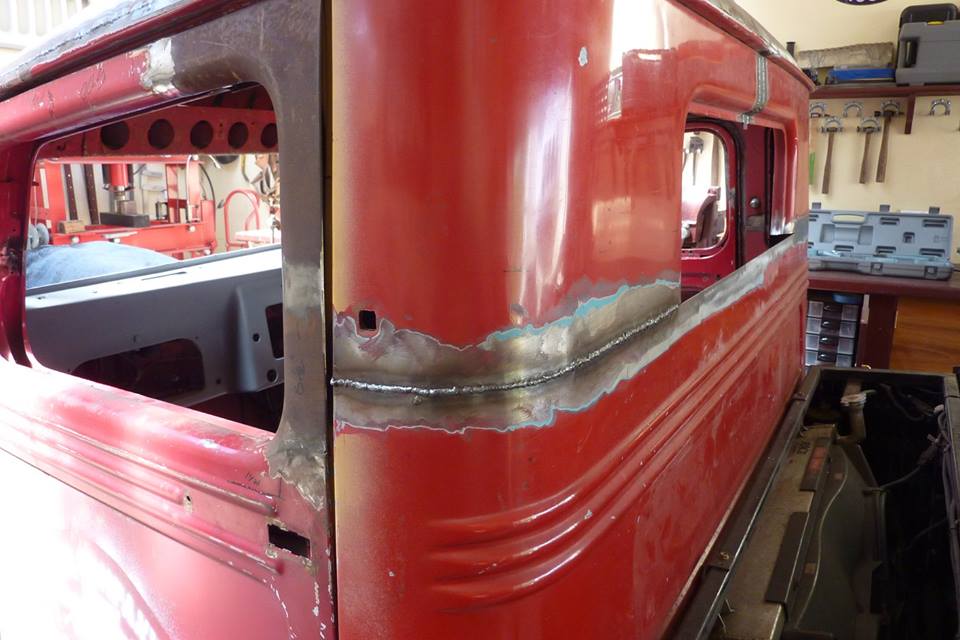
The joint has now been taken down to flush with a flap disc once the panel was very close to flat. Just remember if may move with the sanding a little. Can be could to tighten a slightly loose panel without using a shrinking disc. Will use one at this stage if needed.


Now done with a strip disc and checked again to make sure it is still all flat.


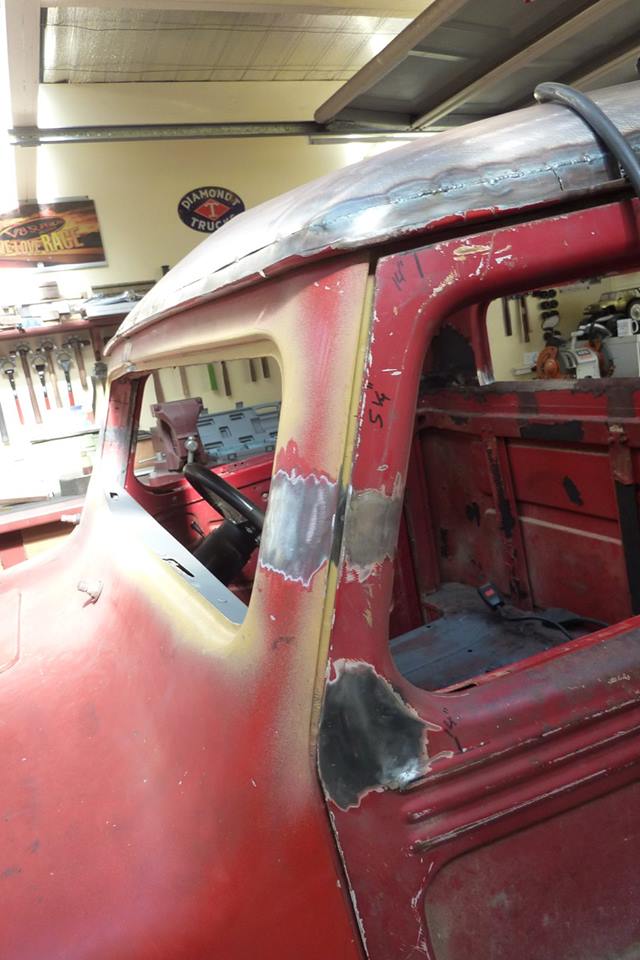
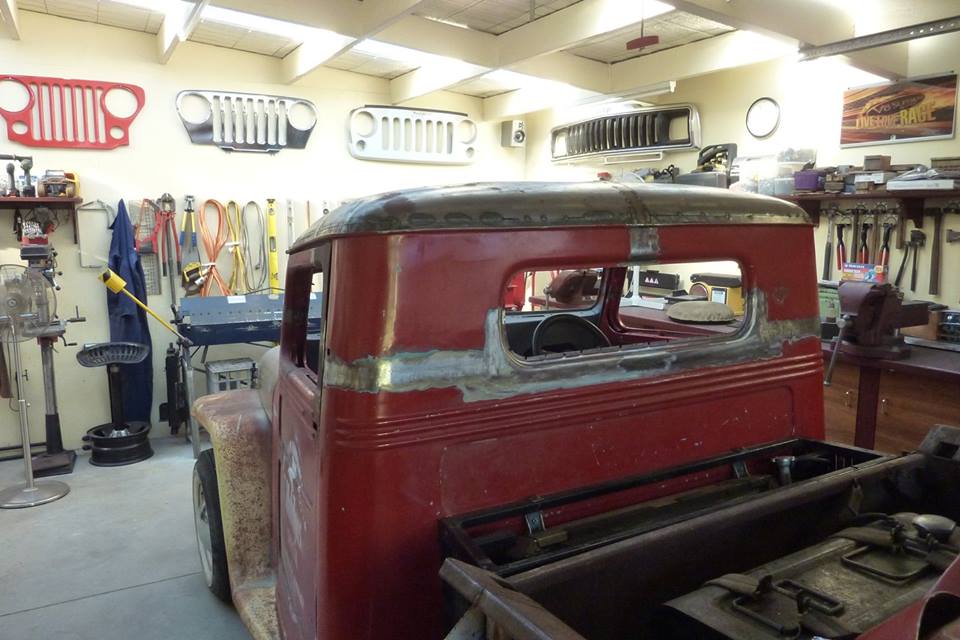
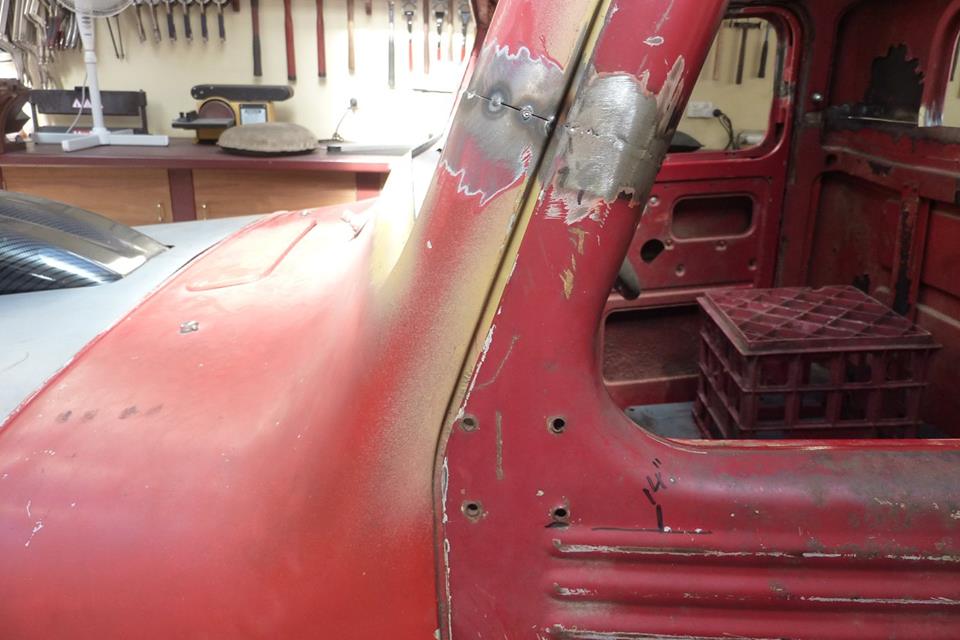
Have finished welding the A pillar and mirror screw holes.


Right side done as well and also did the window frame on both sides as the near by joint. Old aerial hole a patch cut for and welded up.


B pillar half done on both sides.


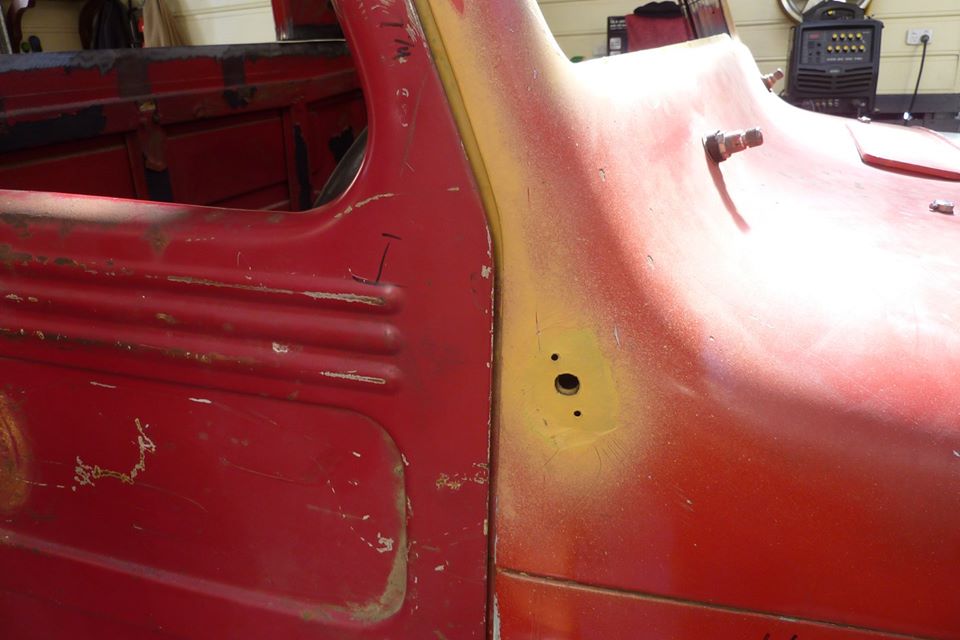
I will put in a plate with a welded nut behind it for the upper seat belt bolt. Saves the bolt crushing the B pillar and the outside panel like it has. Really need to open this up anyway as otherwise you cannot get to weld the other side of the B pillar which is covered by the outside panel.


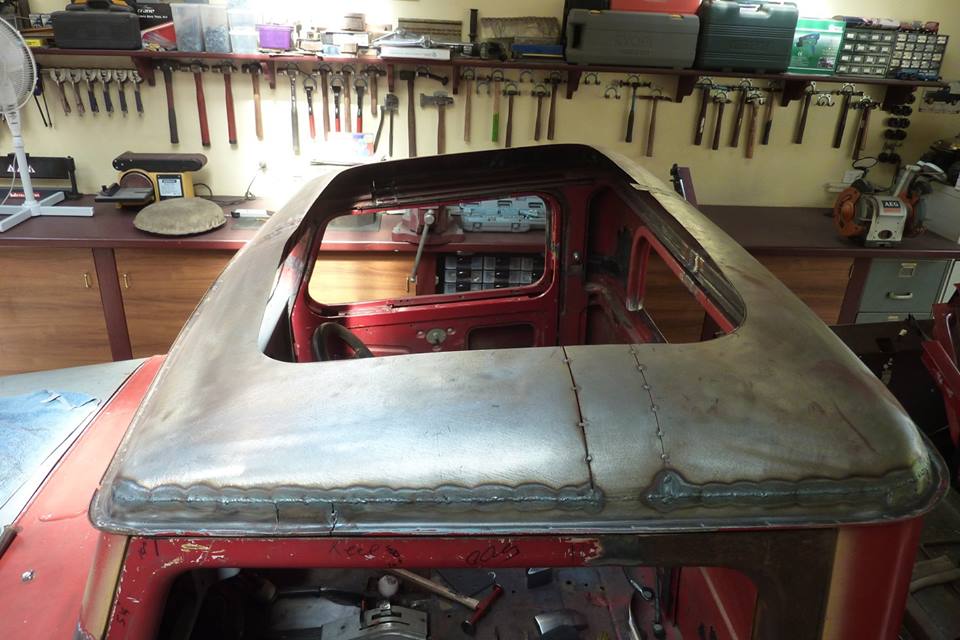
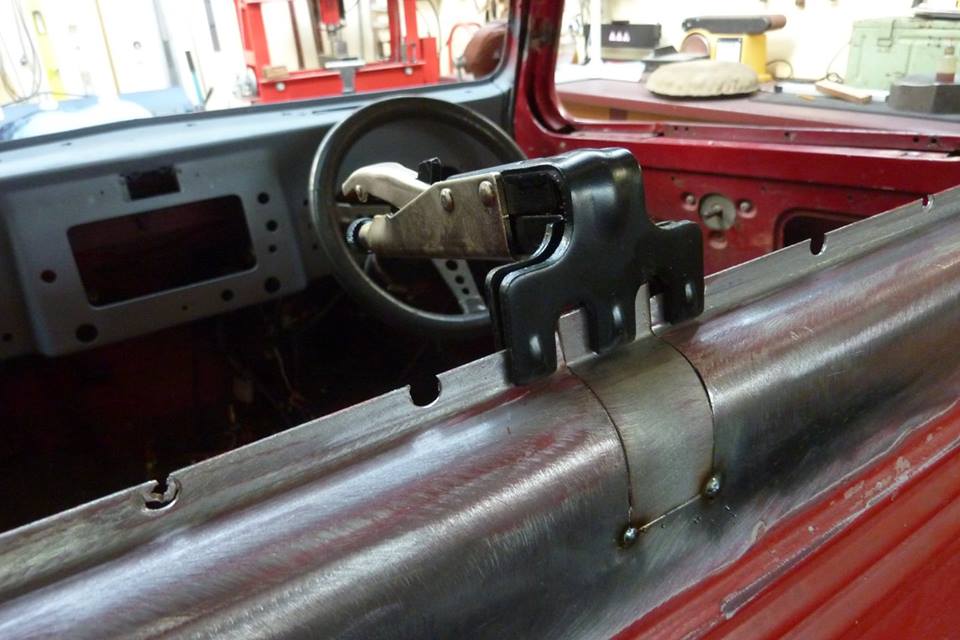
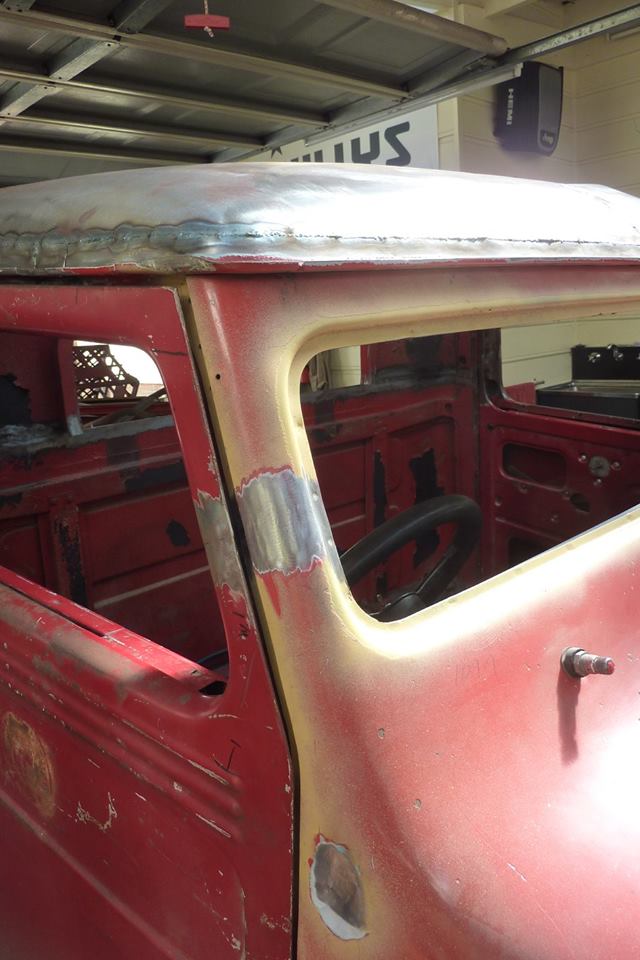
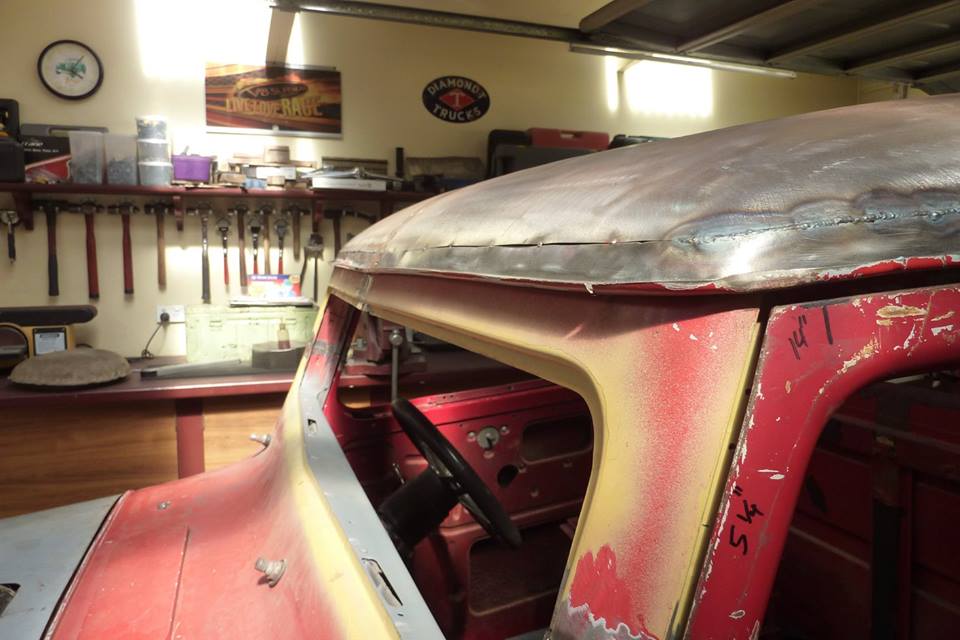
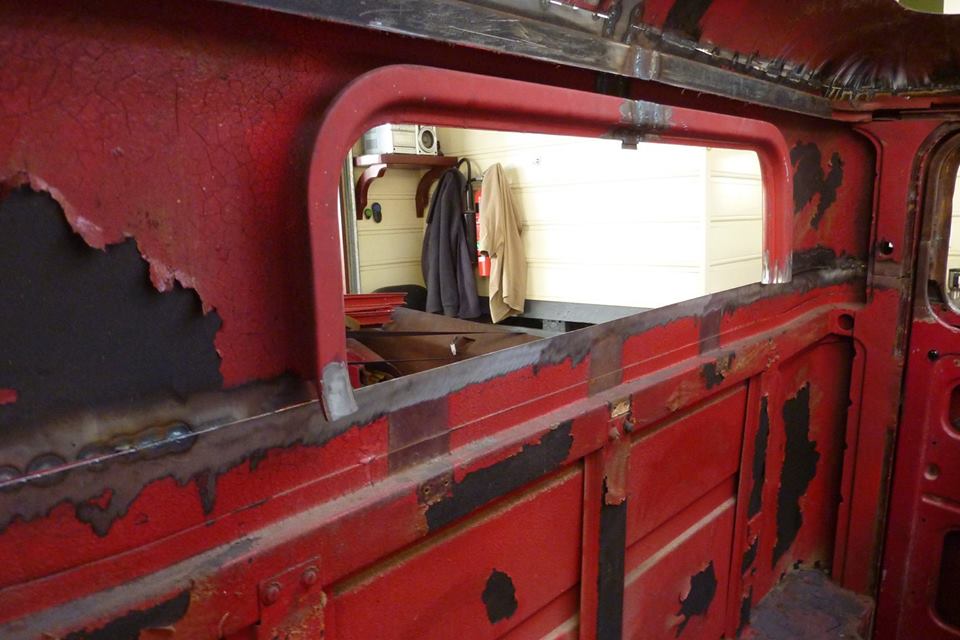
Still thinking of the best way to prepare this roof for the roof insert that the owner wants to rivet in place later on. If I had this project from the start I would have run the roof panel while it was off through the bead roller putting a step or joggle all the way around the opening. This would give the panel insert something to sit in later on and a seal underneath too. Then tipped down a small edge as well to give some stiffness.
Option 1.
The fastest way now would be to just run around with my joggle pliers and put a step in. It only puts one in though 1.2mm down and 13mm-1/2" wide. Not enough width to tip an edge. Could get the stiffness by making a frame for the insert that will then support the opening once in place.
Option 2.
Tip a 1/2" edge by hand all the way around to give the required stiffness and have the insert sit on top of the roof panel.
Option 3.
I make a piece from scratch with the joggle and tipped edge and fully weld it in all the way around the roof opening. Best end result but a lot of hammer correction later which might take more time than he wants.

Any other ideas?
__________________
Cheers, Marcus.

My web site:
http://willyshotrod.com Over 5'000 Club
Likes: (3)

Last edited by Gojeep; 14-11-2017 at 12:29 PM.
  #6  
Old 14-11-2017
Tyvokka's Avatar
Tyvokka  Tyvokka is offline
Jedi Master
 
Join Date: Jan 2011
Location: WJ JK Jeep Trailer Jeep R/C Sydney
Age: 79
Posts: 2,550
What Jeep do I drive?: WJ
Likes: 1,088
Liked 919 Times in 625 Posts
Check out my Ride(s)
Default

Crazy skills, Marcus. Welldone!
__________________
Grand Wookie Jedi
Rrrrrrrr-aghhhh!
http://youtu.be/e8aEDaeBMyI
  #7  
Old 15-11-2017
Gojeep's Avatar
Gojeep  Gojeep is offline
LokRinger
 
Join Date: Jul 2002
Location: Victoria
Posts: 6,869
Likes: 788
Liked 1,754 Times in 556 Posts
Default

Many thanks guys. Certainly testing my skill set dealing with it so good for learning still.

Not as much to show today but took more time than needed as the window had been cut through the radius rather than the vertical section of the window.


I thought the rear window would be out of proportion if left stock height seeing it would be taller than the front windscreen. After chatting with Christos about it, he came up with a suggestion of chopping it 40mm-1.5".


So after cutting out the rest of the window curve left in the upper section and adding it to the lower piece, I chopped the 1.5" out. Think it looks spot on now with the other side now done too.


Looks like the filler piece I just made suits this welding clamp perfectly! Allows you to tack the join inside the clamp while holding everything straight.


Rear wall on the outside now all finished! Have to build the inside window flange next.
__________________
Cheers, Marcus.

My web site:
http://willyshotrod.com Over 5'000 Club
Likes: (4)
Post New Thread  Reply


Thread Tools Search this Thread
Search this Thread:

Advanced Search

Posting Rules
You may not post new threads
You may not post replies
You may not post attachments
You may not edit your posts

BB code is On
Smilies are On
[IMG] code is On
HTML code is On


All times are GMT +10. The time now is 06:24 AM.


Advertisements


AJOR does not vouch for or warrant the accuracy, completeness or usefulness of any message, and are not responsible for the contents of any message. The messages express the views of the author of the message, not necessarily the views of AJOR or any entity associated with AJOR, nor should any advice be substituted as technical advice replacing that of a mechanic. You agree, through your use of this service, that you will not use AJOR to post any material which is knowingly false and/or defamatory, inaccurate, abusive, vulgar, hateful, harassing, obscene, profane, sexually oriented, threatening, invasive of a person's privacy, religious, political or otherwise violative of any law. You agree not to post any copyrighted material unless the copyright is owned by you or by AJOR. The owner, administrators and moderators of AJOR reserve the right to delete any message or members for any or no reason whatsoever. You remain solely responsible for the content of your messages, and you agree to indemnify and hold harmless AJOR, the administrators, moderators, and their agents with respect to any claim based upon transmission of your message(s). The use of profile signatures to intentionally mislead or misdirect any member on this forum is not acceptable and may result in your account being suspended. Any trip that is organised through the AJOR forum is participated at your own risk. If you or your vehicle is damaged it is your responsibility, not that of the person that posted the thread, message or topic initiating the trip, nor the organisers of AJOR or moderators of any specific forum. This forum and associated website is the property of AJOR. No user data is harvested and no information supplied in your registration will be sold for profit.


Powered by vBulletin® Version 3.8.7
Copyright ©2000 - 2024, vBulletin Solutions, Inc.

AJOR © 2002 - 2024 AUSJEEPOFFROAD.COM. All corporate trademarked names and logos are property of their respective owners. Ausjeepoffroad is in no way associated with DaimlerChrysler Corporation or Fiat Jeep.
www.ausjeep.com www.ausjeep.com.au www.midlifemate.com ausjeepforum.com www.r9kustoms.com
vB Ad Management by =RedTyger=