WH: Grand Hemi build - Page 6 - AUSJEEPOFFROAD.COM Jeep News Australia and New Zealand

Go Back   AUSJEEPOFFROAD.COM Jeep News Australia and New Zealand > JEEP GARAGE > Jeep build up
Register Forums Trading Your Jeep My Garage Mark All Read

Post New Thread  Reply
 
Thread Tools Search this Thread
  #36  
Old 03-11-2019
Windex's Avatar
Windex  Windex is offline
Full Flexer
 
Join Date: Oct 2008
Location: Gippsland Vic
Posts: 1,110
What Jeep do I drive?: WH
Likes: 11
Liked 98 Times in 67 Posts
Default

Well got cracking on fitting the new stuff, nothing super exciting at the moment but enough to keep me busy!

Replaced a lower ball joint on the drivers side which was very wobbly, boot had failed and then the rest had gone to hell. Removed the spindles on both sides just to give me space to fit up my new struts. Removed a couple of bushes from the diff housing, massive respect to the guys who have done this on car cause damn it took me some time with a punch, chisel and a recipro saw.

Part number for the ball joint MOOG K80629


  #37  
Old 07-11-2019
Windex's Avatar
Windex  Windex is offline
Full Flexer
 
Join Date: Oct 2008
Location: Gippsland Vic
Posts: 1,110
What Jeep do I drive?: WH
Likes: 11
Liked 98 Times in 67 Posts
Default

Started trying to press the new bushes in but having a really hard time getting them to go in straight, the Jeeperf ones have a lip on them that makes getting the press to sit nicely on it quite hard.
  #38  
Old 24-11-2019
Windex's Avatar
Windex  Windex is offline
Full Flexer
 
Join Date: Oct 2008
Location: Gippsland Vic
Posts: 1,110
What Jeep do I drive?: WH
Likes: 11
Liked 98 Times in 67 Posts
Default

Well got it all back together and its on its wheels again!

Replaced the entire strut assembly with a Bilstein setup with softer coils so we'll see how they go as they bed in currently seem to be sitting at the same height as the old CRDSTU setup was. Pressed in one of the Jeeperf diff mounts to replace a shagged one, swapped in a new QD2 solenoid in the diff and replaced all the steering components except the rack.

SPLAT! - This is why I decided to replace these (plus one seemed to be squeaking)


Diff with new bushing pressed in, I managed to press it in without removing the pinion flange thankfully.


The straps and jack were more used as to position it with another strap at the back used as the hoist.
Attached Thumbnails
Click image for larger version

Name:	inner rod.jpg
Views:	0
Size:	76.3 KB
ID:	78643   Click image for larger version

Name:	inner rod 2.jpg
Views:	0
Size:	55.3 KB
ID:	78644   Click image for larger version

Name:	inner rod 3.jpg
Views:	0
Size:	61.9 KB
ID:	78645   Click image for larger version

Name:	new bushes.jpg
Views:	0
Size:	73.6 KB
ID:	78646   Click image for larger version

Name:	splat.jpg
Views:	0
Size:	62.4 KB
ID:	78647  

Click image for larger version

Name:	diff wrangle 1.jpg
Views:	0
Size:	93.0 KB
ID:	78648  
  #39  
Old 30-01-2020
Windex's Avatar
Windex  Windex is offline
Full Flexer
 
Join Date: Oct 2008
Location: Gippsland Vic
Posts: 1,110
What Jeep do I drive?: WH
Likes: 11
Liked 98 Times in 67 Posts
Default

So in line with the driveline updates I've been chasing a rumble so ended up pulling the front shaft down and replacing the CV end as it was pretty tired and the rubber had cracked and was leaking grease everywhere so I got the Hardie Spicer XR8 one and was ready to roll, then as I had it up I dropped the transcase fluid to find... mud


So drained that and ordered some more MobilFluid424 to flush it all out, decided to do the rear diff too and found it wasn't in the greatest shape for only having done 10k kms.


While I had it all apart had a good look at the gears and play in the diff, all seems fine but does seem to have a bit of slop in the spider gears but we'll see how that goes when shes back on the road (got me a spare diff sitting in the shed).

Of course as I had the thing in the air I decided to look at the rear shaft and found that one of the unis was well stuffed, so Jeep in their wisdom decided to make it a non-serviceable part So getting a custom one made up at a driveshaft place just to get a new uni in there, new shaft will use snap rings on its unis so they can be replaced by a monkey like me if need be in the future.
  #40  
Old 11-04-2020
Windex's Avatar
Windex  Windex is offline
Full Flexer
 
Join Date: Oct 2008
Location: Gippsland Vic
Posts: 1,110
What Jeep do I drive?: WH
Likes: 11
Liked 98 Times in 67 Posts
Default

Been quiet for awhile with all the COVID stuff going on but been doing a few little jobs, currently the car is without its rear driveshaft as the shop still has it and hasn't been able to source some parts for it... this has lead to many a long hour on Carsales looking at more Jeeps

Since the car isn't going anywhere I decided to try making myself a new air intake pipe, I'd been wanting to do this for some time as the stock suitcase has a way of always being in the way meaning the start to any activity is to remove it.


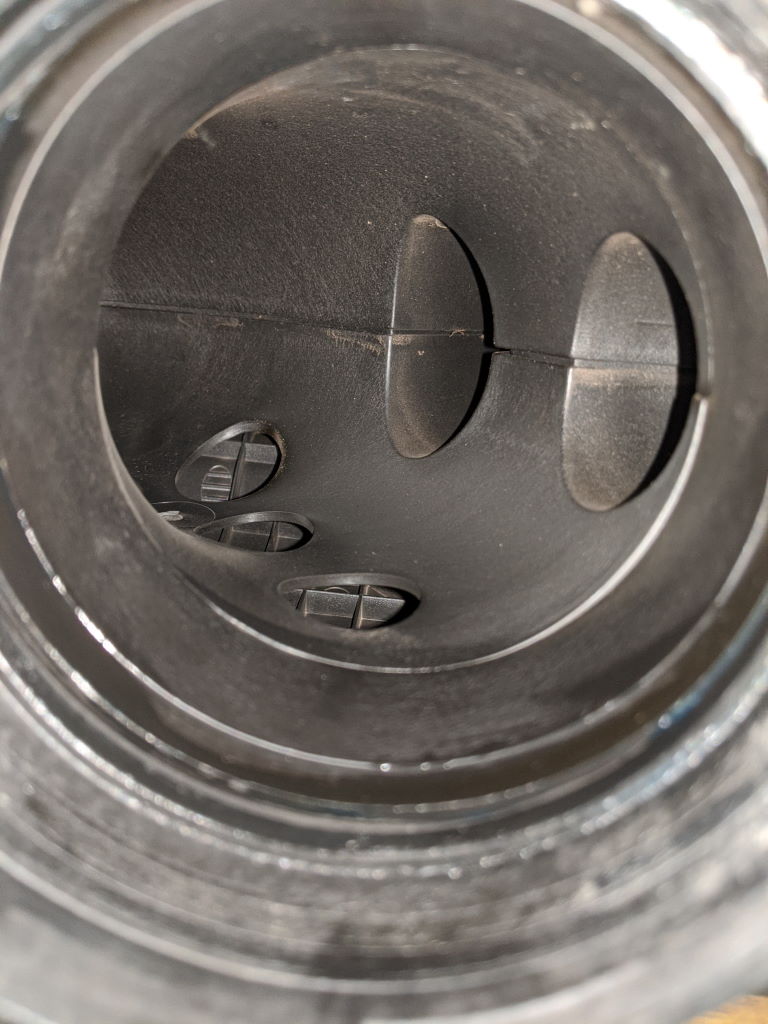
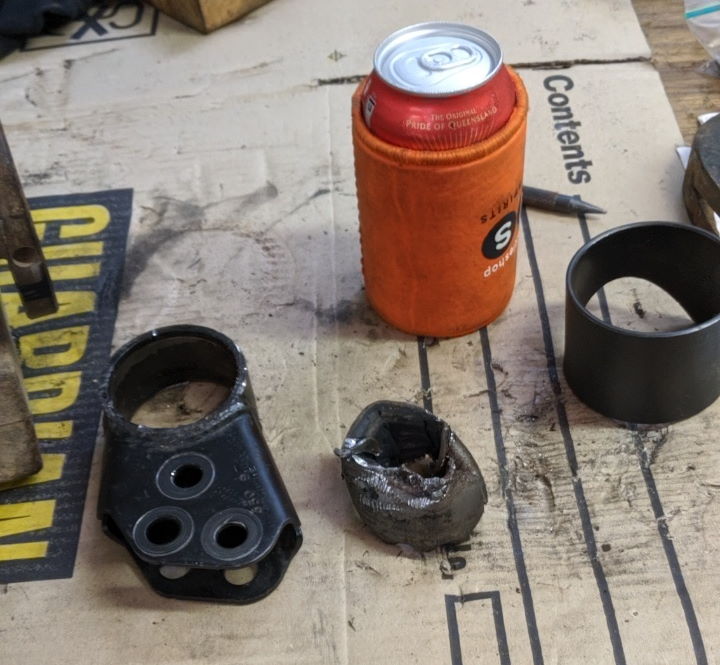
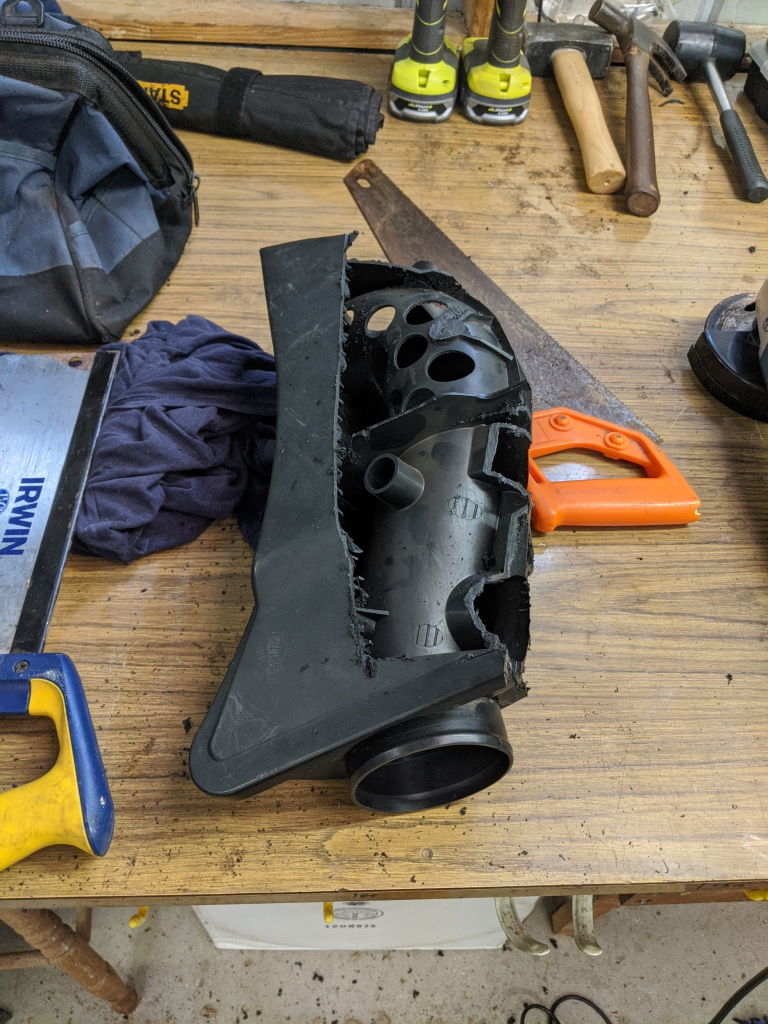
After looking at a few options I took a deep breath and hacked up the stock item, it actually has a pipe that is outlined externally so using a cut off wheel, saws, a dremel and tin snips I removed all the excess.


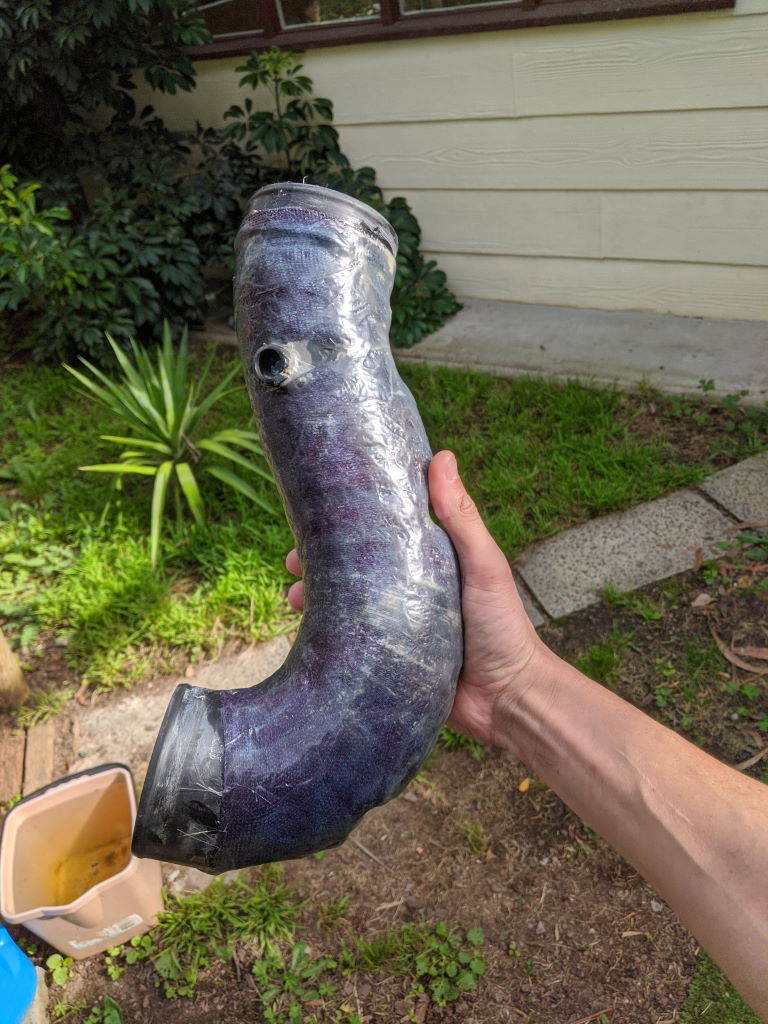
Now that I had it all shaped up I was trying to figure out how to seal it all, or create a copy or if I could just use some silicone race tape to seal it. I ended up finding some good videos of people using fibreglass tape that is used by the medical profession (this was a few months back) to shape it up so I gave that a shot (cost about $10 on Amazon). Despite just looking like cloth tape, this is actually rock hard.


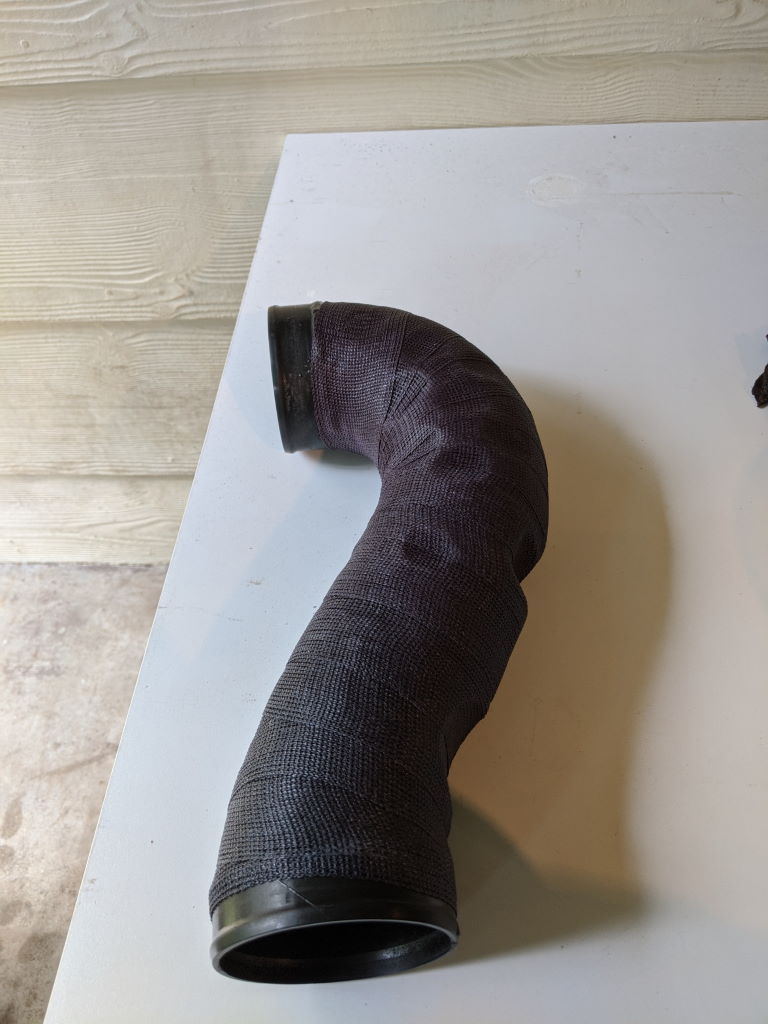
This gave it shape and was actually very strong, what it wasn't was airtight! So now that I had that as a base closing up all the major holes I started fibreglassing it up with both resin and matting for the larger holes and just resin on the areas already sealed. Gave it a sand and a test fit to check it hadn't gone out of shape.


Then applied the final coat of resin to really seal it up, I ended up putting some Sikaflex on the inside of the tube to cover all the joins and holes from the inside which I now thing might have been overkill. Thinking I might give it some paint to finish it off but pretty happy with how it turned out, I'll definitely be keeping an eye on it but reasonably confident that its all sealed up nicely.
  #41  
Old 30-04-2020
Windex's Avatar
Windex  Windex is offline
Full Flexer
 
Join Date: Oct 2008
Location: Gippsland Vic
Posts: 1,110
What Jeep do I drive?: WH
Likes: 11
Liked 98 Times in 67 Posts
Default

Well like many of us I've had a bit of time on my hands so been chipping away at a few things to keep me occupied.

I swapped in a new power steering pump to try and reduce the whine the old one was producing, new one seems a little quieter but definitely not a game changer. Removing it wasnt too hard but as usual a few other things had to come out to make it easy.
  • Air intake
  • Battery
  • Top radiator hose

Then a little manipulation of the aircon lines to get to the bolts on the pump and it was off.
  #42  
Old 05-05-2020
Windex's Avatar
Windex  Windex is offline
Full Flexer
 
Join Date: Oct 2008
Location: Gippsland Vic
Posts: 1,110
What Jeep do I drive?: WH
Likes: 11
Liked 98 Times in 67 Posts
Default New wheels and tyres

Been toying with the idea of moving to 16 inch rims for awhile now to try and give me a little more sidewall and a few more options in tyres. With some gentle massaging I've managed to get some 16x7 0-offset to fit, then it was time for tyres, I've got a 255/85/R16 fitted up which is about 33 inch in the old money.

Front
  • There is a rub on the front pinch weld, I've already flattened the weld but need to cut and glue the plastic.
  • The front of the guard looks like it will clear but need to cycle the suspension more to make sure
  • The top lip looks like it will clear but will be very close due to the aggressive sidewalls
  • The upper control arm bolt has heaps of clearance as these aren't particularly wide tyres.


Rear
I measured on the passengers side on the rear which is the side the panhard rod attaches to the frame so should be the side that protrudes the most but I will check both sides to be sure.
  • The lip inside the wheel arch is very close so I might trim that as I've seen a few how-tos on the US sites


Attached Thumbnails
Click image for larger version

Name:	front_above.jpg
Views:	0
Size:	33.7 KB
ID:	78902   Click image for larger version

Name:	front_front.jpg
Views:	0
Size:	35.8 KB
ID:	78903   Click image for larger version

Name:	front_rear.jpg
Views:	0
Size:	63.2 KB
ID:	78904   Click image for larger version

Name:	hard_lock_front.jpg
Views:	0
Size:	45.9 KB
ID:	78905   Click image for larger version

Name:	pinch_weld_rub.jpg
Views:	0
Size:	69.0 KB
ID:	78906  

Post New Thread  Reply


Posting Rules
You may not post new threads
You may not post replies
You may not post attachments
You may not edit your posts

BB code is On
Smilies are On
[IMG] code is On
HTML code is On


All times are GMT +10. The time now is 12:08 PM.


Advertisements


AJOR does not vouch for or warrant the accuracy, completeness or usefulness of any message, and are not responsible for the contents of any message. The messages express the views of the author of the message, not necessarily the views of AJOR or any entity associated with AJOR, nor should any advice be substituted as technical advice replacing that of a mechanic. You agree, through your use of this service, that you will not use AJOR to post any material which is knowingly false and/or defamatory, inaccurate, abusive, vulgar, hateful, harassing, obscene, profane, sexually oriented, threatening, invasive of a person's privacy, religious, political or otherwise violative of any law. You agree not to post any copyrighted material unless the copyright is owned by you or by AJOR. The owner, administrators and moderators of AJOR reserve the right to delete any message or members for any or no reason whatsoever. You remain solely responsible for the content of your messages, and you agree to indemnify and hold harmless AJOR, the administrators, moderators, and their agents with respect to any claim based upon transmission of your message(s). The use of profile signatures to intentionally mislead or misdirect any member on this forum is not acceptable and may result in your account being suspended. Any trip that is organised through the AJOR forum is participated at your own risk. If you or your vehicle is damaged it is your responsibility, not that of the person that posted the thread, message or topic initiating the trip, nor the organisers of AJOR or moderators of any specific forum. This forum and associated website is the property of AJOR. No user data is harvested and no information supplied in your registration will be sold for profit.


Powered by vBulletin® Version 3.8.7
Copyright ©2000 - 2024, vBulletin Solutions, Inc.

AJOR © 2002 - 2024 AUSJEEPOFFROAD.COM. All corporate trademarked names and logos are property of their respective owners. Ausjeepoffroad is in no way associated with DaimlerChrysler Corporation or Fiat Jeep.
www.ausjeep.com www.ausjeep.com.au www.midlifemate.com ausjeepforum.com www.r9kustoms.com
vB Ad Management by =RedTyger=