Grand Willys Project - Page 200 - AUSJEEPOFFROAD.COM Jeep News Australia and New Zealand

Go Back   AUSJEEPOFFROAD.COM Jeep News Australia and New Zealand > JEEP GARAGE > Jeep build up
Register Forums Trading Your Jeep My Garage Mark All Read

Post New Thread  Reply
 
Thread Tools Search this Thread
  #1394  
Old 13-11-2017
Turismo07's Avatar
Turismo07  Turismo07 is offline
Full Flexer
 
Join Date: Aug 2008
Location: Perth
Posts: 919
What Jeep do I drive?: XJ
Likes: 185
Liked 121 Times in 86 Posts
Default

Quote:
Originally Posted by Gojeep View Post
I won't be working on my project until I finish fixing and then finishing this, so no more updates here for a while.


Quote:
Originally Posted by Gojeep View Post
I start a seperate thread on this elsewhere and link to it later here.
...in the meantime, I guess this will have to do...
__________________
JK CRD
KK
WJ Build - Sold
http://www.ausjeepoffroad.com/forum/...d.php?t=121119
Likes: (1)
  #1395  
Old 04-12-2017
Gojeep's Avatar
Gojeep  Gojeep is offline
LokRinger
 
Join Date: Jul 2002
Location: Victoria
Posts: 6,869
Likes: 788
Liked 1,754 Times in 556 Posts
Default


Door trims are next on the list of things to do. One set I already stripped of paint had hardly a scratch on it. The second set you can see they must have driven a lot with the window down and the elbow out the window. Get fined for doing that here now a days!

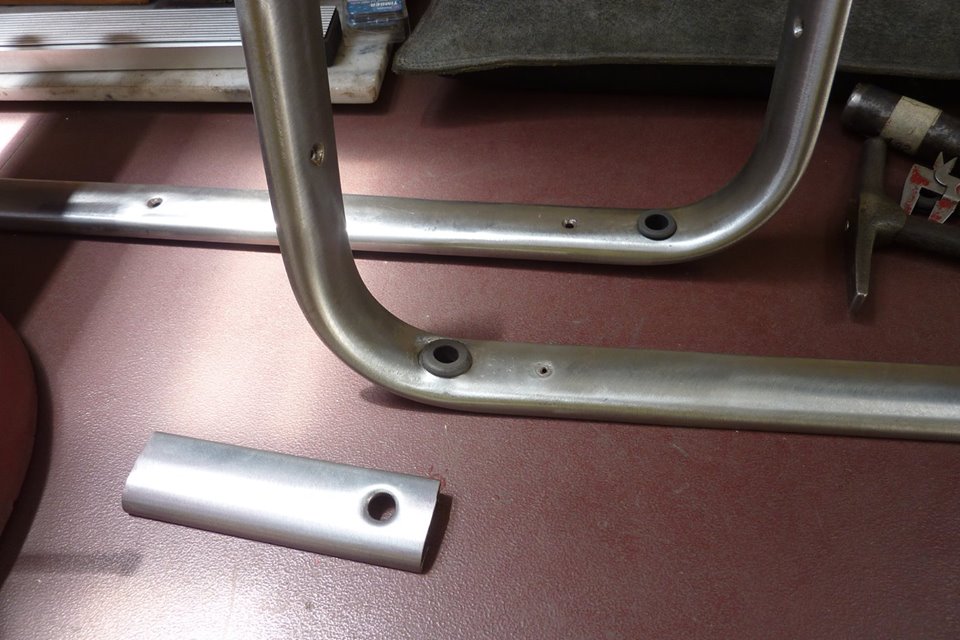
I needed the door lock button to come through the trim so tried a few different ways. The rear most one was using the donor piece but it jammed the button as the angle was not right. Tried a grommet and raised the metal to get it flatter, but still didn't like the look. So think I will go with the closest one with the flared hole.
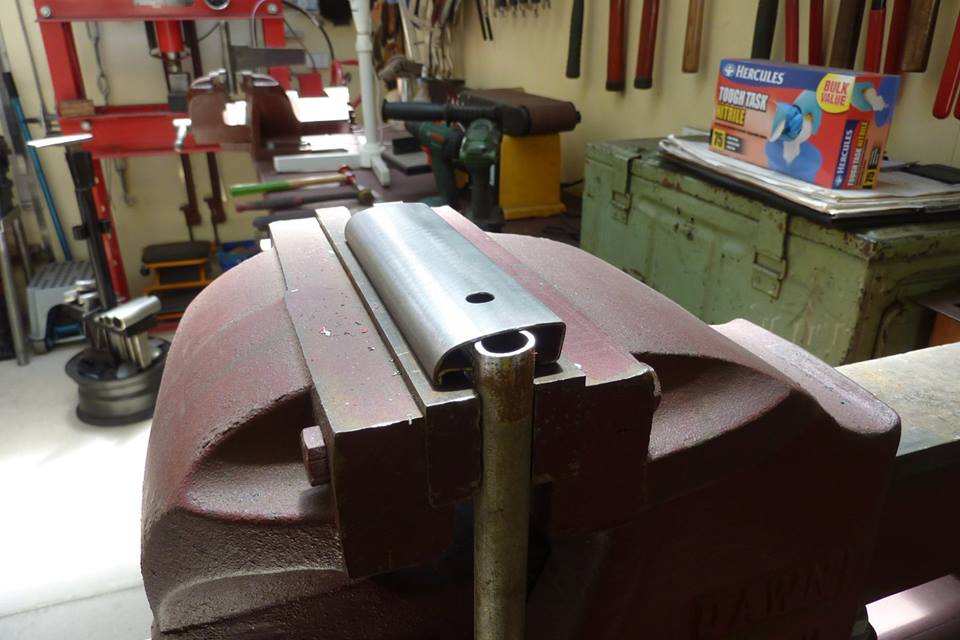

To make the flare I practised on some scrap first. Ground the top of a tube, that had the inside diameter I wanted, to match the curve of the trim.
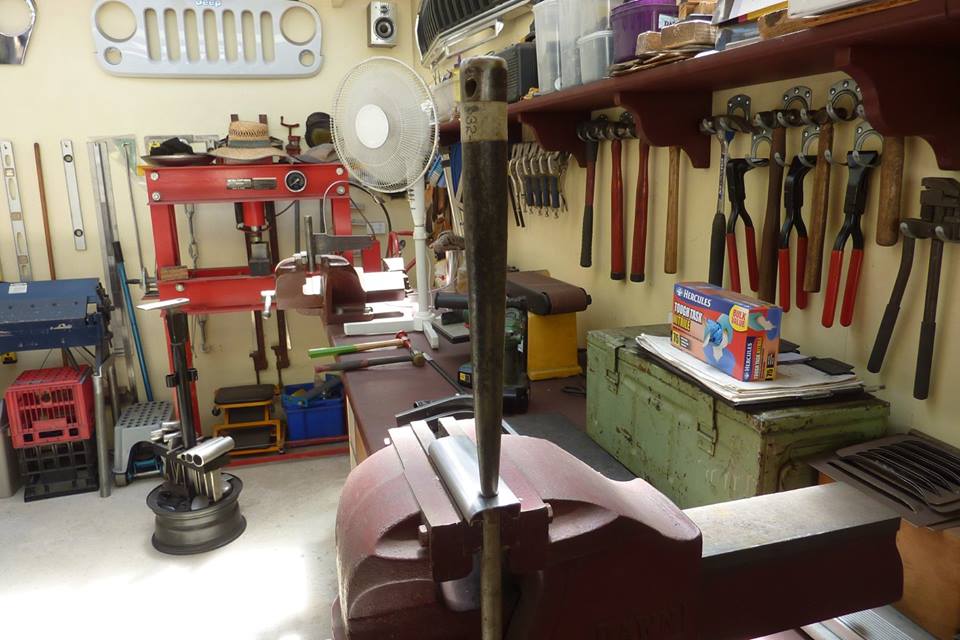

Then simply drove a rope splicing spike through the hole. Would be 35 years since I learnt this craft when doing my farrier training! Could also use a podgy or round bar shaped to suit as well.
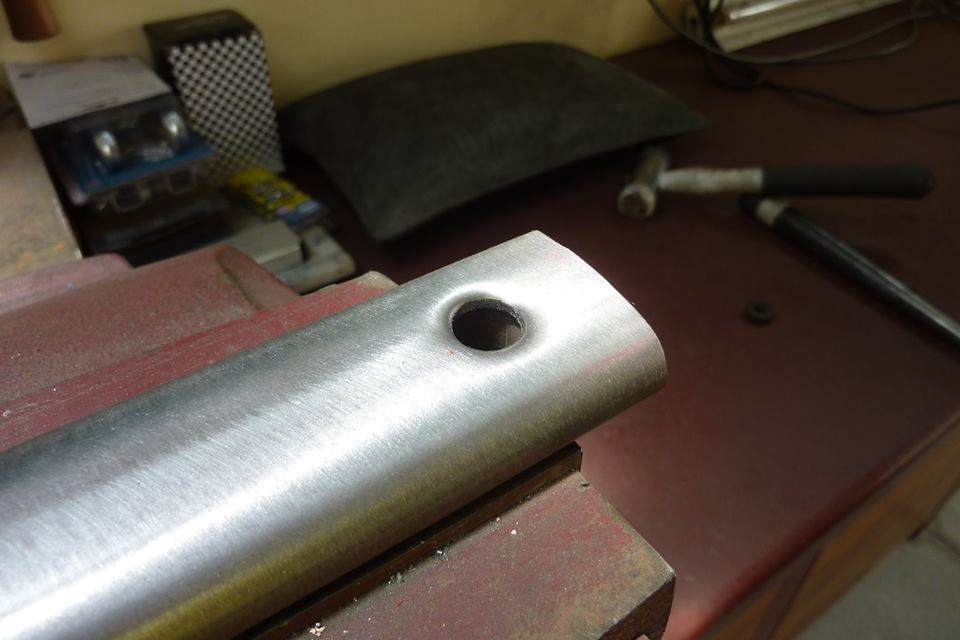

Looks better than just a hole with a sharp edge.
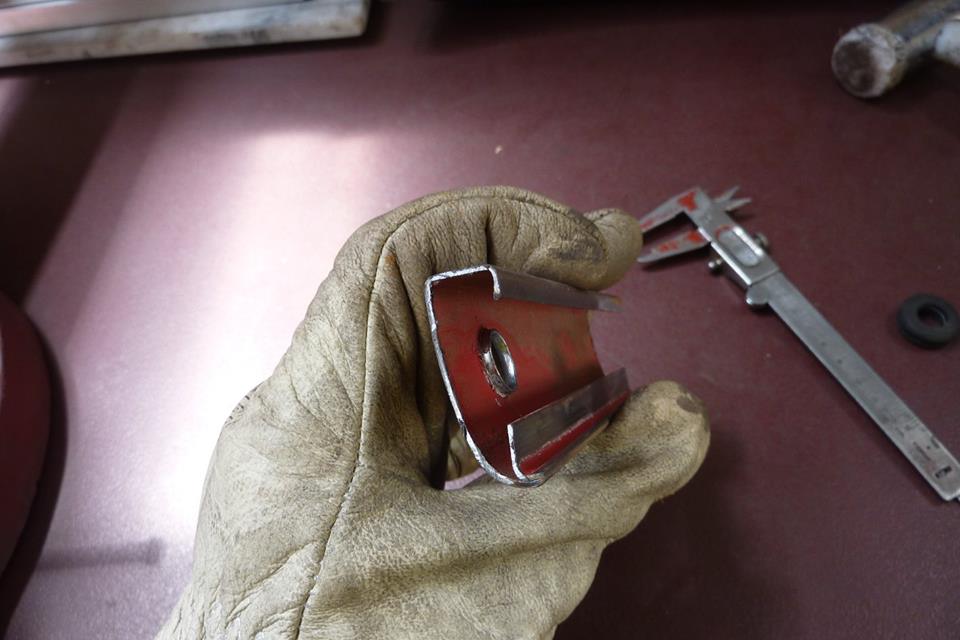

The hole was drilled 10mm-3/8" with the final hole size of 13mm-1/2". I tapped the spike in a little from the backside as well to turn the flare outwards so an edge wouldn't dig into the button.
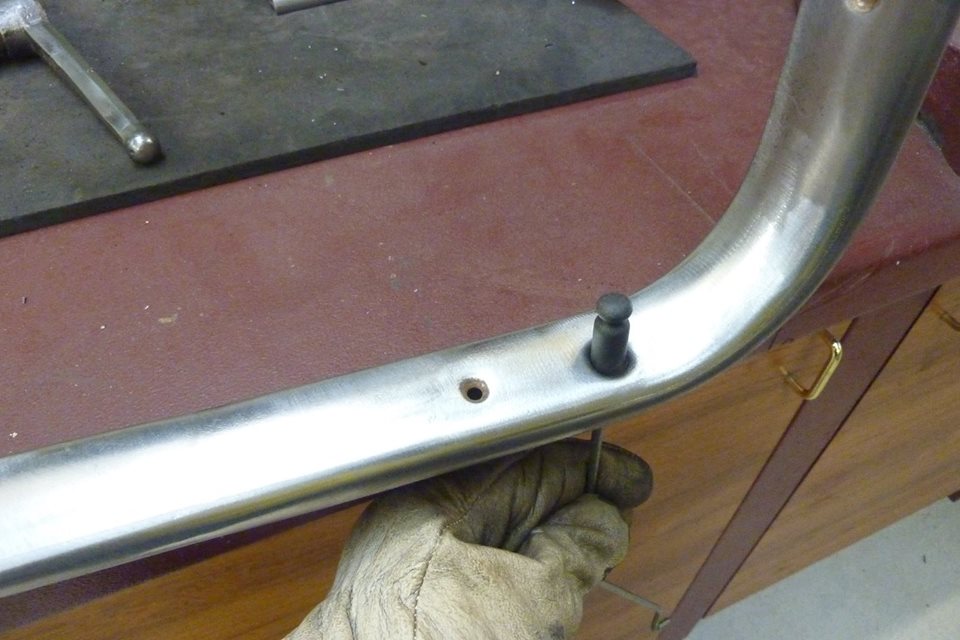

I think this gives a neater finish than the grommets.
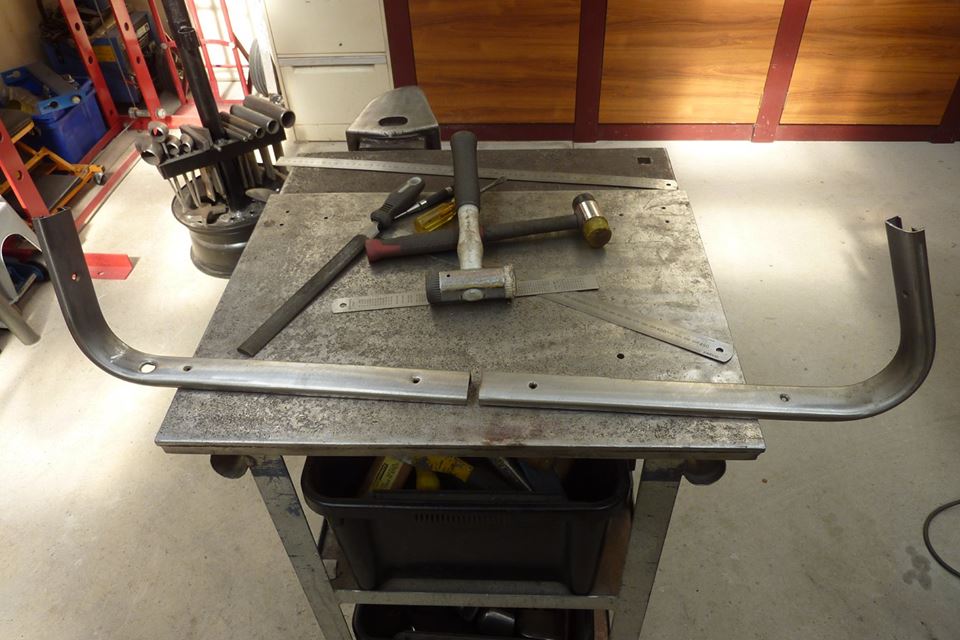

Using a different frame for the front and rear sections to make up the 115mm-4.5" longer doors, meant the mounting holes in the middle were unevenly spaced. Originally thought I could live with that when I cut them this way, but turns out I can't!
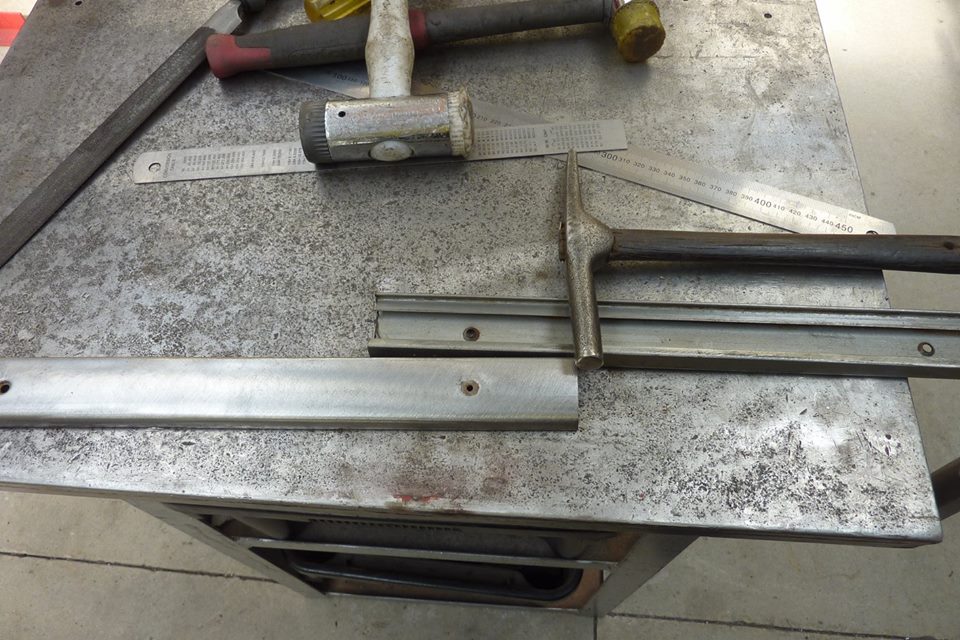

Using my trusty old cobbler's hammer, I hammered the flare flat from the inside. Also noted the now smaller hole size to help with making a new depression later.
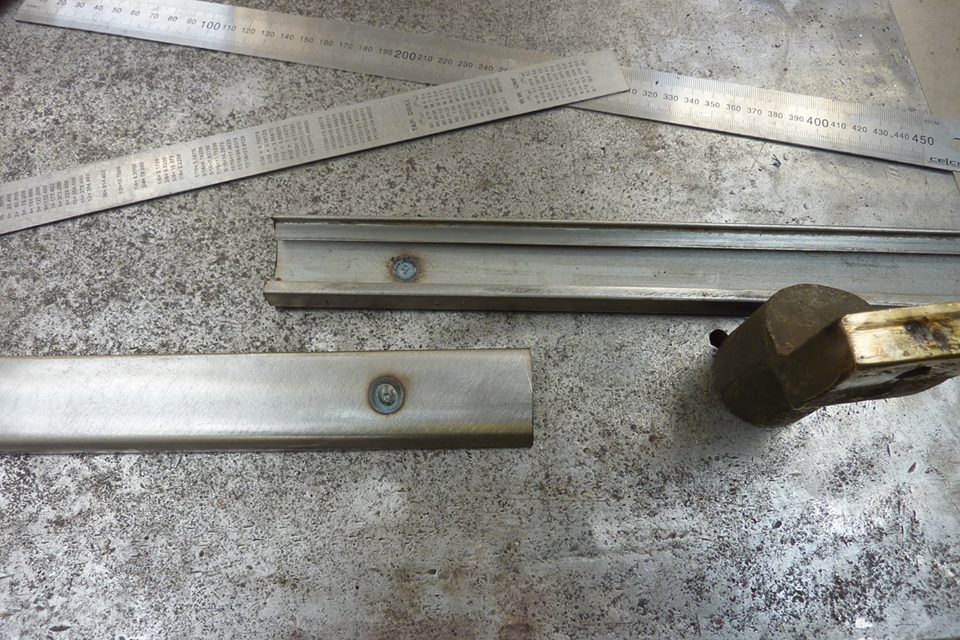

A quick tack over a big old brass cable lug fills the hole. You can see how the underside of the top piece comes out using this technique.
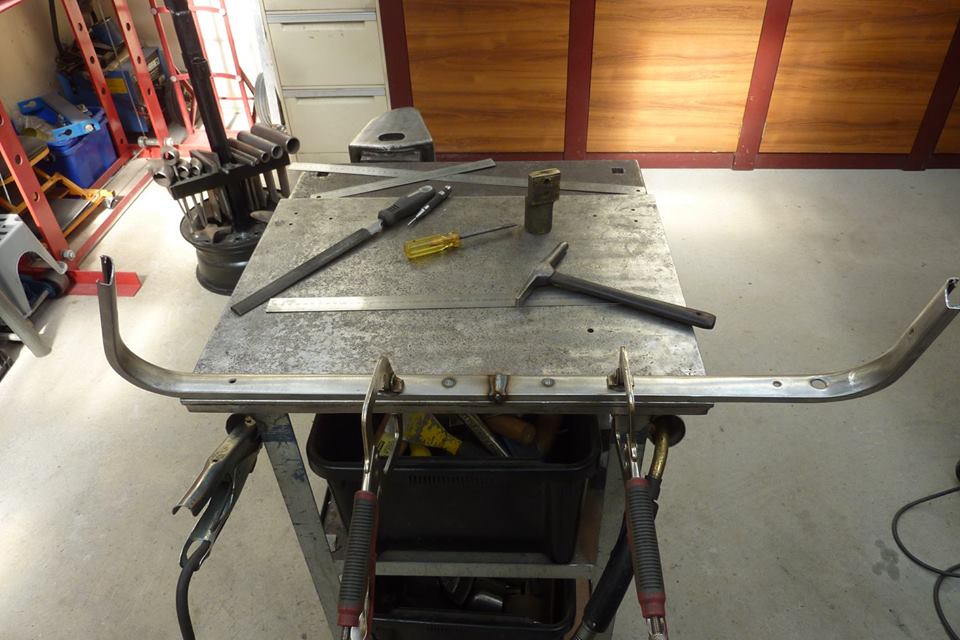

Pieces clamped down to the bench to keep it all aligned while welding.
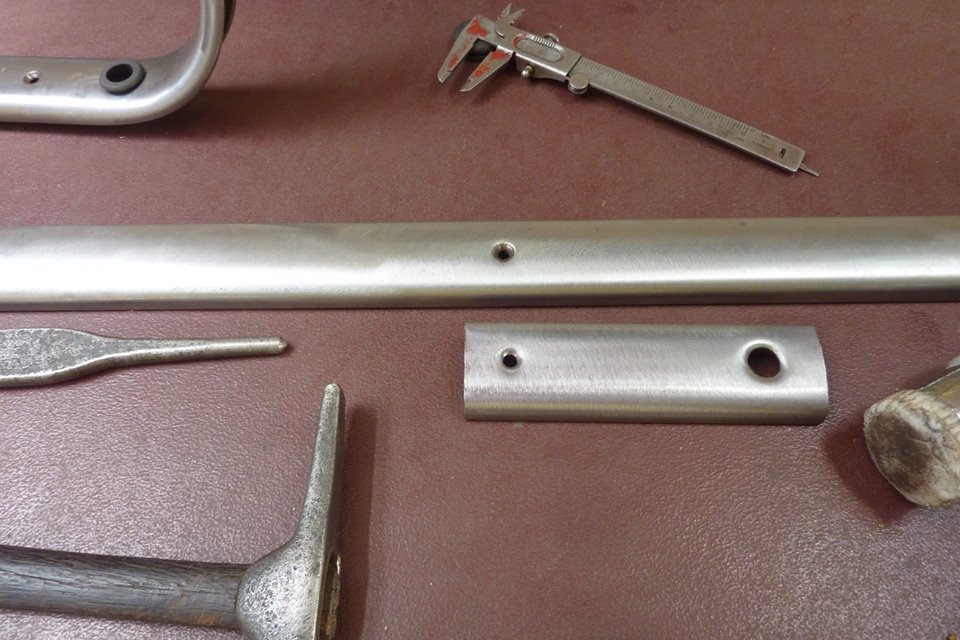

Now to make the new counter sink depression match the factory ones. I used the centre punch pictured and hammered it over a bar I drilled to match the outside diameter of the flare I wanted.
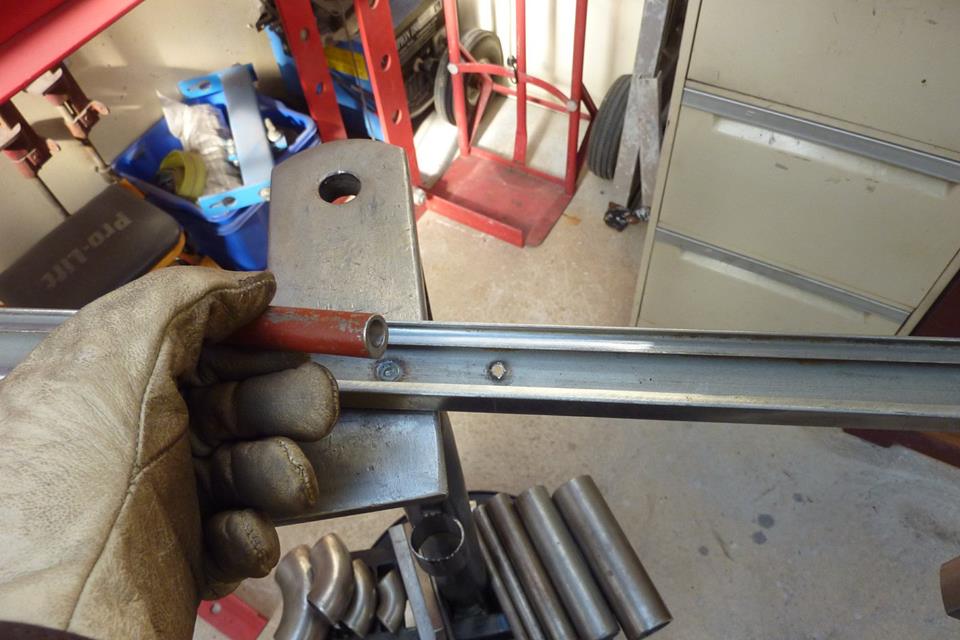

The bar was drilled offset slightly to still centre under the hole between the trim edges. Bar was ground to match the trim and held in the vice like the lock button hole.
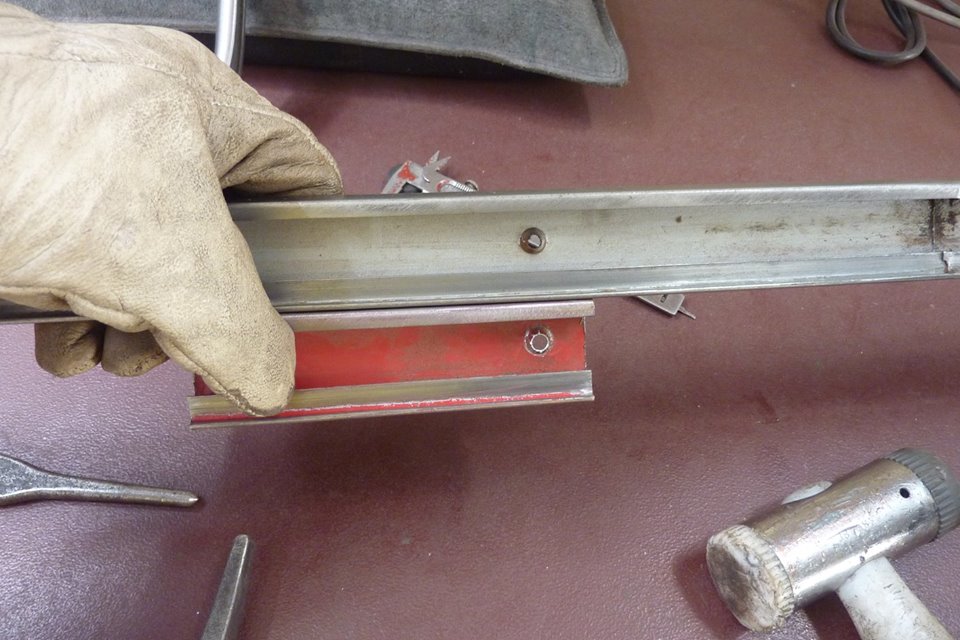

The trim was also placed face down on the bench and hammered with the drilled bar to make the flare more distinct. Factory flare above with test piece below.
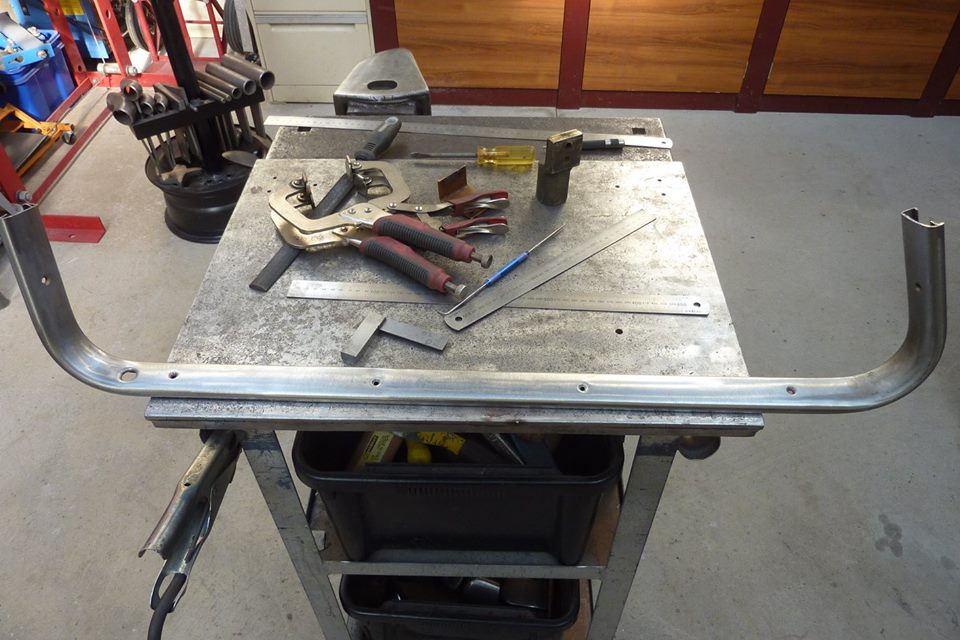

Holes now evenly spaced.


I noticed the doors would change alignment too easily since the piece between the inner and outer sides was cutout for the one piece window conversion. I needed a way to brace the ends around the back of the window channel so I made up this piece to do it.
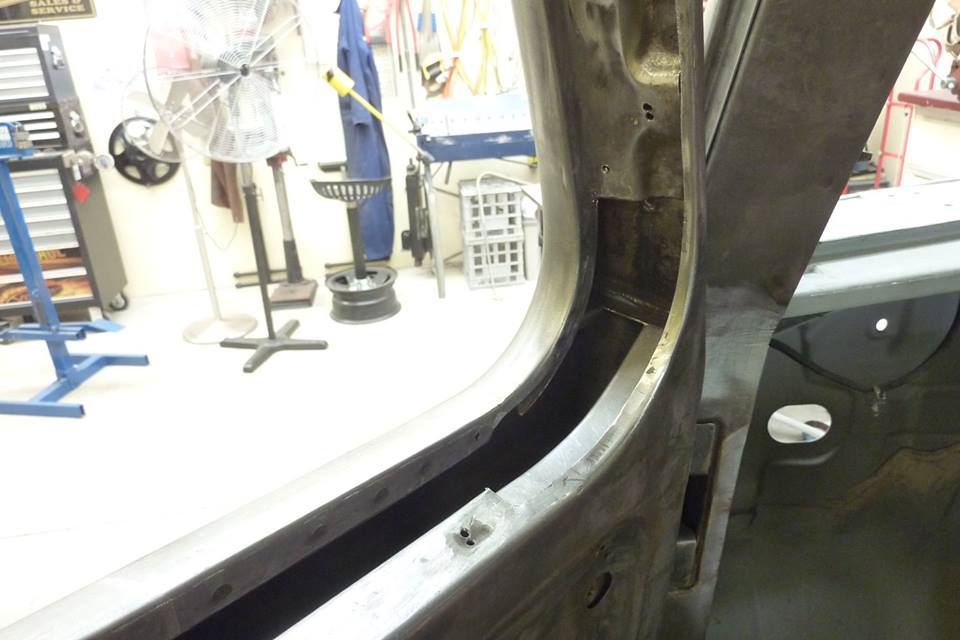

I fitted a similar piece at both ends even though it was only braced at the front before. This was welded in later and it stopped all the movement I had and the doors hold their shape now.
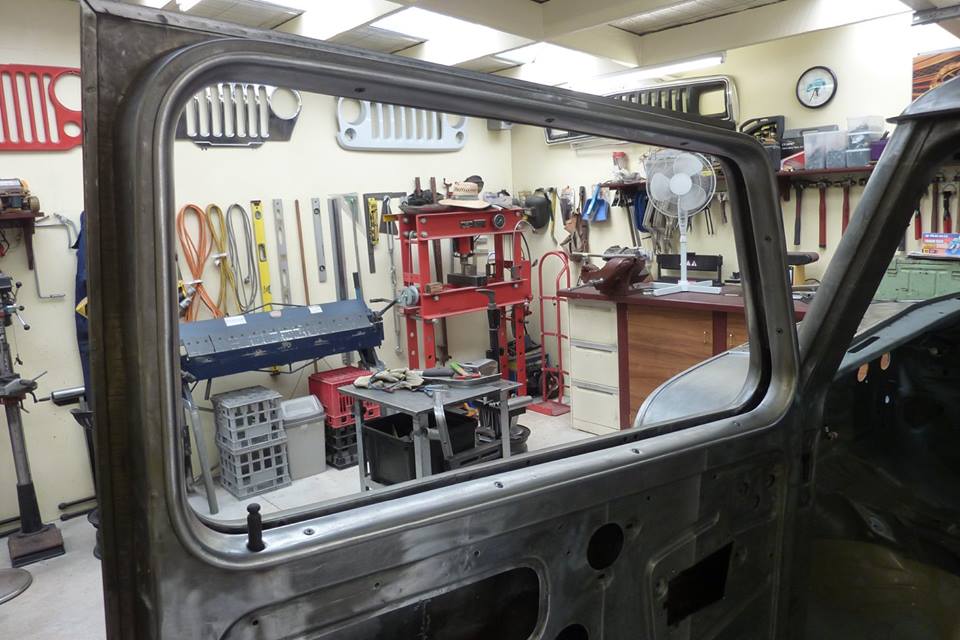

Trim now finished. I also added an extra mounting screw along the top as well. Needed to weld in a saddle into the frame for the screw to go into, like the stock ones had, otherwise the screw would go right through to the outside!
__________________
Cheers, Marcus.

My web site:
http://willyshotrod.com Over 5'000 Club
Likes: (5)
  #1396  
Old 04-12-2017
SeaComms's Avatar
SeaComms  SeaComms is offline
MonsterMoose
 
Join Date: Jun 2010
Location: Noosa QLD.
Age: 58
Posts: 7,940
What Jeep do I drive?: WK2
Likes: 1,432
Liked 809 Times in 466 Posts
Check out my Ride(s)
Default

The finer details, that’s what I love about this build!


Sent from my iPad using Tapatalk
__________________
Cheers, Dave :)

2010 JK, then a 2015 KL Trailhawk, now a 2017 GC Trailhawk!

Over 5000 Club
Likes: (1)
  #1397  
Old 10-12-2017
Gojeep's Avatar
Gojeep  Gojeep is offline
LokRinger
 
Join Date: Jul 2002
Location: Victoria
Posts: 6,869
Likes: 788
Liked 1,754 Times in 556 Posts
Default


This is the harness from the donor I need to add. There is no way the rubber part will squeeze down to the 5mm gap I have between the door and the A pillar, nor do I want such big holes in either side.


My idea is to have a hole only big enough for the round corrugated part to slide in and out of on the A pillar side. By removing the plastic housing the boot ends fitted on, the plugs pass through sideways and the wide part of the boot fits through once rolled up.


I have drilled a hole 14mm-9/16" smaller than the round part of the boot in the A pillar. I made this tool to flare the hole.


The slot fits over the edge of the hole like this.


Then you pull up a little bit at a time and work your way around the hole. The T handle works well making sure the slot is always bottomed out while pulling on it. I used the small mallet to help it around as the flare got over about 45*. Could also hit against the underside of handle to pull the hole level if it sank in at all.


Once nearly there I tapped through the hammer which was the size I wanted in the end. Helped round the hole a bit more too.


It left a 7mm-1/4" flare which will stop the corrugated part of the boot getting caught as it goes in and out while using the door.


Once the flare was finished I was able to pass a holesaw right through and drill out the other side of the A pillar to get the wires and plugs through. So the hole at the start was 29mm-1.1/8". The 10mm-3/8" slot opened up the hole to 43mm-1.11/16", 14mm bigger. I had done a test hole first to see what I would end up with. But the slot needs to be half the depth you want the diametre to increase by, plus about 2.5 times the material thickness.


With the plugs all the way through the A pillar and the wide part of the boot inside it, you can push and pull the boot in and out even on the angles it will see with the door opening and closing without it catching.


Now the door side I don't want to move so I want the final hole size to be the small diameter of the corrugated grooves. I am still going to make a small flare so the edge of the hole doesn't cut through the boot over time. Notice the angled cut along with the other one on top.


The angled cut is so I can start the flare and clear the hinge and the edge of the door. I switch to the other slot once about halfway done flaring.


So this hole was 25mm-1" to start with it ended up at 33mm-1.5/16", 8mm-5/16" bigger. This was with a 5mm-3/16" slot and with a 4mm-5/32" deep flare.


With the big oval part of the boot inside the door and the depth of the flare inside the narrowest part of the boot grooves, it sits there firmly.


A this is how it looks when all in place. Can also just make out one of the plugs in the cavity inside the kick panel area once it has passed right through the A pillar. To remove the door I simply unplug from there and pull the boot through followed by the plugs and only takes a minute or so.
__________________
Cheers, Marcus.

My web site:
http://willyshotrod.com Over 5'000 Club
Likes: (6)
  #1398  
Old 16-12-2017
Gojeep's Avatar
Gojeep  Gojeep is offline
LokRinger
 
Join Date: Jul 2002
Location: Victoria
Posts: 6,869
Likes: 788
Liked 1,754 Times in 556 Posts
Default

Only a little update.


Doing what I can on the windscreen trim. The windscreen is 220mm-9" wider than stock so each side has to extend half of that. No height change as the whole windscreen frame was lowered instead by sectioning the cowl 50mm-2".


The defrost louver lengthening finished. This is all you will see from the inside of the cab.


Enough airflow to work the defrost from the longer stock louver. The mounting holes were welded up and moved and repunched to be even where needed.


Now the door modifications are completed, I am stripping the doors right down and removing the hinges so I can spray the inside with a zinc coating. I drill a couple of small holes through the inner door skin and into the hinge so I can put them right back in the same spot. Each hinge was drilled differently so I know from where they came. When putting the hinge back, just line up the holes and screw it down.
__________________
Cheers, Marcus.

My web site:
http://willyshotrod.com Over 5'000 Club
Likes: (4)
  #1399  
Old 15-01-2018
Gojeep's Avatar
Gojeep  Gojeep is offline
LokRinger
 
Join Date: Jul 2002
Location: Victoria
Posts: 6,869
Likes: 788
Liked 1,754 Times in 556 Posts
Default


Played around seeing if I could use the stock door check strap with the bar going into the A pillar instead of the door, to aviod the one piece windows, but just couldn't get it to work that way. So I'm going the same way as many Jeeps have. Going to start by welding this heavier gauge angle inside the door and A pillar where mounts will be fixed.


Angle plug welded into position inside the door. This is just to make sure the screws don't get pulled through should the door be caught by a gust of wind or let go when parked on a side slope!


Ground down the welds and pilot holes drilled.


Bought some stainless steel footman loops and using an old leather belt for mock up.


These a often called Chicago Rivets or Screw Backs. I got nickel plated brass ones with a 8mm-5/16" head diameter. They just screw into themselves making riveting leather easy. Strap can be wrapped around a bar for instance that is already welded into place.

I have got it on back to front to make it easier to work out the length I need to make the strap.


Works really well and this mock up strap will work as a template for when it is time to do upholstery.


I'm actually trying to find another one of these belts that I used to have to make the strap from in the final version. Can't seem to find them anymore so if someone stops one, please let me know. The only belts I can find with Jeep stamped on them now have it only once at the very end with the belt holes too close to use it.
__________________
Cheers, Marcus.

My web site:
http://willyshotrod.com Over 5'000 Club
Likes: (2)
  #1400  
Old 15-01-2018
Hoobz's Avatar
Hoobz  Hoobz is offline
Full Flexer
 
Join Date: Feb 2013
Location: Geelong. Vic.
Age: 52
Posts: 1,163
What Jeep do I drive?: WG
Likes: 511
Liked 342 Times in 221 Posts
Check out my Ride(s)
Default

Are you a coach builder by trade Gojeep?
__________________
Either write something worth reading or do something worth writing.
Post New Thread  Reply


Posting Rules
You may not post new threads
You may not post replies
You may not post attachments
You may not edit your posts

BB code is On
Smilies are On
[IMG] code is On
HTML code is On


All times are GMT +10. The time now is 10:33 AM.


Advertisements


AJOR does not vouch for or warrant the accuracy, completeness or usefulness of any message, and are not responsible for the contents of any message. The messages express the views of the author of the message, not necessarily the views of AJOR or any entity associated with AJOR, nor should any advice be substituted as technical advice replacing that of a mechanic. You agree, through your use of this service, that you will not use AJOR to post any material which is knowingly false and/or defamatory, inaccurate, abusive, vulgar, hateful, harassing, obscene, profane, sexually oriented, threatening, invasive of a person's privacy, religious, political or otherwise violative of any law. You agree not to post any copyrighted material unless the copyright is owned by you or by AJOR. The owner, administrators and moderators of AJOR reserve the right to delete any message or members for any or no reason whatsoever. You remain solely responsible for the content of your messages, and you agree to indemnify and hold harmless AJOR, the administrators, moderators, and their agents with respect to any claim based upon transmission of your message(s). The use of profile signatures to intentionally mislead or misdirect any member on this forum is not acceptable and may result in your account being suspended. Any trip that is organised through the AJOR forum is participated at your own risk. If you or your vehicle is damaged it is your responsibility, not that of the person that posted the thread, message or topic initiating the trip, nor the organisers of AJOR or moderators of any specific forum. This forum and associated website is the property of AJOR. No user data is harvested and no information supplied in your registration will be sold for profit.


Powered by vBulletin® Version 3.8.7
Copyright ©2000 - 2024, vBulletin Solutions, Inc.

AJOR © 2002 - 2024 AUSJEEPOFFROAD.COM. All corporate trademarked names and logos are property of their respective owners. Ausjeepoffroad is in no way associated with DaimlerChrysler Corporation or Fiat Jeep.
www.ausjeep.com www.ausjeep.com.au www.midlifemate.com ausjeepforum.com www.r9kustoms.com
vB Ad Management by =RedTyger=