Grand Willys Project - Page 222 - AUSJEEPOFFROAD.COM Jeep News Australia and New Zealand

Go Back   AUSJEEPOFFROAD.COM Jeep News Australia and New Zealand > JEEP GARAGE > Jeep build up
Register Forums Trading Your Jeep My Garage Mark All Read

Post New Thread  Reply
 
Thread Tools Search this Thread
  #1548  
Old 07-10-2019
Gojeep's Avatar
Gojeep  Gojeep is offline
LokRinger
 
Join Date: Jul 2002
Location: Victoria
Posts: 6,870
Likes: 789
Liked 1,754 Times in 556 Posts
Default

Quote:
Originally Posted by bodgie View Post
A small job that I'm sure took more time than anticipated.
That it surely did! I ended up going the simple approach rather than anything complicated and fancy.

Quote:
Originally Posted by SeaComms View Post
A small not-too-picture-worthy job for you, another chance to admire your handiwork for us.

Love it.

It's more the details for me rather than the finished look, though that's always a bonus at the end!

Sent from my SM-G965F using Tapatalk
Great to hear.
__________________
Cheers, Marcus.

My web site:
http://willyshotrod.com Over 5'000 Club
  #1549  
Old 19-10-2019
Gojeep's Avatar
Gojeep  Gojeep is offline
LokRinger
 
Join Date: Jul 2002
Location: Victoria
Posts: 6,870
Likes: 789
Liked 1,754 Times in 556 Posts
Default

The best laid plans of mice and men often go awry.


Suffering from the flow on effect of adding the spare tyre under the floor. Things I had planned to put there now have to find a new home. The charcoal canister on the donor went on the outside of the rail here. I was just going to swap it to the inside before the exhaust was run to this side to go around the spare.


I thought maybe here, but after taking out the rear springs to check clearance at full compression, it was not going to work.


Laying it on its side would work but would have to change the orientation of the vent control valve.


From the factory the vent control valve was like this. When the charcoal canister was laid over horizontally, like on a JK Jeep Wrangler, the valve was still positioned vertically.


Well, I saw that it had different clocking positions possible, so only had to refit it 90* differently to make it work.


But before I went any further, I thought where am I going to fit the battery which I had planned to be where the spare is now too? It was too close to the exhaust if I put it opposite the canister, so out came my lovely K member to make room for it!


Whipped up another less elaborate K member one bay further back


Can see where the term K member comes from. It works just as well back here as it will stop the chassis trying to turn into a parallelogram anywhere along the rails.


There was more room above the fuel tank here too as it drops down at the top. Plumbing worked out better here as was actually too close before. The small left over line connects to the fuel filler vent port and the vent control valve to a vent filter also mounted there. That won't be done until after the bed is made.


I have also run the fuel and vent lines which just clicked back into place without change. The brake lines were also run.


All lines were just clipped into the donor factory holders in the same positions along the frame too. No bending was even needed!
__________________
Cheers, Marcus.

My web site:
http://willyshotrod.com Over 5'000 Club
Likes: (5)
  #1550  
Old 27-10-2019
Gojeep's Avatar
Gojeep  Gojeep is offline
LokRinger
 
Join Date: Jul 2002
Location: Victoria
Posts: 6,870
Likes: 789
Liked 1,754 Times in 556 Posts
Default


From this 2mm-14g cold rolled galvanised steel, I am going to make a battery tray.


My folder has trouble folding a narrow edge as there is not enough leverage against it, so did it by hand over the edge of the bench. I sometimes start with a wider piece and cut it back after folding.


My Chinese made folder can't handle this at all so back to my old home built one. Still use it for things like this.


I am using a DIN75 case battery, https://www.centurybatteries.com.au/...75lh%20mf/info as it exceeds the original stock donor specifications for the HEMI V8. They have a ledge running around the bottom of the case which the double fold at the back of the tray will sit over.


I put two nut inserts in so that the angle piece will press down on the front ledge of the battery case holding it down. This is the way DIN batteries are most often held in place.


I installed the inserts from the bottom as thought it would be neater. The two flared holes reduce the weight while adding stiffness to the bottom and giving drainage.


Also going to use nut inserts to hold the battery tray in place on the cross members. Normally the collar around the insert sits proud, but I want it flush so you don't get a build up of dirt between the tray sides and the cross member. So I re-ground a drill bit that matched the outside diameter of the insert with flat cutting edges like used when drilling sheet metal.


Only drilled just enough so that the collar sat flush.


Drilled the centre out to suit the insert. You can also buy special bits to do this exact job of creating the recess for the insert.


The nut inserts work like a heavy duty rivet except the mandrel doesn't stay in the rivet once finished. You actually screw the mandrel into the insert and thread it back out again afterwards.


I used four M10 inserts to hold the tray in place. It has to hold a 20kg-44lb battery.


The underside of the bed floor will be level with the cross members on the left of picture. I have 30mm-1.25" clearance above the battery. Gives me enough height to clear the 15mm-5/8" front lip of the tray when fitting and removing the battery. The mufflers run under the tray but are 125mm-5" away from the bottom of the tray.
__________________
Cheers, Marcus.

My web site:
http://willyshotrod.com Over 5'000 Club
Likes: (3)
  #1551  
Old 31-10-2019
Gojeep's Avatar
Gojeep  Gojeep is offline
LokRinger
 
Join Date: Jul 2002
Location: Victoria
Posts: 6,870
Likes: 789
Liked 1,754 Times in 556 Posts
Default

Can anyone help with a 5.7 HEMI where and how the purge valve mounted? Looks like it should slide over a flat piece.
__________________
Cheers, Marcus.

My web site:
http://willyshotrod.com Over 5'000 Club
  #1552  
Old 02-11-2019
Gojeep's Avatar
Gojeep  Gojeep is offline
LokRinger
 
Join Date: Jul 2002
Location: Victoria
Posts: 6,870
Likes: 789
Liked 1,754 Times in 556 Posts
Default


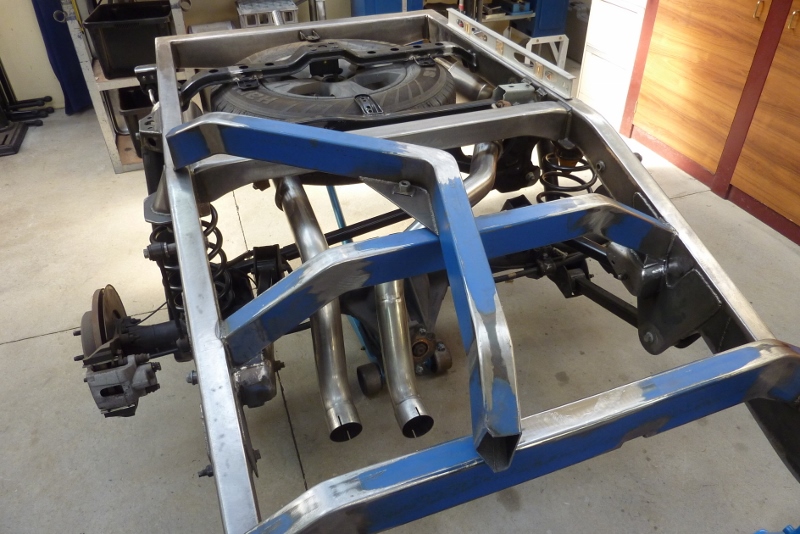
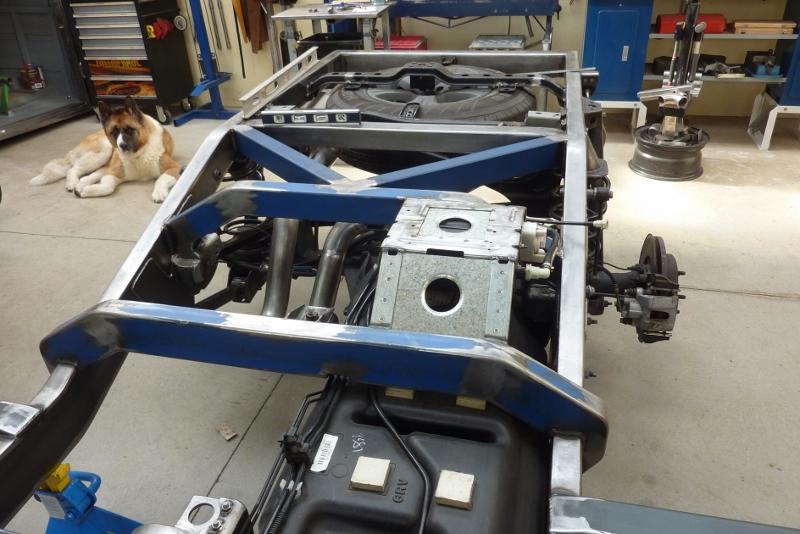
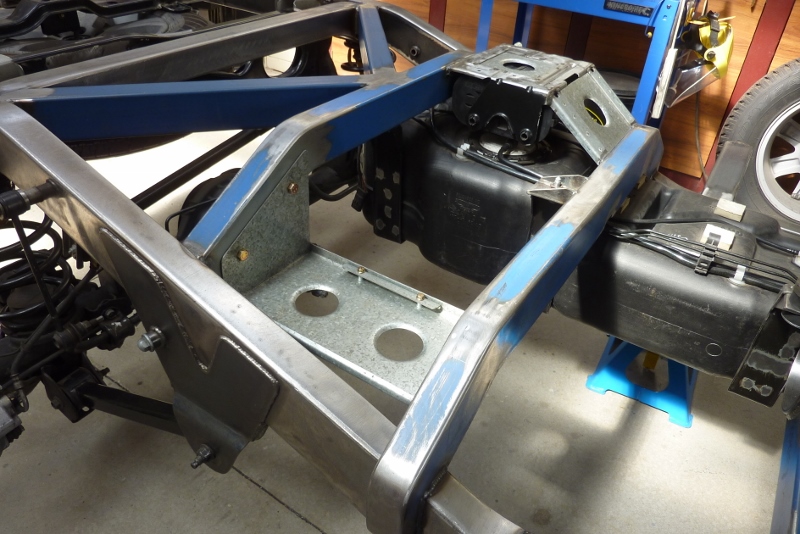
Still more frame changes! I lowered the spare tyre winch cross member down so that the top was flush with the chassis after coming up with a better idea to make the bed floor sit flat on the chassis later on. Then I saw an opportunity to reduce the rear overhang as well, so off comes the cross member.


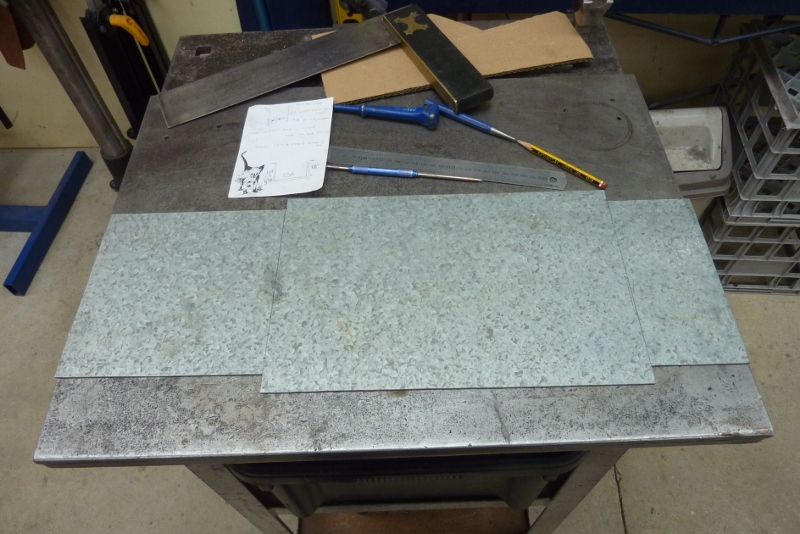
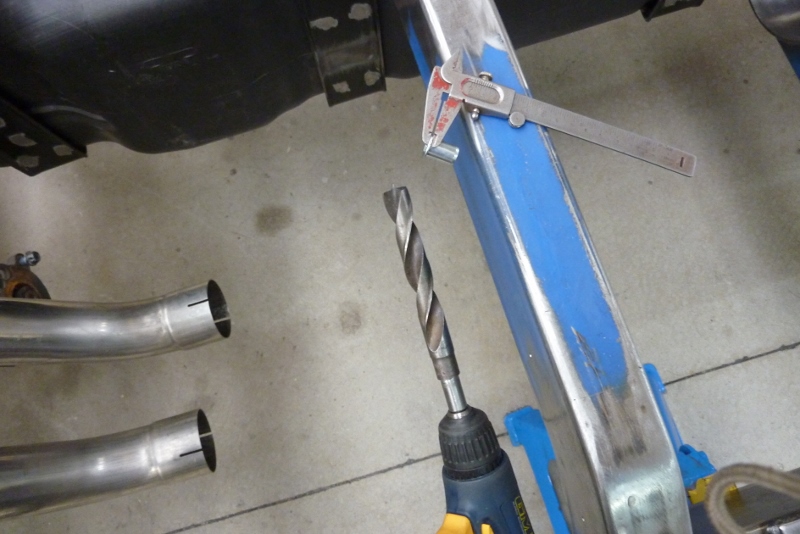
Making a brand new one from 100x50x5mm, (4"x2"x3/16"), RHS. I like to include the end caps for the frame ends at the same time. It increases the weld area of the cross member itself while reducing the total welds needed to adding a separate cap later on.


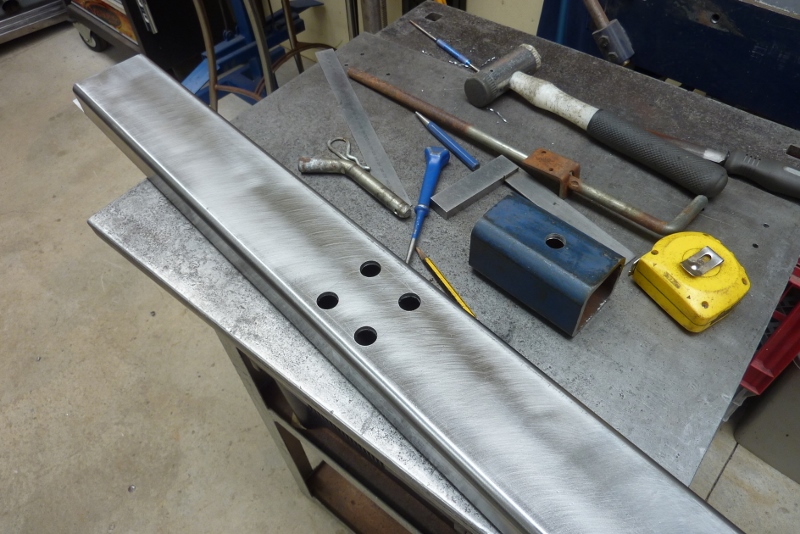
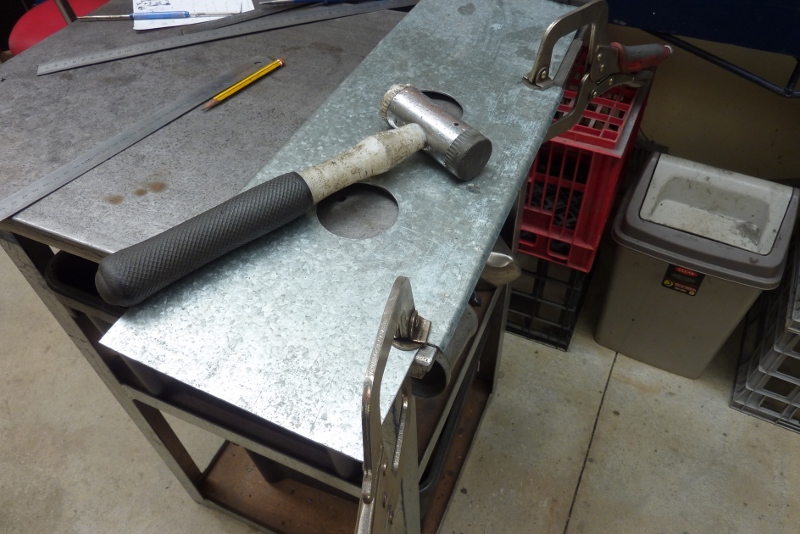
Adding a new receiver hitch into the cross member like before.


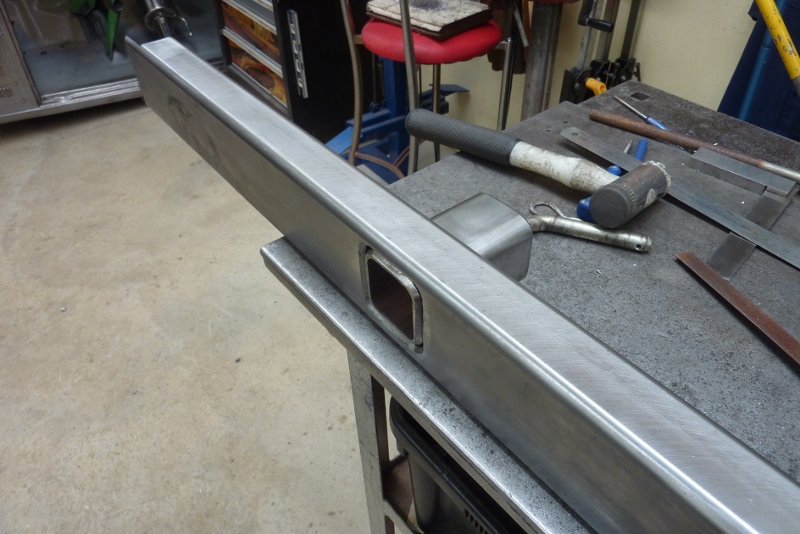
Bevelled the cross member as well and the receiver for best possible weld penetration when doing a flush fit.


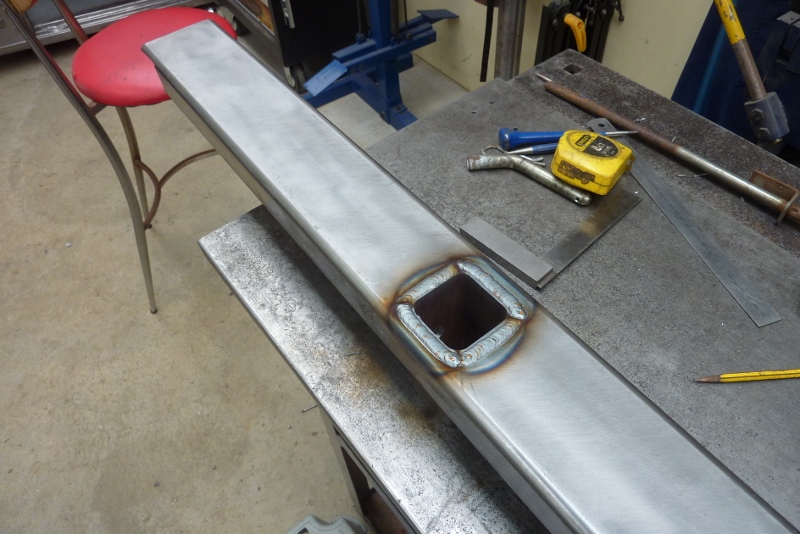
Welding completed. I always take photos before any grinding in case the certifying engineer needs to know the quality of the weld afterwards.


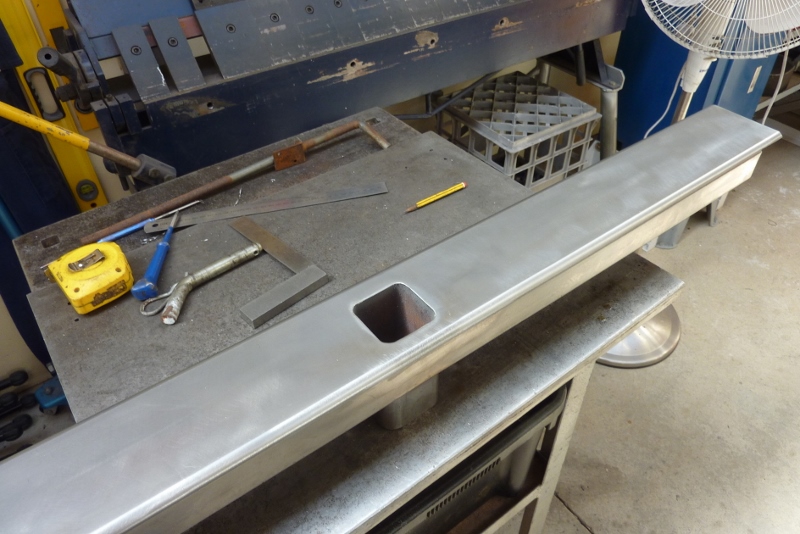
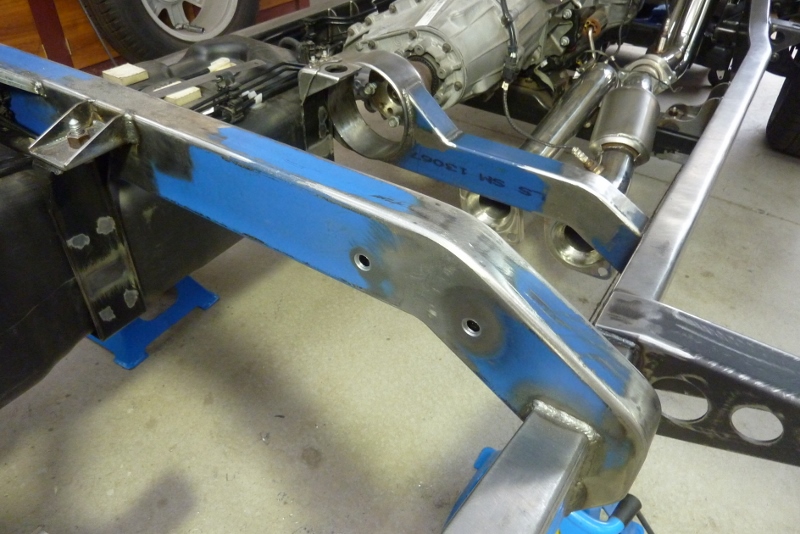
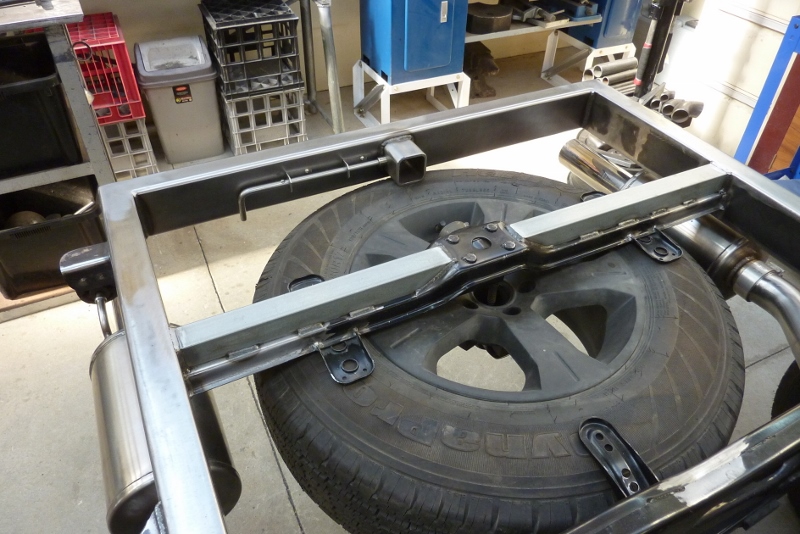
All ground flush ready to install. If I leave it like the stock configuration, the rear cross member is seen below the tailgate.


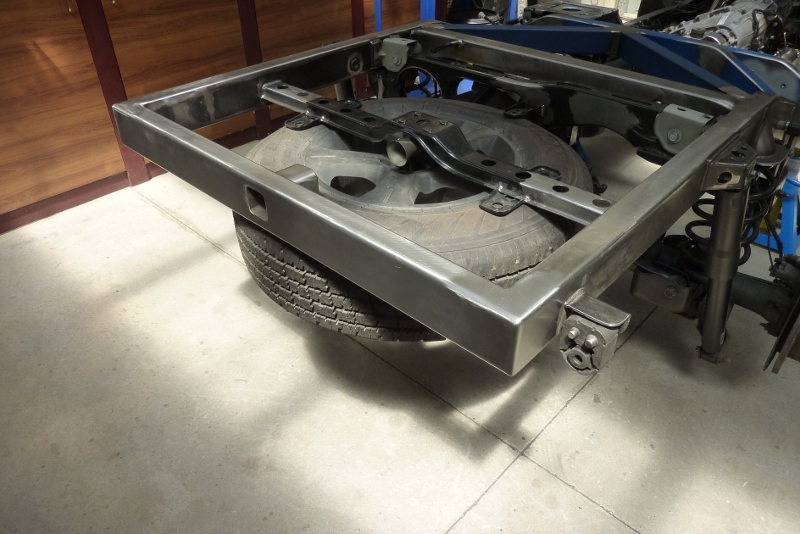
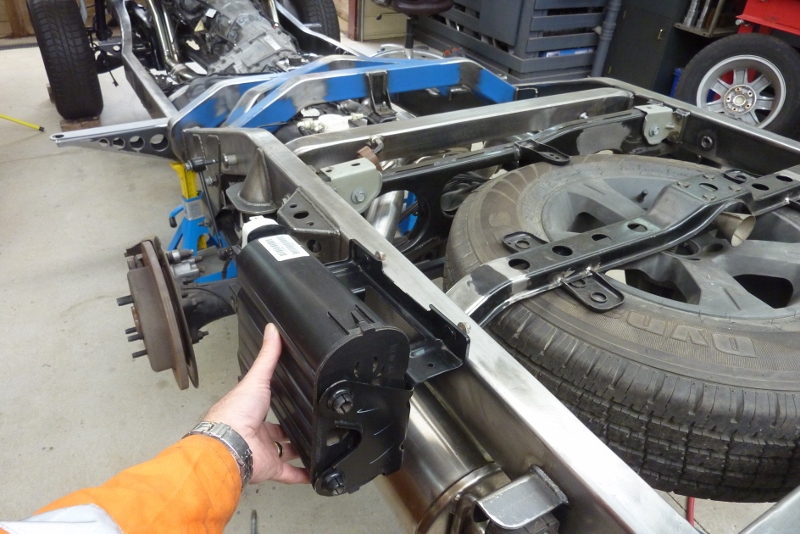
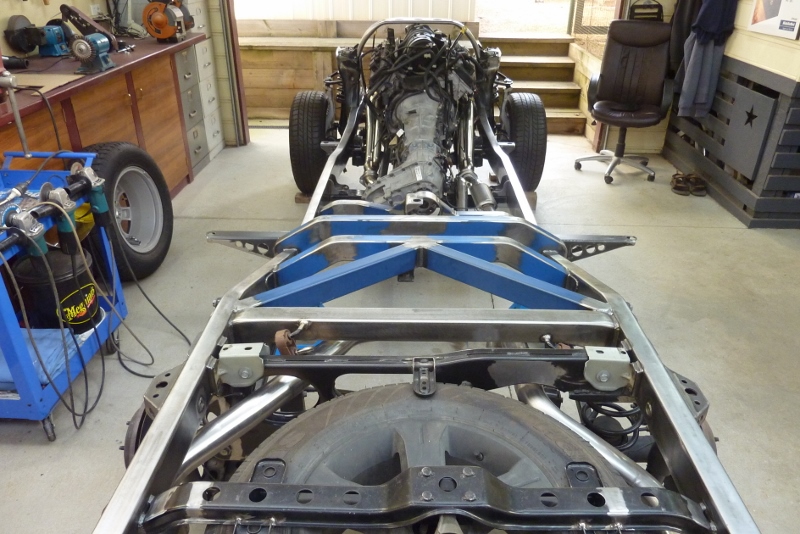
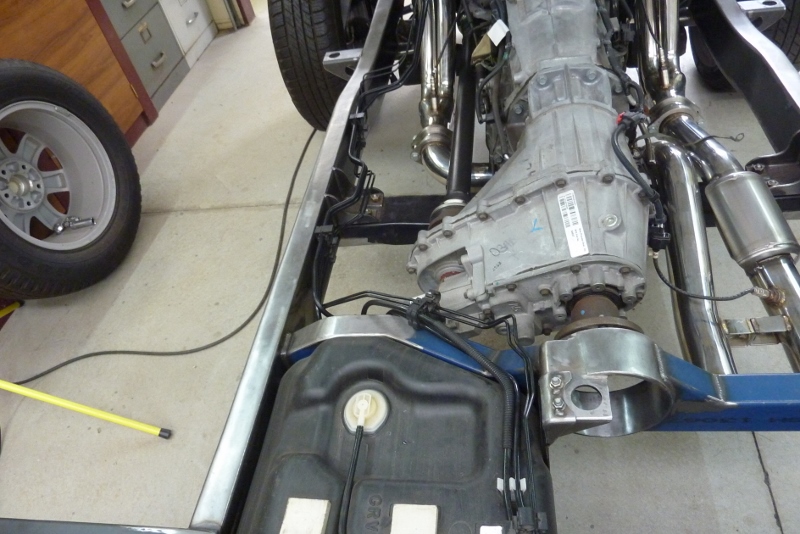
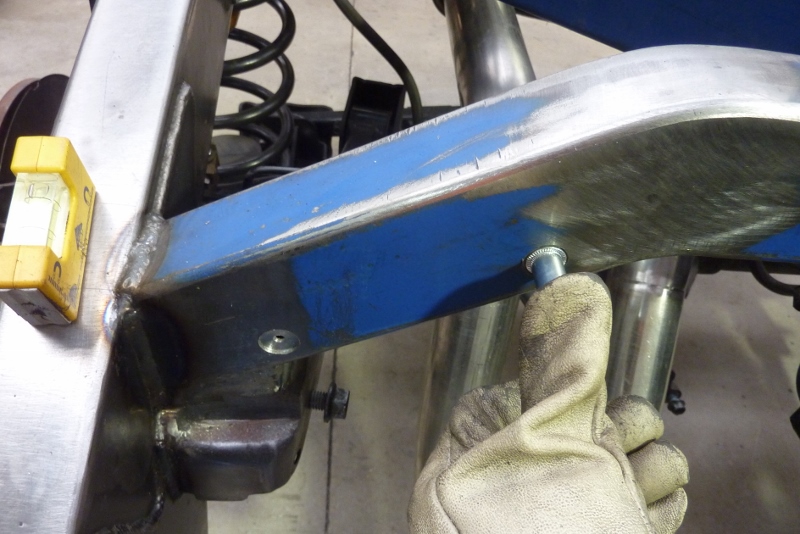
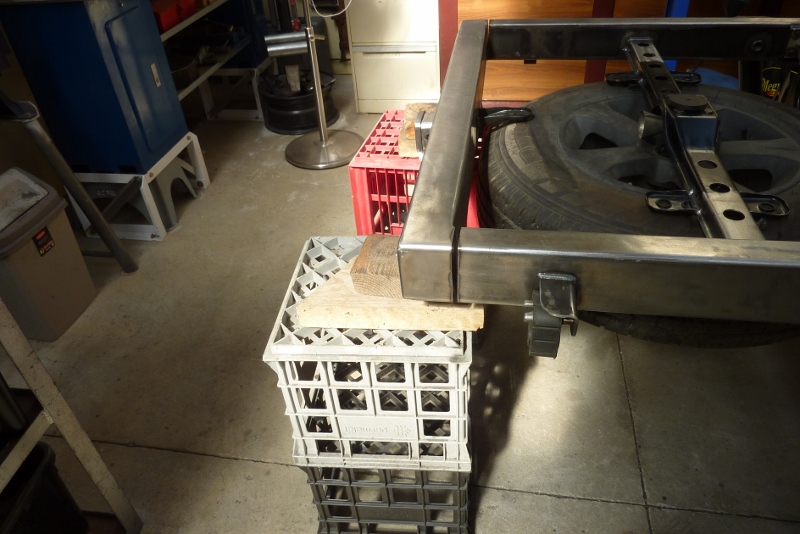
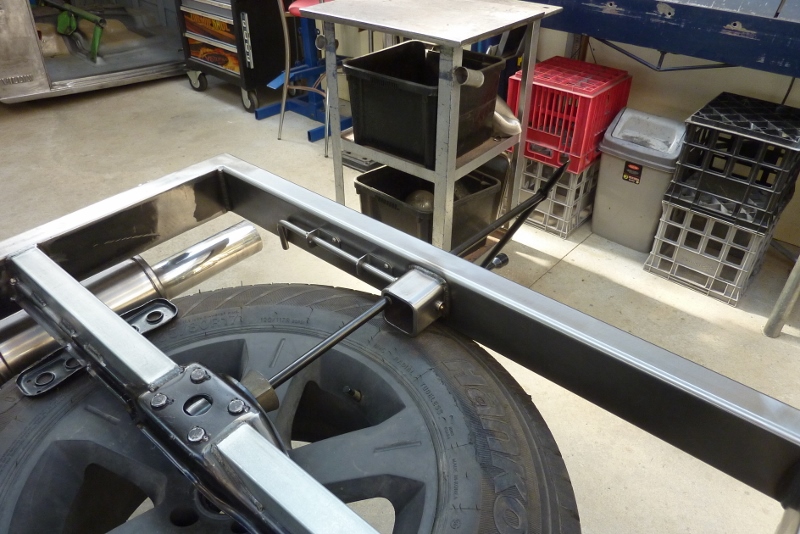
So what is different? Well when I dropped the winch cross member to make it flush with the top of the chassis, I saw that by going back to the original width cross member, and raising the hitch receiver height slightly, I could move the cross member forward by 75mm, (3"), over the tyre to help reduce the rear overhang. Should make a more balanced look the side profile of the bed once it is made.


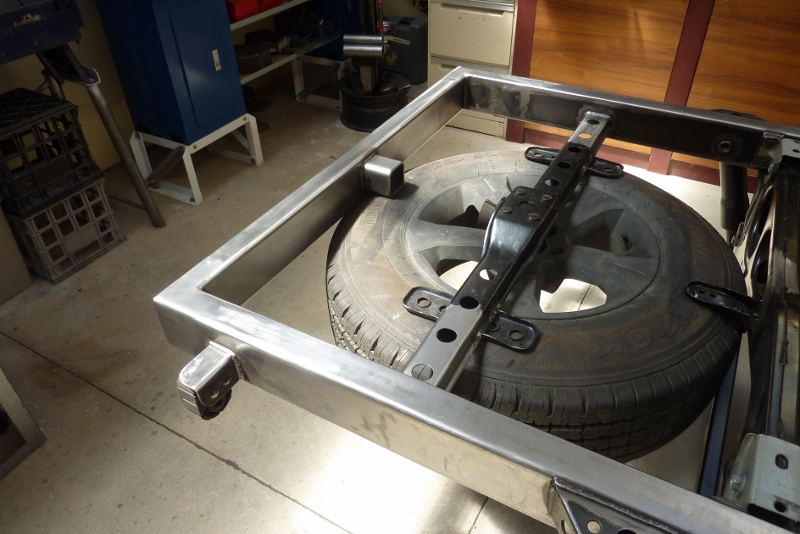
The hitch receiver now acts as one of the supports for the tyre.


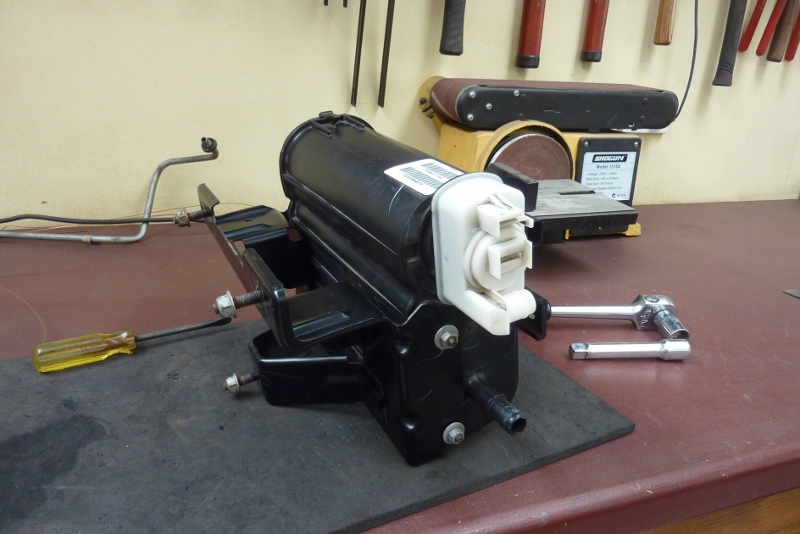
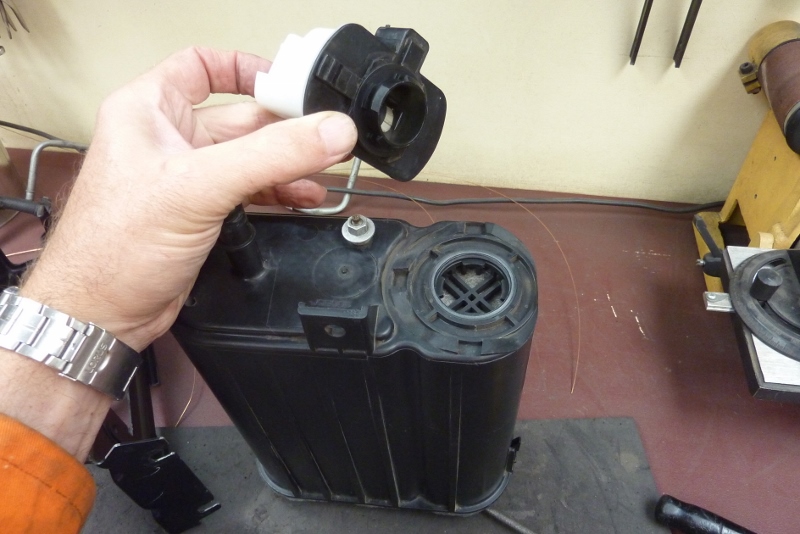
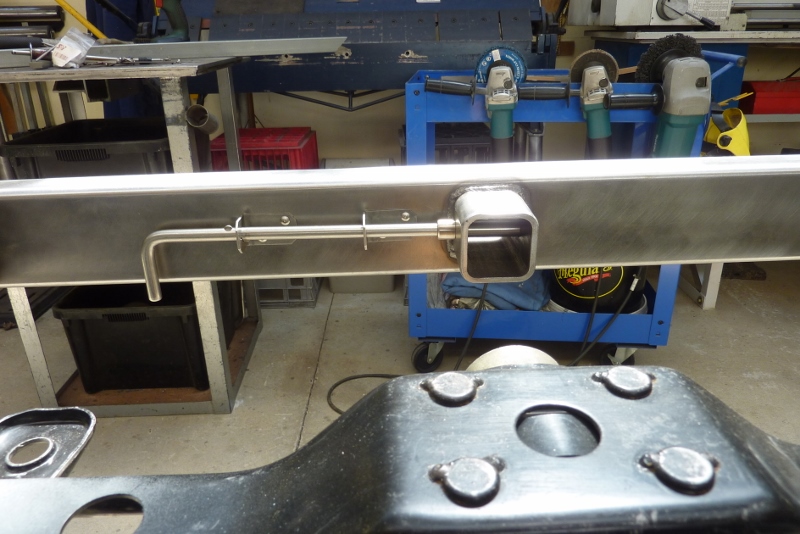
I also came up with a way to connect my Jeep jack handle to the tyre winch. I made this adapter that fits the winch end.


The adapter then just slots into the jack handle shaft.


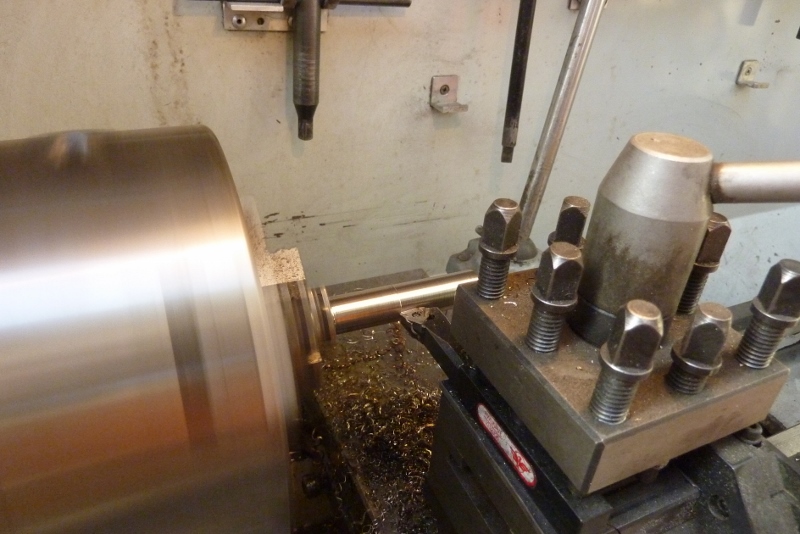
Now a bit of time on the lathe for the next part. This is 304 solid stainless bar.


The machined part is the new hitch pin. I am making a extended hitch pin from a 304 stainless steel gate drop bolt.


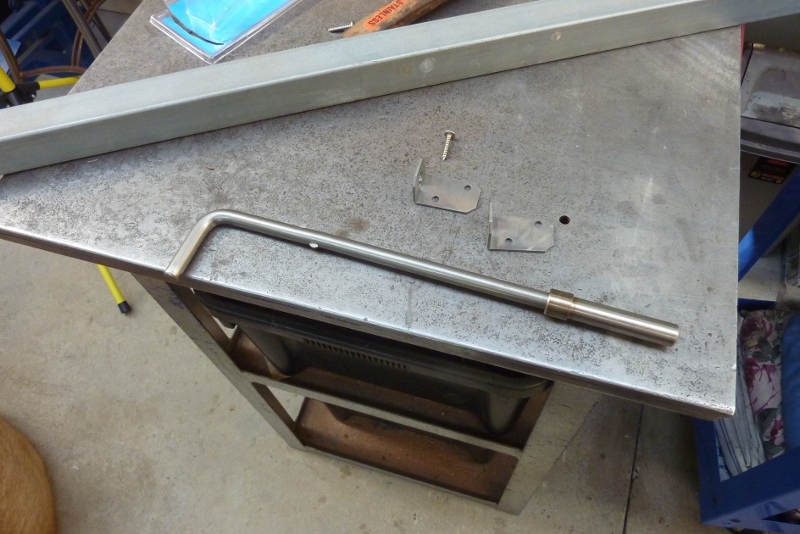
I bored the end of the hitch pin collar an interference fit so I could press it onto the drop bolt.


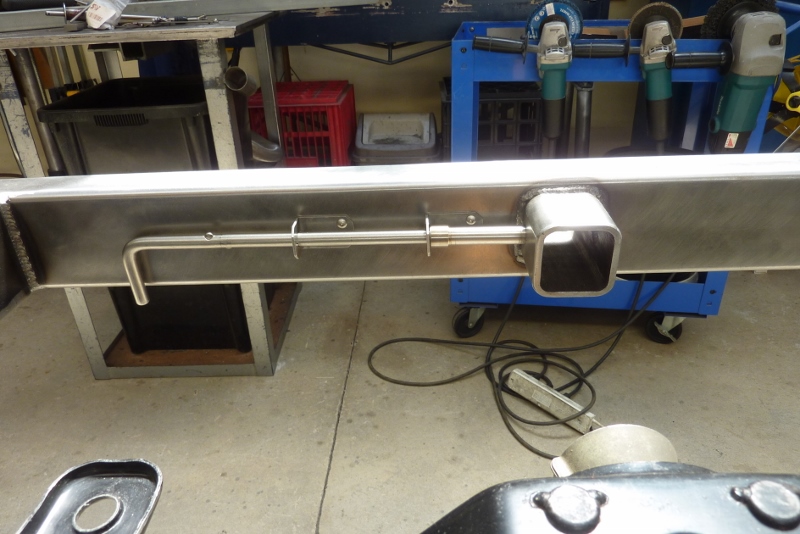
The drop bolt has tangs normally for holding the bolt up when you swing open your gates. Well I have made it so it locks the pin into the closed position. The tang has to pass through a slot in the bolt support with the handle horizontal and then it locks tightly once the handle is down.


To slide the pin out you just twist the handle up and side it back. The pin collar acts as a stop against one of the bolt supports so it cannot be pulled out too far. Simple but effective.


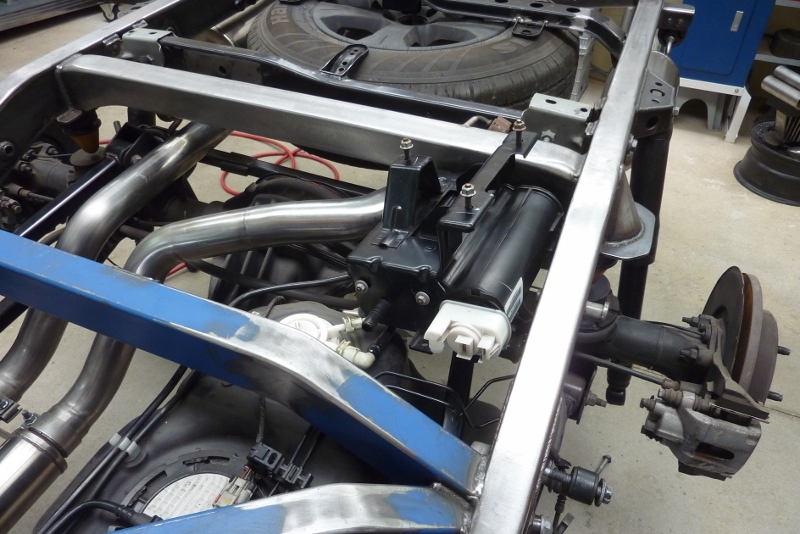
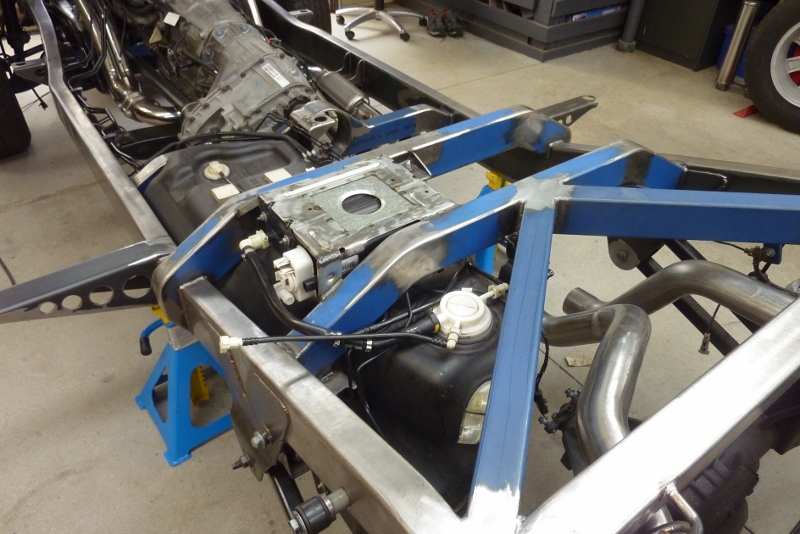
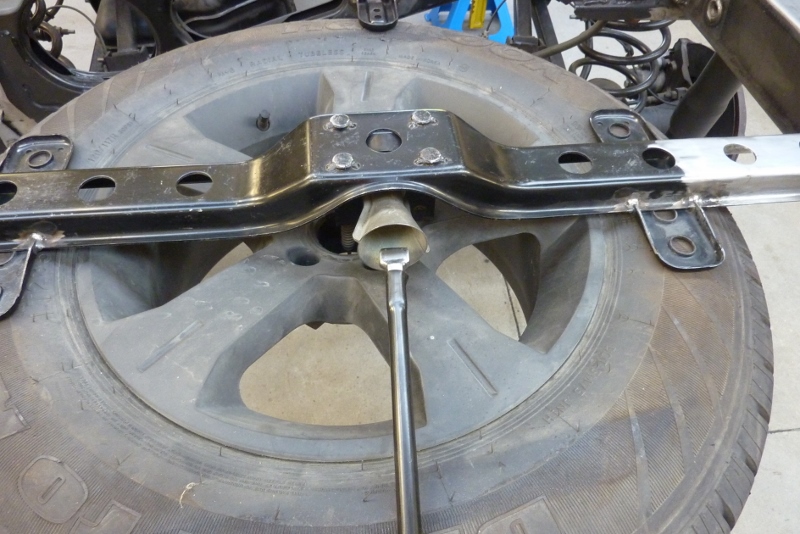
The jack shaft rests nicely on the hitch pin too when winching the tyre up and down. You can see now it would have been hard to access the hitch pin if it had not been extended off to the side.


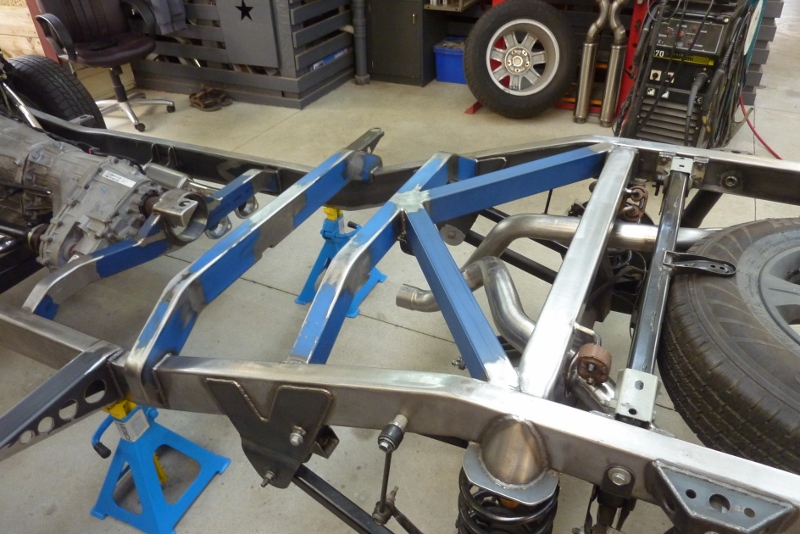
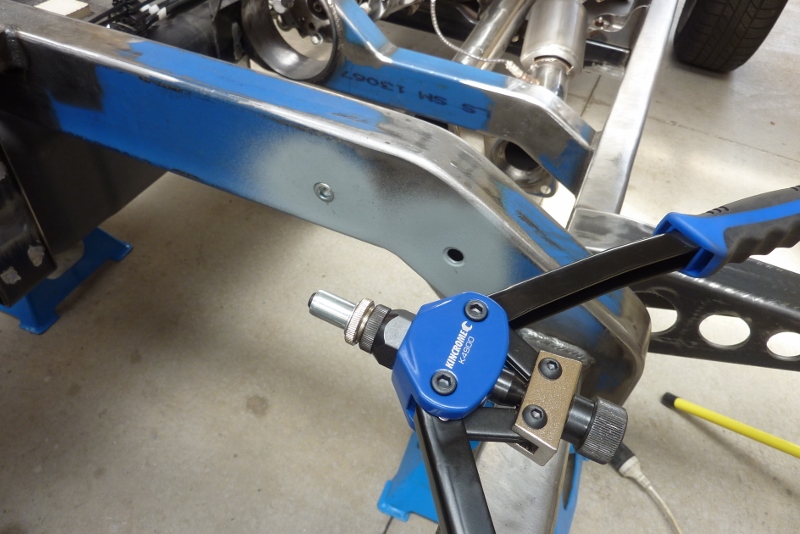
I noticed some flex in the winch cross member so have reinforced it.
__________________
Cheers, Marcus.

My web site:
http://willyshotrod.com Over 5'000 Club
Likes: (4)
  #1553  
Old 03-11-2019
bodgie's Avatar
bodgie  bodgie is offline
Rock Munki
 
Join Date: Aug 2009
Location: Castle Hill, NSW
Posts: 2,136
What Jeep do I drive?: WG
Likes: 11
Liked 300 Times in 245 Posts
Default

You've got to love steel, it lets you do this easily.

One YouTuber (SVSeeker) likes to say it's done right, becuase we've done it twice. It's been interesting to see how this project evolves, just shows you'll never get it right from the begining.
  #1554  
Old 04-11-2019
Gojeep's Avatar
Gojeep  Gojeep is offline
LokRinger
 
Join Date: Jul 2002
Location: Victoria
Posts: 6,870
Likes: 789
Liked 1,754 Times in 556 Posts
Default

Quote:
Originally Posted by bodgie View Post
You've got to love steel, it lets you do this easily.

One YouTuber (SVSeeker) likes to say it's done right, becuase we've done it twice. It's been interesting to see how this project evolves, just shows you'll never get it right from the begining.
Skills and ideas develop over time like this build has shown. There are always things you later you think you can do differently or better. Some you live with and others you need to change.

Video update.
__________________
Cheers, Marcus.

My web site:
http://willyshotrod.com Over 5'000 Club
Likes: (4)
Post New Thread  Reply


Posting Rules
You may not post new threads
You may not post replies
You may not post attachments
You may not edit your posts

BB code is On
Smilies are On
[IMG] code is On
HTML code is On


All times are GMT +10. The time now is 03:59 PM.


Advertisements


AJOR does not vouch for or warrant the accuracy, completeness or usefulness of any message, and are not responsible for the contents of any message. The messages express the views of the author of the message, not necessarily the views of AJOR or any entity associated with AJOR, nor should any advice be substituted as technical advice replacing that of a mechanic. You agree, through your use of this service, that you will not use AJOR to post any material which is knowingly false and/or defamatory, inaccurate, abusive, vulgar, hateful, harassing, obscene, profane, sexually oriented, threatening, invasive of a person's privacy, religious, political or otherwise violative of any law. You agree not to post any copyrighted material unless the copyright is owned by you or by AJOR. The owner, administrators and moderators of AJOR reserve the right to delete any message or members for any or no reason whatsoever. You remain solely responsible for the content of your messages, and you agree to indemnify and hold harmless AJOR, the administrators, moderators, and their agents with respect to any claim based upon transmission of your message(s). The use of profile signatures to intentionally mislead or misdirect any member on this forum is not acceptable and may result in your account being suspended. Any trip that is organised through the AJOR forum is participated at your own risk. If you or your vehicle is damaged it is your responsibility, not that of the person that posted the thread, message or topic initiating the trip, nor the organisers of AJOR or moderators of any specific forum. This forum and associated website is the property of AJOR. No user data is harvested and no information supplied in your registration will be sold for profit.


Powered by vBulletin® Version 3.8.7
Copyright ©2000 - 2024, vBulletin Solutions, Inc.

AJOR © 2002 - 2024 AUSJEEPOFFROAD.COM. All corporate trademarked names and logos are property of their respective owners. Ausjeepoffroad is in no way associated with DaimlerChrysler Corporation or Fiat Jeep.
www.ausjeep.com www.ausjeep.com.au www.midlifemate.com ausjeepforum.com www.r9kustoms.com
vB Ad Management by =RedTyger=