Grand Willys Project - Page 149 - AUSJEEPOFFROAD.COM Jeep News Australia and New Zealand

Go Back   AUSJEEPOFFROAD.COM Jeep News Australia and New Zealand > JEEP GARAGE > Jeep build up
Register Forums Trading Your Jeep My Garage Mark All Read

Post New Thread  Reply
 
Thread Tools Search this Thread
  #1037  
Old 03-02-2015
JeepCJ's Avatar
JeepCJ  JeepCJ is offline
CrawlerStar
 
Join Date: Dec 2014
Posts: 292
What Jeep do I drive?: CJ
Likes: 215
Liked 94 Times in 69 Posts
Default

Hey Marcus,
Something that's not emphasized in your build is the amount of research and planning that's gone into it and sure shows........ tho over coming problems that pop up is always the fun part of every build

keep the updates coming

AL
__________________
cheers, AL


BIGGER IS ONLY BIGGER
the nut's behind the wheel make all the difference
Likes: (2)

Last edited by JeepCJ; 08-02-2015 at 07:50 AM.
  #1038  
Old 07-02-2015
Gojeep's Avatar
Gojeep  Gojeep is offline
LokRinger
 
Join Date: Jul 2002
Location: Victoria
Posts: 6,870
Likes: 789
Liked 1,754 Times in 556 Posts
Default


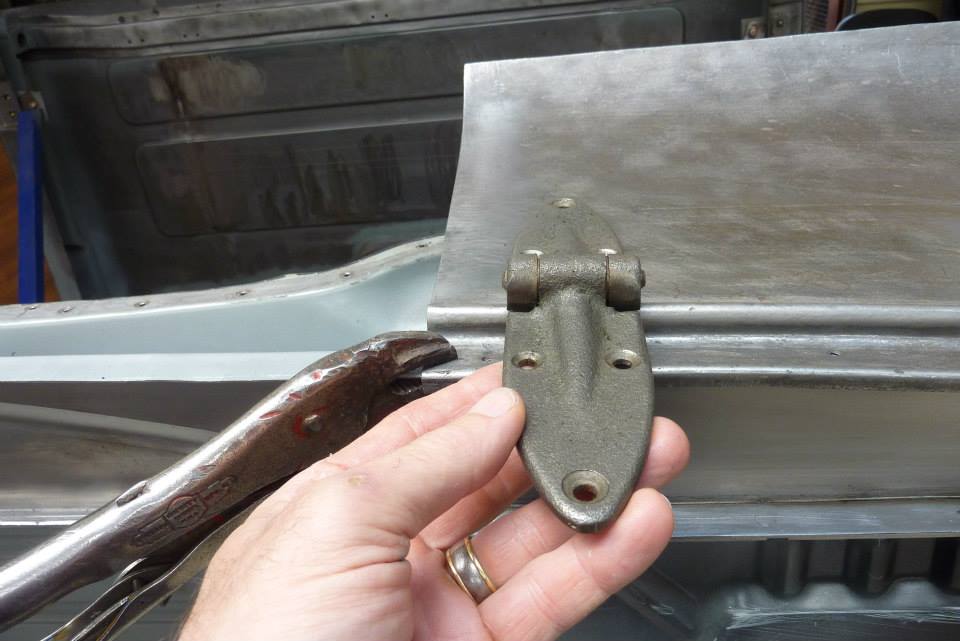
Before welding the cowl back together, I want to do anything that needs to be done while it is easier in pieces. One thing is to make these early Landcruiser cast bonnet hinges fit the cowl.


They need to be level left to right across the cowl so that don't bind. So have to come up with a way to do that and still look factory.


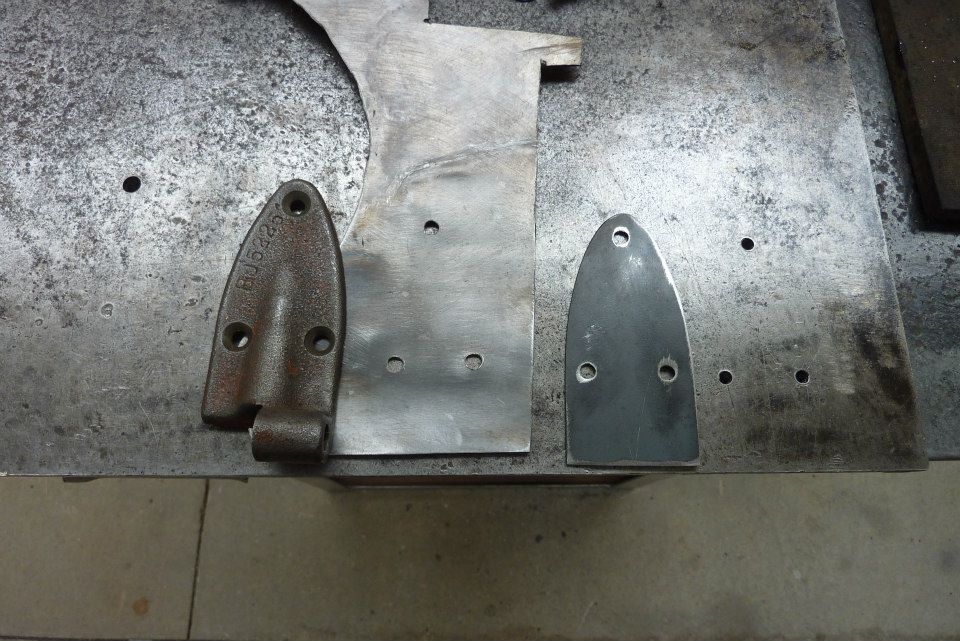
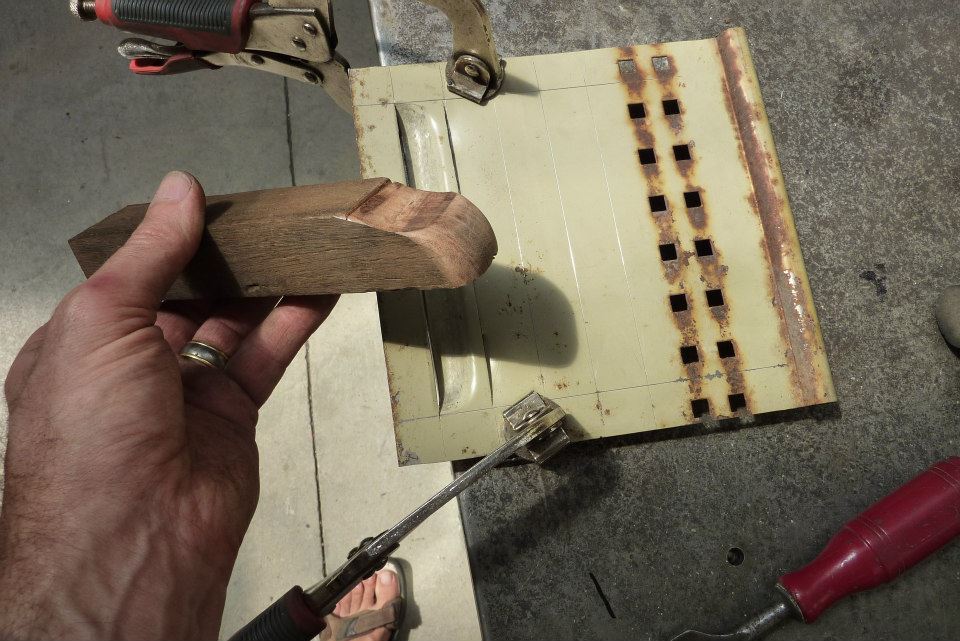
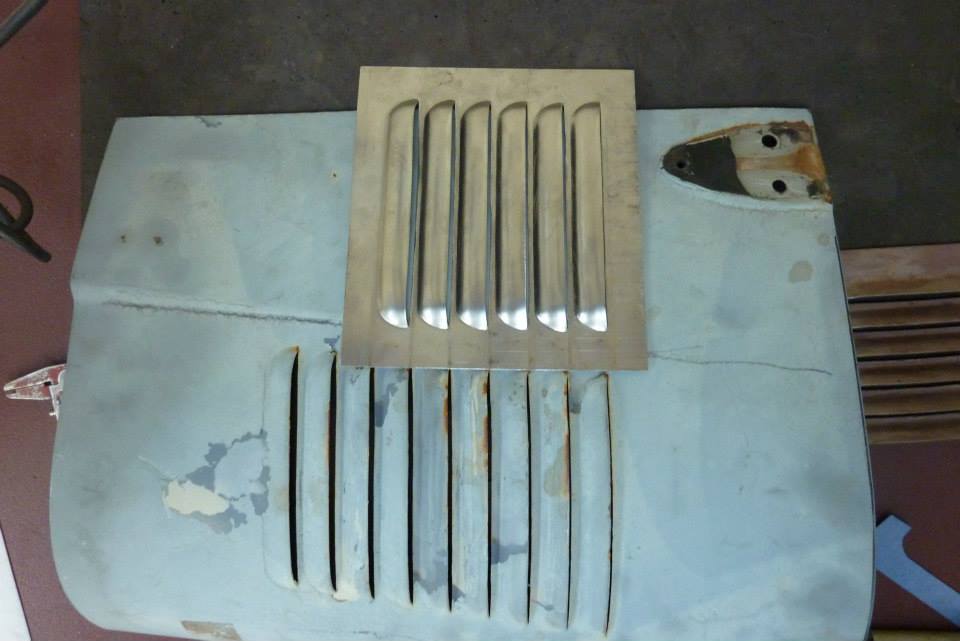
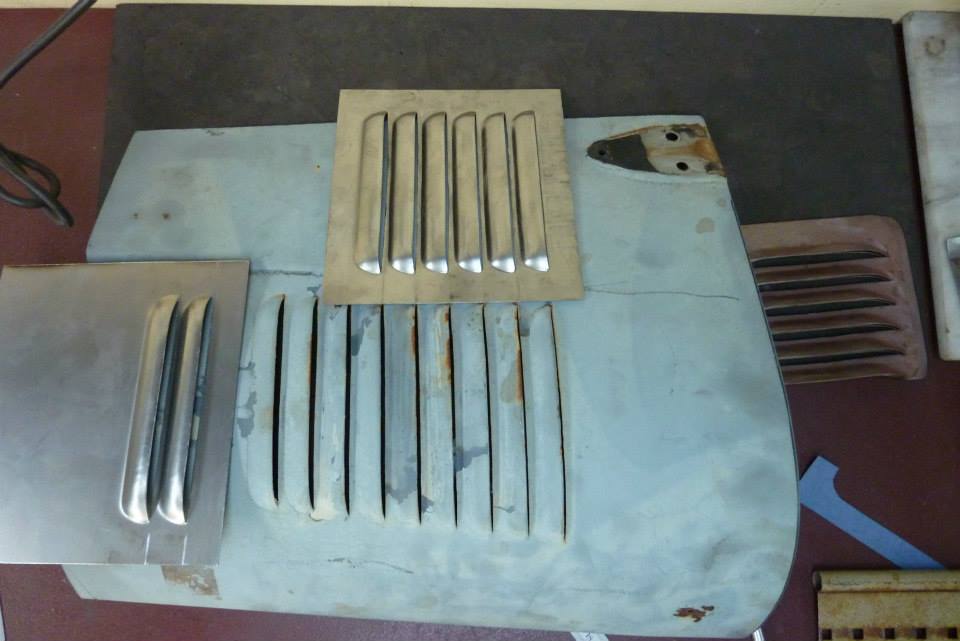
I have a piece of cowl from a Landcruiser that shows how they did it. I was originally going to cut these into the Willys cowl and call it done. But only one was usable due to the rust on the other one on the underside.


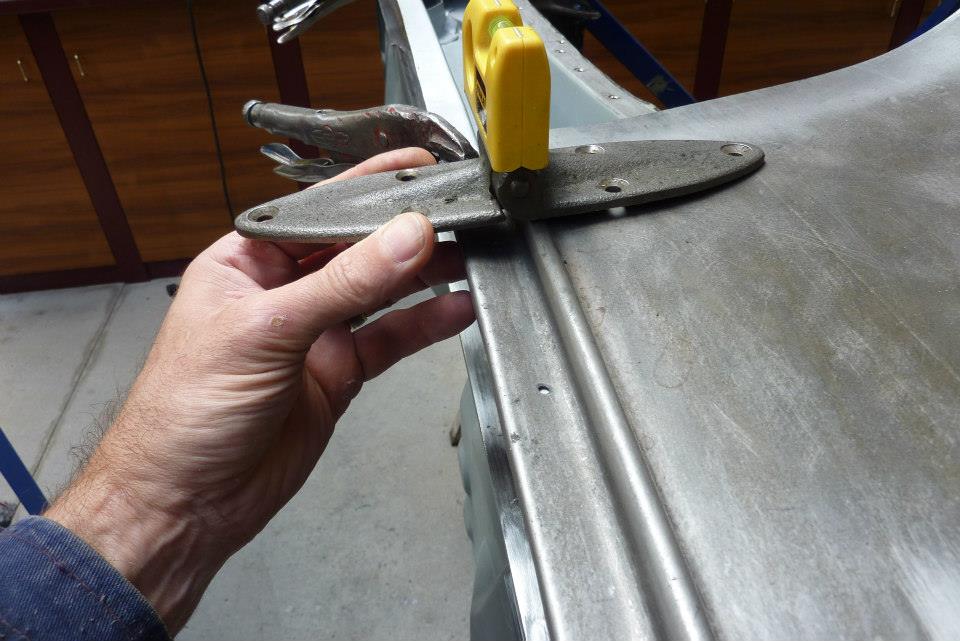
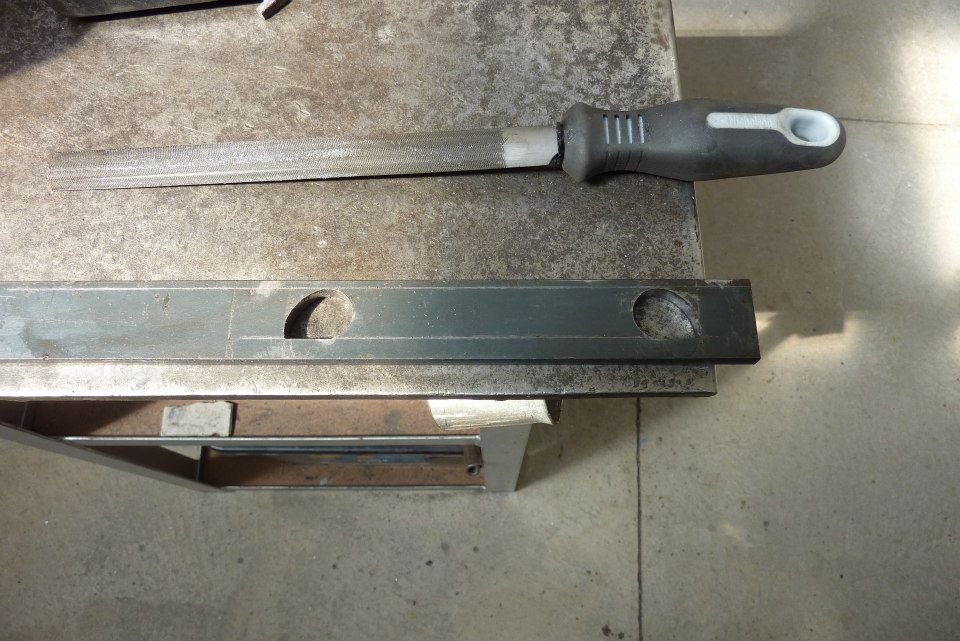
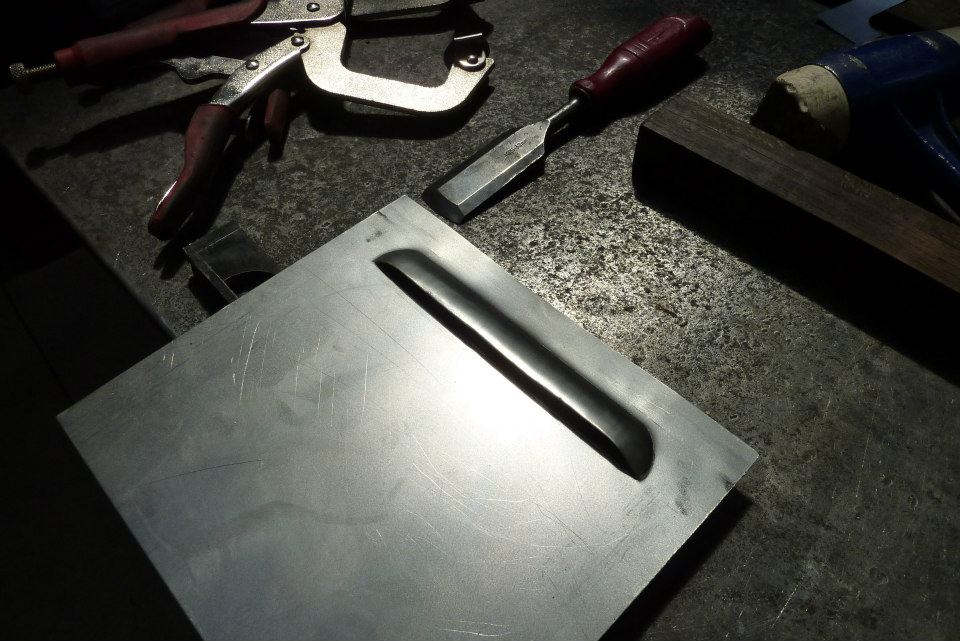
First thing I did was grind down some plate with a 9" grinder to the angle I needed.


Cut the plate out the same shape as the hinge and checked to see it it leveled it.


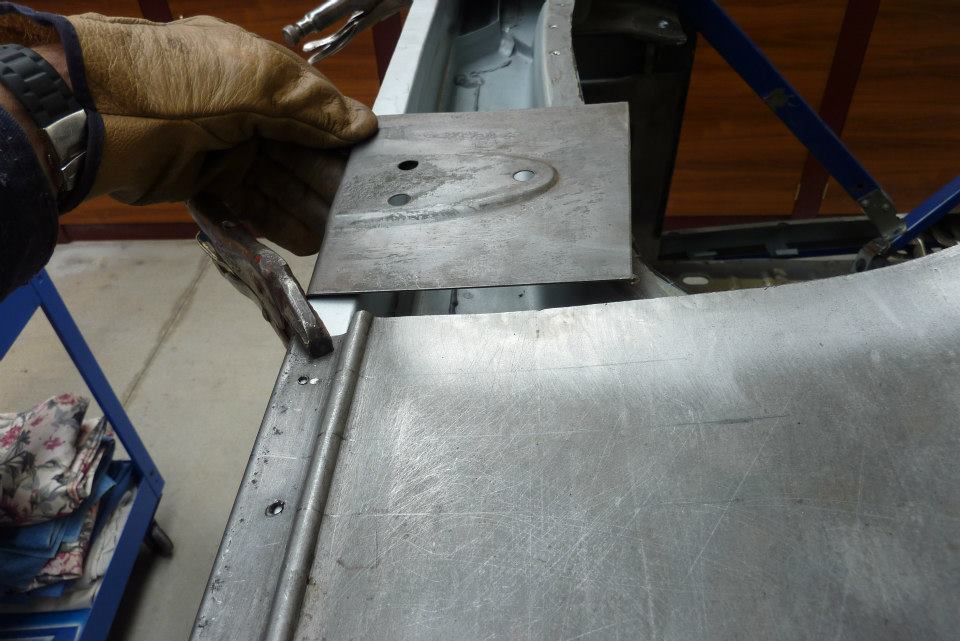
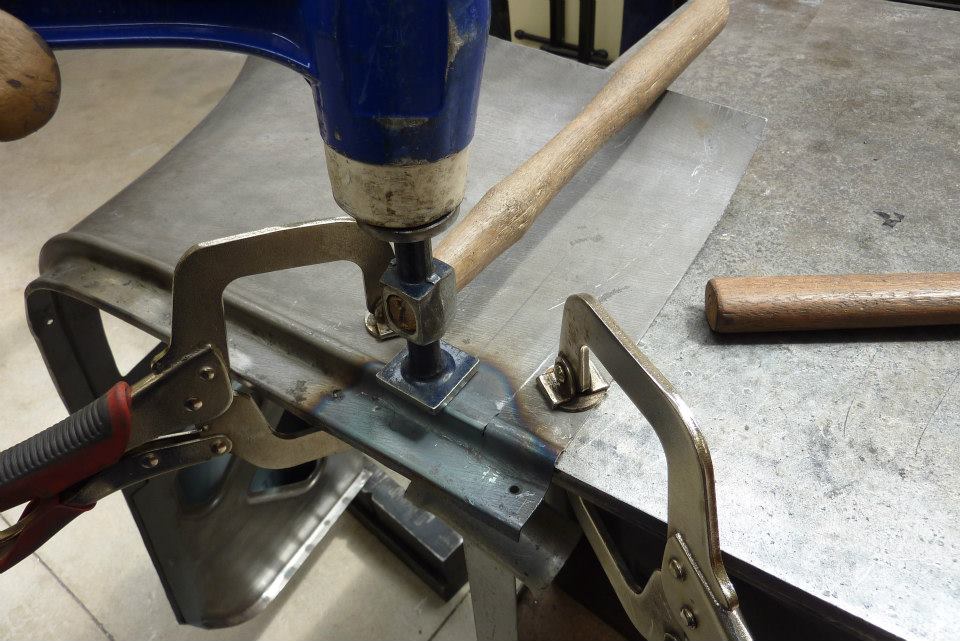
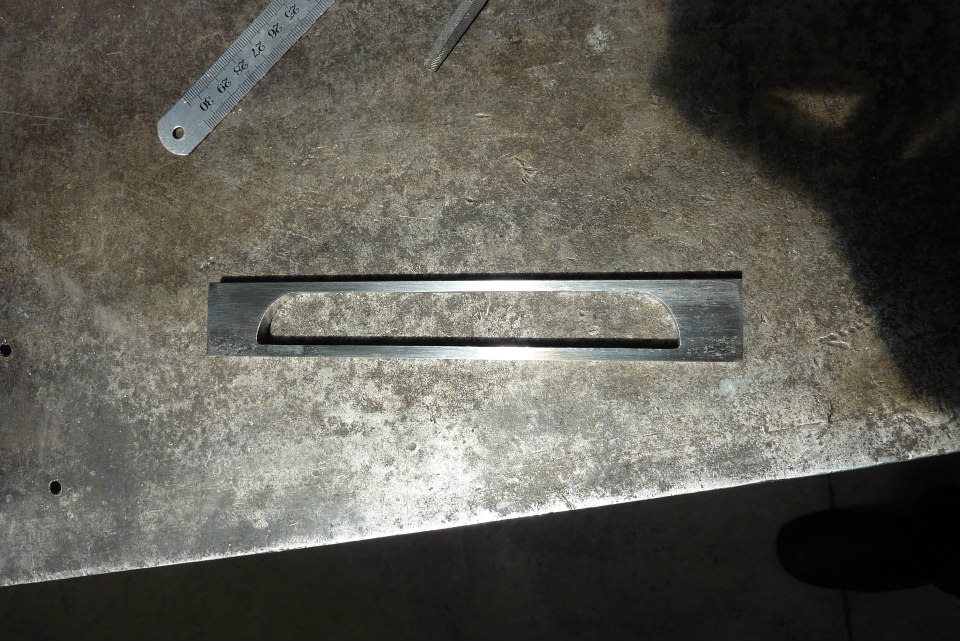
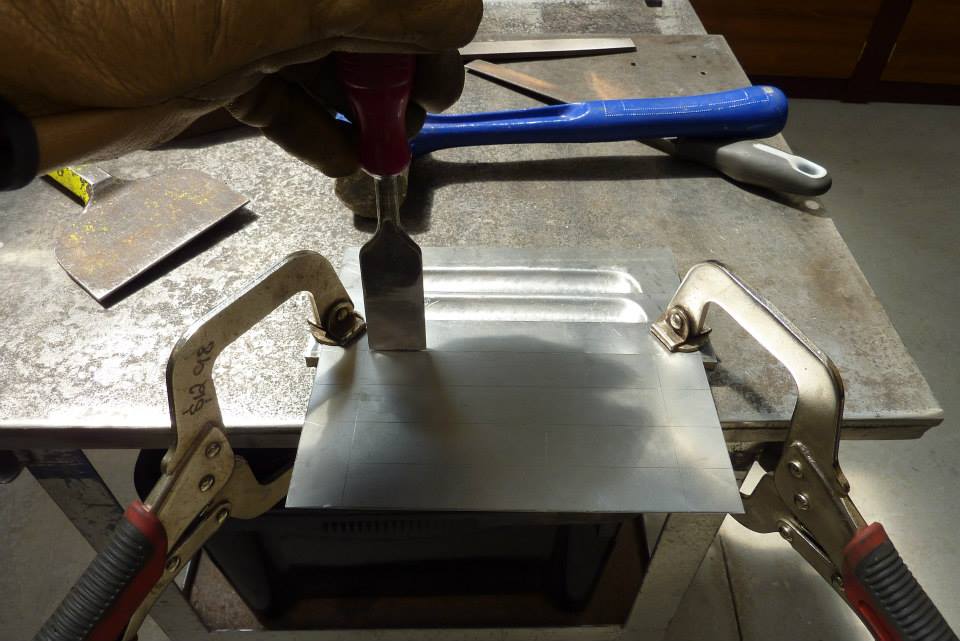
Then did a test on some scrap the same thickness to see if my idea would work. I drilled and tapped the bench to the hinge hole pattern. I will place over that the angled piece of plate followed by the scrap test piece and then bolt the hinge piece over it to keep it all in place.


Can just see the angled piece underneath with it all together.


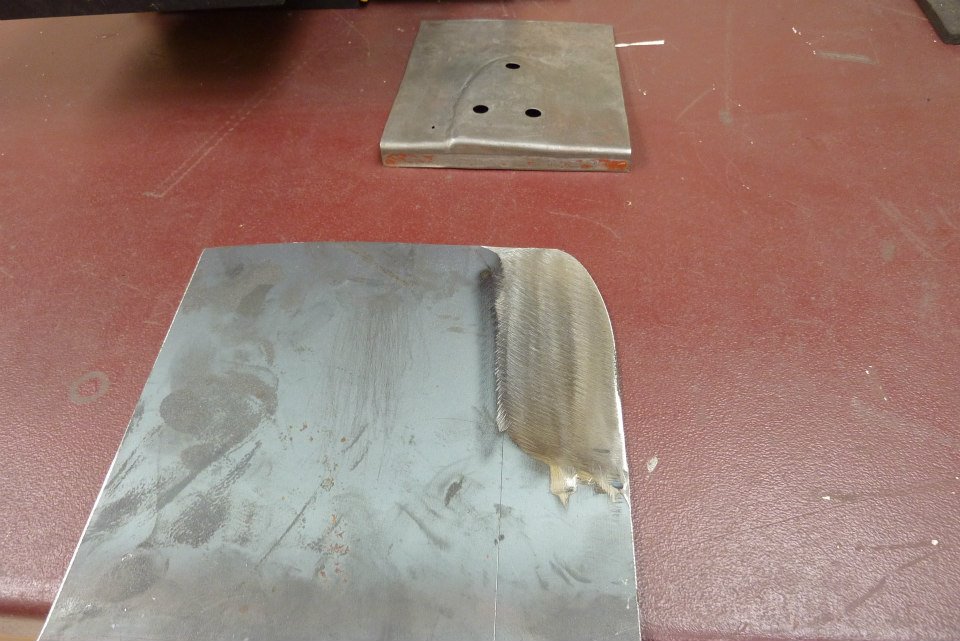
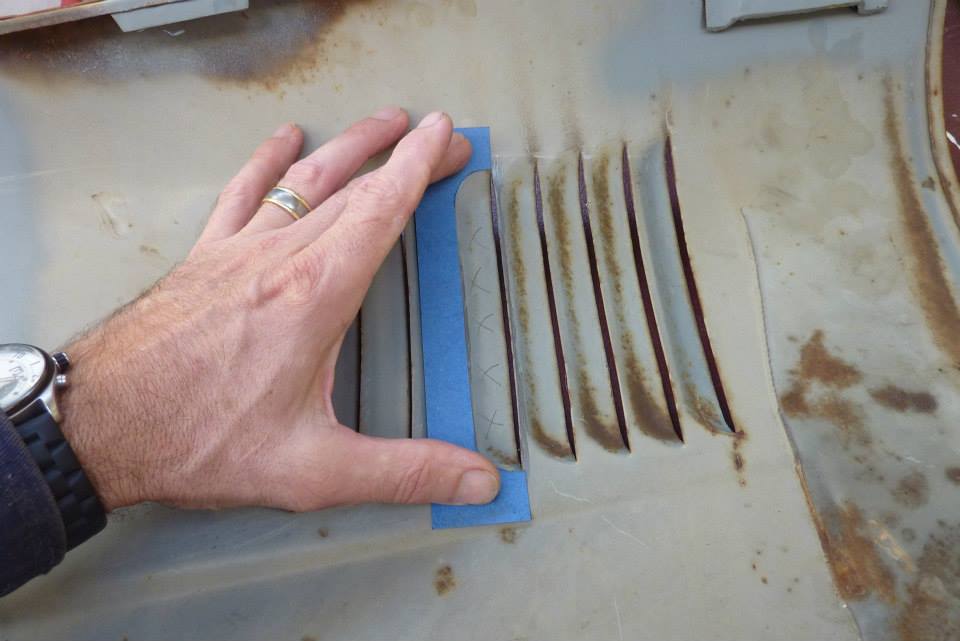
Then hammered down around the edge using a chasing tool like I practised on the grille headlight holes I did while camping.


Looks like it could work.


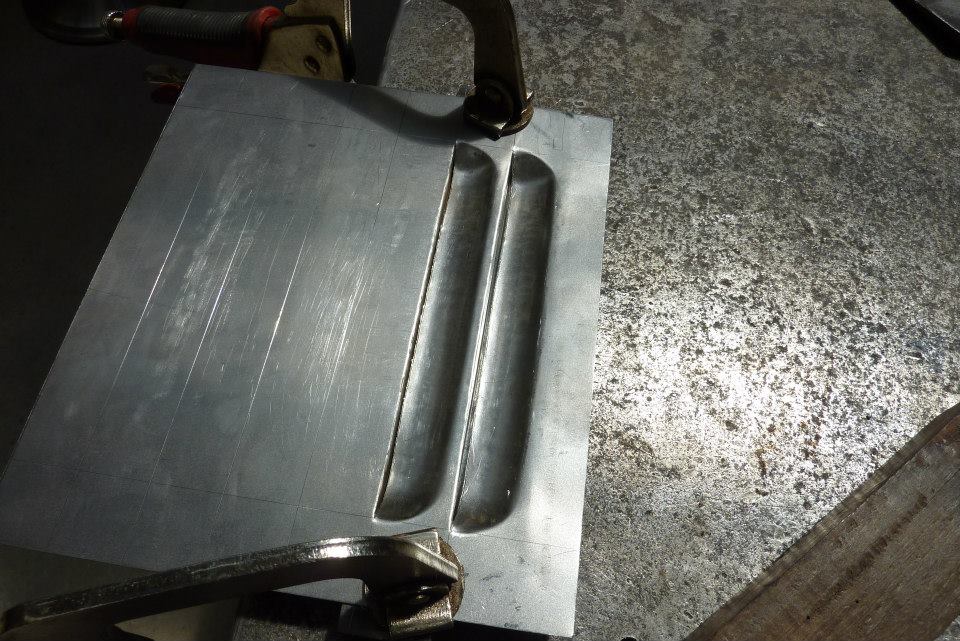
I have made the piece less rounded than the original Landcrusier pressing in the foreground as wanted it closer in shape to the base of the hinge.


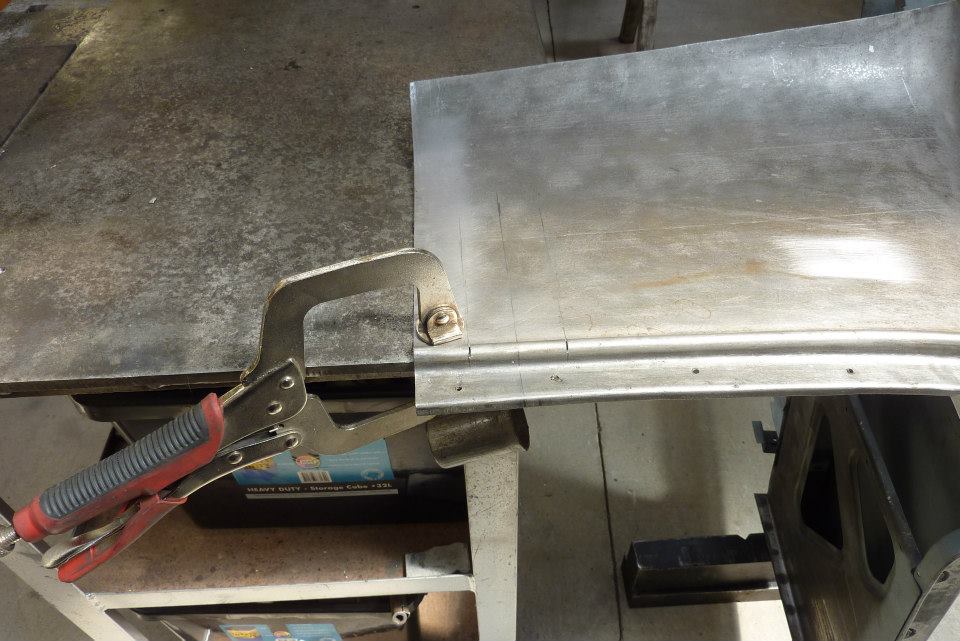
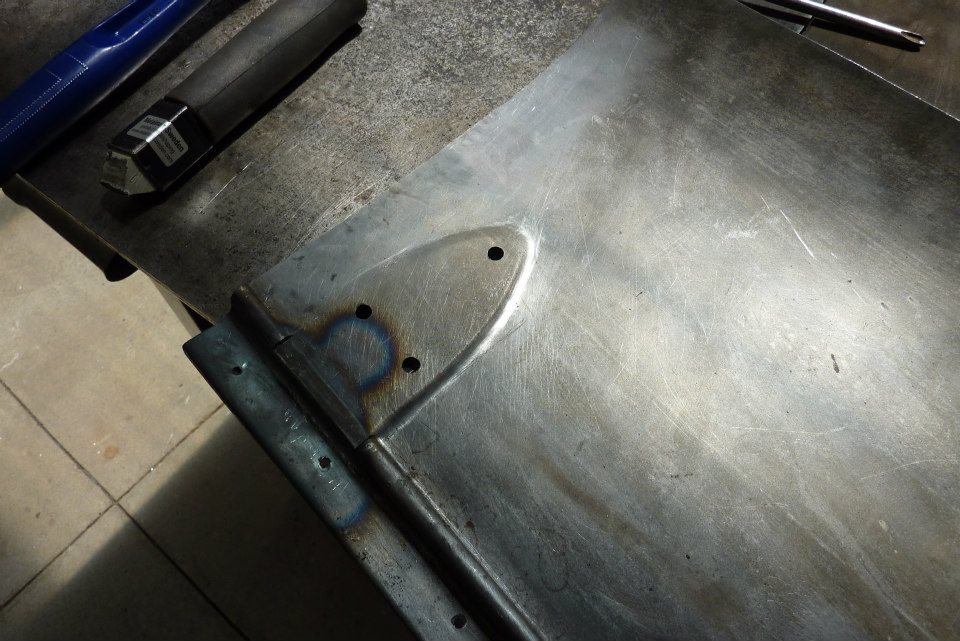
So now to try it on the Willys cowl. I first had to flatten out the bead so I could screw down the hinge flat. I decided to cut a slot with a hacksaw so the bead each side would not be pulled down in the process where I didn't want it.


I heated it with a torch as I wanted it to shrink at the same time. When getting closer to the edge to save risking a miss hit, I hit down on my hammer like this to get right into the corner.


Assembled with the angled form underneath and screwed it all down to the bench.


A few minutes later, hey presto!


Ready to see if the angle is right.


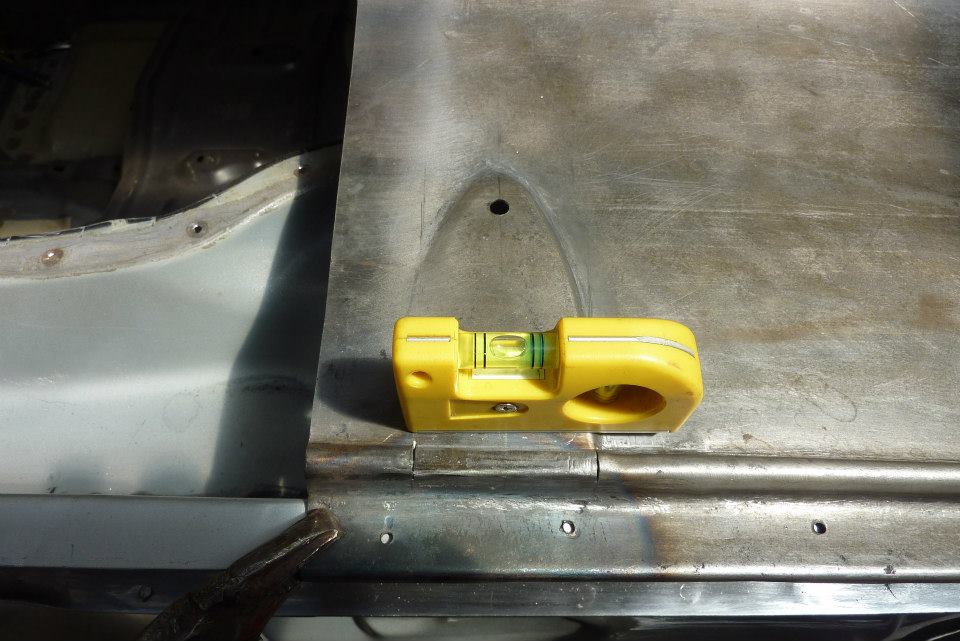
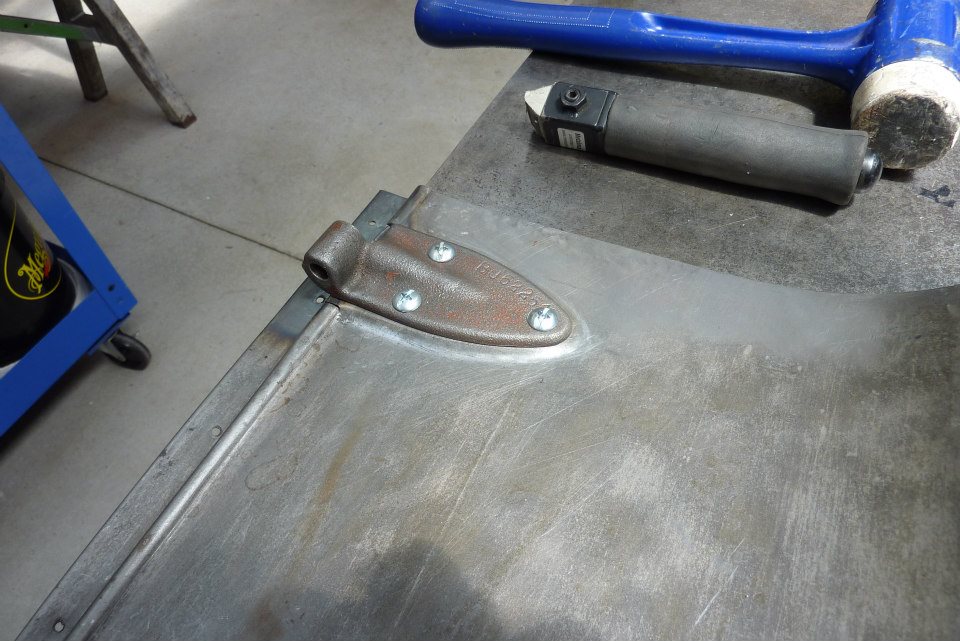
Clamped back down to the firewall and looks to have worked.


Forgot to take a photo of this bit on the other side, but this worked well to get the corner done.


Other one finished.


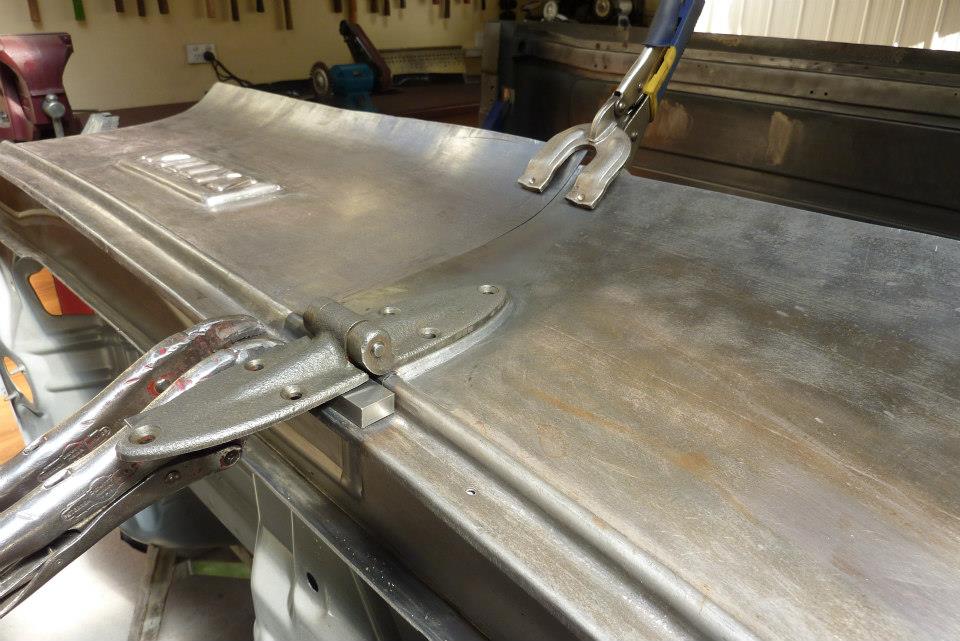
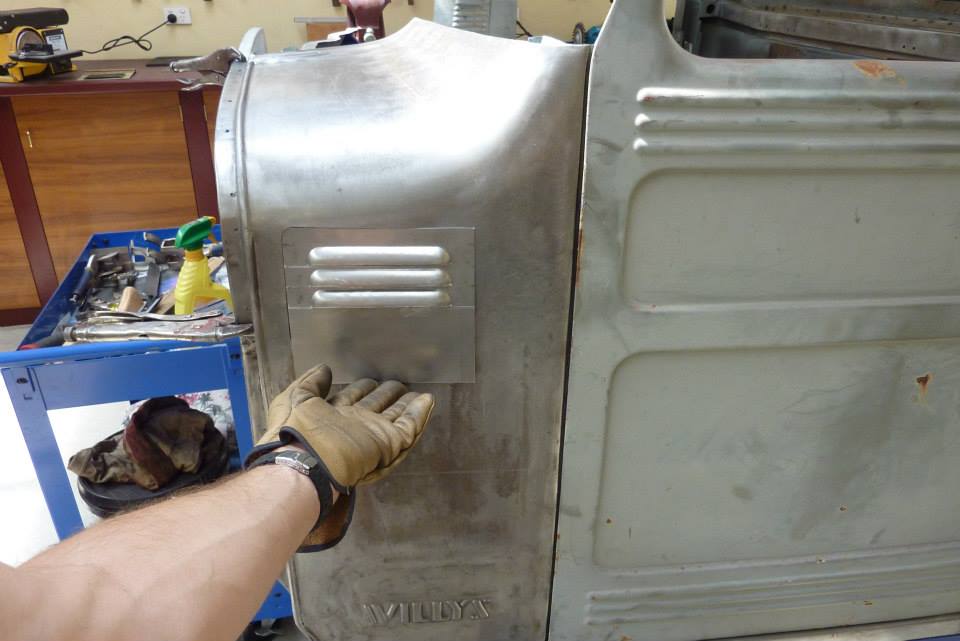
With the Willys stamping raised up as well, think it fits in with the utilitarian look I'm going for.


Noticed that it has pulled down a bit though behind the hinge pressing. Will have to address that.


I placed a piece of rubber on the bench and then flipped the cowl upside down and hammed lightly around the edge of the pressing. I used the rubber as didn't want any stretching while flattening out the edge of the pressing. This brought the dip back out.


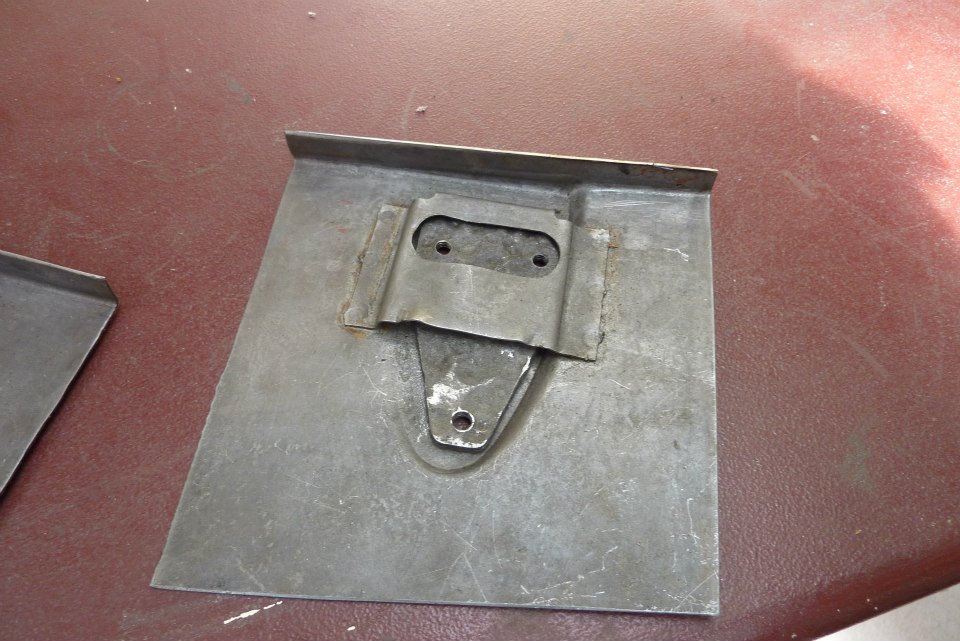
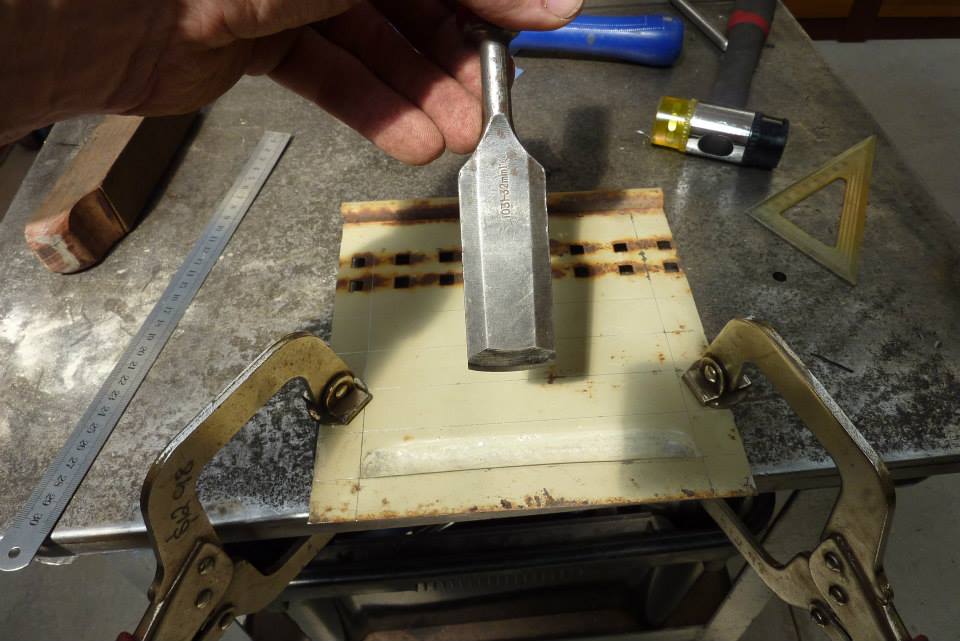
The Landcruiser thread plate floats underneath to give some adjustment. Was badly rusted so will make new ones.


I cut the same metric threads as original so can buy the matching screws to suit the hinges. The area and plate was coated in zinc before assembly and again after plug welding the piece that holds it in place.
__________________
Cheers, Marcus.

My web site:
http://willyshotrod.com Over 5'000 Club
Likes: (7)

Last edited by Gojeep; 02-08-2017 at 08:41 PM.
  #1039  
Old 08-02-2015
bruggz351's Avatar
bruggz351  bruggz351 is offline
DetroitDemon
 
Join Date: Jun 2009
Location: Casino
Posts: 4,801
What Jeep do I drive?: XJ
Likes: 5,510
Liked 1,325 Times in 717 Posts
Default

Haha. Marcus, all I can say mate is, thanks for another update.

I'm waiting for the next one already... Haha.

Cheers

Sent from my FRED.
__________________
Likes: (1)
  #1040  
Old 10-02-2015
driftdave's Avatar
driftdave  driftdave is offline
CrawlerStar
 
Join Date: Dec 2004
Location: Emu Plains
Posts: 342
What Jeep do I drive?: WH
Likes: 9
Liked 17 Times in 12 Posts
Default

Well done, that looks bloody awesome
  #1041  
Old 14-02-2015
Gojeep's Avatar
Gojeep  Gojeep is offline
LokRinger
 
Join Date: Jul 2002
Location: Victoria
Posts: 6,870
Likes: 789
Liked 1,754 Times in 556 Posts
Default


Well after the success of repairing the other set of bonnet louvers, thought I would try making some from scratch for the side of the cowl that better matched than the ones from the FJ45.


Transferred the shape of the louver to some 8 mm/ 5/16" flat I had. Used a holesaw to get a start and then nibbled away at it with a jigsaw and then a file.


This is a little thicker than the height of the louvers, but would allow for some spring back. The middle part was cut out just using a angle grinder.


Tig welded it onto more of the same flat to get a good base to it and stop the sides from spreading. Filled it with oil to cool as might add a little hardness to it without getting brittle like a water quench.


Using a great tip from Per, MetalMan Sweden, I used a wood chisel sharpened with a curve to the end to cut the metal.
Could also drill a small hole at each end and use a thin cutting disc, but leaves a bigger hole not covered by the louver.


Used a bit of very hard red gum to shape into a forming tool. It is important that it is the full width of the louver.


First louver done on new metal.


I made sure the thickness each side of the lower form I cut out matched the spacing between the louvers of the bonnet ones.


I found starting in the corners and lots of small taps to just cut through the metal and no further worked best for me. I scribed lines to follow where to cut and made sure the metal didn't move on the form. You need to hit down right on the very edge for it to work.


Halfway there. Quite like just the three as would match the ribbing, but have done the calculations and not enough area to match the intake of the A/C unit.


I kept the form straight to get consistent shape. The corners need to be a bit ahead of the rest and use plenty of light taps with the mallet working back and forth like a reciprocating machine.


Matches the shape of the template pretty well.


One thing that did show up when I did this one starting from the top, when forming the next louver, it tended to pull the bottom of the louver above it into the form.


I have just started the second one and doing it the other way and stays straight and flatter as have more metal above it.


Seems to be matching quite well so think they are will be good enough to use. I will redo the first one though to get it to stay in better shape.


The bonnet ones taper in length which is not needed for the cowl sides. So took the length of the middle one which was 152 mm/6", to make the new ones. That is an inch longer than the original side ones from the Landcruiser.
__________________
Cheers, Marcus.

My web site:
http://willyshotrod.com Over 5'000 Club
Likes: (4)

Last edited by Gojeep; 02-08-2017 at 08:53 PM.
  #1042  
Old 14-02-2015
cruiserfied's Avatar
cruiserfied  cruiserfied is offline
Full Flexer
 
Join Date: Jun 2012
Location: Coffs Harbour
Posts: 997
What Jeep do I drive?: XJ
Likes: 249
Liked 220 Times in 136 Posts
Check out my Ride(s)
Default

Another fabrication masterpiece.
__________________
96 XJ Limited "Jethro"
4" hybrid lift
32" KM2's
Likes: (1)
  #1043  
Old 15-02-2015
bruggz351's Avatar
bruggz351  bruggz351 is offline
DetroitDemon
 
Join Date: Jun 2009
Location: Casino
Posts: 4,801
What Jeep do I drive?: XJ
Likes: 5,510
Liked 1,325 Times in 717 Posts
Default


HA. You never cease to bloody amaze me man...

Superlative.
__________________
Post New Thread  Reply


Posting Rules
You may not post new threads
You may not post replies
You may not post attachments
You may not edit your posts

BB code is On
Smilies are On
[IMG] code is On
HTML code is On


All times are GMT +10. The time now is 02:47 PM.


Advertisements


AJOR does not vouch for or warrant the accuracy, completeness or usefulness of any message, and are not responsible for the contents of any message. The messages express the views of the author of the message, not necessarily the views of AJOR or any entity associated with AJOR, nor should any advice be substituted as technical advice replacing that of a mechanic. You agree, through your use of this service, that you will not use AJOR to post any material which is knowingly false and/or defamatory, inaccurate, abusive, vulgar, hateful, harassing, obscene, profane, sexually oriented, threatening, invasive of a person's privacy, religious, political or otherwise violative of any law. You agree not to post any copyrighted material unless the copyright is owned by you or by AJOR. The owner, administrators and moderators of AJOR reserve the right to delete any message or members for any or no reason whatsoever. You remain solely responsible for the content of your messages, and you agree to indemnify and hold harmless AJOR, the administrators, moderators, and their agents with respect to any claim based upon transmission of your message(s). The use of profile signatures to intentionally mislead or misdirect any member on this forum is not acceptable and may result in your account being suspended. Any trip that is organised through the AJOR forum is participated at your own risk. If you or your vehicle is damaged it is your responsibility, not that of the person that posted the thread, message or topic initiating the trip, nor the organisers of AJOR or moderators of any specific forum. This forum and associated website is the property of AJOR. No user data is harvested and no information supplied in your registration will be sold for profit.


Powered by vBulletin® Version 3.8.7
Copyright ©2000 - 2024, vBulletin Solutions, Inc.

AJOR © 2002 - 2024 AUSJEEPOFFROAD.COM. All corporate trademarked names and logos are property of their respective owners. Ausjeepoffroad is in no way associated with DaimlerChrysler Corporation or Fiat Jeep.
www.ausjeep.com www.ausjeep.com.au www.midlifemate.com ausjeepforum.com www.r9kustoms.com
vB Ad Management by =RedTyger=