Grand Willys Project - Page 270 - AUSJEEPOFFROAD.COM Jeep News Australia and New Zealand

Go Back   AUSJEEPOFFROAD.COM Jeep News Australia and New Zealand > JEEP GARAGE > Jeep build up
Register Forums Trading Your Jeep My Garage Mark All Read

Post New Thread  Reply
 
Thread Tools Search this Thread
  #1884  
Old 17-10-2021
CJ6np435's Avatar
CJ6np435  CJ6np435 is offline
Lowranger Shocker
 
Join Date: Oct 2003
Location: Hobart TAS
Age: 62
Posts: 1,679
What Jeep do I drive?: CJ
Likes: 41
Liked 133 Times in 100 Posts
Default

the shape you are conjuring up under the roof is totally amazing! totally blowing me away every time, sensational!
__________________
Not another V8!
Likes: (1)
  #1885  
Old 18-10-2021
Gojeep's Avatar
Gojeep  Gojeep is offline
LokRinger
 
Join Date: Jul 2002
Location: Victoria
Posts: 6,870
Likes: 789
Liked 1,754 Times in 556 Posts
Default

Quote:
Originally Posted by CJ6np435 View Post
the shape you are conjuring up under the roof is totally amazing! totally blowing me away every time, sensational!
Thank you so much.
__________________
Cheers, Marcus.

My web site:
http://willyshotrod.com Over 5'000 Club
  #1886  
Old 24-10-2021
Gojeep's Avatar
Gojeep  Gojeep is offline
LokRinger
 
Join Date: Jul 2002
Location: Victoria
Posts: 6,870
Likes: 789
Liked 1,754 Times in 556 Posts
Default


Starting on the rear part of the headliner with more tuck shrinking. This time I had the tucks to the outside and found it a bit easier to crush them down as I had a male form to do it over.


As you would expect it is getting quicker to make the compound corners. This meets up with the other half already done on the pieces over the door opening.


Welded the first three pieces together.


Even though the headliner skin will be covered with flat knit foam backed headliner material to match the Grand Cherokee interior, I still take the time to hand planish and wheel it.


Passenger side in place and can see how it flows better but still giving as much headroom over the seat as possible.


Driver side done and even matches!


I have it tucking in behind the rear window frame. Two more pieces left to go. I will leave welding to the console last so I can take the two side pieces out to weld and planish them easier.
__________________
Cheers, Marcus.

My web site:
http://willyshotrod.com Over 5'000 Club
Likes: (3)
  #1887  
Old 07-11-2021
Gojeep's Avatar
Gojeep  Gojeep is offline
LokRinger
 
Join Date: Jul 2002
Location: Victoria
Posts: 6,870
Likes: 789
Liked 1,754 Times in 556 Posts
Default


I needed a bit more than the flat part of the shelf for the last part of the headliner. I started unfolding one side using wide mouthed clamping pliers.


By the time it was rolled over a stake and run through the English wheel, you can't tell where the folds were.


Welded into place.


I have trimmed it and it is now ready to scribe against the console so it can be butt welded into place.


Other side also done ready for welding everything together.
__________________
Cheers, Marcus.

My web site:
http://willyshotrod.com Over 5'000 Club
Likes: (4)
  #1888  
Old 07-11-2021
CJ6np435's Avatar
CJ6np435  CJ6np435 is offline
Lowranger Shocker
 
Join Date: Oct 2003
Location: Hobart TAS
Age: 62
Posts: 1,679
What Jeep do I drive?: CJ
Likes: 41
Liked 133 Times in 100 Posts
Default

Schmick
__________________
Not another V8!
Likes: (1)
  #1889  
Old 13-11-2021
Gojeep's Avatar
Gojeep  Gojeep is offline
LokRinger
 
Join Date: Jul 2002
Location: Victoria
Posts: 6,870
Likes: 789
Liked 1,754 Times in 556 Posts
Default


Just trying out the console insert that is from the donor Grand Cherokee. It has the map lights, sunglass compartment and also holds another module for the CANBUS system.


Gives you an idea of the placements of the sunvisors, grab handles and reverse park display also.

https://youtu.be/WWk5nJ4mIPA
Also a YouTube update.
__________________
Cheers, Marcus.

My web site:
http://willyshotrod.com Over 5'000 Club
Likes: (3)
  #1890  
Old 17-12-2021
Gojeep's Avatar
Gojeep  Gojeep is offline
LokRinger
 
Join Date: Jul 2002
Location: Victoria
Posts: 6,870
Likes: 789
Liked 1,754 Times in 556 Posts
Default


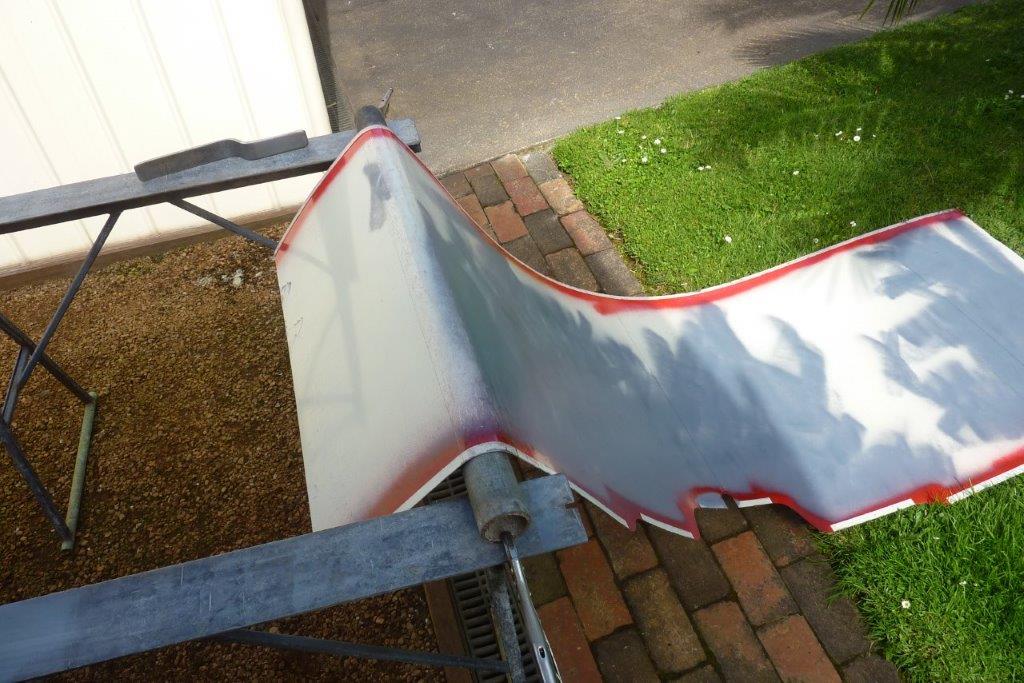
Making the rear wall in one piece. This is also from my office furniture stash and think it was a backing to some steel shelving. Only 0.6mm, (24#), so I folded over all the straight edges to add a little stiffness. Just used sheet metal locking pliers to makes the bends, finished off with flipper and dolly. To roll the corners I pulled it over some pipe but it just made little creases. Must be hot rolled steel. So used the flipper to start smoothing it out and can see the difference in the foreground verses the other end.
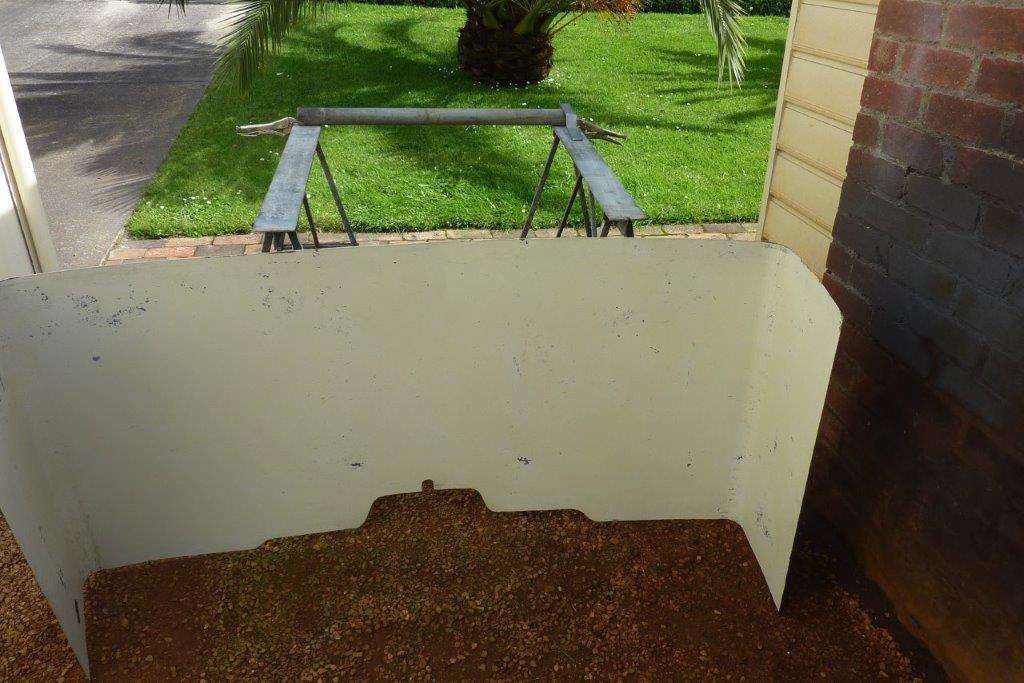

Corners all rolled and ready to trim the sides. They will be cut longer to allow the edge to be folded over as well.
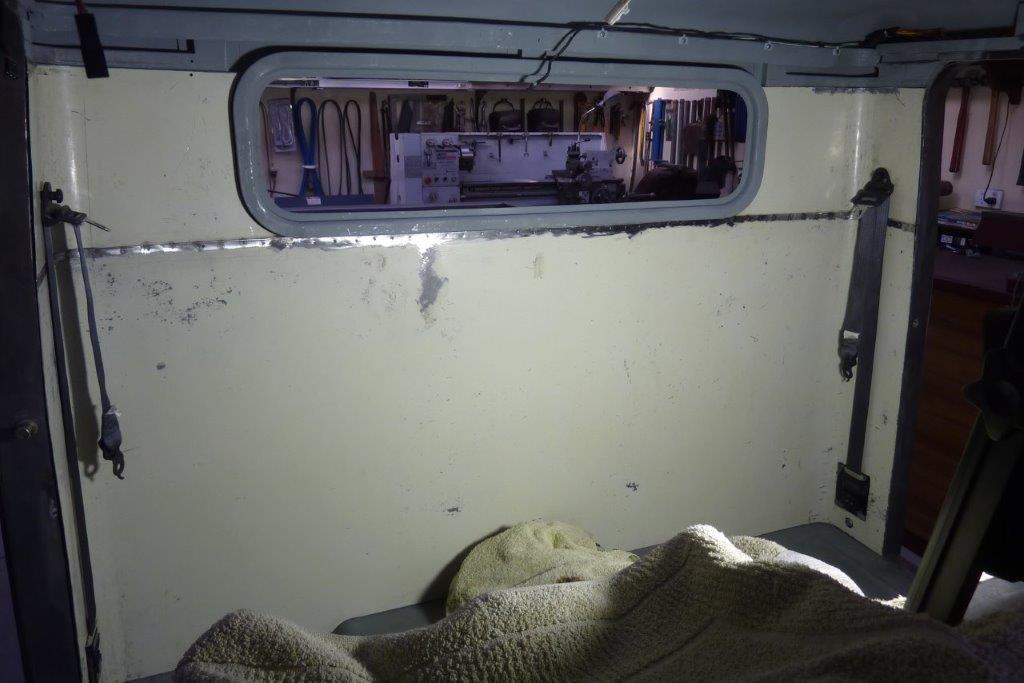

I had to add height to it each side of the window so the bottom edge was put through the step die in the bead roller and then spot welded the seam.
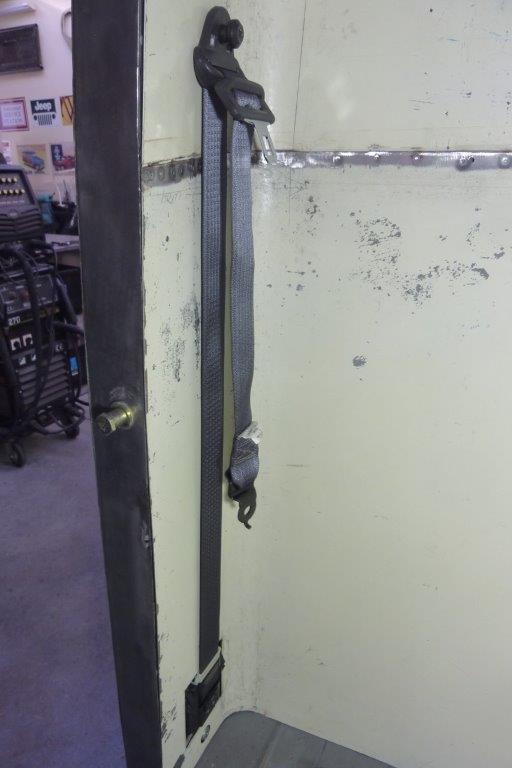

The seat belt inertia reels are nicely recessed into the B pillar. I will make covers for them later on.
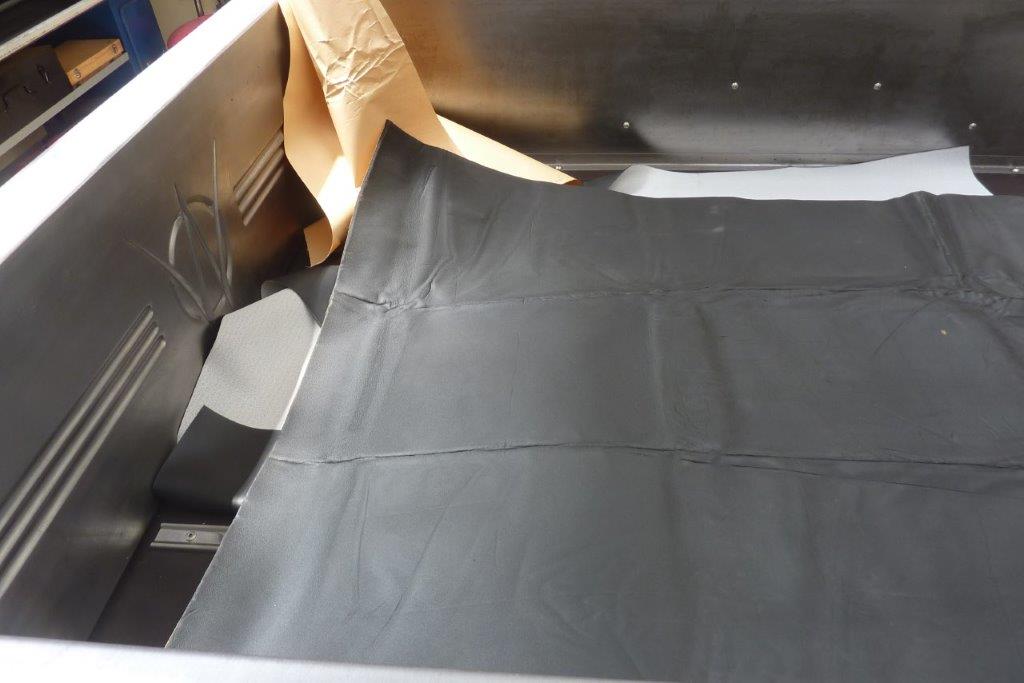

Being still in a lockdown at the time, I could not get any foam for the upholstery. Even the click and collect places were about of stock. Was forced to buy some closed cell foam with an adhesive backing used for automotive sound proofing. Unfortunately the folding creases from being posted are not coming out. This is after laying flat in the sun for a month!
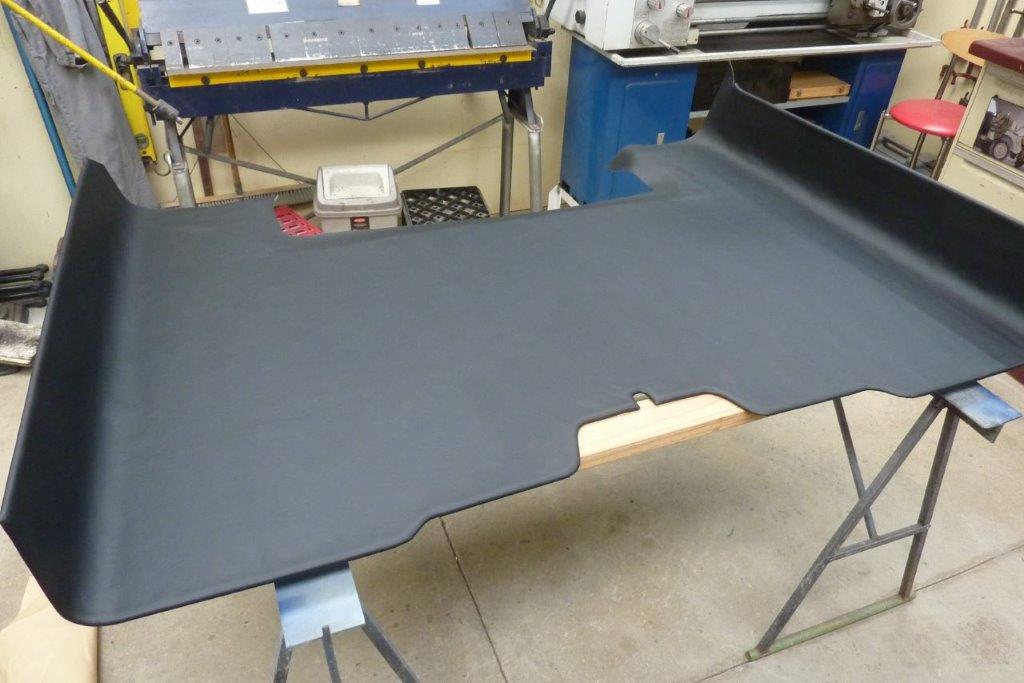

Worse still I found the foam reacted to the spray glue and swelled up when I was covering it with the black synthetic leather! So only used a thin layer in the corners and the rest was glued directly to the steel on the backside. Here just the bottom edge has been done so far.
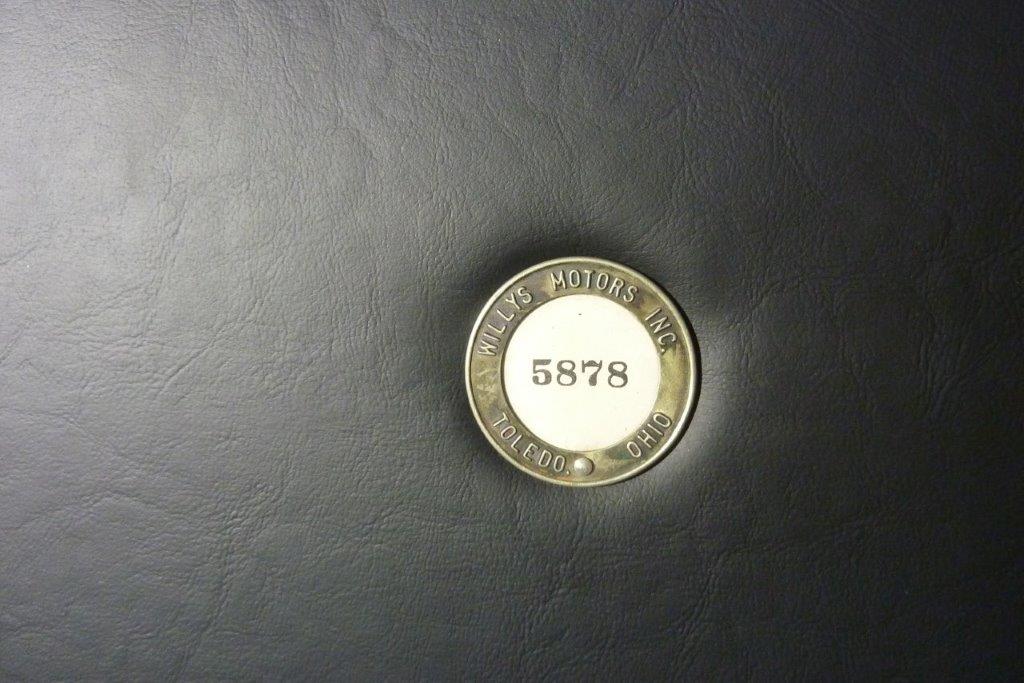

I've become the custodian of this Willys Overland employee identification badge. It belonged to George A. Mack, who worked for Willys Motors for 32 years. His granddaughter Susie thought my project was the perfect place seeing as he would have worked on this vehicle when it was on the assembly line in 1948. Not only that, but her father Pat Stark worked in the Willys plant at the same time and also had a hand in building the original vehicle.
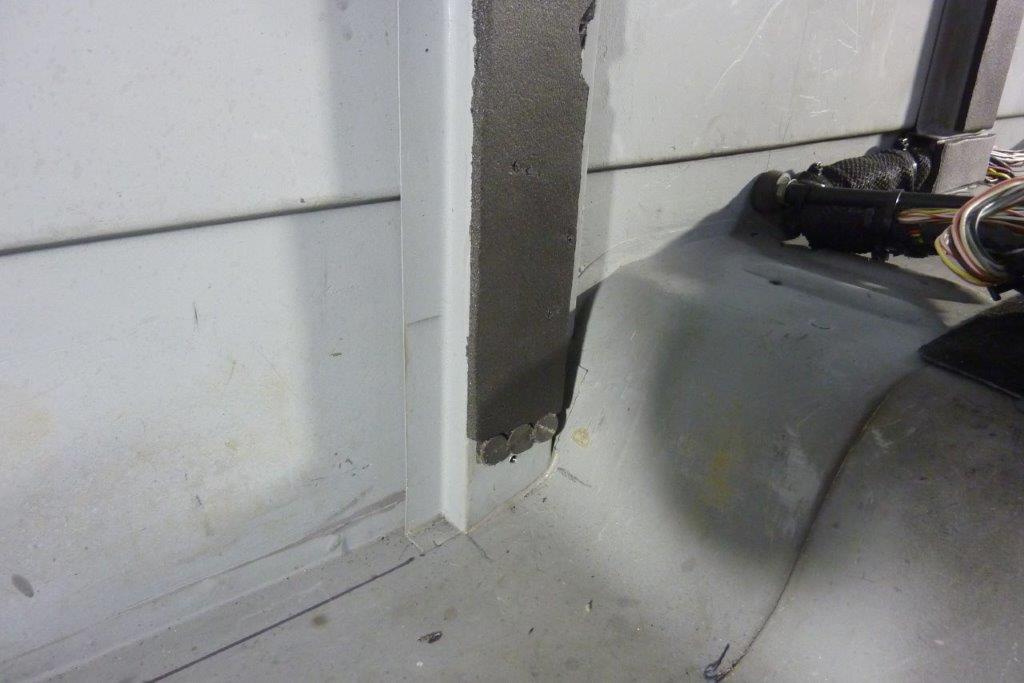

To hold the wall in place I have used magnets on the rear wall supports and trim clips on the sides near the door opening.

I replaced the tack strip with V belts like used for fan belts etc. Then I have used rubber P extrusion around the door opening instead of windlace.

It conforms really well around the corners and suits the modern theme I have going inside the cab.


Here is what the section look like. P Section Extrusion - 22mm x 7mm
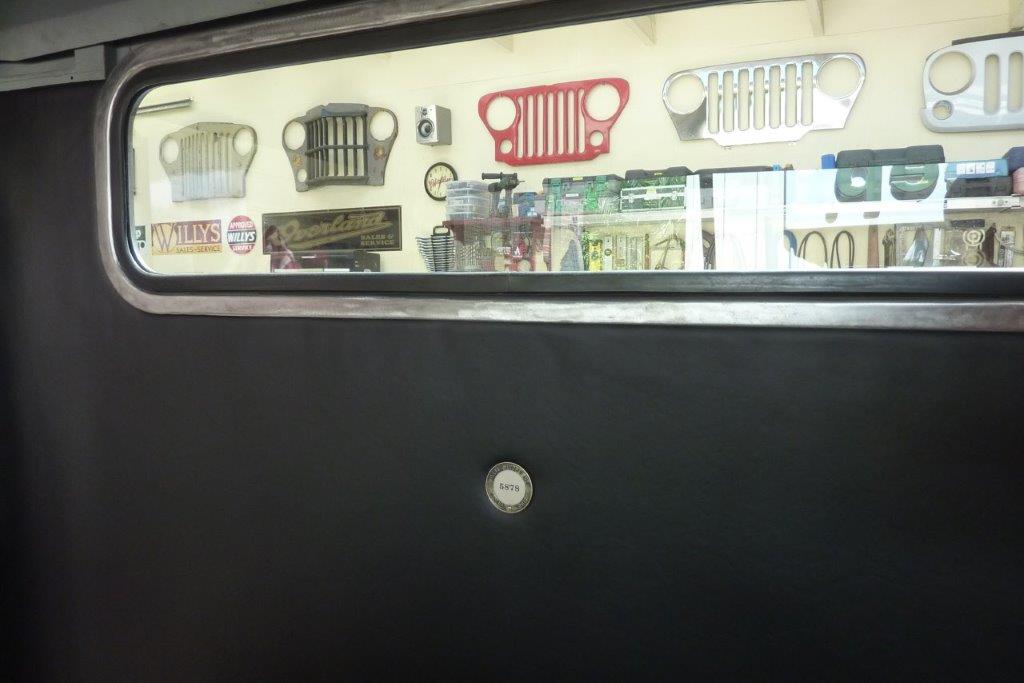

I have the Willys employees badge right in the middle of the rear wall and will be between the bucket seats.
__________________
Cheers, Marcus.

My web site:
http://willyshotrod.com Over 5'000 Club
Likes: (4)
Post New Thread  Reply


Posting Rules
You may not post new threads
You may not post replies
You may not post attachments
You may not edit your posts

BB code is On
Smilies are On
[IMG] code is On
HTML code is On


All times are GMT +10. The time now is 01:59 AM.


Advertisements


AJOR does not vouch for or warrant the accuracy, completeness or usefulness of any message, and are not responsible for the contents of any message. The messages express the views of the author of the message, not necessarily the views of AJOR or any entity associated with AJOR, nor should any advice be substituted as technical advice replacing that of a mechanic. You agree, through your use of this service, that you will not use AJOR to post any material which is knowingly false and/or defamatory, inaccurate, abusive, vulgar, hateful, harassing, obscene, profane, sexually oriented, threatening, invasive of a person's privacy, religious, political or otherwise violative of any law. You agree not to post any copyrighted material unless the copyright is owned by you or by AJOR. The owner, administrators and moderators of AJOR reserve the right to delete any message or members for any or no reason whatsoever. You remain solely responsible for the content of your messages, and you agree to indemnify and hold harmless AJOR, the administrators, moderators, and their agents with respect to any claim based upon transmission of your message(s). The use of profile signatures to intentionally mislead or misdirect any member on this forum is not acceptable and may result in your account being suspended. Any trip that is organised through the AJOR forum is participated at your own risk. If you or your vehicle is damaged it is your responsibility, not that of the person that posted the thread, message or topic initiating the trip, nor the organisers of AJOR or moderators of any specific forum. This forum and associated website is the property of AJOR. No user data is harvested and no information supplied in your registration will be sold for profit.


Powered by vBulletin® Version 3.8.7
Copyright ©2000 - 2024, vBulletin Solutions, Inc.

AJOR © 2002 - 2024 AUSJEEPOFFROAD.COM. All corporate trademarked names and logos are property of their respective owners. Ausjeepoffroad is in no way associated with DaimlerChrysler Corporation or Fiat Jeep.
www.ausjeep.com www.ausjeep.com.au www.midlifemate.com ausjeepforum.com www.r9kustoms.com
vB Ad Management by =RedTyger=