Grand Willys Project - Page 284 - AUSJEEPOFFROAD.COM Jeep News Australia and New Zealand

Go Back   AUSJEEPOFFROAD.COM Jeep News Australia and New Zealand > JEEP GARAGE > Jeep build up
Register Forums Trading Your Jeep My Garage Mark All Read

Post New Thread  Reply
 
Thread Tools Search this Thread
  #1982  
Old 25-08-2022
Gojeep's Avatar
Gojeep  Gojeep is offline
LokRinger
 
Join Date: Jul 2002
Location: Victoria
Posts: 6,870
Likes: 789
Liked 1,754 Times in 556 Posts
Default


Addressing some of the things that could be improved. I was worried when I first made my fuel filler that it could be a slow fill because it first went over the top of the tank with only a little slope before dropping down to the filler port. Tested it with a jerry can it it was fine, however the first time I filled it at the pump it was a different story. It kept shutting off as any spit back made it stop. Only turning the nozzle upside down would allow it to run at half speed but then spill out every where once full! Thought if I had the drop first and then run into the tank might help. No difference at all, even after disconnecting the vent line from the charcoal canister.


So picked up another filler from the same model donor Jeep to see if extra height would help. Wanted to test it first before making anything permanent. So drove to the service station like this and it worked perfectly.


I straightened out the vent line and added a new bend where it would go under the floor. Used some bigger stainless tubing to replace the stock one with the bends in it and added a elbow at the bottom.


The top of the old setup is now the bottom of the new one. Gives you an idea of how much extra 'head' it will have, 400mm/16" extra. The tube coming down from the holder is in case any spillage occurs, it will drain out below the floor level and not inside the bed.


While I was filling up I made a quick tracing of the fuel nozzle so I could make sure it would work well enough. Also that it will still fit once I have a hard tonneau cover hinging over it.


So I got it tucked right hard in the corner and takes little floor space. Running it in from the outside took up a lot more room as it needs a fairly soft radius for the nozzle to still go in far enough.


The drop in the side piece makes it comfortable to open and close the cap.


I had a piece of old stainless that had been heated in the middle and was all warped. Managed to wheel out the shrinkage from the heat and make it good enough to make a shield from. The tabs are for the mounting screws.


I made it wrap around the top and screwed in so it can be easily removed if needed.


The curved part was first wheeled as far as I could get it before bending it the rest of the way over some pipe.
__________________
Cheers, Marcus.

My web site:
http://willyshotrod.com Over 5'000 Club
Likes: (1)
  #1983  
Old 26-08-2022
Gojeep's Avatar
Gojeep  Gojeep is offline
LokRinger
 
Join Date: Jul 2002
Location: Victoria
Posts: 6,870
Likes: 789
Liked 1,754 Times in 556 Posts
Default

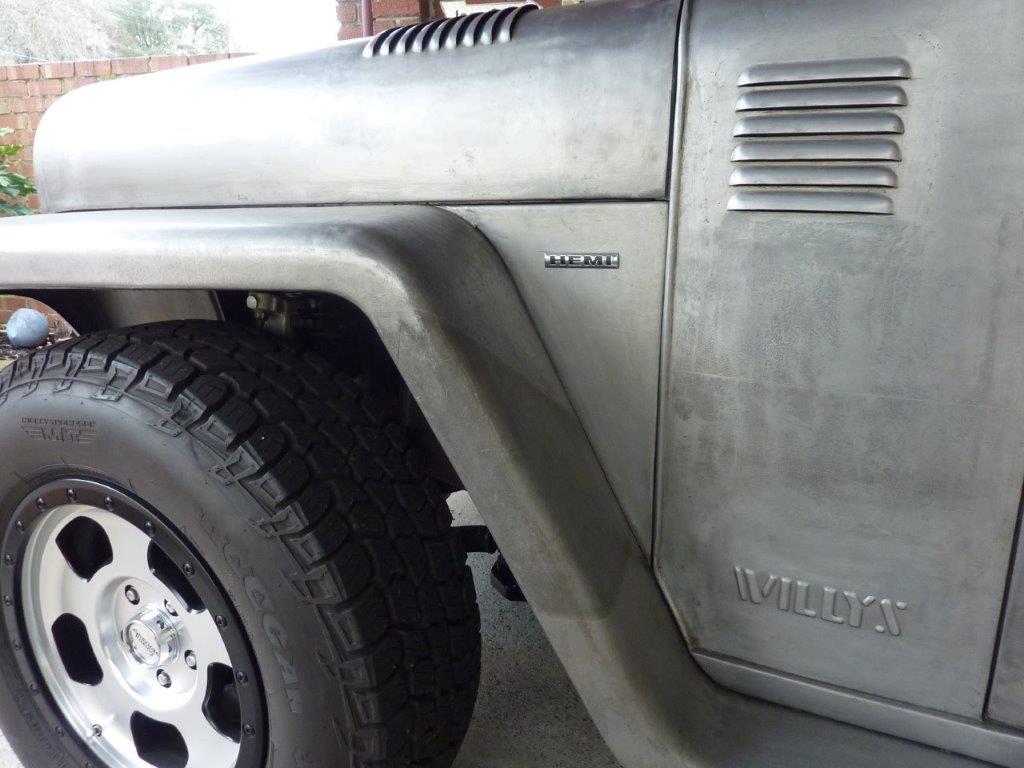
Sorry for all the pictures but often get asked how I can make my welds 'disappear'. Also thought I would show you can do this with a MIG which I often use on small patches like this.


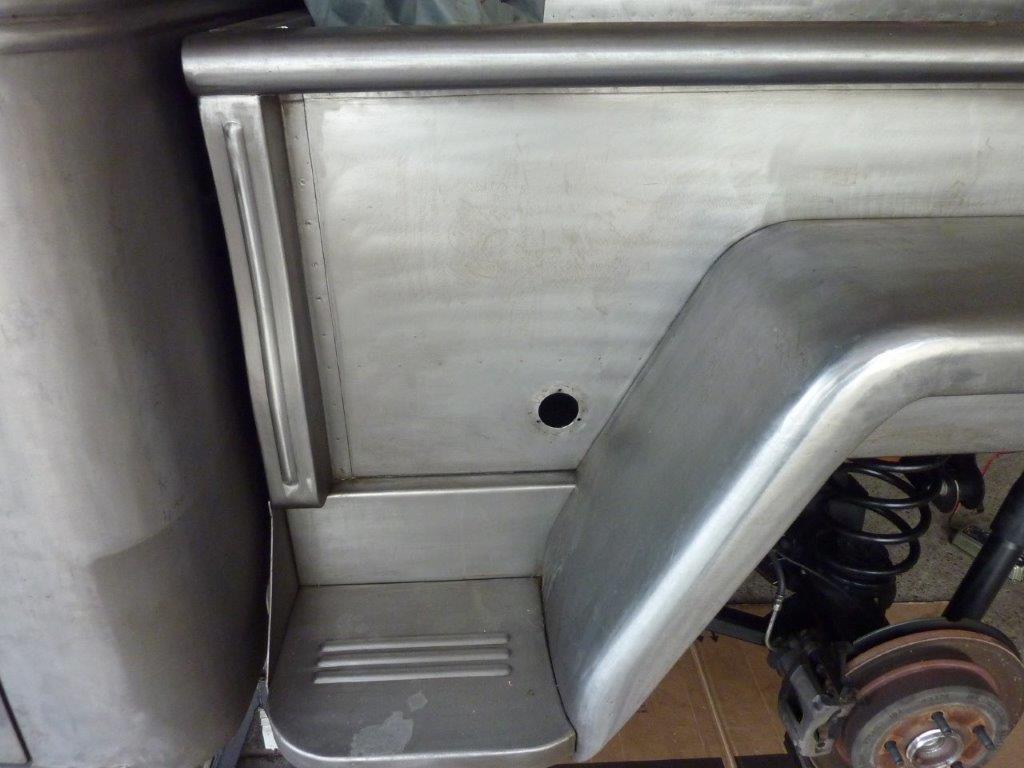
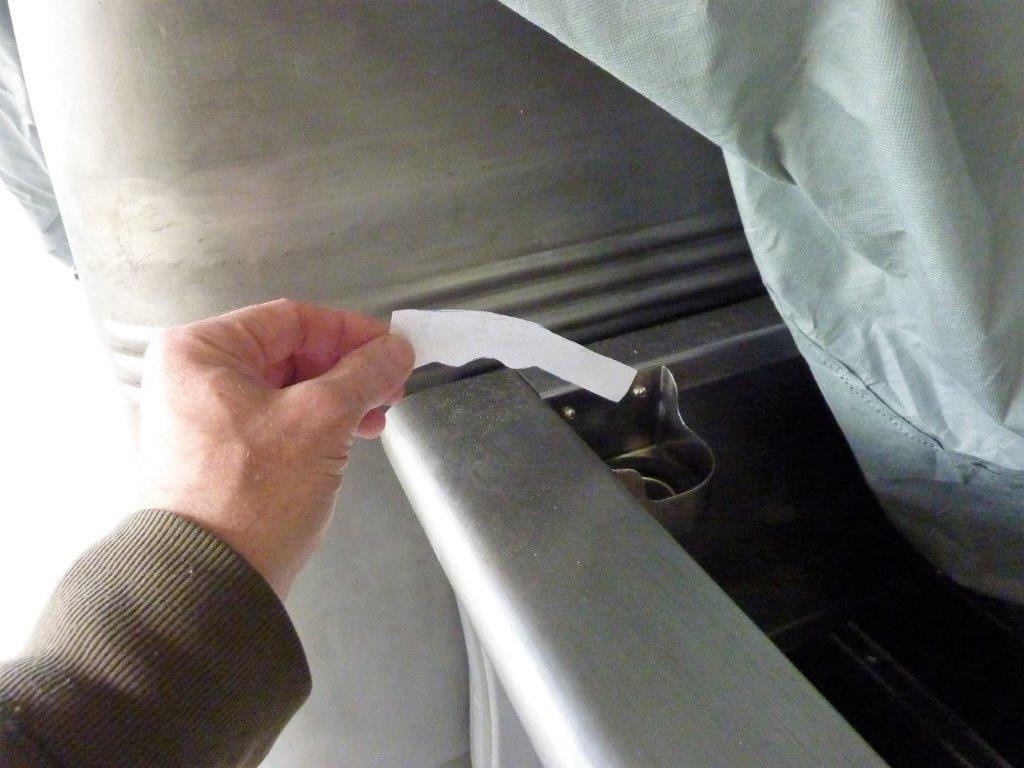
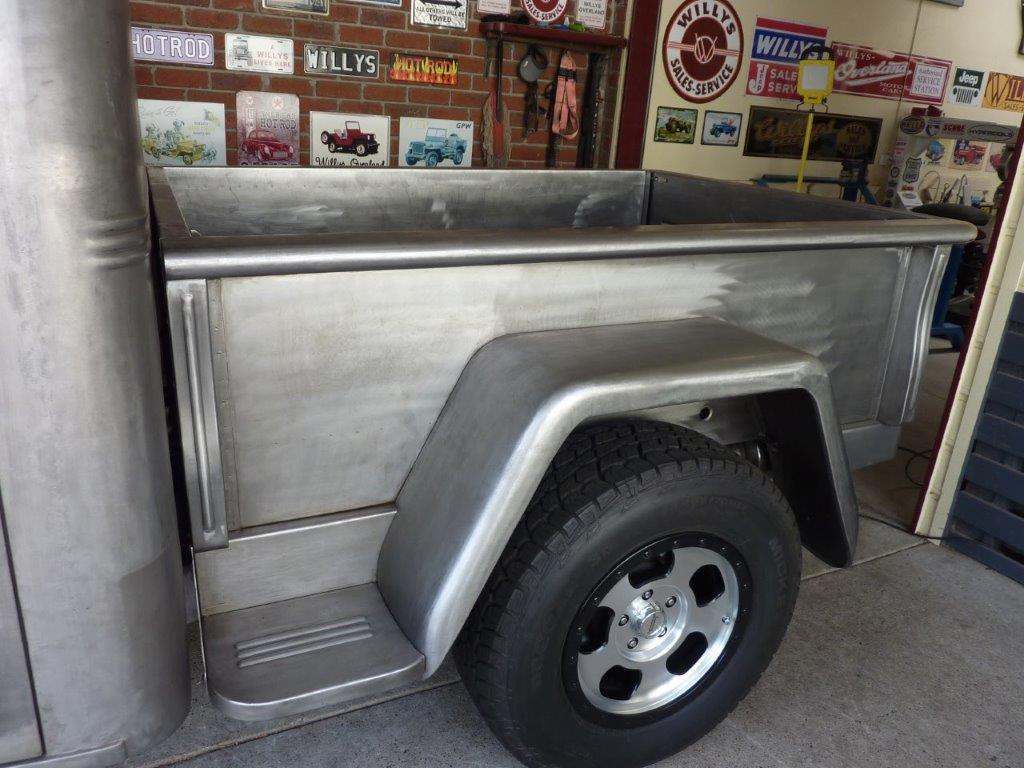
Now I am left with a hole in the side of the bed! So glad I found this out before paint.


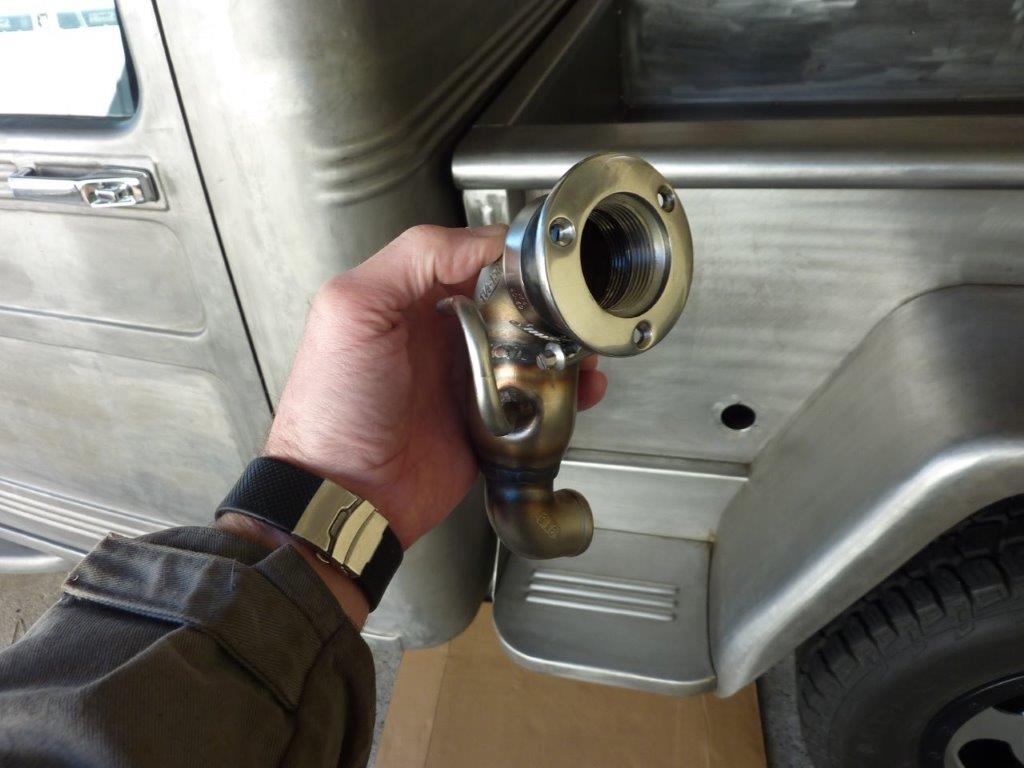
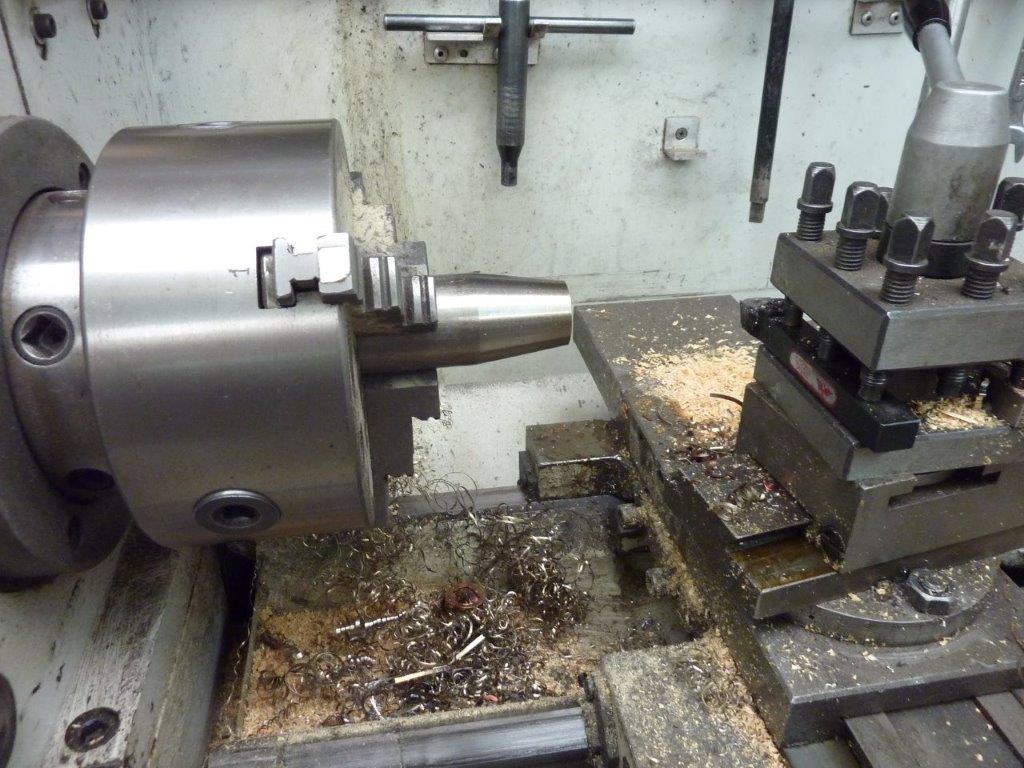
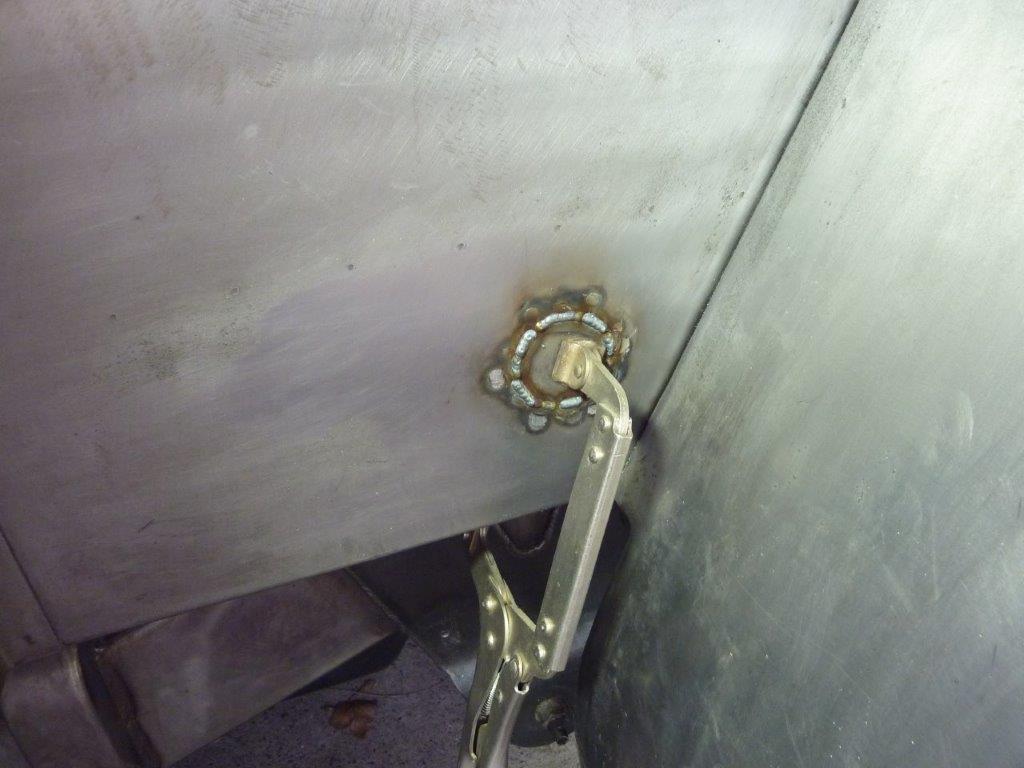
I had to drill out the spot welds I had used to fit the reinforcement ring behind the hole for the filler neck mounting screws. So now I have 10 holes to fill.


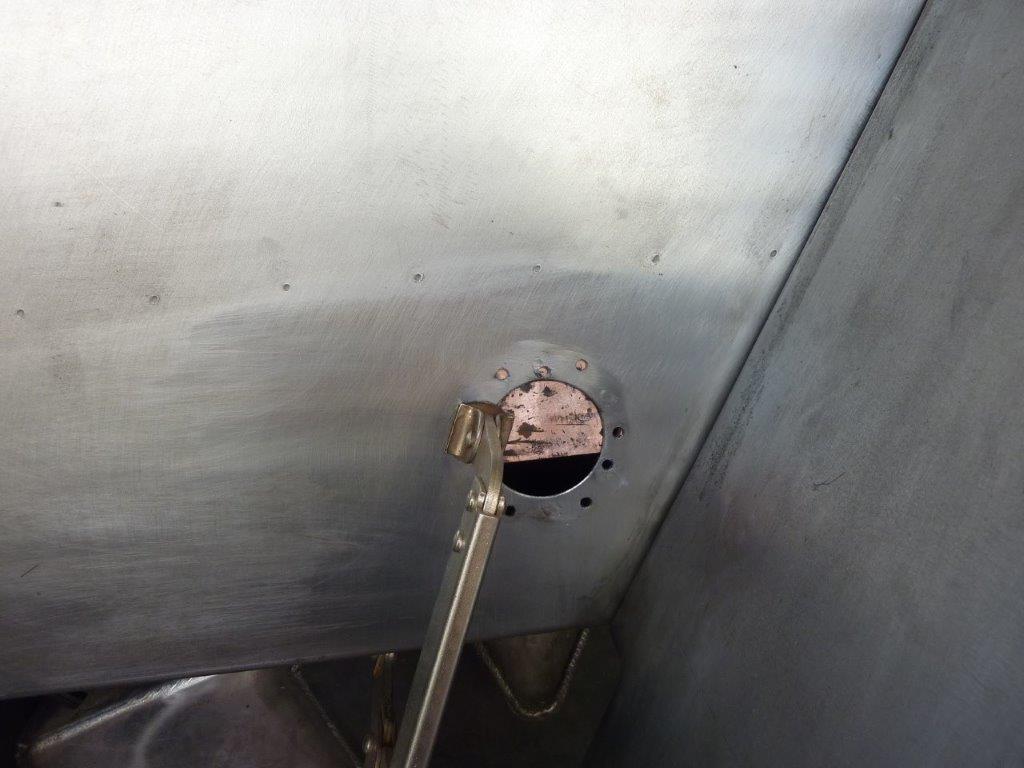
Clamped some copper behind the holes which the weld won't stick too. Also helps draw in heat and means I don't have to grind the backside which is hard to get to.


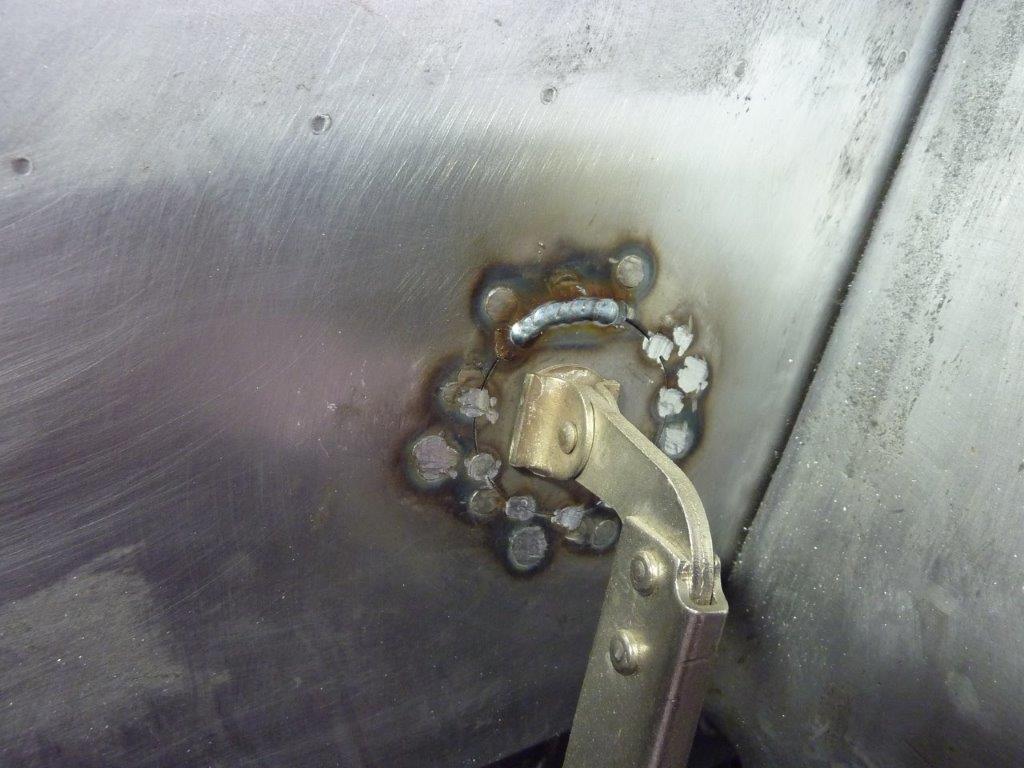
I used a single good hot tack with the mig to fill them. No cooling the weld as don't want to harden the surface making planishing difficult.


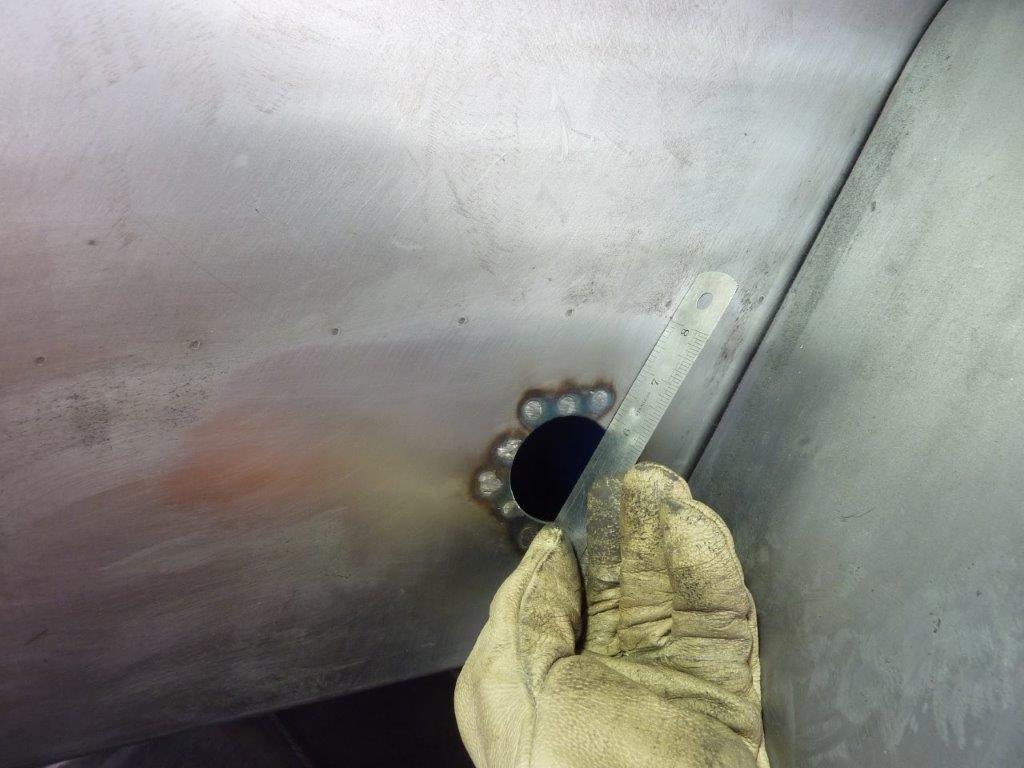
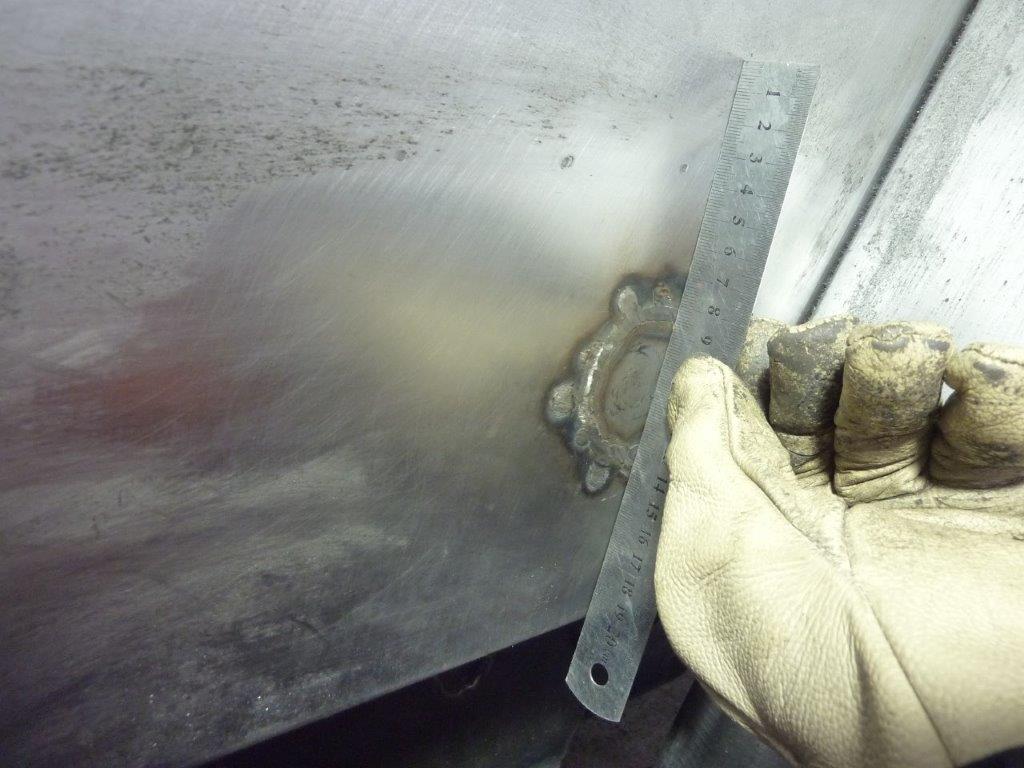
Ground down the welds to a razor blade thickness proud of the surface. This gives me a little extra to flatten hammer on dolly to stretch the welds after shrinking from the heat/cool cycle. Important to get it back flat again before moving on.


I am just using this dolly on the small crown side and this hammer to centre the hits directly over each weld spot.


I do this differently to most you see on shows and youtube by tack staking the patch between the ground down tacks. Each new tack is placed while the one before is still orange in colour. If the last tack cools, you must grind it down to almost flush before adding another tack next to it. Never use air or water to cool as it makes the surface brittle. If you tack and quickly cool, you cannot planish the weld for this reason.


I still move from one side to the other to tack stack between the tacks holding the patch in place.


Because space is limited, I am knocking down the weld with what once was a 9" cut-off disc! I used it in my 9" grinder until it was 5" in size. Then use it in my 5" grinder until it is about 2.5" in size. Then it goes on my die grinder. Only use it on its edge like shown and not on its side like a grinding disc.


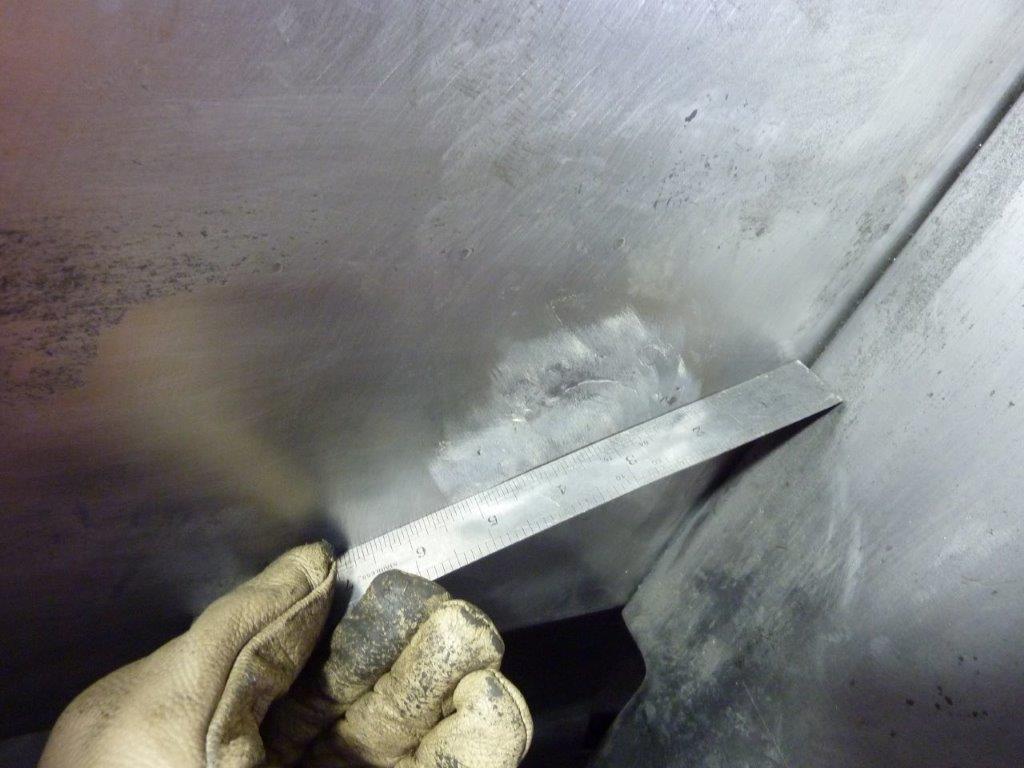
There is a bit of a dip off to the side where it has been welded. I still will not raise that area as I know it was not there before welding up all the holes. It tells me more stretch is needed at the weld site.


Keep checking in all directions and only still hitting where it was welded. If it starts to actually get worse, you have stretched too far and need to shrink it down a fraction using a shrinking disc.


Notice the imperfections left from the welding in the surface.


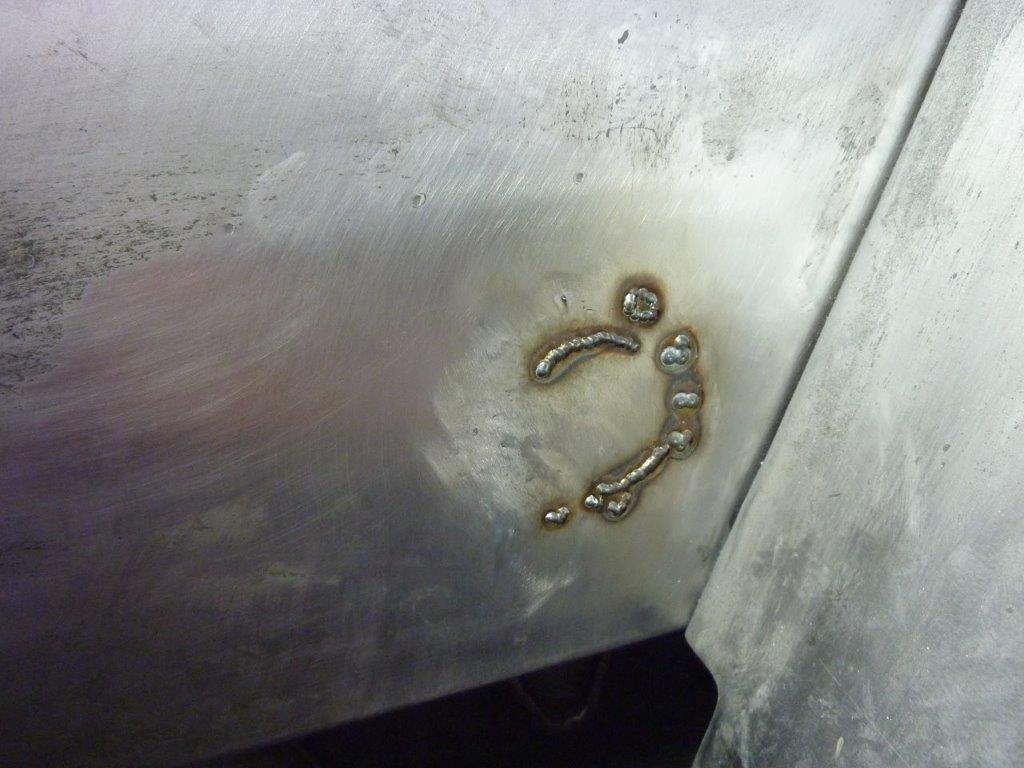
I get rid of them by carefully tacking lightly over the imperfections. This means grinding them down once again and stretching to get back to flat.


The very last part of the almost flat ground welds is done with a flap disc and then followed up with a strip disc.


Using the strip disc can also cause a little shrinking as well. Sometimes good to put a little tension in the panel but might need a slight hammer on dolly work as well.


Holes be gone! Can barely tell they were ever there now.
__________________
Cheers, Marcus.

My web site:
http://willyshotrod.com Over 5'000 Club
Likes: (3)
  #1984  
Old 27-09-2022
Gojeep's Avatar
Gojeep  Gojeep is offline
LokRinger
 
Join Date: Jul 2002
Location: Victoria
Posts: 6,870
Likes: 789
Liked 1,754 Times in 556 Posts
Default

Still working on little details as they show themselves. Been a lot less than I expected to be honest.


To help slow the, "you got a LS in that?", questions, I added a small HEMI badge.


We came up with putting it here on the guard away from the WILLYS pressing as it clashed a bit there and made it a bit busy. Funny thing is that the Chevy guys are even more impressed that it has a HEMI rather than a LS!


Another thing I did was swap out the stock KK Cherokee rear coils in the rear for some stock WH Grand Cherokee ones the same as the donor. I actually used well worn ones from a wreaking yard as they sat an inch lower than my near original donor ones. The ride is so much better in the rear now and matches the front end. It also added another inch of 'hotrod rake' to it.


I had been looking for mirrors that sat out a bit further to help with the wedge shape of the cab, but found nothing I liked more than what I already had. So thought why not widen the ones I already had. First to test the idea I whittled down some 50mm square stock pine and put it in my metal lathe. Used the parting tool to try out some shapes.


This is the shorter of the two I made and quite like the proportions. It is the same height as the diametre of the base.


Was not as keen on the longer version and worried it might vibrate more too.


Next test was to make one out of some scrap aluminium bar stock that I picked up at the scrap yard the last time I was there.


Happy with the shape and size of it. It is not just a straight taper as wanted to mimic the jam nut and make it look less like it was done on a lathe.


The aluminium was too soft to use and scratched easily. So had some solid 40mm 316 stainless bar stock to make some from.


I machined both ends of the bar so could easily duplicate the settings and make them identical.


I went through the grades of sandpaper over it right up to 1200 grade which was the finest I had.


Then onto the buffing wheels to give a better polish to it. Just wanted to match the mirror arm in sheen.


The centre was bored and then tapped 16x1.5mm to match that of the mirror and the mount I already had inside the door. Then the fun part of parting each end off without it flying off somewhere at the end and damaging the polished surface. Did the old pencil inside the piece to hold it when nearing the end to catch it.


Made some gaskets for it and threaded in a set screw. I used loctite to hold them in place with the hex socket inside the spacer. This allows me to tighten the piece to the door before the mirror gets screwed on.


Think it looks fine fitted and can now see my rear wheel to help me reverse into the garage.


Went for a Sunday drive and they are actually more stable than before with little to no vibration! The surface area of the mount is double of what it was before and there is less wind noise too as a bonus.
__________________
Cheers, Marcus.

My web site:
http://willyshotrod.com Over 5'000 Club
Likes: (4)
  #1985  
Old 27-09-2022
Gojeep's Avatar
Gojeep  Gojeep is offline
LokRinger
 
Join Date: Jul 2002
Location: Victoria
Posts: 6,870
Likes: 789
Liked 1,754 Times in 556 Posts
Default

Got a video update on the GrandWillys project.
https://youtu.be/VHC2NMrs3Po
__________________
Cheers, Marcus.

My web site:
http://willyshotrod.com Over 5'000 Club
Likes: (3)
  #1986  
Old 27-09-2022
bodgie's Avatar
bodgie  bodgie is offline
Rock Munki
 
Join Date: Aug 2009
Location: Castle Hill, NSW
Posts: 2,136
What Jeep do I drive?: WG
Likes: 11
Liked 300 Times in 245 Posts
Default

What seems like a good idea at the time can often be a bit dumb or impractical once it's used. I find it interesting how projects evolve after you use them a bit.

Anything else not working for you?

FWIW, I like the way the mirrors look.
  #1987  
Old 28-09-2022
Gojeep's Avatar
Gojeep  Gojeep is offline
LokRinger
 
Join Date: Jul 2002
Location: Victoria
Posts: 6,870
Likes: 789
Liked 1,754 Times in 556 Posts
Default

Quote:
Originally Posted by bodgie View Post
What seems like a good idea at the time can often be a bit dumb or impractical once it's used. I find it interesting how projects evolve after you use them a bit.

Anything else not working for you?

FWIW, I like the way the mirrors look.
It is one of the reasons it was worth giving it a good shake down before paint. Having to shift the fuel filler after paint would have been a nightmare. Probably would have had two fillers instead with nothing connected to the original.

Nothing else has surfaced as yet but hardly driven it long distances, so will see what shows up.
__________________
Cheers, Marcus.

My web site:
http://willyshotrod.com Over 5'000 Club
Likes: (2)
  #1988  
Old 29-09-2022
Gojeep's Avatar
Gojeep  Gojeep is offline
LokRinger
 
Join Date: Jul 2002
Location: Victoria
Posts: 6,870
Likes: 789
Liked 1,754 Times in 556 Posts
Default

So what it like to drive impressions.
https://youtu.be/1rHGwSjVvu8
__________________
Cheers, Marcus.

My web site:
http://willyshotrod.com Over 5'000 Club
Likes: (4)
Post New Thread  Reply


Posting Rules
You may not post new threads
You may not post replies
You may not post attachments
You may not edit your posts

BB code is On
Smilies are On
[IMG] code is On
HTML code is On


All times are GMT +10. The time now is 08:19 AM.


Advertisements


AJOR does not vouch for or warrant the accuracy, completeness or usefulness of any message, and are not responsible for the contents of any message. The messages express the views of the author of the message, not necessarily the views of AJOR or any entity associated with AJOR, nor should any advice be substituted as technical advice replacing that of a mechanic. You agree, through your use of this service, that you will not use AJOR to post any material which is knowingly false and/or defamatory, inaccurate, abusive, vulgar, hateful, harassing, obscene, profane, sexually oriented, threatening, invasive of a person's privacy, religious, political or otherwise violative of any law. You agree not to post any copyrighted material unless the copyright is owned by you or by AJOR. The owner, administrators and moderators of AJOR reserve the right to delete any message or members for any or no reason whatsoever. You remain solely responsible for the content of your messages, and you agree to indemnify and hold harmless AJOR, the administrators, moderators, and their agents with respect to any claim based upon transmission of your message(s). The use of profile signatures to intentionally mislead or misdirect any member on this forum is not acceptable and may result in your account being suspended. Any trip that is organised through the AJOR forum is participated at your own risk. If you or your vehicle is damaged it is your responsibility, not that of the person that posted the thread, message or topic initiating the trip, nor the organisers of AJOR or moderators of any specific forum. This forum and associated website is the property of AJOR. No user data is harvested and no information supplied in your registration will be sold for profit.


Powered by vBulletin® Version 3.8.7
Copyright ©2000 - 2024, vBulletin Solutions, Inc.

AJOR © 2002 - 2024 AUSJEEPOFFROAD.COM. All corporate trademarked names and logos are property of their respective owners. Ausjeepoffroad is in no way associated with DaimlerChrysler Corporation or Fiat Jeep.
www.ausjeep.com www.ausjeep.com.au www.midlifemate.com ausjeepforum.com www.r9kustoms.com
vB Ad Management by =RedTyger=