Hi Folks, big thankyou to all before me who posted online as I just finished my coolant turbo hose change. 7/13 Build MY14 with 83K. I just want to add a few items if you are going to attempt. If you do, once finished, the strip down and rebuild becomes clear and easy to do but tough on the body. I have Bullbar incl. so the distance to engine means stints on your knees on the radiator plate. The 60mm rubber hose was hard to press with fingers in centre of hose so aging way faster than normal but in good nick. More on this later.
Before you even begin, your best bet is to seek out a long quality allen key to sacrifice and fabricate a 5mm hex drive by cutting the angle off. Standard allen keys, the long edge into a 1/4 drive socket can work but you actually need the 5mm hex shaft longer to clear the pipe head so best chance at near square to the bolt head. I didn't have this so one end of hex sanded in some slight angles to cater and other end proper squared off (poor mans uni-joint). The bolts in mine were high tensile steel. If a long drive can be made you can crack the bolt and torque again so you know this if covered off. I ended up lucky by dropping in a crappy allen key that mated well (short side in point to passenger side) just enough to crack the torque after some removal. The shock value is hard to even see it so patience is paramount. All threads were compressed air out and WD40 lubed to all can hand tighten up. Preventative in case you have to do again.
Blue tak for bolt rebuild comes in handy and secondly a magnet for those fumble finger moments. Its because you cannot get easy finger access.
Next, in the pic is my average stanley 8mm spanner welded to a cut down T40. Length from tip to center weld is 17mm, but it needs to be 15mm to get the job done as I cracked the intake seal first to allow extra room here. Cracking the bolts had a jack handle on the Stanley spanner. I'm a stick welder only so your friends with more advanced welders are the key tip here.
Difficult areas for me, I tried to remove the wiper arms to then remove rear engine cowling failed to get the wiper arms off the bolt heads (must be a further technique here) so just dived in without rear cowling removed and, in hindsight it could be a good option if you want to do this as well, I should have listened to you folk and removed perhaps. The other failure is how in hell do you get access to the rear clamp and final electrical connector at the Turbo inlet. I just gave up and continued as I could lift harness with all else disconnected. Wiring is not complex as you might think as pictures and different electrical sockets will see you getting it all sorted. Approach in rebuild is just study your work and first finish driver side, then front engine and finally passenger side which has most disconnects done. Pics do come in handy, 3 or 4 will see you in safe mode.
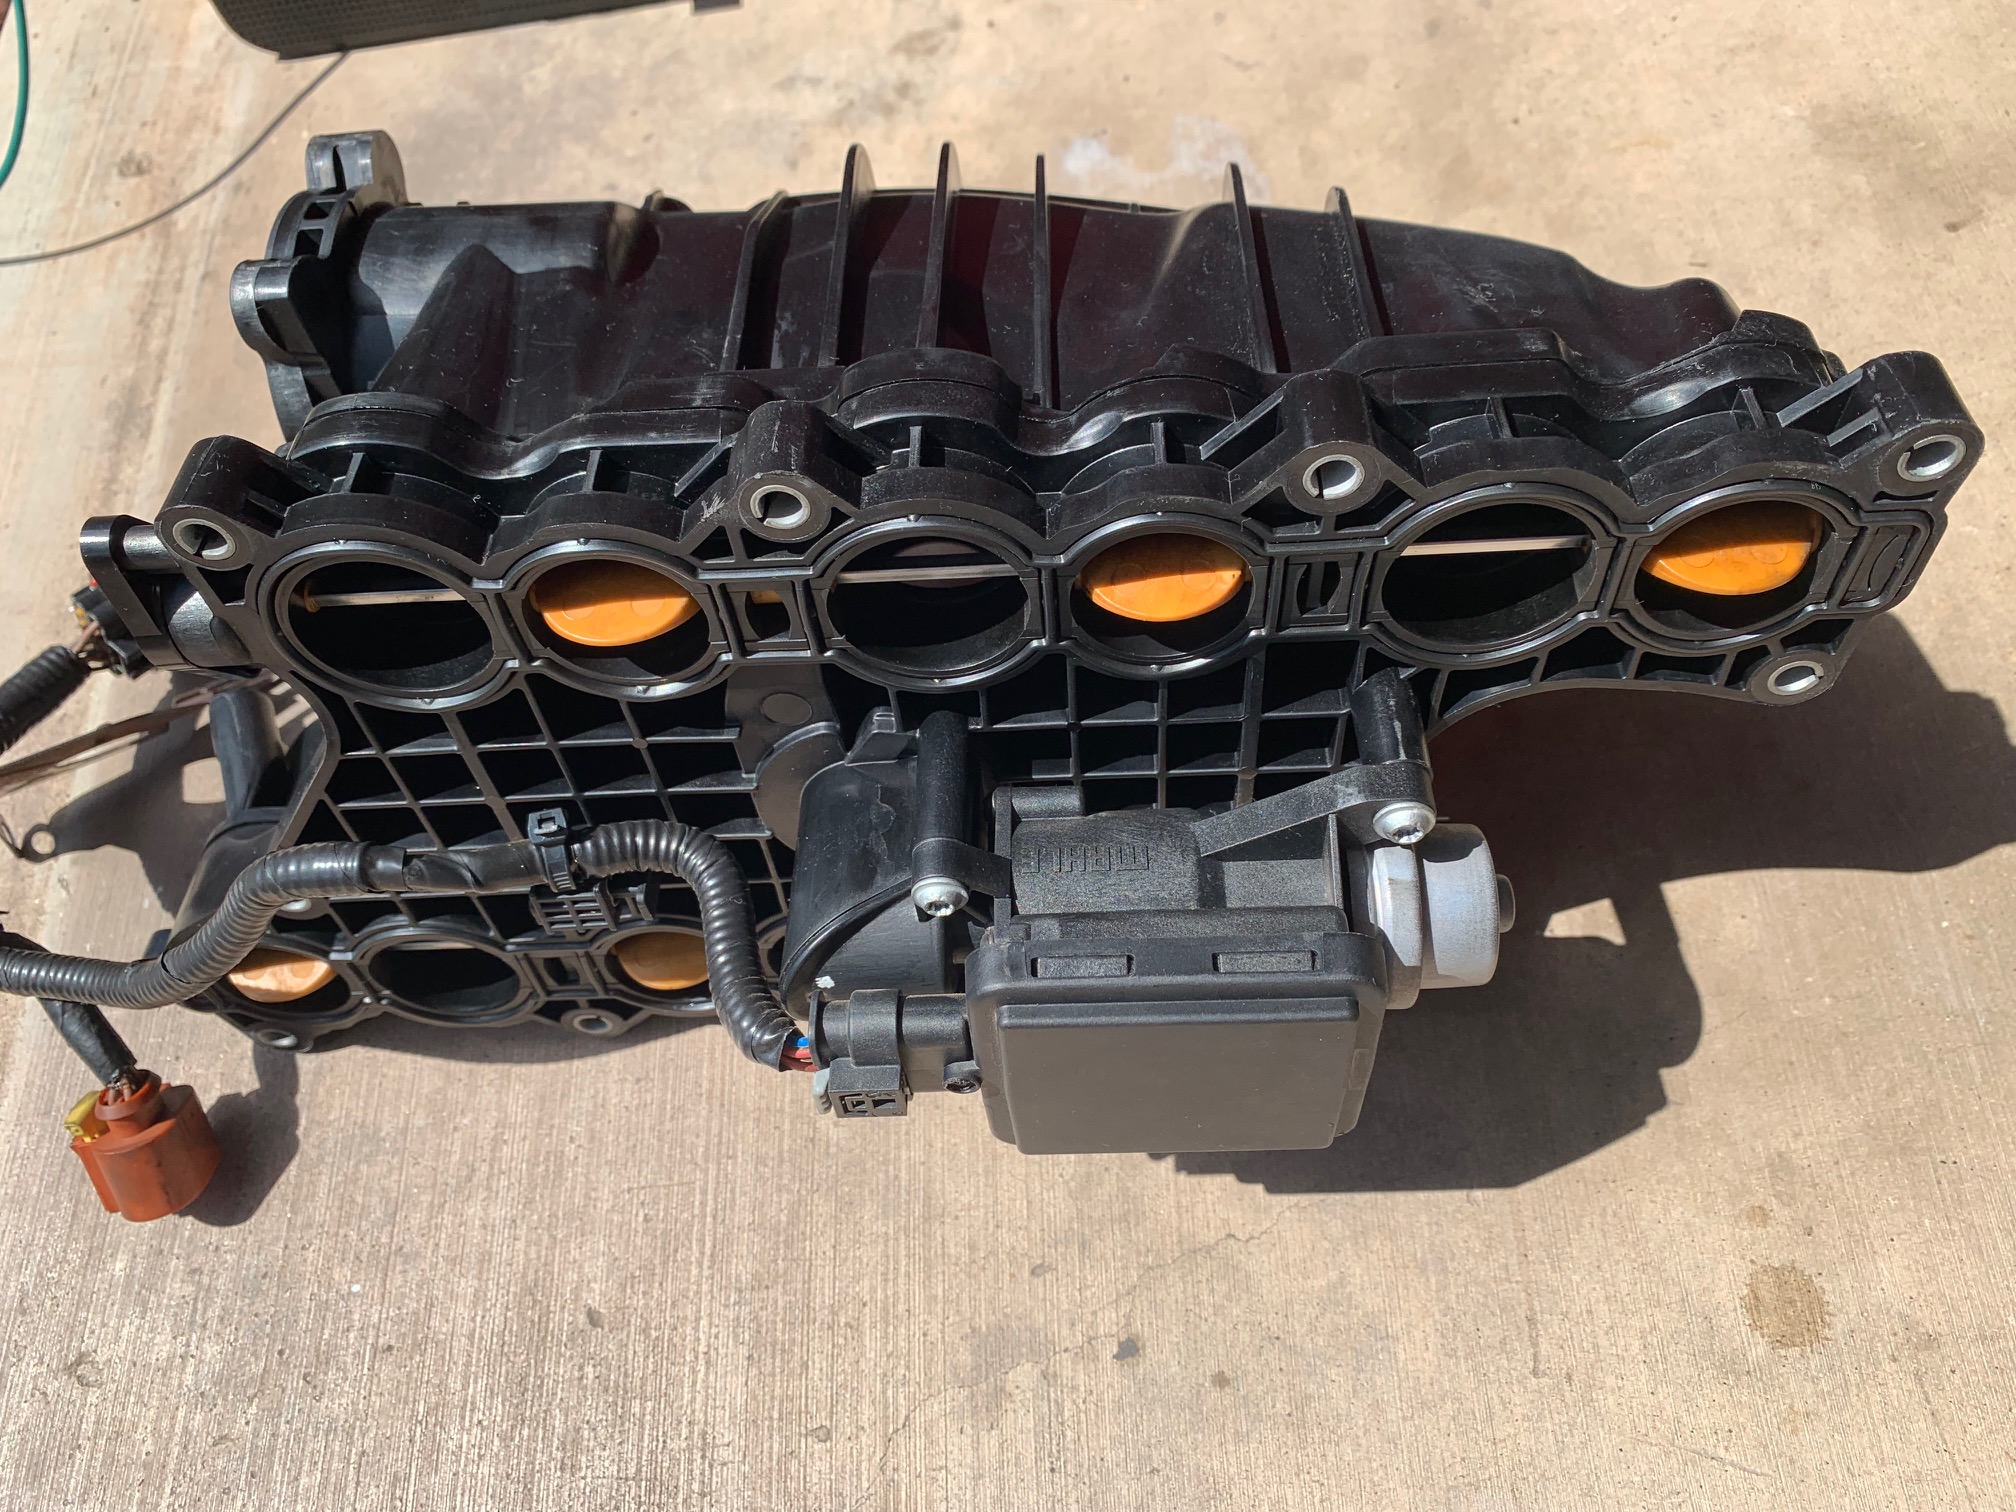
Pulling the intake out still is a 5 minute frustrating light arm wrestle and same when putting back. There was Zero clearance! And I can see why, that swirl motor is almost the same width distance of the intake heads, and if you study the swirl motor bolts, only three to connect, as the missing forth is there to allow for a clamping system for the coolant pipe perhaps. It's the vertical line down so not to foul the swirl motor with your clamps. The two inner rear intake bolts (Bolts 9 and 11 on earlier torque sequence pic) are just a tad difficult to remove so driver side inner rear is first to go in temporarily as you can move the manifold to get it in then just finger tighten down sufficiently to get a socket on to finish. I was unable to extract this bolt with manifold in situ on way out and only after cracking the seal for some lateral movement.. So last out and first in for this bolt. Rubber hammer to crack the seal was needed and then only light taps.
Manifold cleaning well good luck as is a shitty job. The two intake gaskets first looked deformed so WD40 then unpick it out. I sun dried and a few hours saw a compete return to as new so have a look at my pick on the gasket edging as you would not know its a used one, soft to handle and good to go. Hated every cleaning moment so as I live on acreage, out with the high pressure gurney and job done after getting into all the places of large built up soot and crud. Can be done with standard nozzle and de greaser usage. You need to remove the two end caps to release any water build up as with the remaining seals for intake and EGR. T5 torx by hand if I remember. Easy to do to check swirl end caps. There are sections in that manifold that have significant build up.
You get to strip and clean your intake components as well.
I used the 10mm or 3/8 branded silicone with single quality ear clamps SPPAC-08_05Pack from Motorsport accessories. I had purchased rated USA branded worm drives but after seeing the work area, went to ear clamping. So its easy to get the front coolant pipe and hose out but you soon see the other rear pipe end to the turbo is underside of the turbo oil cooler pipe so impossible to remove. Note for those thinking of buy a coolant hose kit with both ends at high price, its not going to happen to install it. I need to ask if you remove rear engine firewall cowling does that mean you can disconnect the turbo oil feeder tube thus get the whole coolant hose out? Does not look easy with engine in car.
The First forward clamp, done on the bench and very happy with the 21mm ear clamp for max force here. Now the issue is getting my clamp tool into the engine bay to clamp rear side (Fail) so ended up with one of those small crappy junk pliers and stripped the rubber handles off with tubes on to start. Painful as got to 3/4 of clamp force as the crappy handles were bending. A decent plier of this type with tubes attached is just the ticket however I just went onto standard pliers to finish off but still not quite the strength of the first. For those who have not used these clamps, the 5 pack means you can have a play on bench before car attempt. This is the only place you will get caught if you cannot clamp on sufficiently. Thus I had the rear worm drive ready to go. That large clamp is a Pirtek T bolt and there is zero chance of that getting in but would be my pick for silicone. Reused the copper washers after light dressing with 1200 grit as they are not flimsy by any means.
Now I found out my EGR was bleeding exhaust gas as I recently placed a blanking plate on EGR (Murchison's Tune done) and I found a tough ring of soot trying to escape the gasket as I did not seal this side. Secondly, I would have loved to disconnect swirl motor under intake but the motor wiring harness later enters a large block harness on throttle valve so unpicking will be painful to test on car to see if it generates a fault code. But if you get a tune these are further questions, I.e. will the tune eliminate Swirl motor. End of day, just leave it all in place. With swirl motor removed, swirl plates are linked and spring loaded so you can actuate to ensure your water cleaning has not affected operation and light oil on completion.
Coolant drain, well coolant is going to come out of the block as both inlet and outlet pipes to radiator are mounted high! I suctioned out about 200mm sitting in the valley of block with upto a litre all up pouring out on the ground. I will later bypass the coolant hose to EGR as I realised I can eliminate a second failure point in that the exhaust gas cannot enter the coolant and pressure the hoses and rupture hoses. the Front EGR coolant line to lower engine would be ideal to drain the block but you cannot get to it behind the alternator unfortunately. A gas to coolant fault will certainly pressure that small hose. I did not worry about a heat shield as it’s just a horrible place adjacent head, turbo and coolant flow perhaps.
Engine start, let the low pressure pump prime, first attempt was 5+ seconds of cranking, stop and re primp and presto, full start on all cylinders (not lumpy progressive).
Looking back, I can do the tear down near twice as fast in time, the top of the engine looks simple now. Do I want to do it again, well no.


 2013 Jeep Grand Cherokee Laredo 4x4 CRD
