Grand Willys Project - Page 168 - AUSJEEPOFFROAD.COM Jeep News Australia and New Zealand

Go Back   AUSJEEPOFFROAD.COM Jeep News Australia and New Zealand > JEEP GARAGE > Jeep build up
Register Forums Trading Your Jeep My Garage Mark All Read

Post New Thread  Reply
 
Thread Tools Search this Thread
  #1170  
Old 08-12-2015
WHHEMI's Avatar
WHHEMI  WHHEMI is offline
No Winching
 
Join Date: Oct 2007
Location: yarra valley
Age: 54
Posts: 3,403
What Jeep do I drive?: WH
Likes: 650
Liked 126 Times in 88 Posts
Default

Looking good Marcus, as always.
__________________
Formally known as greenjk
Likes: (2)
  #1171  
Old 08-12-2015
oldon  oldon is offline
CrawlerStar
 
Join Date: Jan 2012
Posts: 469
What Jeep do I drive?: XJ
Likes: 408
Liked 228 Times in 157 Posts
Default

Going by the rest of your work Marcus, you could do the roof in your sleep. Regards oldon.
Likes: (1)
  #1172  
Old 10-12-2015
Gojeep's Avatar
Gojeep  Gojeep is offline
LokRinger
 
Join Date: Jul 2002
Location: Victoria
Posts: 6,870
Likes: 789
Liked 1,754 Times in 556 Posts
Default

Another update this week! Making up for the other weeks when I had nothing to show with all the paint stripping and dipping. Got more hours in too getting some things done before the metalmeet.


Thought I would make up some profile templates to help as a guide when rolling the roof panel. Just used a shrinker to bend it to the curve I wanted. Did half then traced that so I could make the other half the same.


With reducing the profile at the back earlier, you can see it is pretty similar using the same gauge at the front.


Need a front to rear one as well.


Now you can see how much shape it actually needs


Left to right not as much.


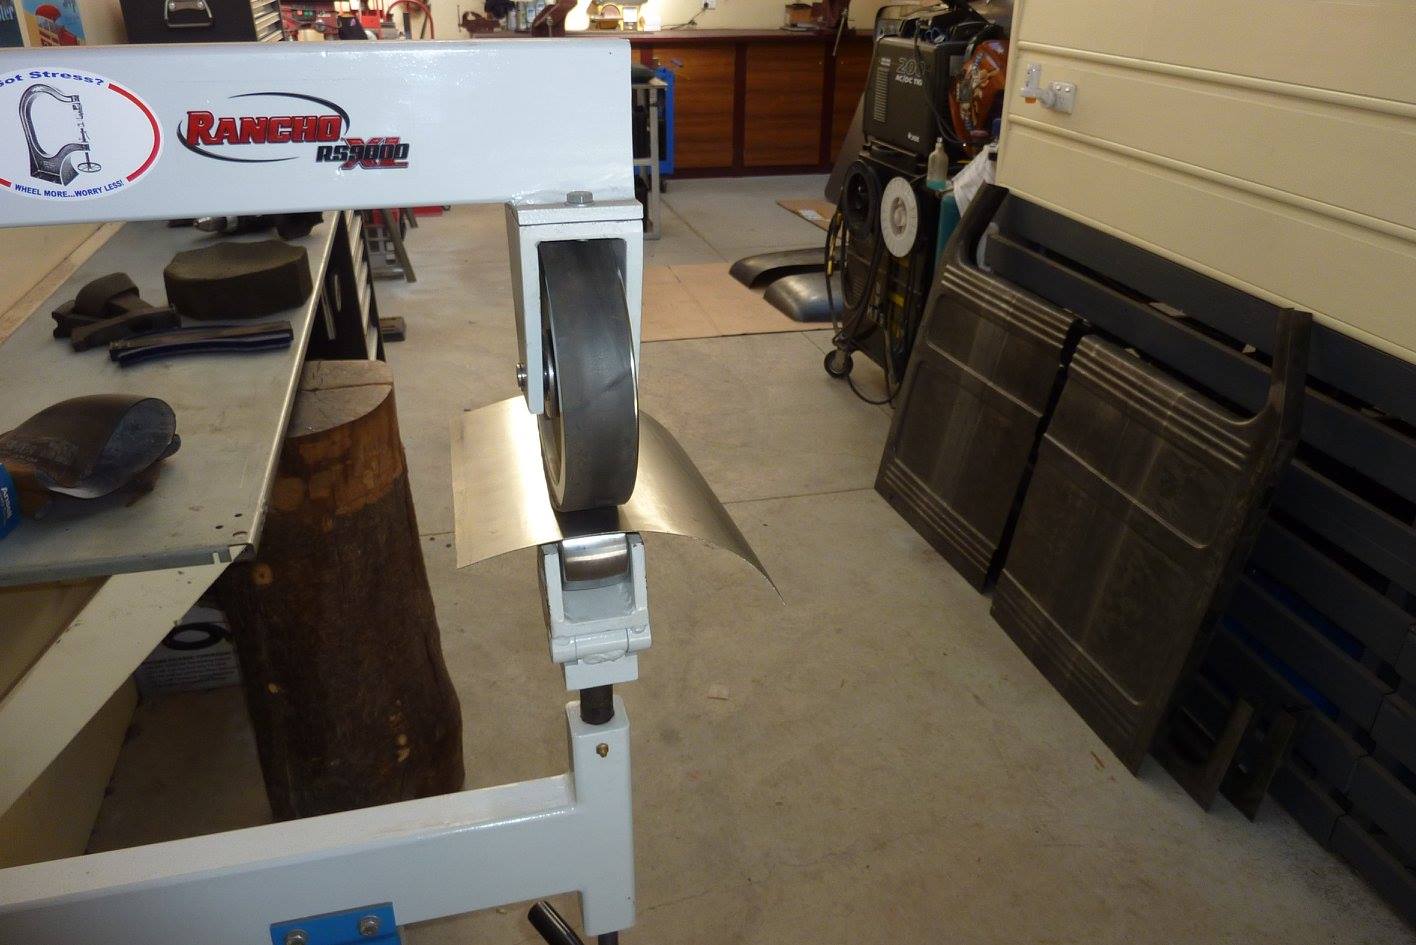
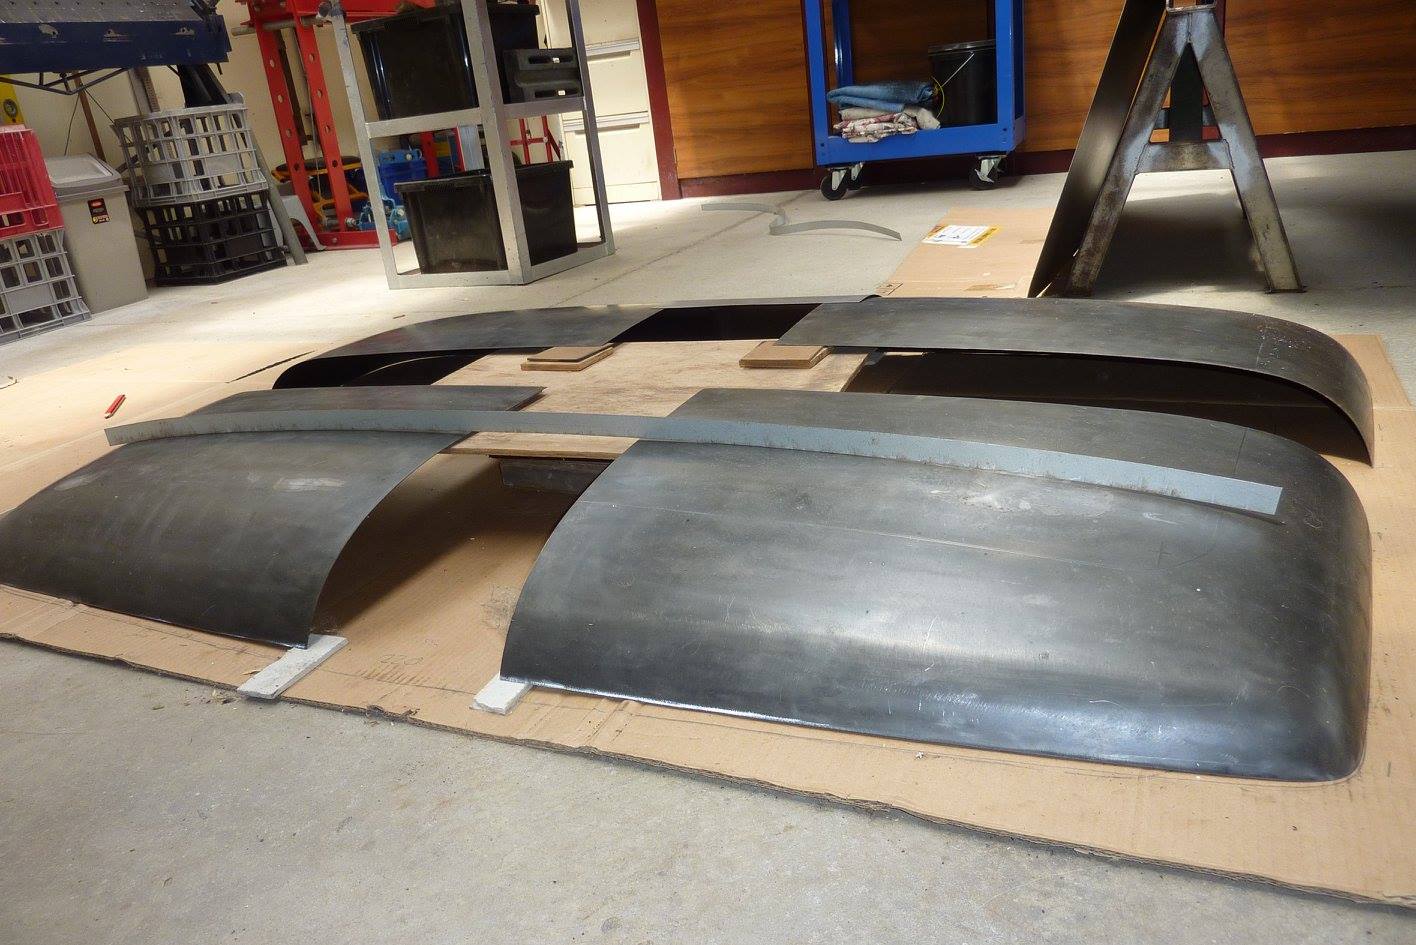
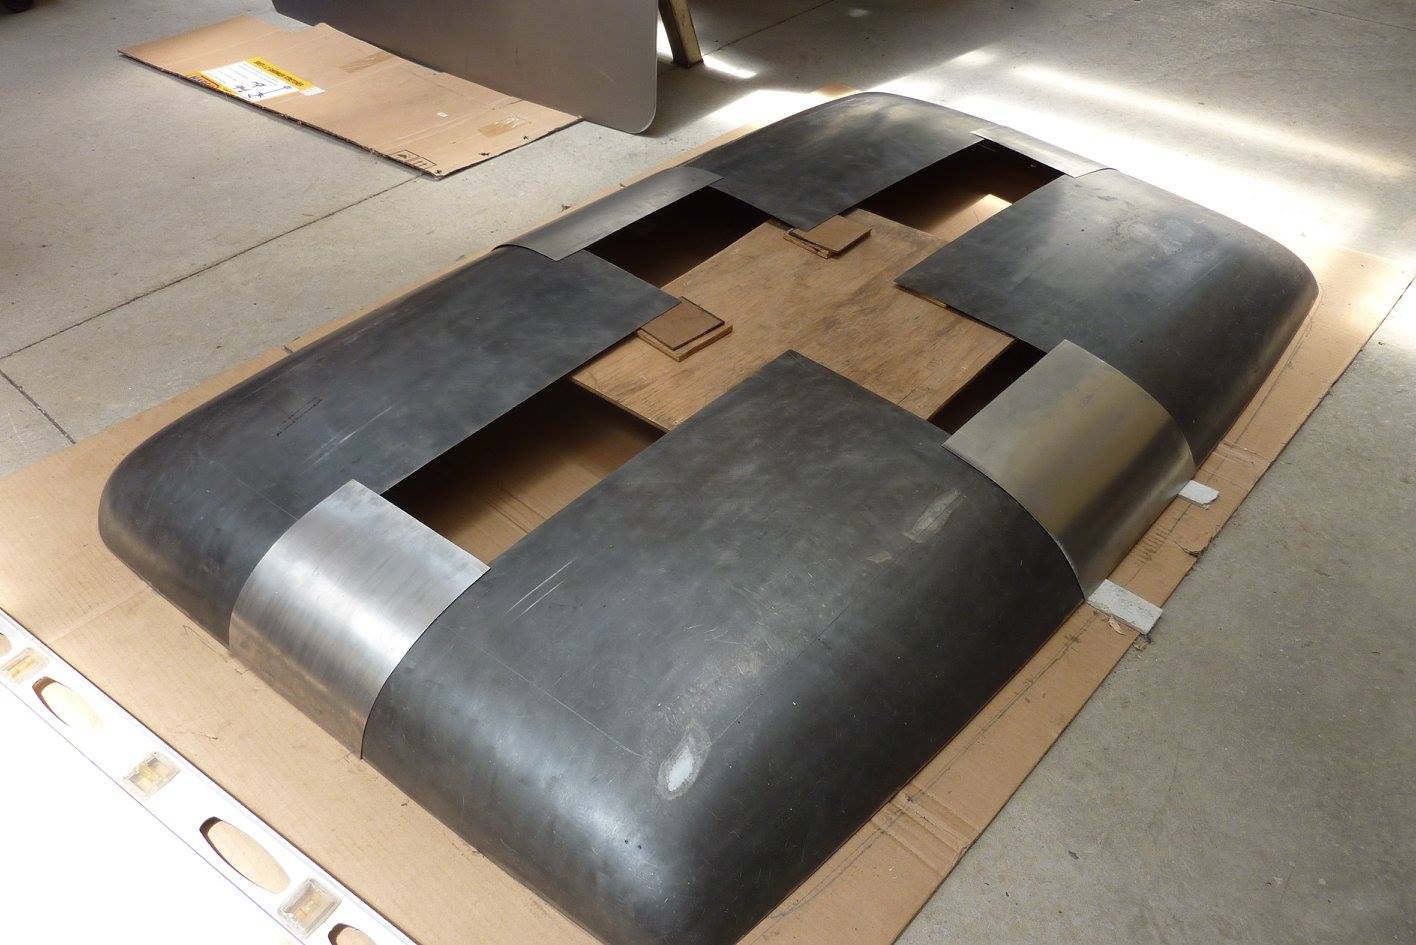
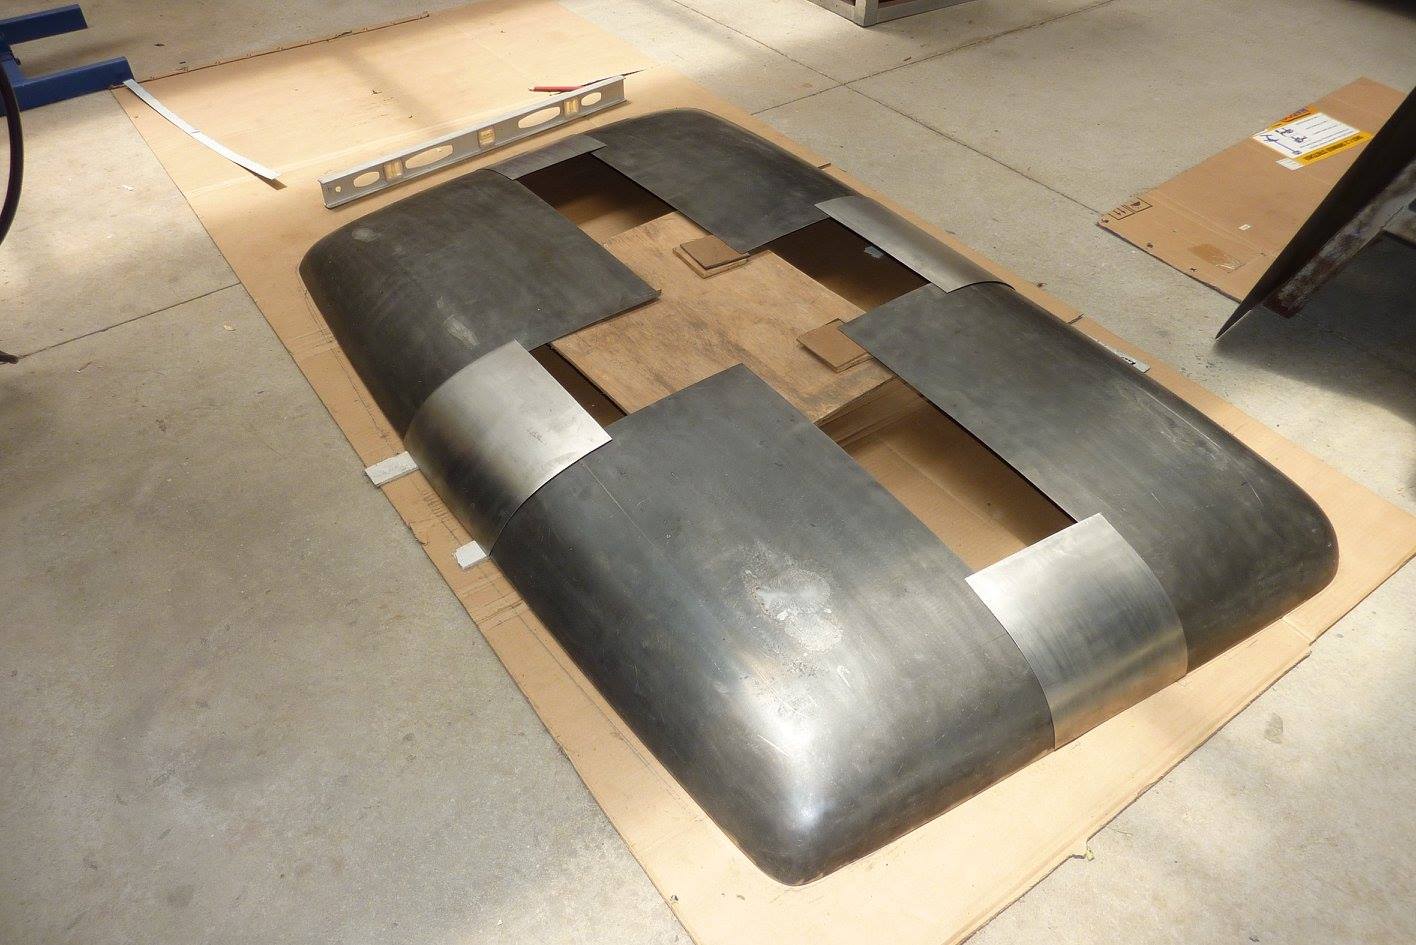
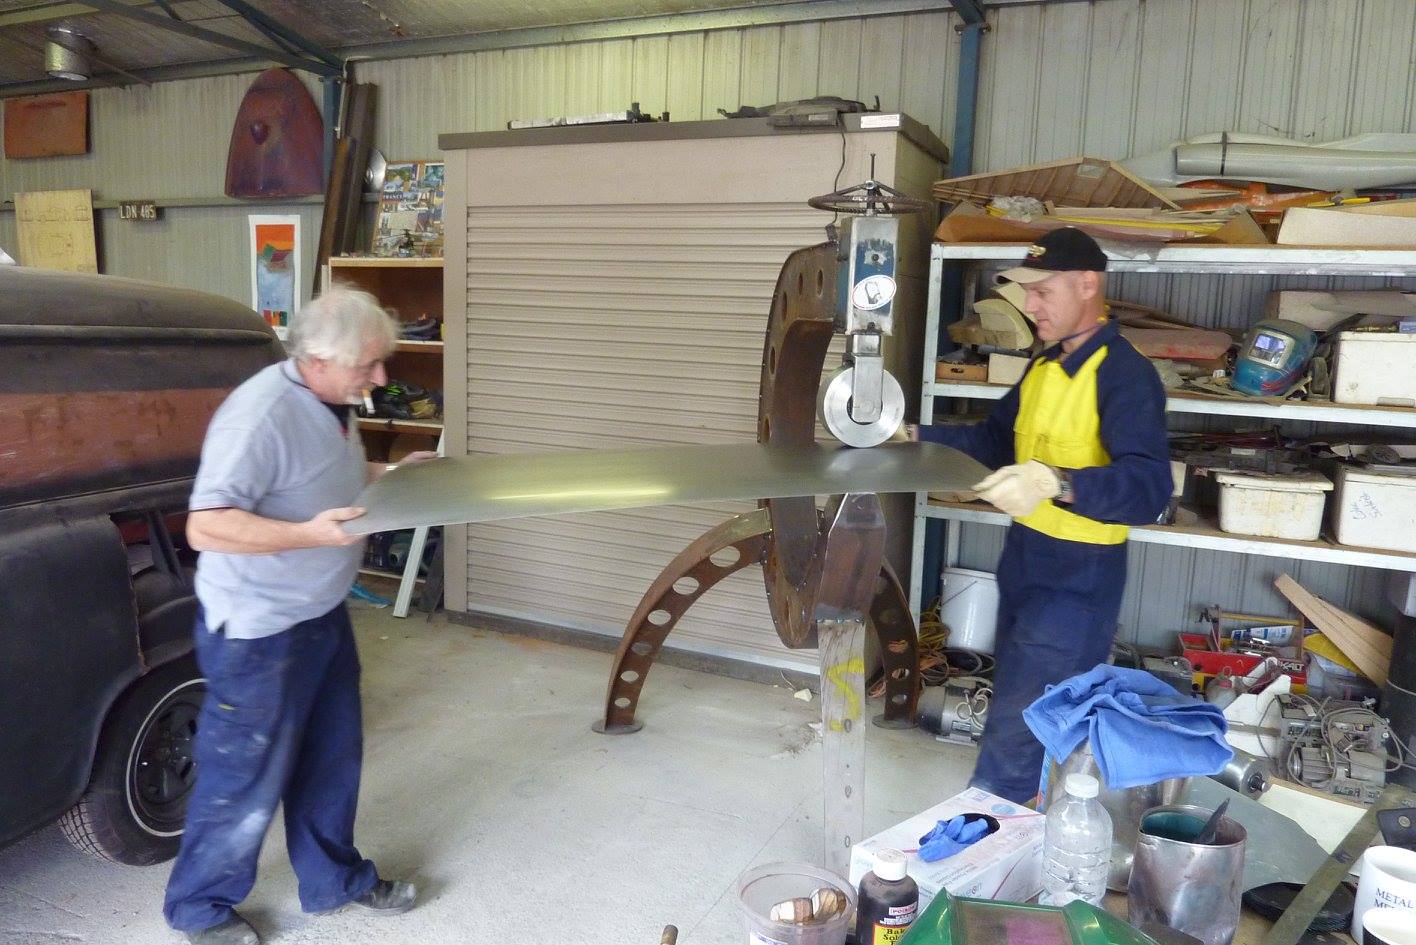
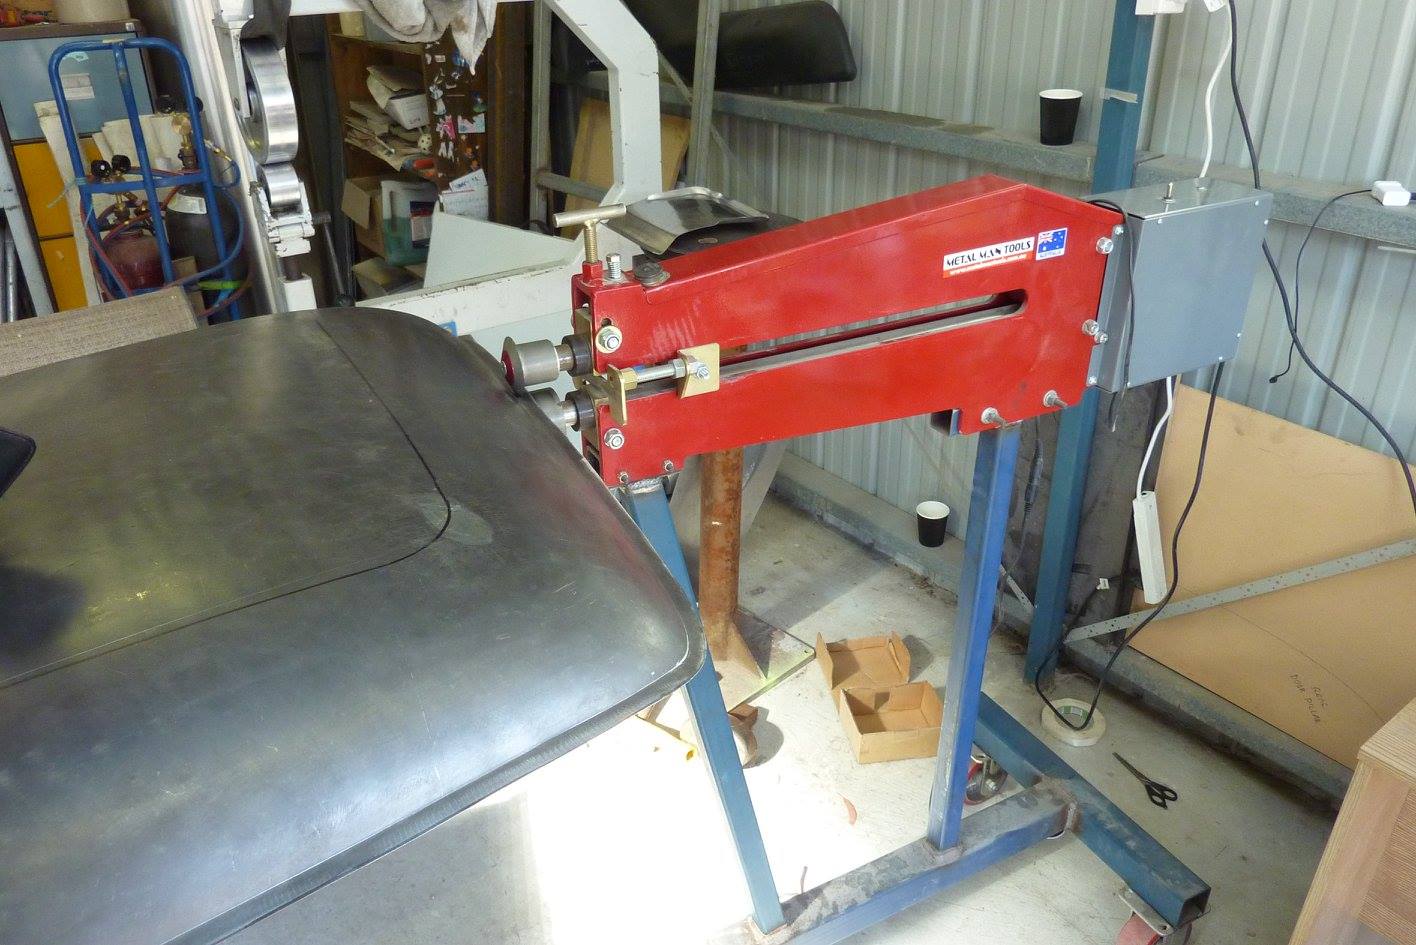
Thought I would do the fill in pieces. I decided to add a inner tube of the top wheel so it would work more as a roller and only bend in one direction. If both the upper and lower are metal, it compresses the metal as it passes through creating a compound curve rather than just bending it in one direction over the lower anvil with the rubber in place.


With the back pretty straight, it worked out nicely just using the upper wheel with the rubber for the whole thing.
The 6mm-1/4" packers are there because the roof frame actually is not flat and is that much higher in the middle. So this makes sure all the shaping will suit the frame profile.


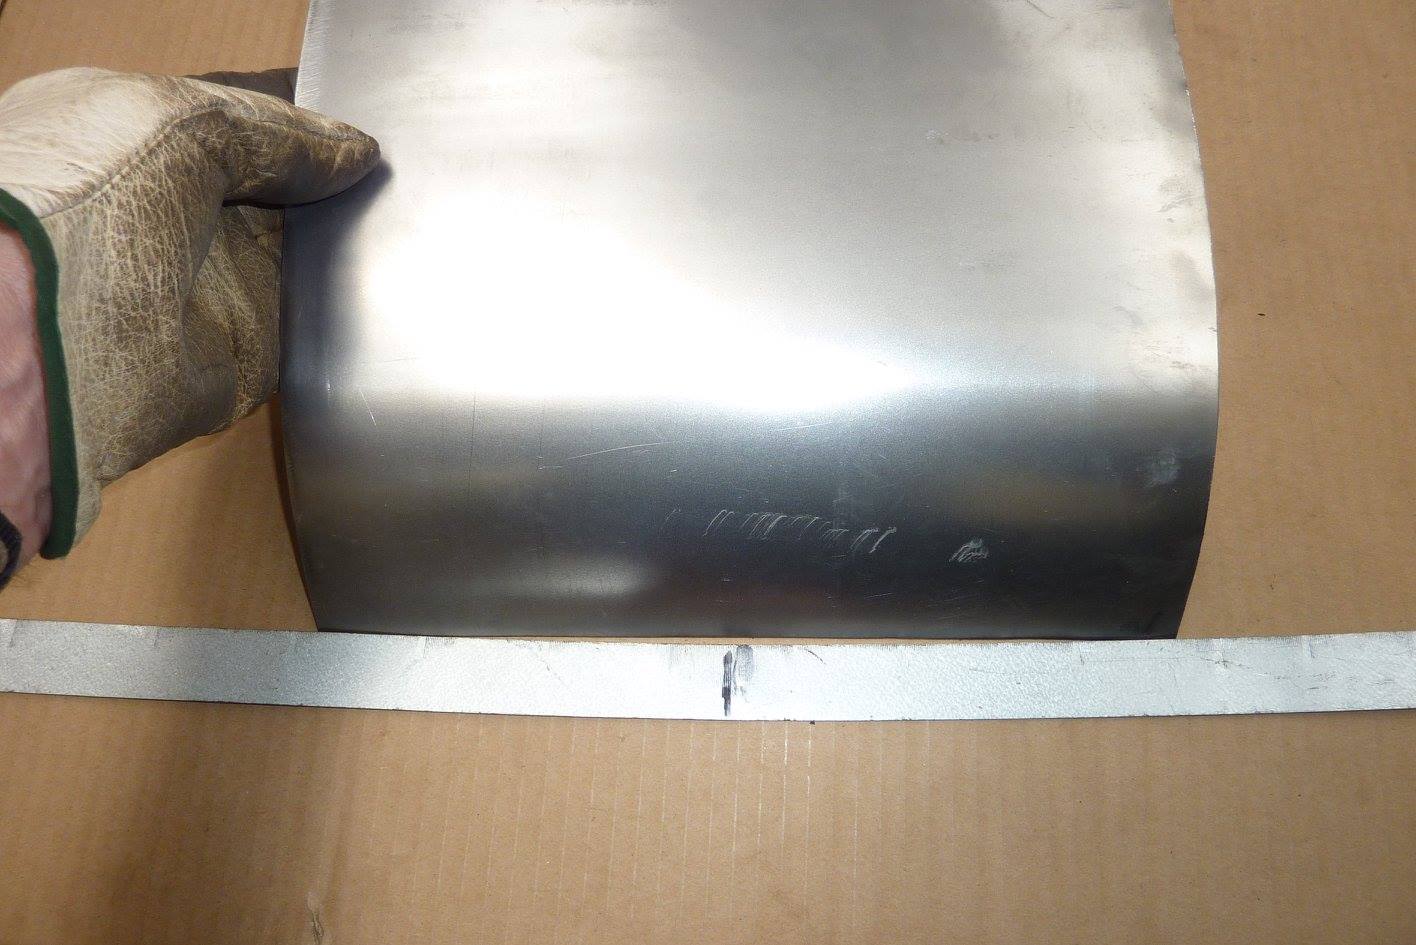
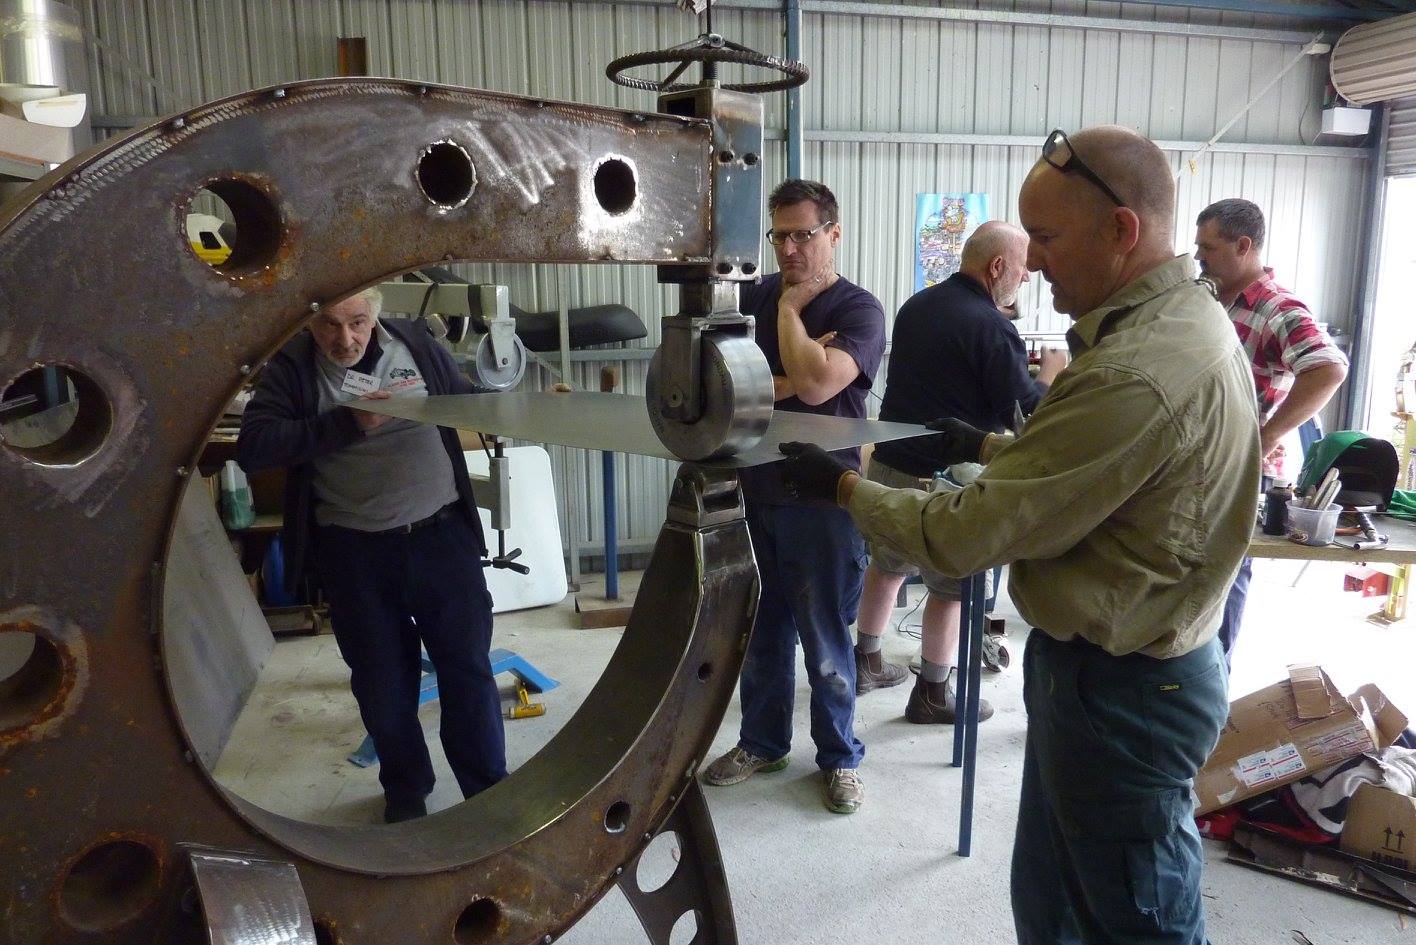
The front is more tricky as will need a compound curve right at the front. I first washed over the whole piece with the rubber upper and my shallowest lower anvil and can see the first part is already the right curve.


The used the next anvil wheel with some more radius and only ran over the bottom 2/3rds. More contact has been made.


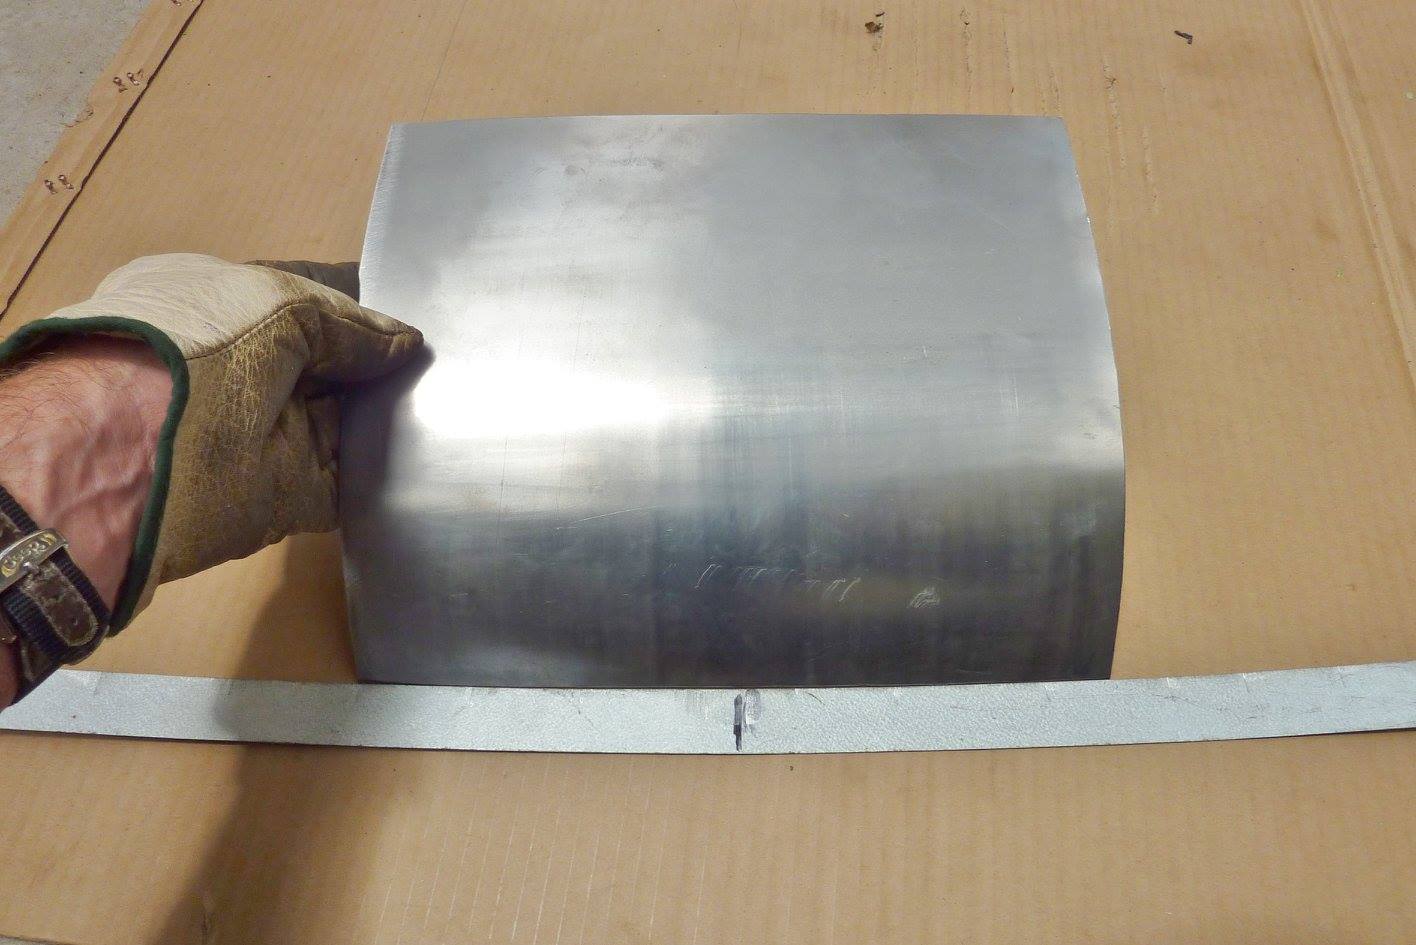
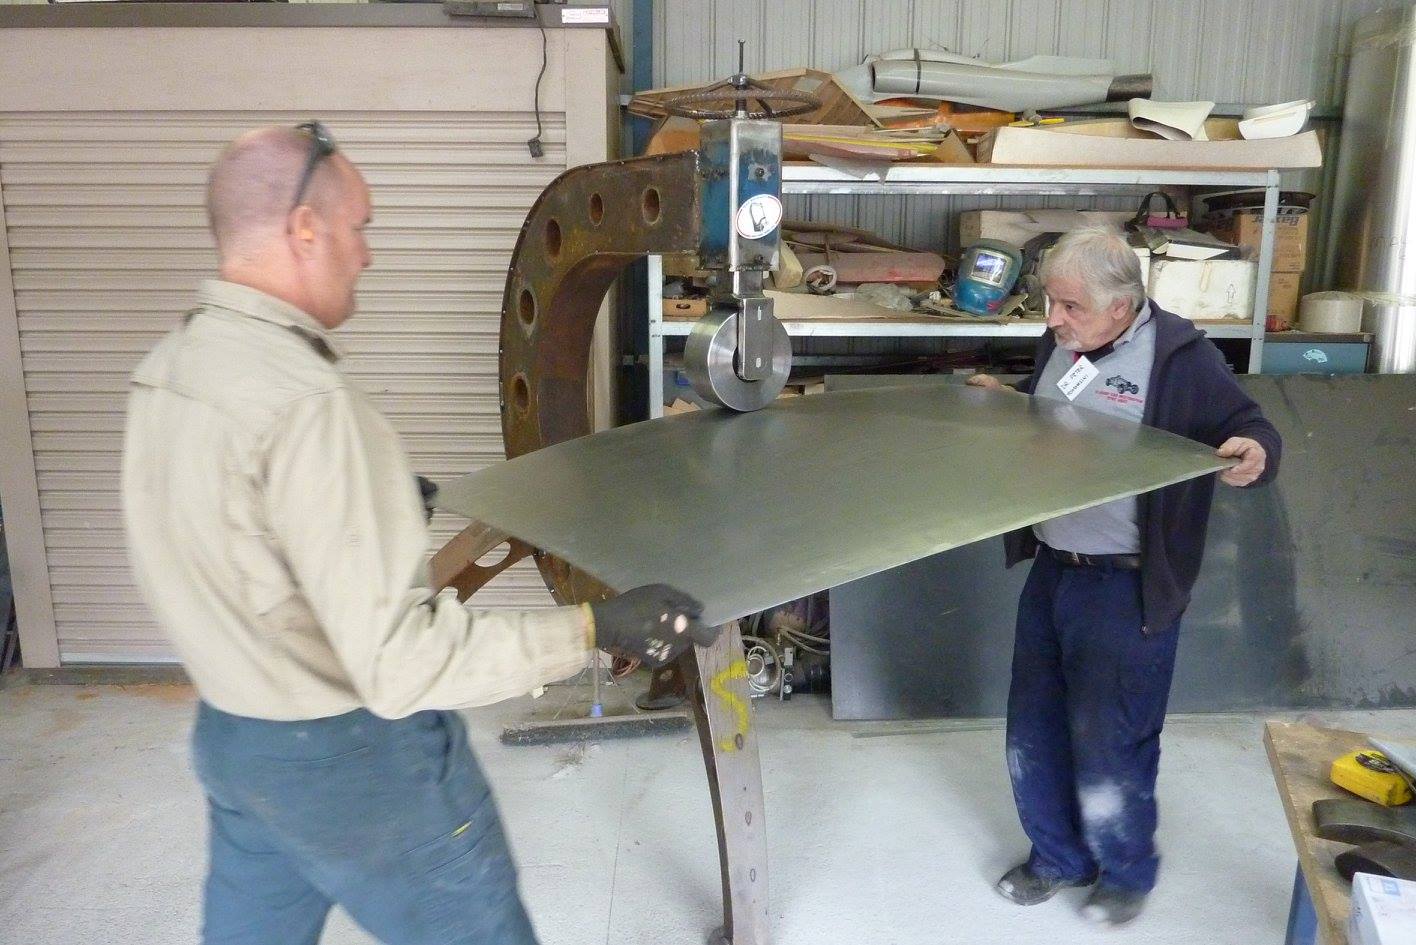
Getting close to matching the bottom radius too on that second anvil. So will switch to the third anvil and concentrate at the top of the lower 1/3rd.


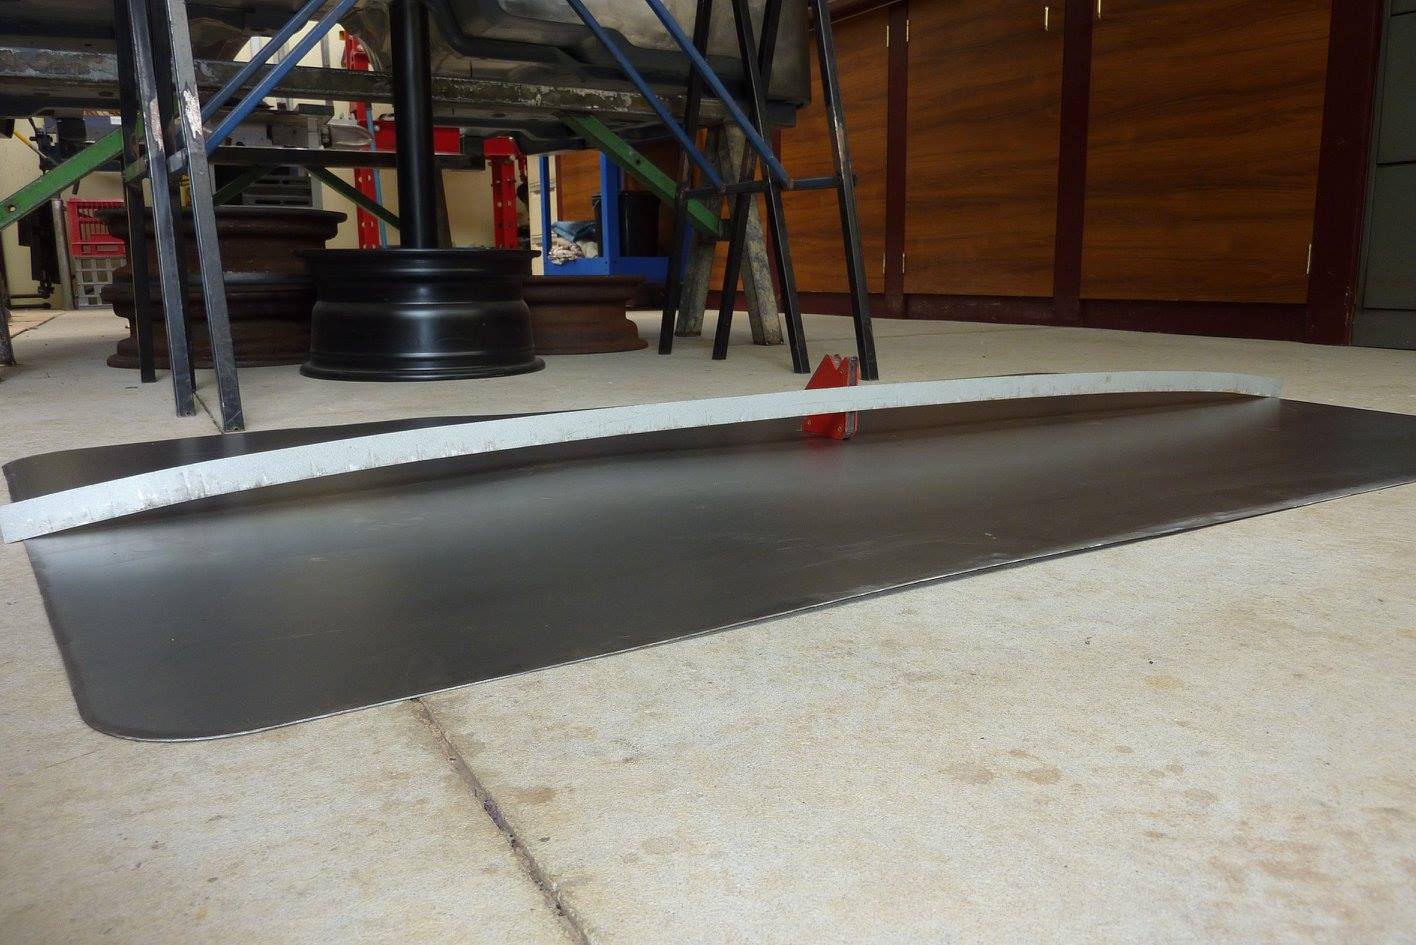
So only rolling with the rubber upper in the one direction for the whole thing, the curve is right in this direction.


But if you look along the very front edge you can see it needs more curve to match the panels each side of it.


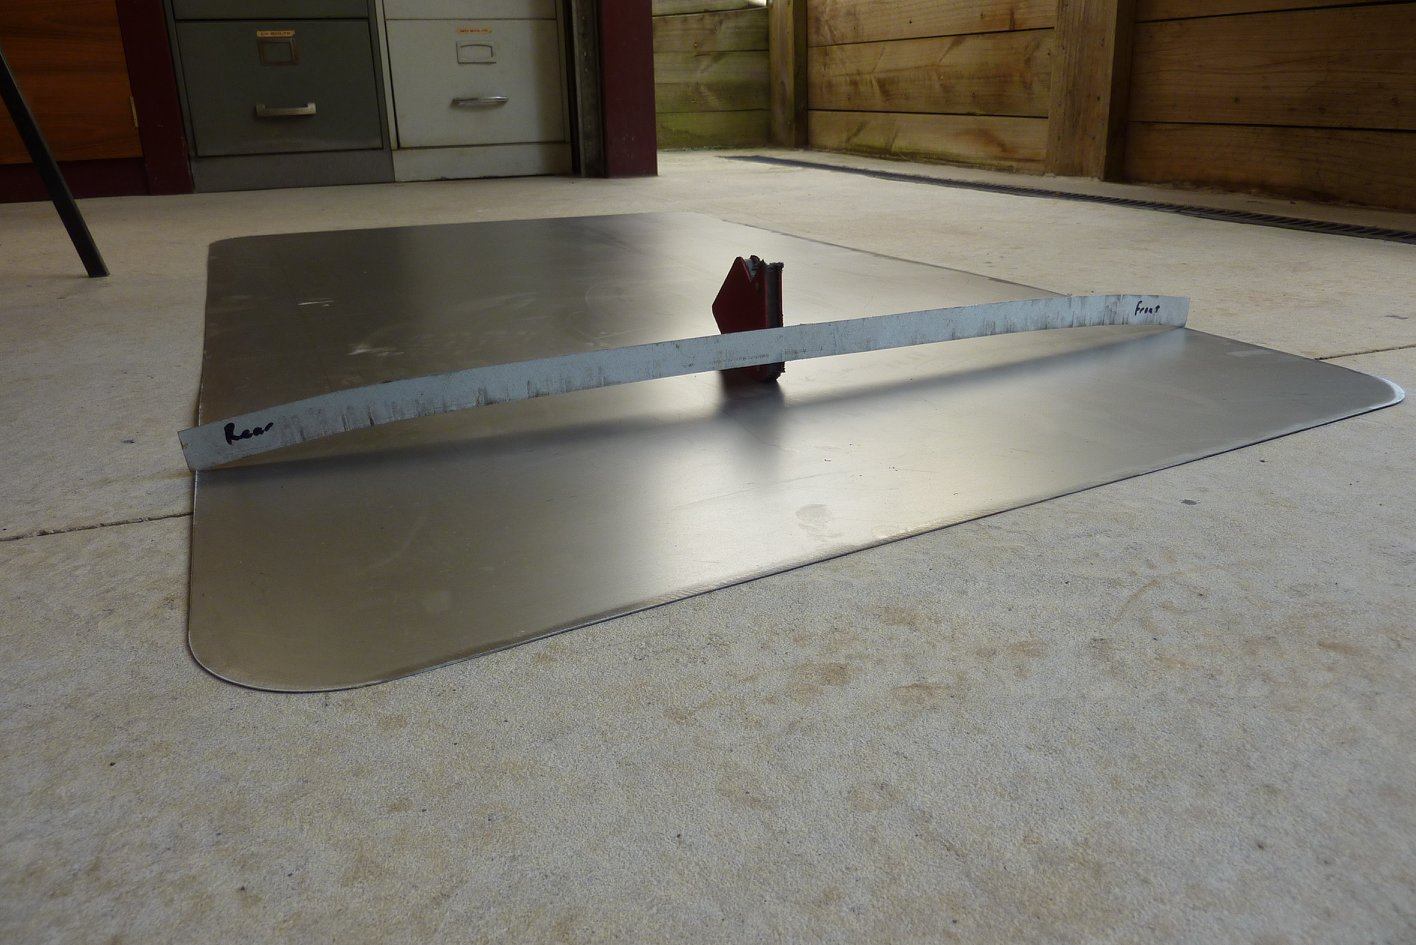
I made a profile gauge to what flowed along the front of the roof panel. Can see how the middle needs to come forward.


What I did is remove the rubber and using the first lower anvil again, just washed over the first third front to rear, the opposite direction to before. That curved the front nicely to match the profile.


Can see now how it flows better along the front now. Probably not the way it is normally done, but it worked well for me. When I had tried doing the whole piece without using the rubber, I got too much curve left to right.


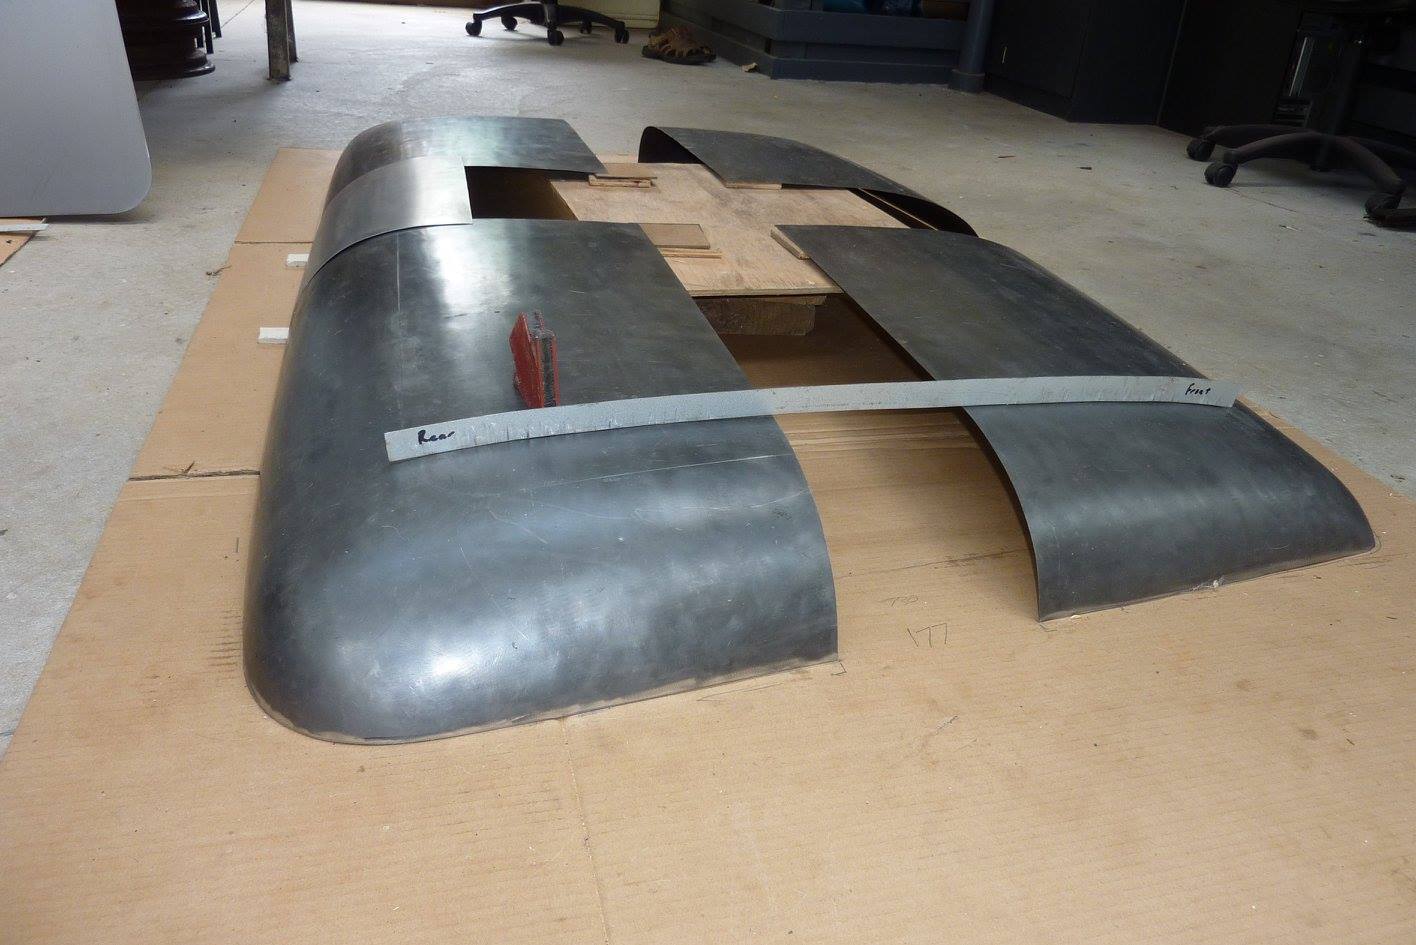
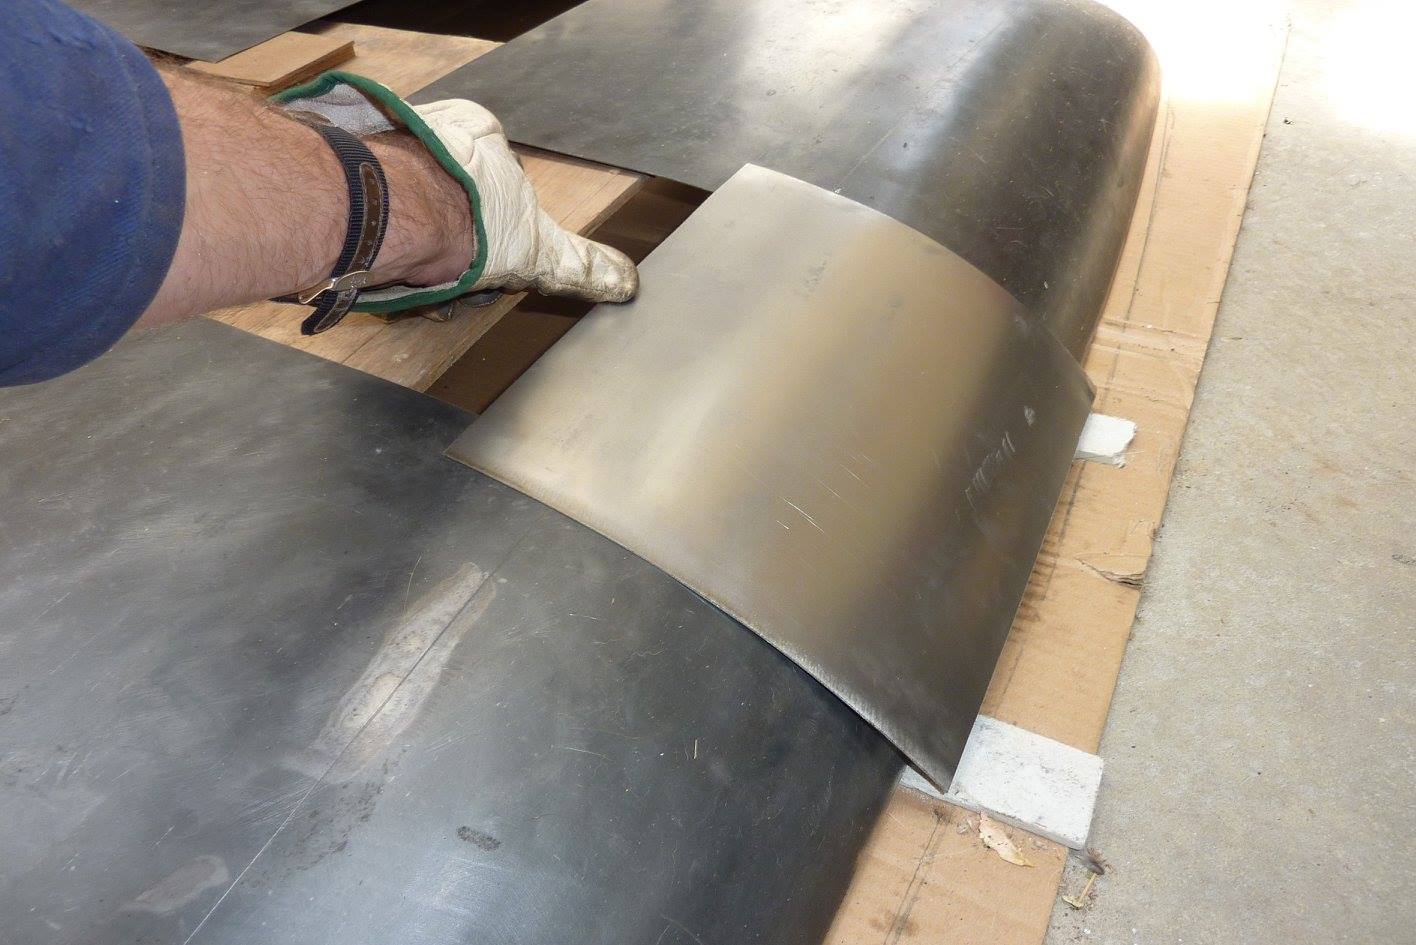
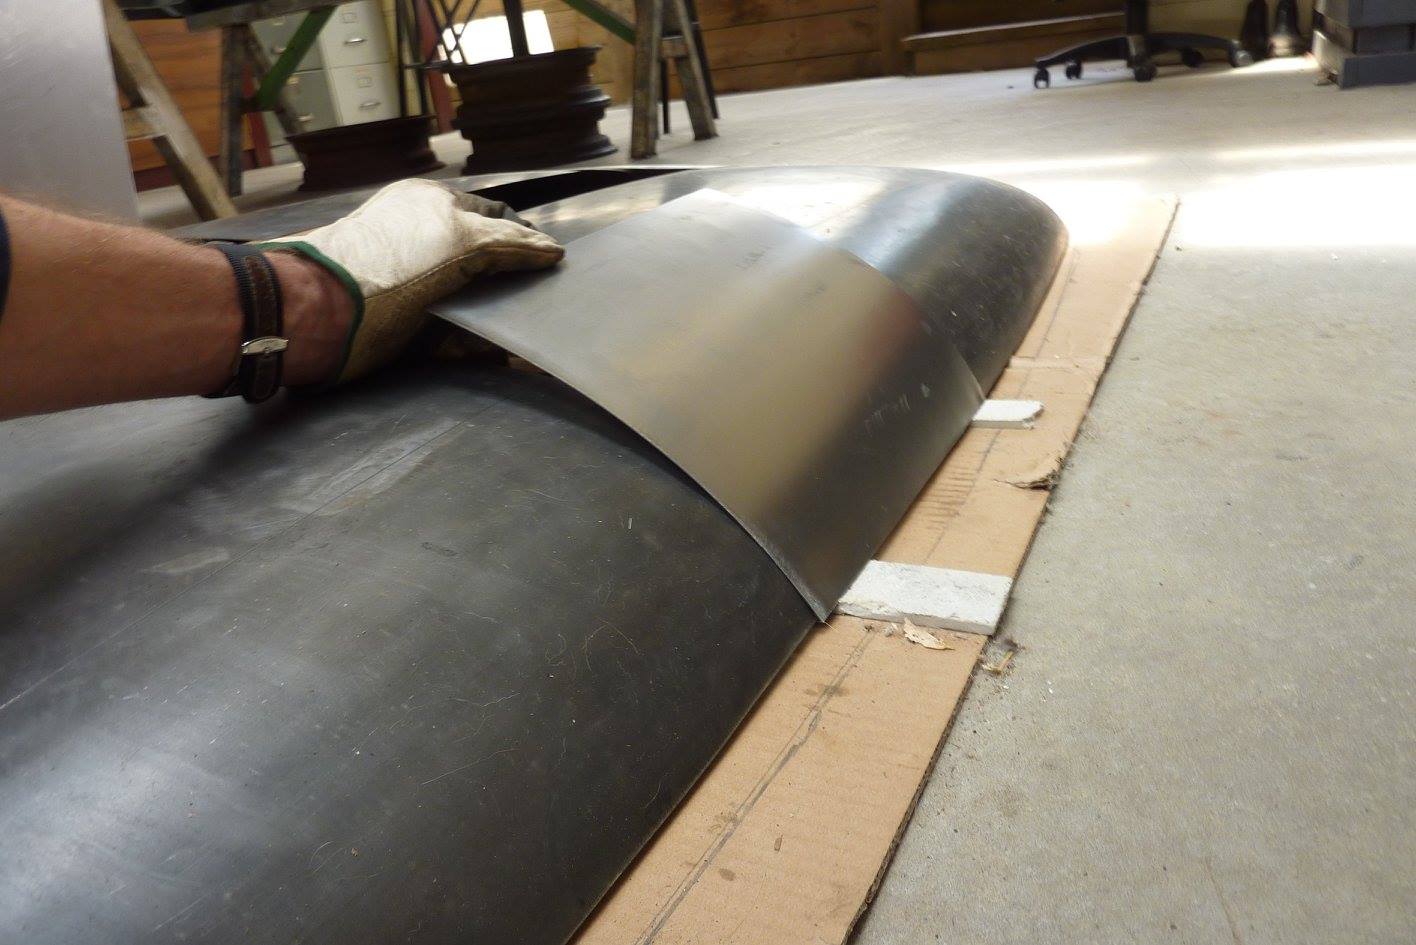
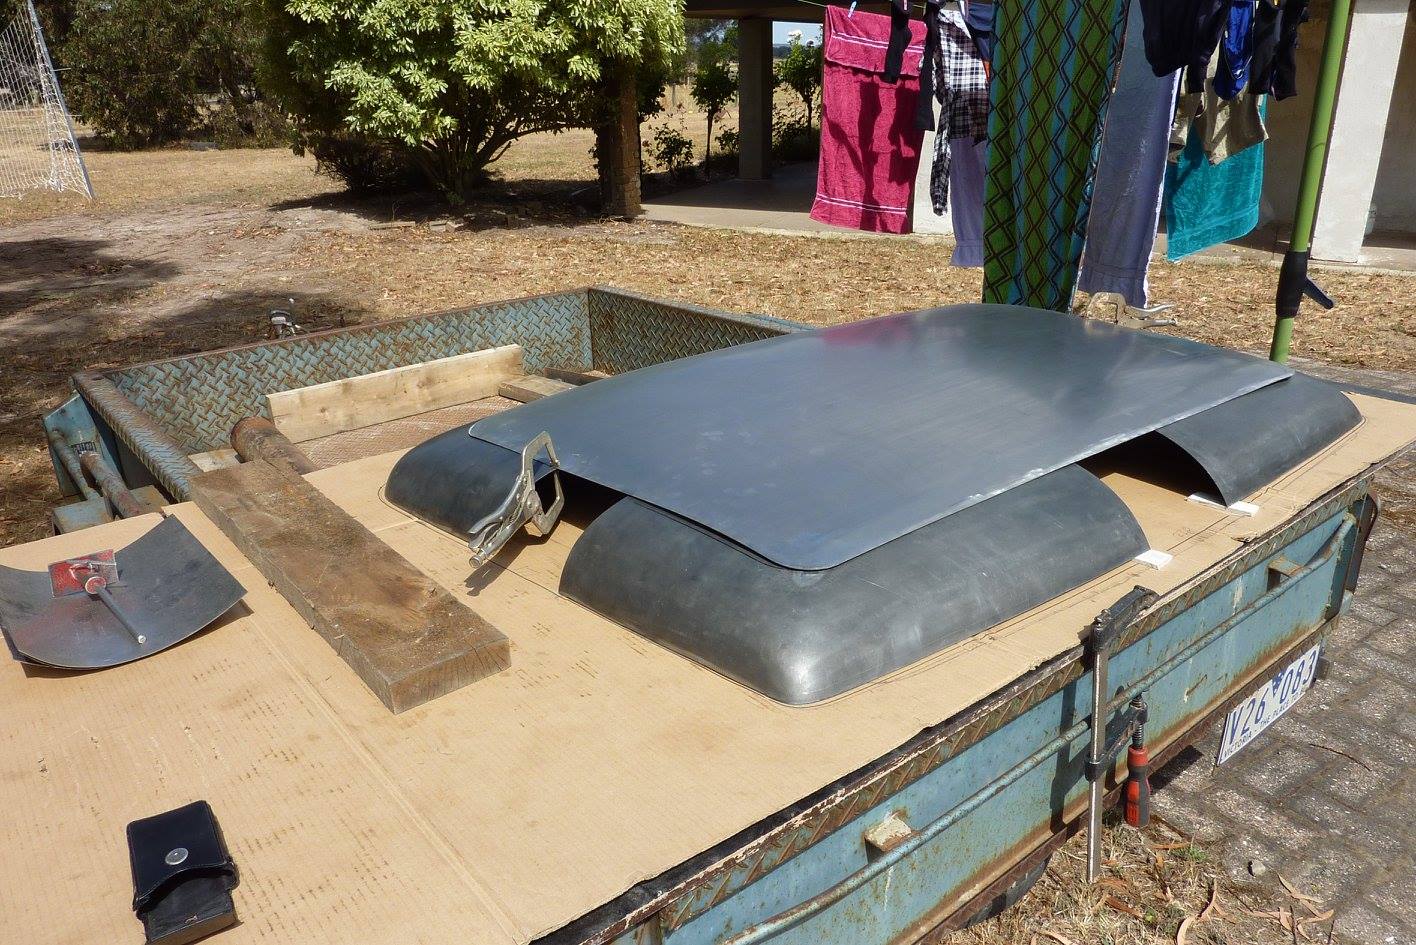
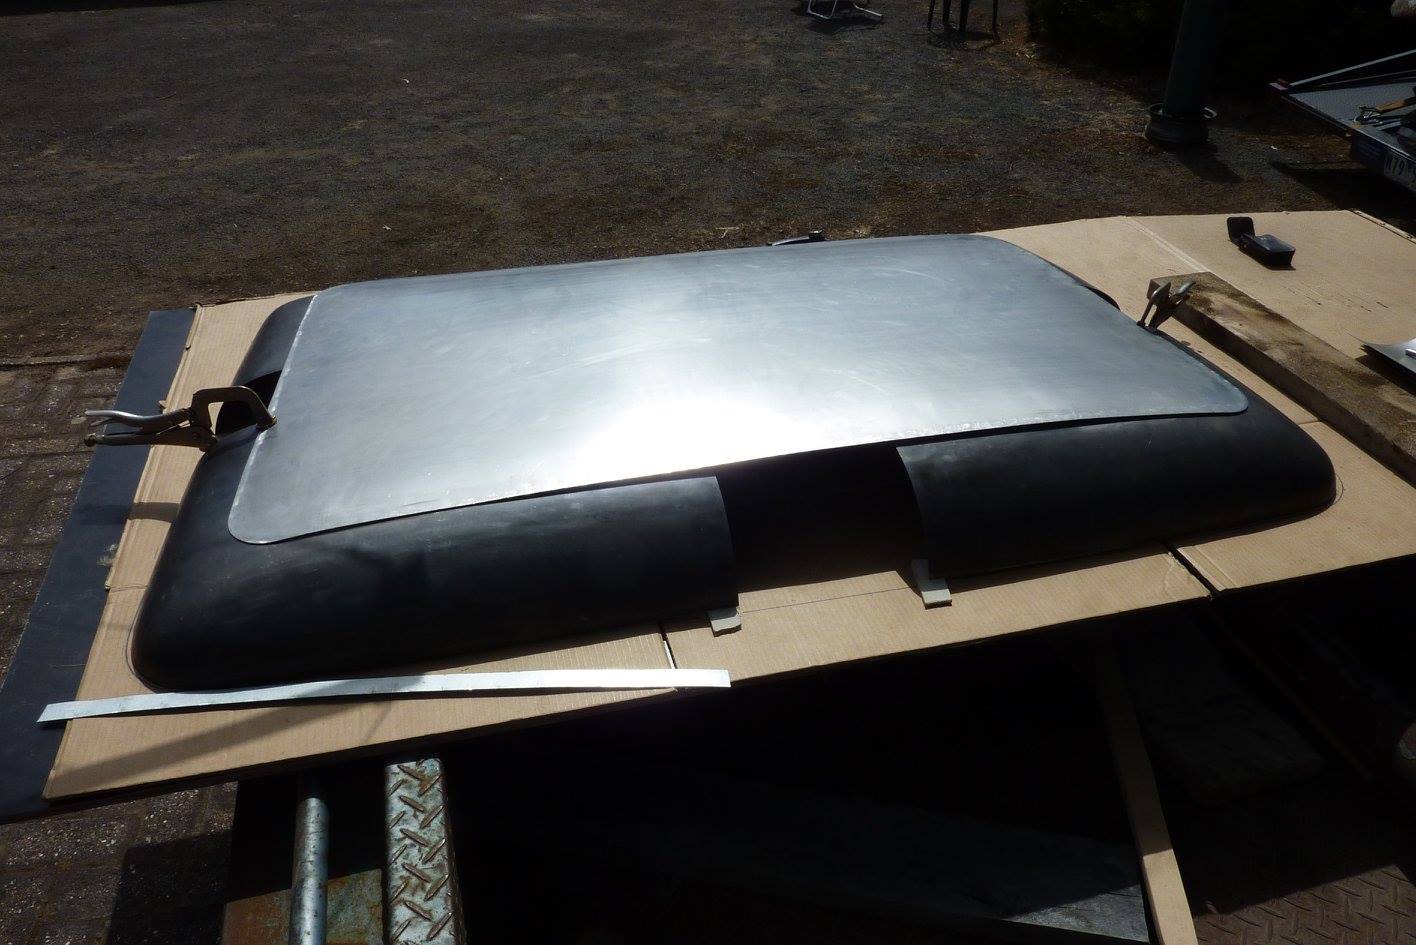
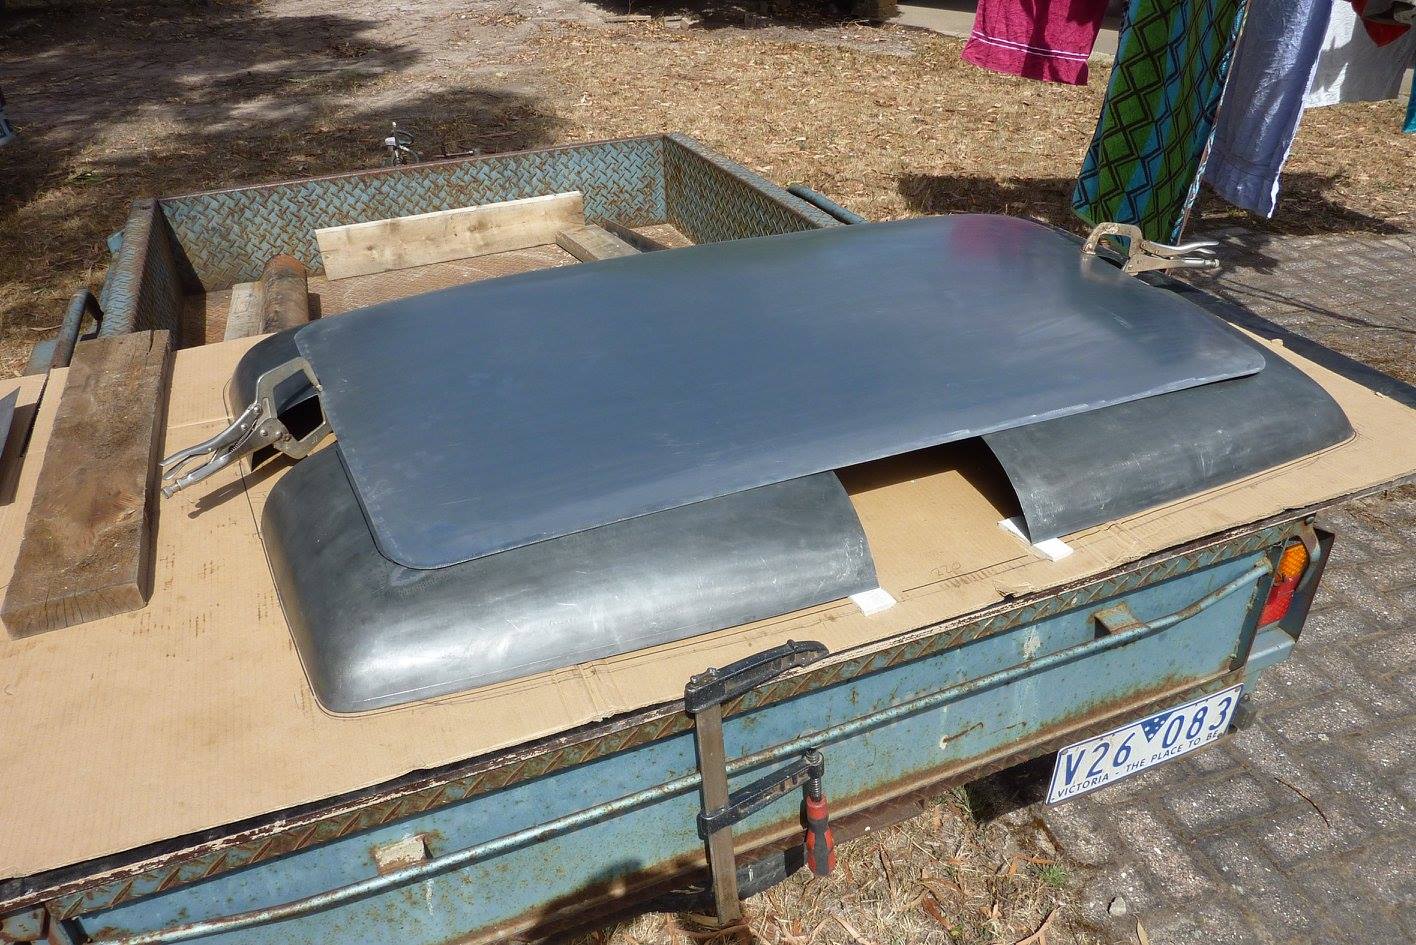
The two side pieces have also been done and did it a similar way to the front piece as it has curve as well but right across the panel. So the final wash over was done from one end to the other in the opposite direction to the forming with the rubber left to right.


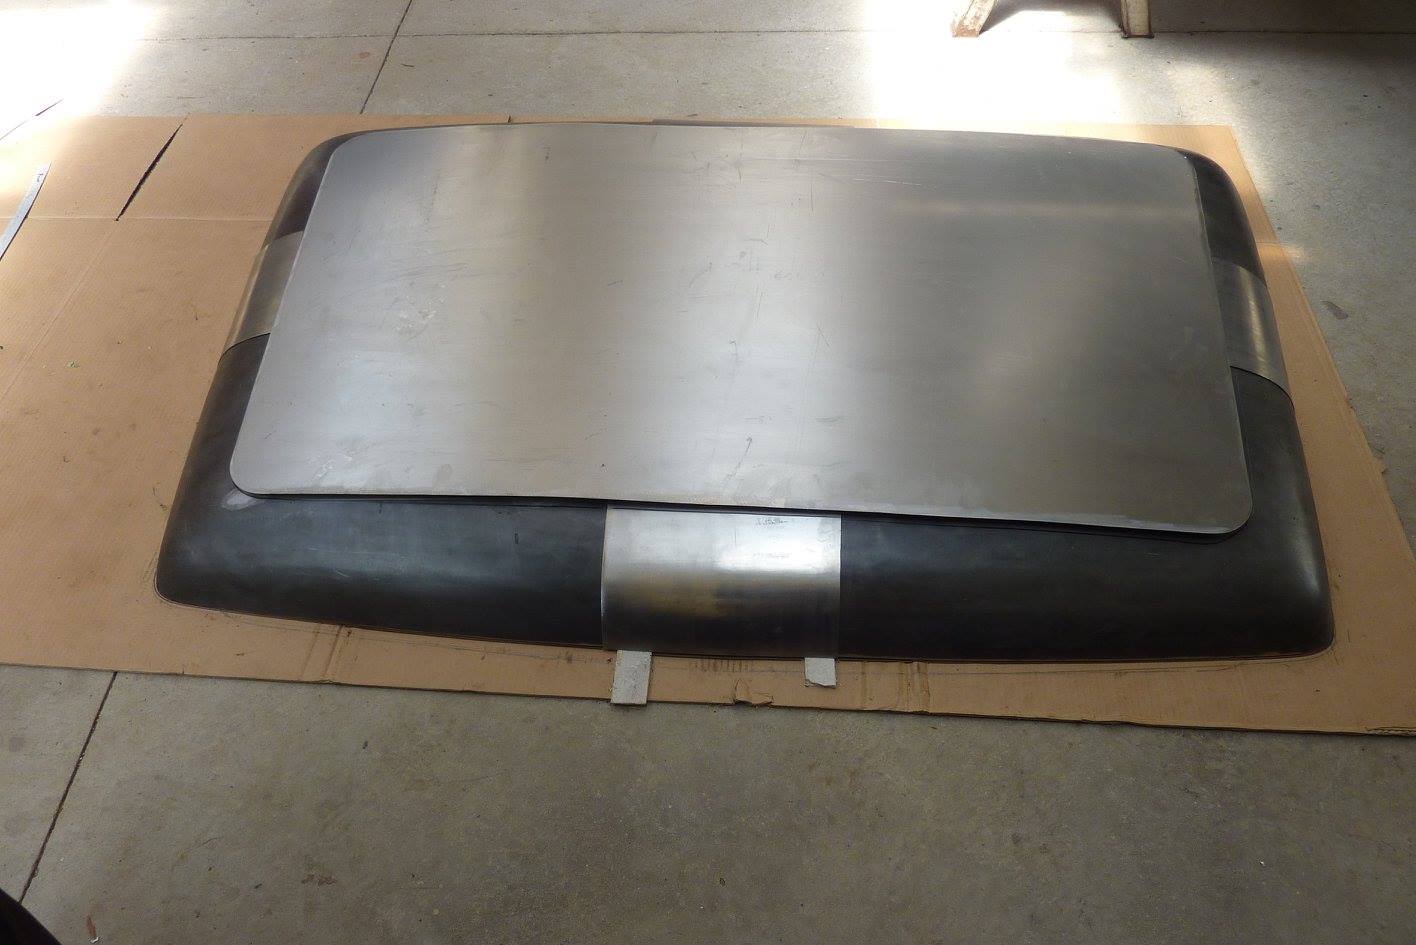
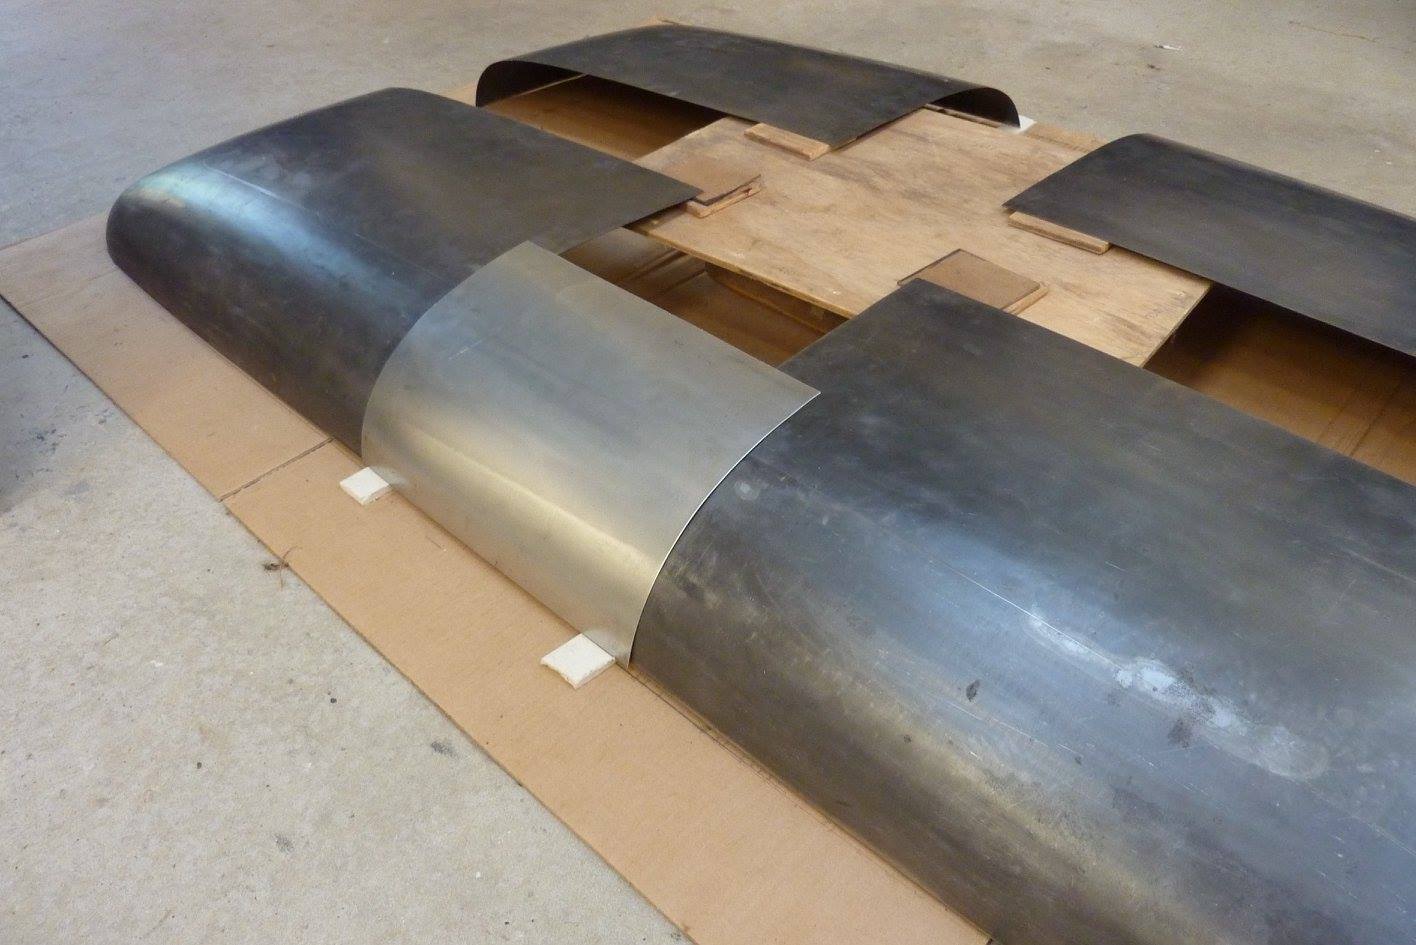
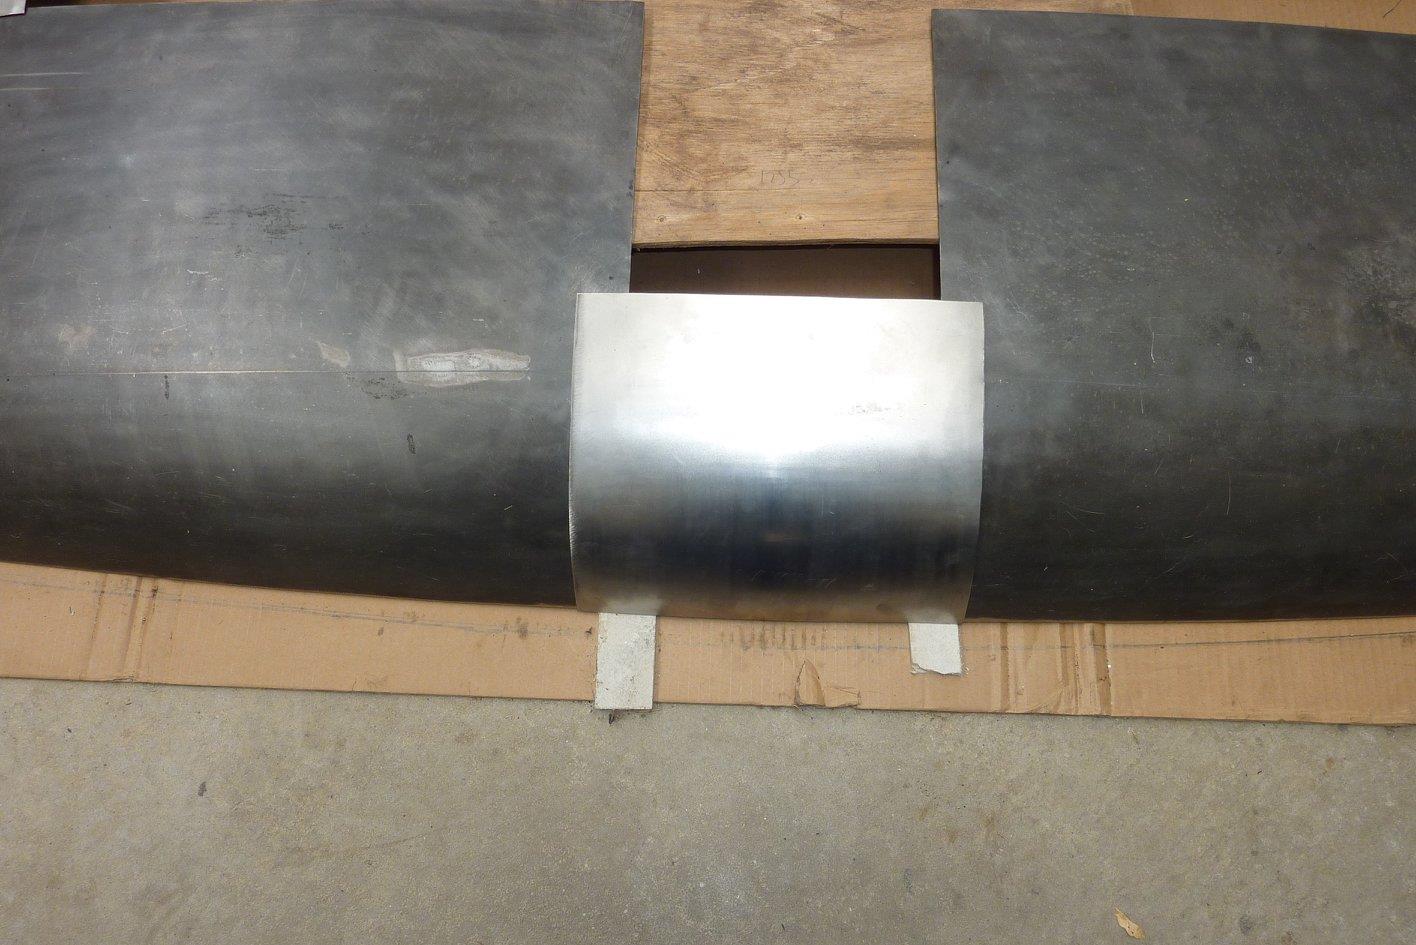
So all ready to do the in fill panel now.
__________________
Cheers, Marcus.

My web site:
http://willyshotrod.com Over 5'000 Club
Likes: (7)

Last edited by Gojeep; 03-08-2017 at 11:00 AM.
  #1173  
Old 10-12-2015
bodgie's Avatar
bodgie  bodgie is offline
Rock Munki
 
Join Date: Aug 2009
Location: Castle Hill, NSW
Posts: 2,136
What Jeep do I drive?: WG
Likes: 11
Liked 300 Times in 245 Posts
Default

Definitely looking good, I was thinking a while back the roof may be a little high and break the proportions. Looks like the extra width/length will work well.

Looking forward to seeing you stitch it all together.
Likes: (1)
  #1174  
Old 13-12-2015
Gojeep's Avatar
Gojeep  Gojeep is offline
LokRinger
 
Join Date: Jul 2002
Location: Victoria
Posts: 6,870
Likes: 789
Liked 1,754 Times in 556 Posts
Default

Thanks for the likes and comments.
Was good to be shaping some metal again rather than just strip and dip all the time.
__________________
Cheers, Marcus.

My web site:
http://willyshotrod.com Over 5'000 Club
Likes: (1)
  #1175  
Old 15-12-2015
Gojeep's Avatar
Gojeep  Gojeep is offline
LokRinger
 
Join Date: Jul 2002
Location: Victoria
Posts: 6,870
Likes: 789
Liked 1,754 Times in 556 Posts
Default

Well it was certainly worthwhile being able to attend the second ever Metal Meet here in Australia. Being only new to wheeling it was great having help to wheel such a big panel which can't be done on your own and to have the guidance of a master in the field while doing it!

With 50 years of metal shaping experience, it was a privilege to have Peter Tommasini give guidance on shaping my new roof skin. Here he is setting the right tension on John's almost finished English Wheel. He passed on tips like getting me to push by hand some shape into the panel before we even started. Placed the panel on its long edge on the floor and I got Nigel to hold some curve in it while I pushed the palm of my hand from top to bottom in a stoke to help hold the curve along it. Once it had some stiffness to it we put it up into the wheel. We still had to hold tension in the panel by twisting our hands to hold some curve while we wheeled at the start to stop it flopping around.


Can see now some shape starting to get into it. Peter would check how we were going every 10 minutes or so and sometimes have correct anything that needed fixing.


Getting some one on one myself with Peter now. Learned a lot about how holding the panel at what height and making sure it was level so it wouldn't get a twist in it.


A big thank you to Nigel too for hanging on the end of the panel with me for over 4 hours as we passed the sheet back and forth!


We stopped all the time to check the panel on the floor of the workshop using the profile gauges I had made beforehand. Also a lot of reading the panel by running a hand over it and checking it by eye. When we started to get close I setup the roof panels to see how the infill panel were blending into them.


Looking across the back on it. It doesn't look like it has changed much but there is a lot of shape into it now and no where near flat anymore even though it looks like it. Remember the profile gauges I made that showed just how much the edges had to come down.


One corner was still sitting up a bit but a slight amount of pressure would have it sitting perfectly. The weld shrink would pull it down as well.


Time to tip the flanges back into the edge of the original roof panels that I had pancaked. On the corners I first hammered the edges here as they needed to be stretched so it would not distort the corner as it was being tipped.


Used Dennis's powered bead roller to make the job a bit easier for me to tip the flange. Slowly increased the flange angle by lifting the panel a bit more each time. Took 3-4 passes to get the angle I needed. This flange is what sits in the gutter of the roof frame and gets spot welded in when the factory assembles it. I will be plug welding instead as don't own a spot welder.
__________________
Cheers, Marcus.

My web site:
http://willyshotrod.com Over 5'000 Club
Likes: (5)

Last edited by Gojeep; 03-08-2017 at 03:14 PM.
  #1176  
Old 15-12-2015
SeaComms's Avatar
SeaComms  SeaComms is offline
MonsterMoose
 
Join Date: Jun 2010
Location: Noosa QLD.
Age: 58
Posts: 7,940
What Jeep do I drive?: WK2
Likes: 1,432
Liked 809 Times in 466 Posts
Check out my Ride(s)
Default

I cannot explain in words how much I appreciate the detail you are giving us. This whole thread could end up part of body building course!!
__________________
Cheers, Dave :)

2010 JK, then a 2015 KL Trailhawk, now a 2017 GC Trailhawk!

Over 5000 Club
Likes: (2)
Post New Thread  Reply


Posting Rules
You may not post new threads
You may not post replies
You may not post attachments
You may not edit your posts

BB code is On
Smilies are On
[IMG] code is On
HTML code is On


All times are GMT +10. The time now is 03:54 AM.


Advertisements


AJOR does not vouch for or warrant the accuracy, completeness or usefulness of any message, and are not responsible for the contents of any message. The messages express the views of the author of the message, not necessarily the views of AJOR or any entity associated with AJOR, nor should any advice be substituted as technical advice replacing that of a mechanic. You agree, through your use of this service, that you will not use AJOR to post any material which is knowingly false and/or defamatory, inaccurate, abusive, vulgar, hateful, harassing, obscene, profane, sexually oriented, threatening, invasive of a person's privacy, religious, political or otherwise violative of any law. You agree not to post any copyrighted material unless the copyright is owned by you or by AJOR. The owner, administrators and moderators of AJOR reserve the right to delete any message or members for any or no reason whatsoever. You remain solely responsible for the content of your messages, and you agree to indemnify and hold harmless AJOR, the administrators, moderators, and their agents with respect to any claim based upon transmission of your message(s). The use of profile signatures to intentionally mislead or misdirect any member on this forum is not acceptable and may result in your account being suspended. Any trip that is organised through the AJOR forum is participated at your own risk. If you or your vehicle is damaged it is your responsibility, not that of the person that posted the thread, message or topic initiating the trip, nor the organisers of AJOR or moderators of any specific forum. This forum and associated website is the property of AJOR. No user data is harvested and no information supplied in your registration will be sold for profit.


Powered by vBulletin® Version 3.8.7
Copyright ©2000 - 2024, vBulletin Solutions, Inc.

AJOR © 2002 - 2024 AUSJEEPOFFROAD.COM. All corporate trademarked names and logos are property of their respective owners. Ausjeepoffroad is in no way associated with DaimlerChrysler Corporation or Fiat Jeep.
www.ausjeep.com www.ausjeep.com.au www.midlifemate.com ausjeepforum.com www.r9kustoms.com
vB Ad Management by =RedTyger=