Grand Willys Project - Page 198 - AUSJEEPOFFROAD.COM Jeep News Australia and New Zealand

Go Back   AUSJEEPOFFROAD.COM Jeep News Australia and New Zealand > JEEP GARAGE > Jeep build up
Register Forums Trading Your Jeep My Garage Mark All Read

Post New Thread  Reply
 
Thread Tools Search this Thread
  #1380  
Old 08-10-2017
Gojeep's Avatar
Gojeep  Gojeep is offline
LokRinger
 
Join Date: Jul 2002
Location: Victoria
Posts: 6,870
Likes: 789
Liked 1,754 Times in 556 Posts
Default

Sorry about going into so much detail on these locks, but I struggled to find much about this on the net so thought others might need the information one day.


Next up is making the doors lock and unlock. I wanted a manual release on the inside of the door in case something happened to the central locking. I had these wide flat head bolts to use as pivots from an old CRT monitor I think. I always strip down and take fasteners out of everything that is to be thrown out and everything goes into the sorted bins I have. The pivot links were cut from some flat stock.


I fully welded the head of the bolt to the door frame. I didn't want any long term fatigue so why I chose the widest flat bolt/screw head to use. What needs to be operated is the L shaped lever coming out of the lock and needs to go straight up and down, but is on the wrong side of the glass.


I used these door lock release rods from the donor front doors and bent them to suit the offset I needed.


This is the best way I could think of to move the lever up and down directly under it. It sometimes would jam if you tried pushing up on an angle. This is another reason I ran the latch with the locking lever at the bottom as it would work conventionally. Pulling up on the door release knob would pull down the lever and unlock it like shown.


Pushing down on the inside lock rod would push it into the locked position. The pivot link was made as long as I could to get enough travel without binding. Also made sure the pivot link is level halfway through its travel to prevent binding as well. A nyloc nut on the pivot bolt will used for final assembly.


Next thing was to make a mount for the central locking actuator/solenoid. I didn't want another set of screws or rivets at the end of the door, or on the inside either. So will hide them under the door card. The metal was too thick for my folder so knocked it over in my smallest vise.


Needed a joggle in it to suit the door. So after the first fold was made, I raised it up 1/4" and then bent it back the other way. Held this hammer against the edge to start with and hit it with a nylon mallet.


One joggle!


It clears the motor nicely. These came out of a XJ Jeep Cherokee, pre 97, but are the same found on many GM cars from the 80's and early 90's. They actually have a rack and pinion system in them. Better than the cheap Chinese versions in the kits.


The stock rod for the actuator won't work as angle is too great and in the way of the end of the glass channel.


Bent the first bend in the vise but the second bend won't work in it. So clamped a set of Visegrips in the vise to make the second bend.


Knocked it over and now matches the stock rod.


I also put another step in it so it would line up directly under the pivot link. Less wear on the actuator this way.


First two bends are to locate it in the top of the actuator.


Last two bends are to get it lined under the pivot link.


Here it is all mounted up. In the locked position now.


Unlocked position.


Screws will be hidden under the door card which sits inside the recess. Wafer head self drilling screws were used to hold it in place. The self drilling ones are hardened and won't wallow out over time. Can also see why the joggle was needed in the bracket.
__________________
Cheers, Marcus.

My web site:
http://willyshotrod.com Over 5'000 Club
Likes: (6)
  #1381  
Old 15-10-2017
CJ6np435's Avatar
CJ6np435  CJ6np435 is offline
Lowranger Shocker
 
Join Date: Oct 2003
Location: Hobart TAS
Age: 62
Posts: 1,679
What Jeep do I drive?: CJ
Likes: 41
Liked 133 Times in 100 Posts
Default

Well done Gojeep, I wouldn't attempt a mechanism like this without drawing it up in 3d, amazing!
__________________
Not another V8!
Likes: (1)
  #1382  
Old 15-10-2017
Tyvokka's Avatar
Tyvokka  Tyvokka is offline
Jedi Master
 
Join Date: Jan 2011
Location: WJ JK Jeep Trailer Jeep R/C Sydney
Age: 79
Posts: 2,550
What Jeep do I drive?: WJ
Likes: 1,088
Liked 919 Times in 625 Posts
Check out my Ride(s)
Default

You never cease to amaze us Marcus.
__________________
Grand Wookie Jedi
Rrrrrrrr-aghhhh!
http://youtu.be/e8aEDaeBMyI
Likes: (1)
  #1383  
Old 15-10-2017
Gojeep's Avatar
Gojeep  Gojeep is offline
LokRinger
 
Join Date: Jul 2002
Location: Victoria
Posts: 6,870
Likes: 789
Liked 1,754 Times in 556 Posts
Default

Many thanks guys.
Little by little I'm getting there.
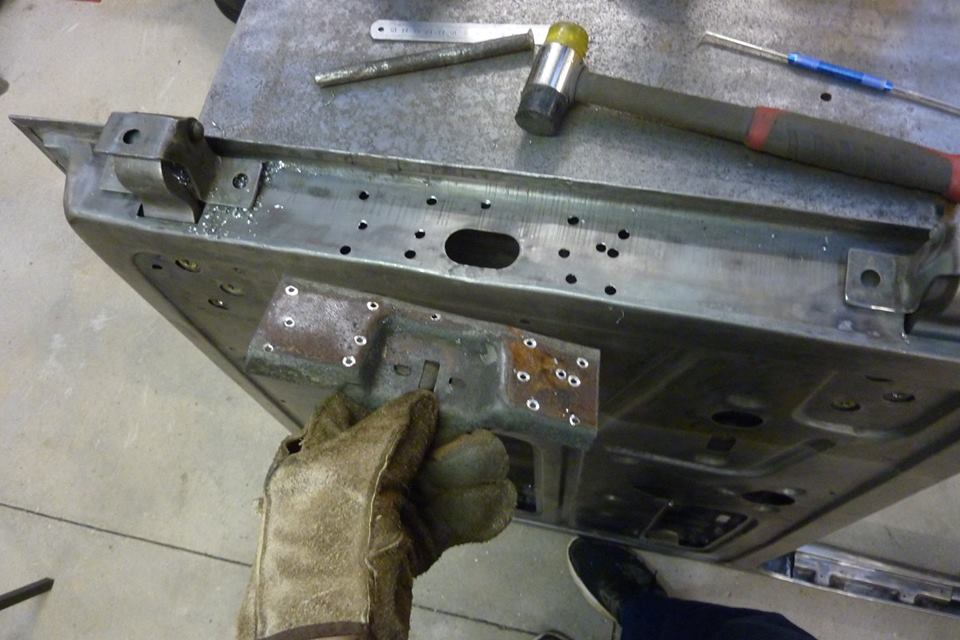

I am getting rid of the 1/4 vent windows and going to one piece glass. It means that the door check bracket has to be removed as can't run that style anymore. I'll have to come up with something else like a simple strap that the CJ Jeeps have.
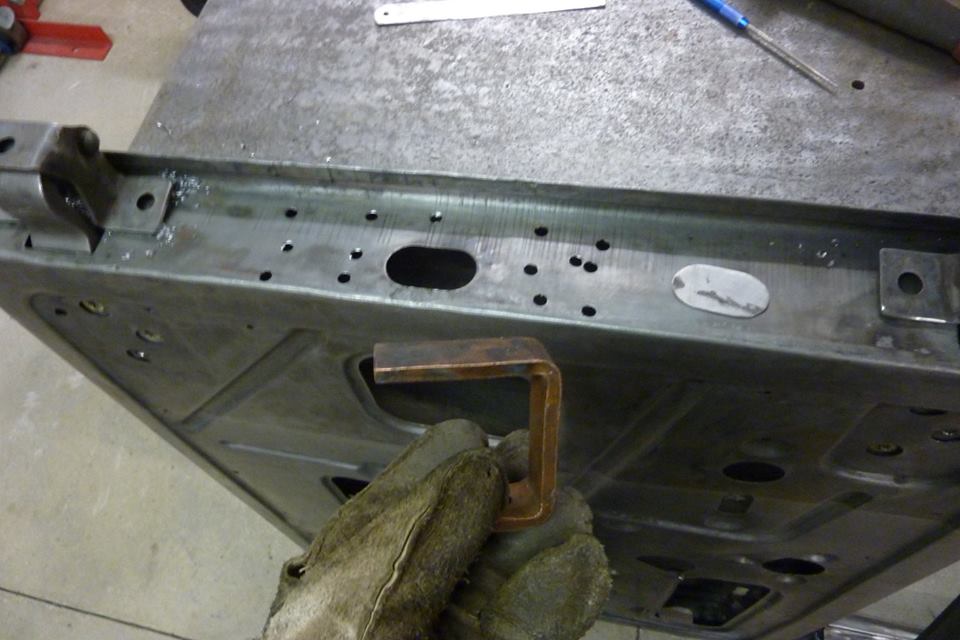

To fill all the spot weld holes I just use a thick piece of copper under the hole and weld it shut with the mig. The oval hole I have cut a patch for.
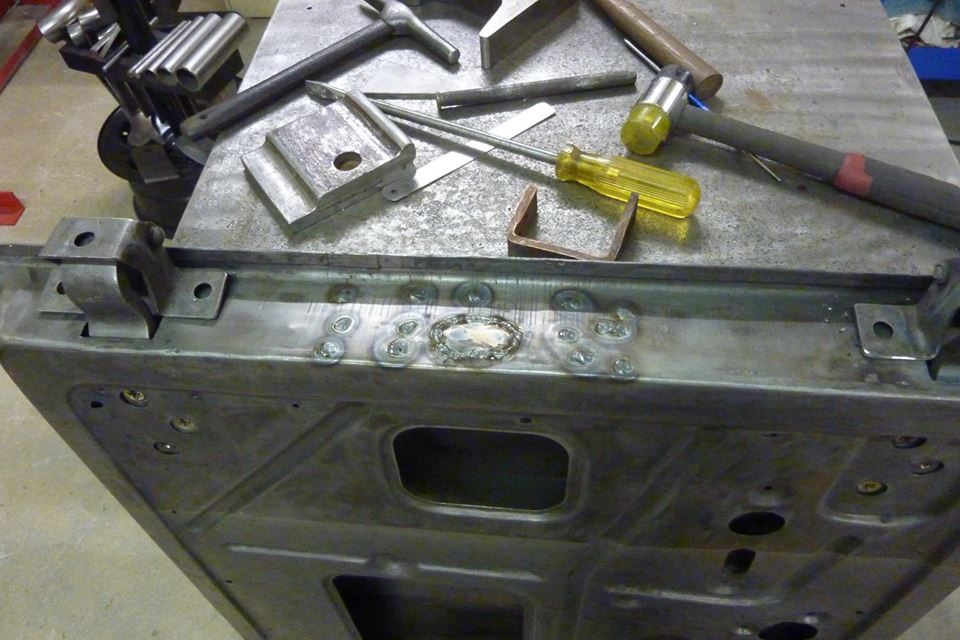

All the holes gone. Will grind them down to a razor blade thickness above the parent metal. Then flap disc to flush followed by a strip disc.
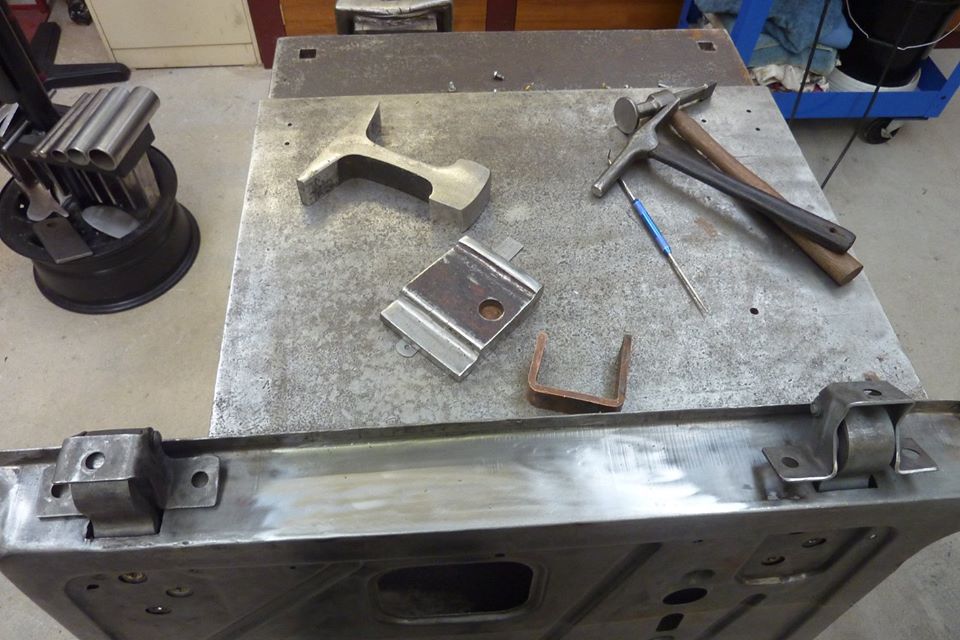

Hammer dollied the weld area flat and all done.
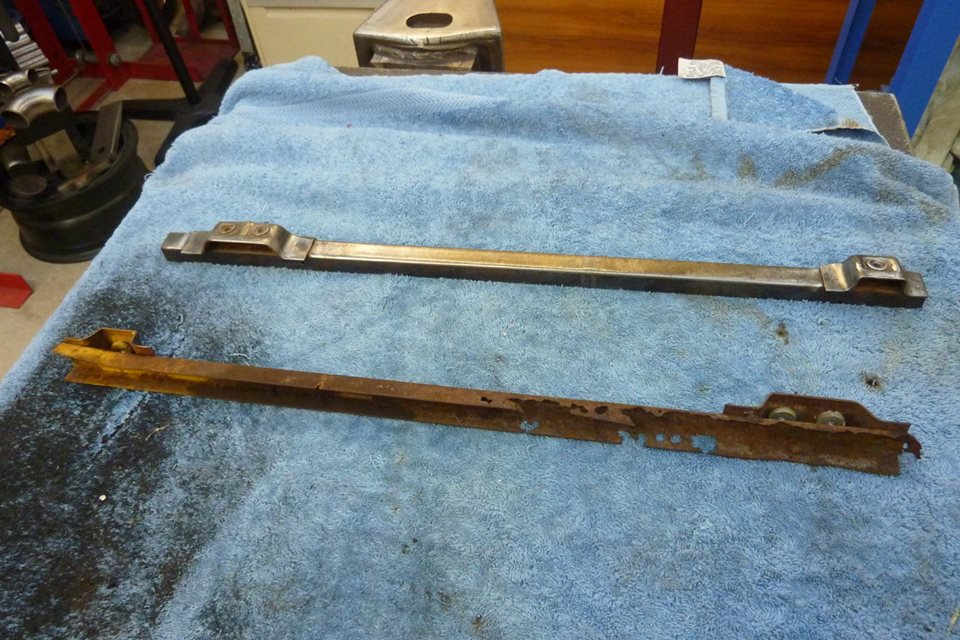

Out of the four doors I had, only one of the window channels needs replacing. I'll be using the same channels that ran down the latch end of the doors at both ends now. They are left and right so need one of each in each door.
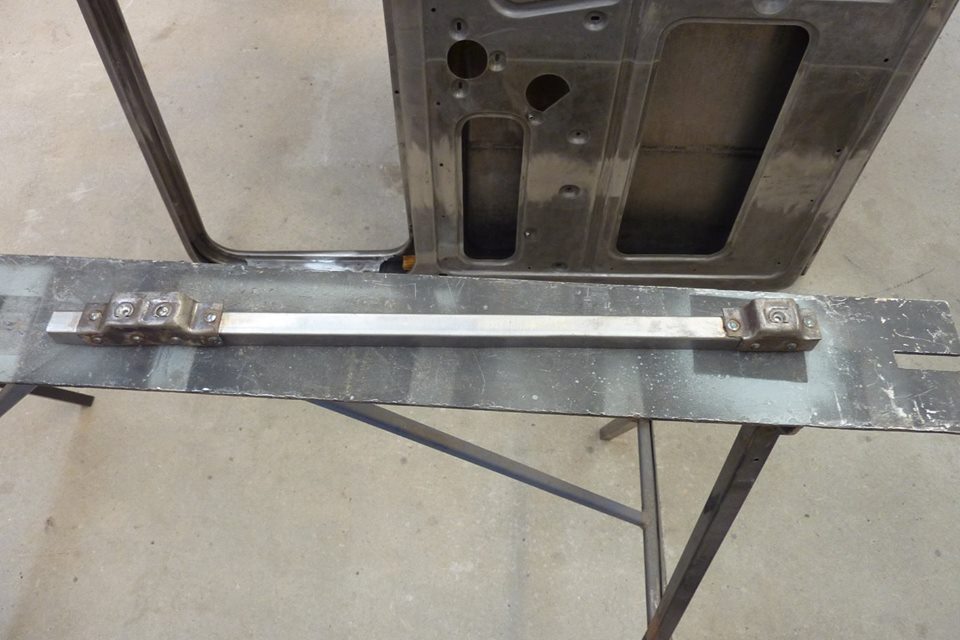

Fortunately I only had to fold up the channel and the mounts were still alright.
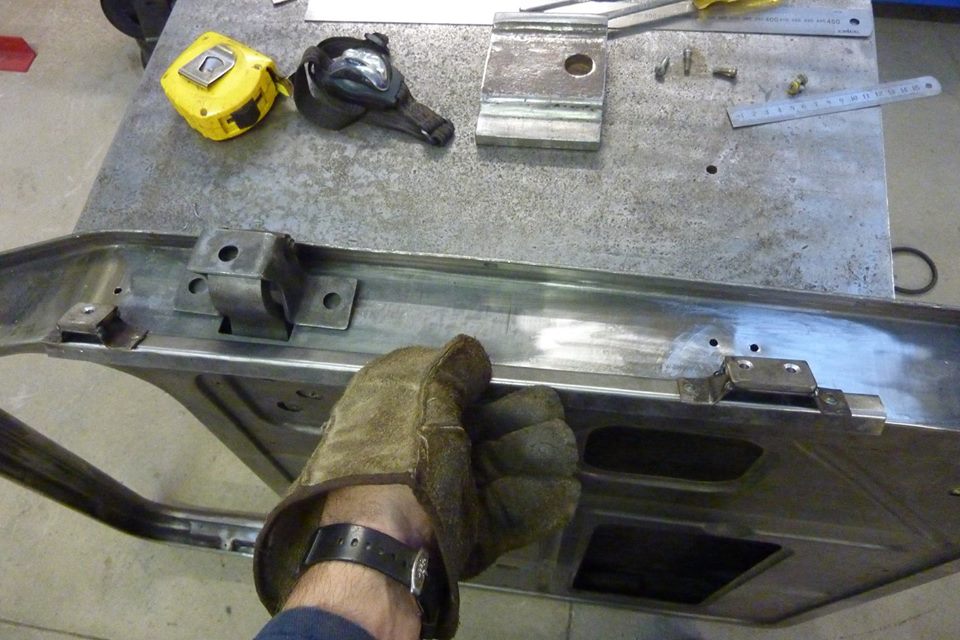

The channel will sit inside the door where shown by the holes drilled. It will sit at the same height as the latch end of the door. Also note that 5mm-3/16" spacer was added to the mounts to space it out to line up under the window frame correctly and not interfere with the hinge reinforcements.


Just showing on a scrap door the curved piece in the corner, as well as the piece holding the inner and outsides together, that has to be removed.
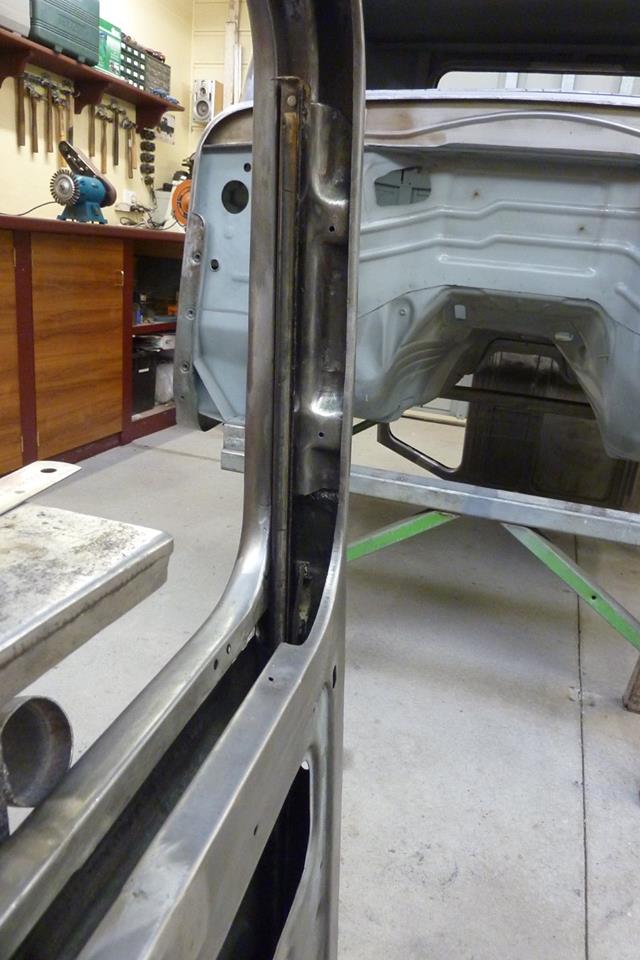

The latch end of the door channel alignment was first checked to make sure it was a straight line from the window frame down all the way inside the door channel. Used the old 1/4 vent channel inside the other one to check, but also found a string line worked well. Glass does not bend so needs to be inline. The factory holes were a bit off so I welded them shut and moved them over and then copied that over to the hinge side of the door.
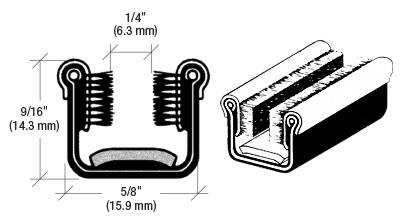

I bought two 2400mm-96" lengths of flexible window channel the same as stock. They are cloth covered with the bristles on the sides.
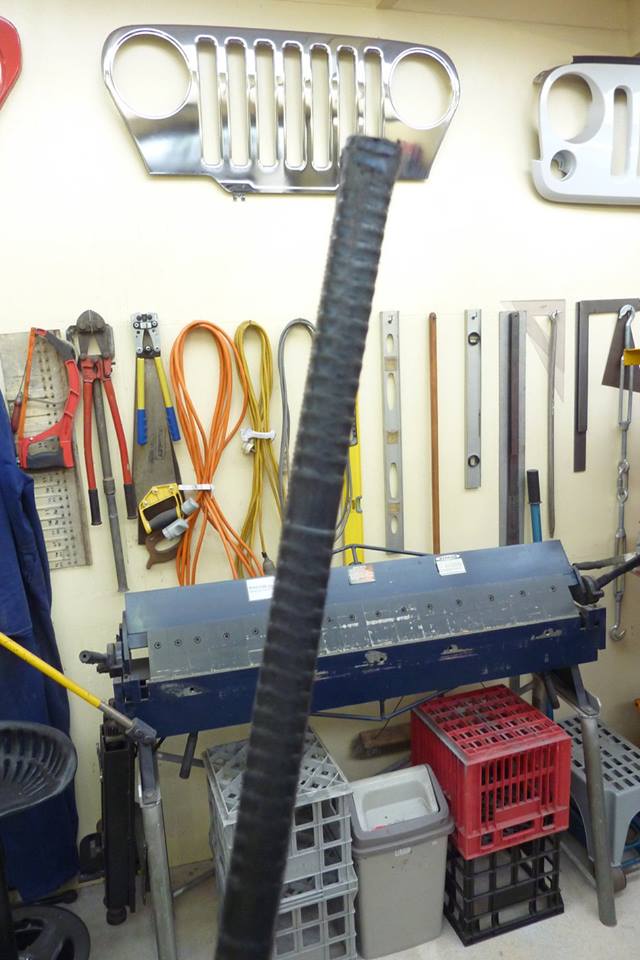

Can see the back of the channel is segmented allowing you to bend it around the corners.
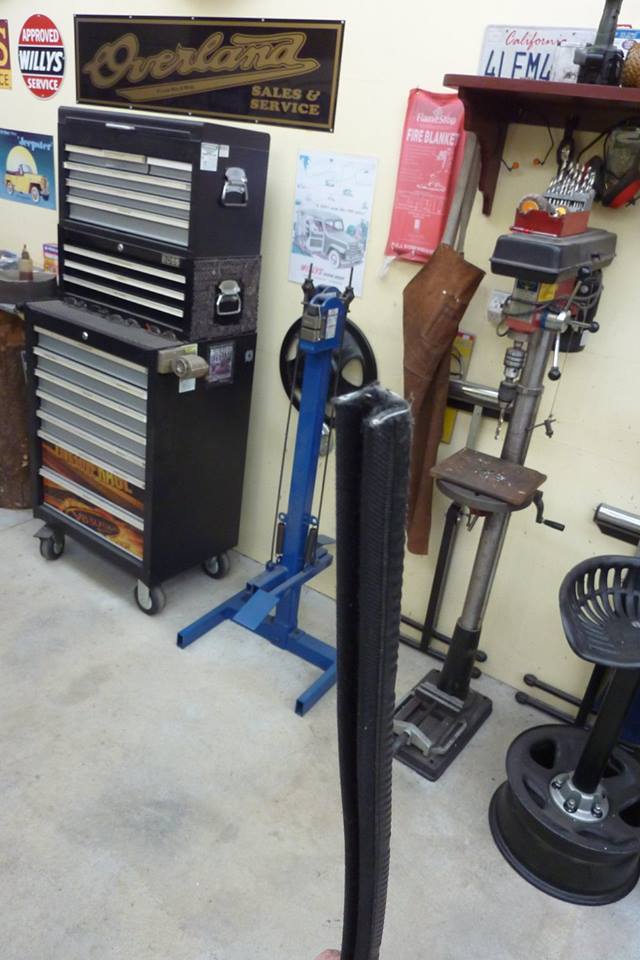

The channel inside is made from aluminium.
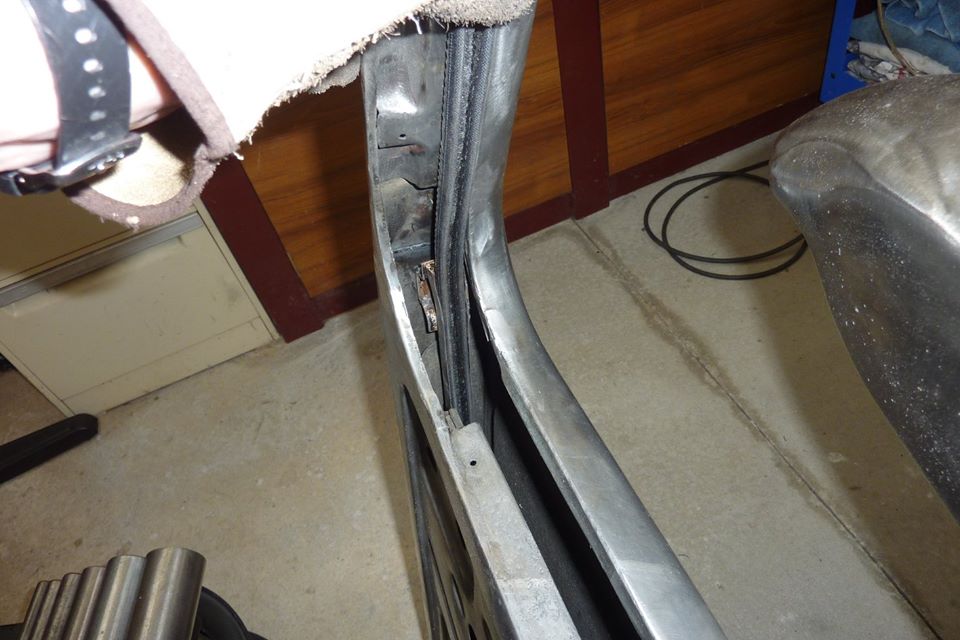

Can see how it will come up out of the new position at the front of the door.
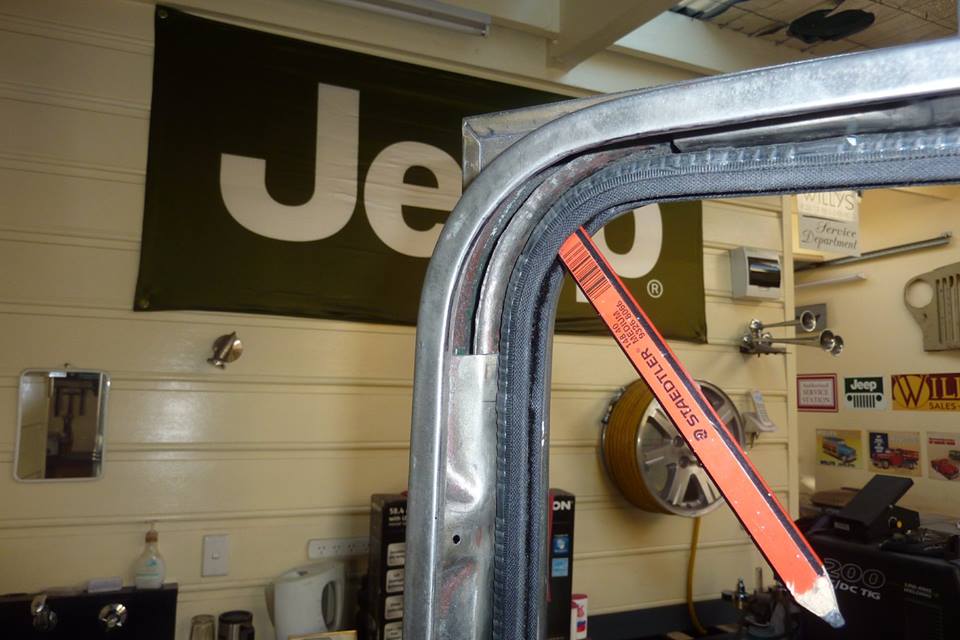

To help it bend around the corners I found a carpenter's pencil worked well. I secured the channel the same as stock with some small counter sink screws.
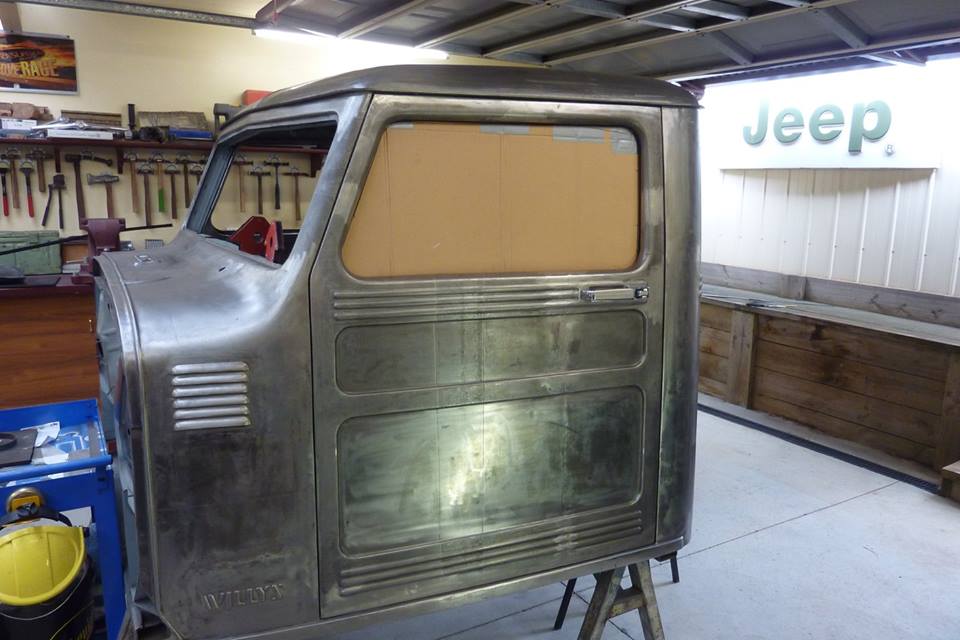

I cut some cardboard roughly into shape and then marked around the inside edge of the window channel. The added the depth of the channel, 10mm-3/8", to that mark with some dividers.
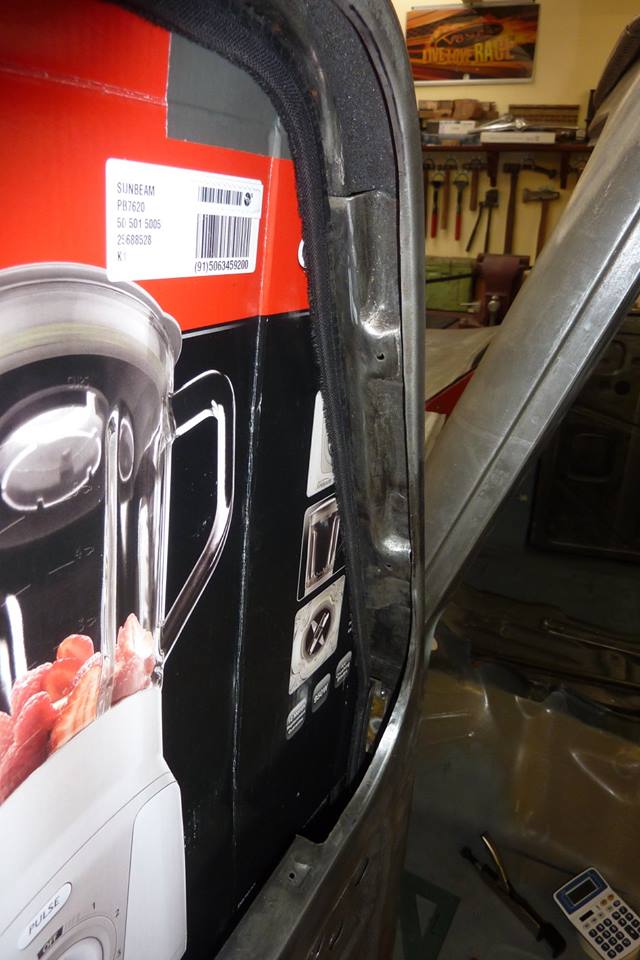

Can see how it sits inside the channel. I made it go inside the door to add some stability to the front edge when down.
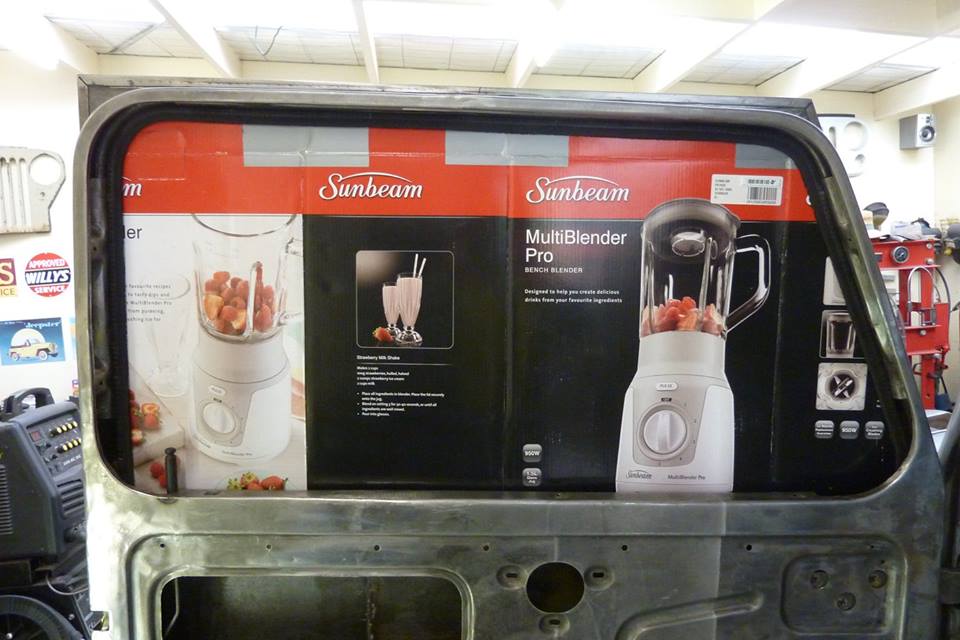

The bottom of the template is level with the top of the door card recess.
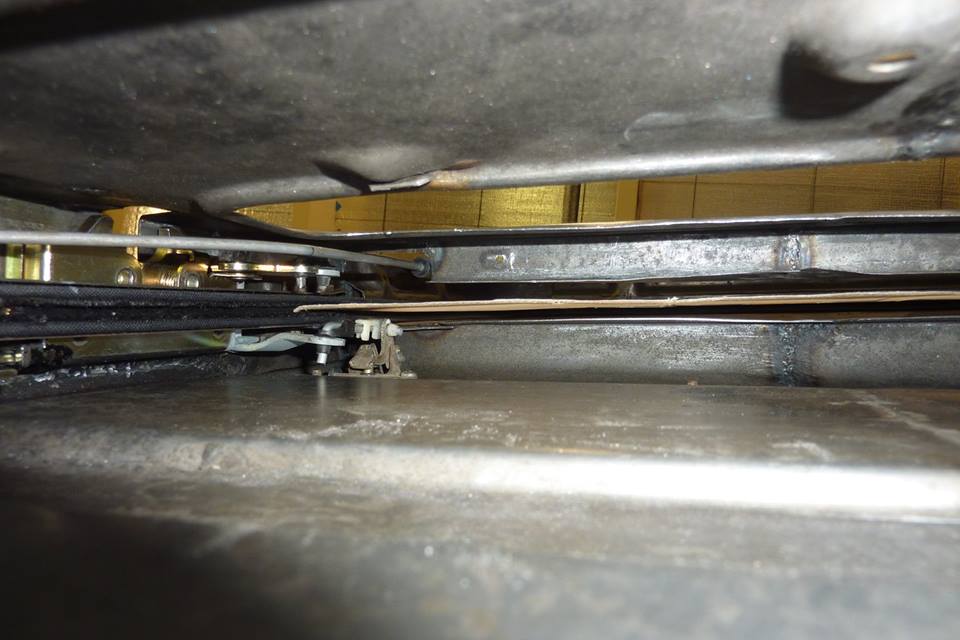

I was happy to see that it cleared the door handle linkages. I will make templates from MDF next using the cardboard one to scribe around.
__________________
Cheers, Marcus.

My web site:
http://willyshotrod.com Over 5'000 Club
Likes: (5)
  #1384  
Old 22-10-2017
Gojeep's Avatar
Gojeep  Gojeep is offline
LokRinger
 
Join Date: Jul 2002
Location: Victoria
Posts: 6,870
Likes: 789
Liked 1,754 Times in 556 Posts
Default


Bought a universal electric window kit. I went with the motor off around the side rather than fitted directly to the bottom of the guide rail to give me more mounting options.


Before committing to cutting out my final window template, I wanted to make sure it went into the door deep enough. You need a minimum of 38mm-1.5" below the window sill to make sure it won't foul when the window is fully up. I made it 50mm-2" to give me a bit of room.


I thought the best place in height would be that the mounting bracket would sit directly over the ridge on the inner panel. Would be more strength there and the bolts heads would sit inside the ridge making them near flush so the door card would not bulge over them.


Still enough room for the motor to be off the bottom of the door. The motor is normally faced toward the hinges.


Transferring the cardboard template over to some MDF bracing board that was 5mm-3/16" thick. I choose this thickness as was the same as the stock glass that was in there. Can also see the 1/2" I added extra to the bottom. Also made sure the front and back edges were square to each other.


The best place to centre the guide rail of the electric window system is at the balance point. This would be the middle if top and bottom, plus both sides were parallel to each other, but not the case with one piece windows. So I found the point by balancing it over a round pencil and marked the spot. Primitive but effective.


No trimming was needed and fitted first go. The balance point of the template was marked from top to bottom so I could workout where the the electric window needed to be fitted.


No binding as it went down either. I could also mark the door where the balance line was at different points. It must remain exactly parallel to the window channels on each side though.


To know what the distance from the mount to the glass needed to be, I measured from inside the panel to the side of the template close to where the bolts would go. Did the same for the bottom mount.


This is flipped around to show how much needs to be trimmed off the top to fit inside the door and have the mount on the ridge. Balance point line on the template tells me where to mount the guide rail left to right inside the door. I had it lined up exactly in the middle of the left and right glass clamps.


The ruler inside the clamps for the glass gives me where to measure too from the inside panel to the glass. It measured 38mm and I only needed 32mm. So I flatted the mounting bracket enough to loose the 6mm extra.


The two mounting bolts are now holding it in place. I made sure the guide rail was parallel to the window channel to stop any binding. Also put a straight edge across the template to make sure it stayed flat as it went up and down to check the mounting position was right depth wise. Our American Akita doing a photo bomb!


The bottom mount had to be flatten some as well as wanted it to sit back a bit from the panel face. You can make out the bolt I will use also to support the motor itself.


A simple bracket with a little joggle in it secures the bottom of the guide rail. Made up a Z bracket for the motor to keep it supported and off the door skins. Could have also bolted with a spacer directly through the inner panel, but didn't want the thick bolt head to stick out.
__________________
Cheers, Marcus.

My web site:
http://willyshotrod.com Over 5'000 Club
Likes: (7)

Last edited by Gojeep; 22-10-2017 at 07:39 PM.
  #1385  
Old 22-10-2017
Gojeep's Avatar
Gojeep  Gojeep is offline
LokRinger
 
Join Date: Jul 2002
Location: Victoria
Posts: 6,870
Likes: 789
Liked 1,754 Times in 556 Posts
Default

Just added some missing photos and info to the last post.
__________________
Cheers, Marcus.

My web site:
http://willyshotrod.com Over 5'000 Club
Likes: (1)
  #1386  
Old 24-10-2017
Turismo07's Avatar
Turismo07  Turismo07 is offline
Full Flexer
 
Join Date: Aug 2008
Location: Perth
Posts: 919
What Jeep do I drive?: XJ
Likes: 185
Liked 121 Times in 86 Posts
Default

I love seeing your American Akita photo bomb your photos!

We have an American Akita too but she mostly just chills off in the distance, it's our Shiba Inu that likes to come and check out what I am doing and quite often he'll choose to lay right where I am working.
__________________
JK CRD
KK
WJ Build - Sold
http://www.ausjeepoffroad.com/forum/...d.php?t=121119
Post New Thread  Reply


Posting Rules
You may not post new threads
You may not post replies
You may not post attachments
You may not edit your posts

BB code is On
Smilies are On
[IMG] code is On
HTML code is On


All times are GMT +10. The time now is 06:35 PM.


Advertisements


AJOR does not vouch for or warrant the accuracy, completeness or usefulness of any message, and are not responsible for the contents of any message. The messages express the views of the author of the message, not necessarily the views of AJOR or any entity associated with AJOR, nor should any advice be substituted as technical advice replacing that of a mechanic. You agree, through your use of this service, that you will not use AJOR to post any material which is knowingly false and/or defamatory, inaccurate, abusive, vulgar, hateful, harassing, obscene, profane, sexually oriented, threatening, invasive of a person's privacy, religious, political or otherwise violative of any law. You agree not to post any copyrighted material unless the copyright is owned by you or by AJOR. The owner, administrators and moderators of AJOR reserve the right to delete any message or members for any or no reason whatsoever. You remain solely responsible for the content of your messages, and you agree to indemnify and hold harmless AJOR, the administrators, moderators, and their agents with respect to any claim based upon transmission of your message(s). The use of profile signatures to intentionally mislead or misdirect any member on this forum is not acceptable and may result in your account being suspended. Any trip that is organised through the AJOR forum is participated at your own risk. If you or your vehicle is damaged it is your responsibility, not that of the person that posted the thread, message or topic initiating the trip, nor the organisers of AJOR or moderators of any specific forum. This forum and associated website is the property of AJOR. No user data is harvested and no information supplied in your registration will be sold for profit.


Powered by vBulletin® Version 3.8.7
Copyright ©2000 - 2024, vBulletin Solutions, Inc.

AJOR © 2002 - 2024 AUSJEEPOFFROAD.COM. All corporate trademarked names and logos are property of their respective owners. Ausjeepoffroad is in no way associated with DaimlerChrysler Corporation or Fiat Jeep.
www.ausjeep.com www.ausjeep.com.au www.midlifemate.com ausjeepforum.com www.r9kustoms.com
vB Ad Management by =RedTyger=