JK: Hunty's Jeep - Page 14 - AUSJEEPOFFROAD.COM Jeep News Australia and New Zealand

Go Back   AUSJEEPOFFROAD.COM Jeep News Australia and New Zealand > JEEP GARAGE > Jeep build up
Register Forums Trading Your Jeep My Garage Mark All Read

Post New Thread  Reply
 
Thread Tools Search this Thread
  #92  
Old 09-05-2011
deanfoldi's Avatar
deanfoldi  deanfoldi is offline
Full Flexer
 
Join Date: Mar 2010
Location: cronulla
Posts: 856
What Jeep do I drive?: TJ
Likes: 0
Liked 0 Times in 0 Posts
Default

Quote:
Originally Posted by hunty View Post
Hi Mate
I dumped the factory box for a straight through ages ago & yes it does sound a bit better / louder and at the time I was certain that it gave a tiny bit more down low grunt!
cheers Hunty
what do u mean by the factory box ?
  #93  
Old 10-05-2011
hunty's Avatar
hunty  hunty is offline
Full Flexer
 
Join Date: Dec 2009
Location: Sid den knee
Posts: 1,011
What Jeep do I drive?: JK
Likes: 2
Liked 22 Times in 13 Posts
Smile JK Fender gold plated clips

Hi Guyz
I have been slowly over the past 3 years beating up on my plastic fantastic fenders, almost everytime I go wheelin I rip & crunch & brake those little clips that hold em on.

My drivers side rear fender has been just hanging on with 3 or 4 out of 15 clips now for over a year and on the weekend I let my "L" Plater son do some of the wheelin and between him & I we finally tore it totally off.

I went to buy some of these little clips from my local Chrysler blokes and too my (and the spare parts guyz) utter dismay discovered that the list price on these little plastic clips is $11.78ea - I asked for 20 of them (before he figured out the price) as I wanted to replace all of them on the drivers rear and have a few spares that I could keep in my trail repair kit. Do the math for 20 clips;
$235.60c - There is now way in hell that I will pay that for what amounts to a simple bumper clip.

I walked across the road to Pacific spares (like repco) and asked if they stocked bumper clips - they did and I bought 18 for $4.75 tot saving = $230.85

I simply clipped them into my fender - had to do a bit of Mcgyvering lol - which amounted to placing a small piece of gaffa / 100mph tape to hold them exactly in place as I reinstalled the fender, I realise that so many of you could figure out far better ways to reinstall the fender but I am lazy and needed my heap back on the road ASAP as its my daily drive. it took me less than 2 min to bodge them back on and only $4.75 they feel like they are on solidly and have survived some pretty full on wheelin already - I hope this bodggy is useful Jeepers!
cheers Hunty


  #94  
Old 10-05-2011
hunty's Avatar
hunty  hunty is offline
Full Flexer
 
Join Date: Dec 2009
Location: Sid den knee
Posts: 1,011
What Jeep do I drive?: JK
Likes: 2
Liked 22 Times in 13 Posts
Smile 10ton Muffler

Quote:
Originally Posted by deanfoldi View Post
what do u mean by the factory box ?
Hi Deanfoldi
my bad - I must have typed that reply in my sleep lol
I should have said Muffler which I give credit to Chrysler for making one very efficient - my jeep used to sound like an EV / stealth bomber - I have had many positive comments from people who have heard my Jeep drive by so based on that and my own satisfaction - I would recommend it! cheers Hunty
  #95  
Old 10-05-2011
hunty's Avatar
hunty  hunty is offline
Full Flexer
 
Join Date: Dec 2009
Location: Sid den knee
Posts: 1,011
What Jeep do I drive?: JK
Likes: 2
Liked 22 Times in 13 Posts
Smile Cable tie Cam

Hey Guyz
Thanx for all the kind words re my JK

Heres a new motorsport sensation - cable tie cam LoL well I secured my Iphone 4 to the high lift jack on the back of my JK in order to record the "New & Improved sound" so heres the video "Cable tie cam" it sounds like Im going fast but im not because its a JK LoL anyway enjoy the soundz
cheers Hunty

ps sorry for the rattling sound my loose High lift jack makes and the last few seconds of what sounds like my JK overrunning - its the padlock swinging that secures the high lift

http://youtu.be/DH2B4AHt_wM

Last edited by hunty; 10-05-2011 at 03:26 PM.
  #96  
Old 12-05-2011
hunty's Avatar
hunty  hunty is offline
Full Flexer
 
Join Date: Dec 2009
Location: Sid den knee
Posts: 1,011
What Jeep do I drive?: JK
Likes: 2
Liked 22 Times in 13 Posts
Smile Must watch vid for Dana30 JKers & How to replace uni

Hi Guyz
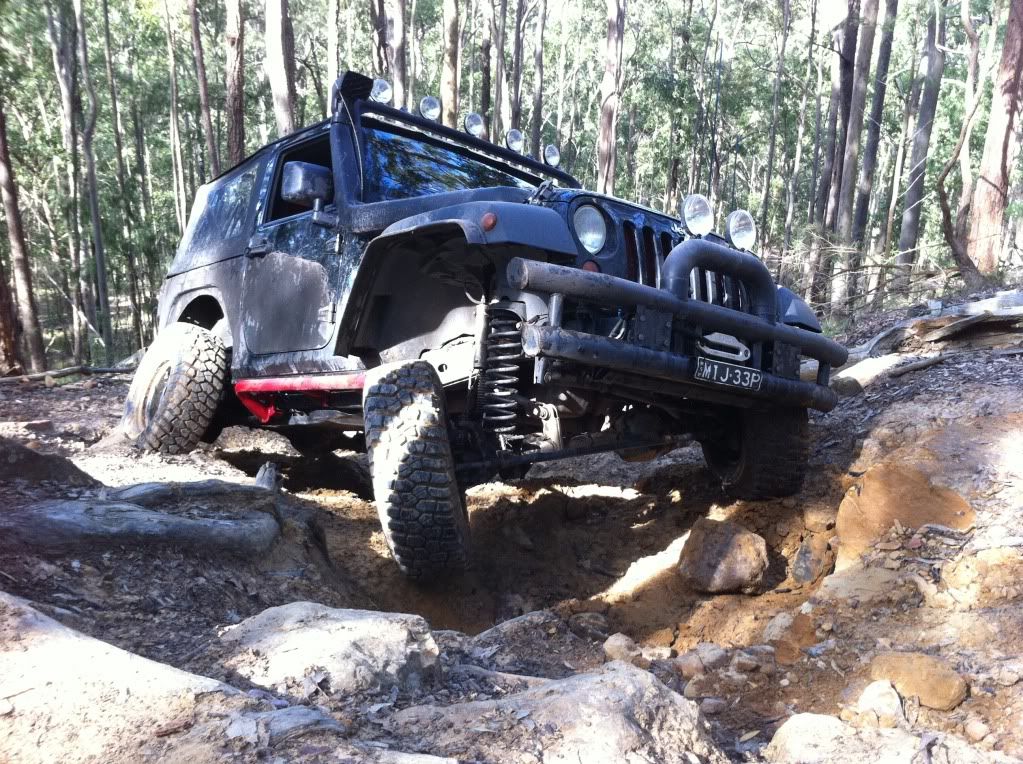
I was out wheeling last weekend in the Watto's, B+ grade trails in low range 1st, scrambling up a fairly steep hill and heard a very soft metallic sounding tick / crack,
so I immediately switched off the engine and did some investigating, pulled & pushed just about everything - nothing found, so I decided to drive on carefully and get off the trails and go home!

Returned to 2wd and the faint clicking went away, OK that tells me the problem is in the front end, so I upon investigation i discovered some damage to the drivers front UNI joint, so before I fixed it I gaffed my iphone4 to my bull bar and made the video below, Hopefully if you watch the vid and commit the sound to memory when you hear it on your Jeep (and you will eventually - its not if - its when) you will be able to quickly recognise it and switch to 2wd before you damage the uni ears, my repair cost me a uni joint and my time. I have seen several other JK'ers ignore the warning signs and then have to replace hubs & axels - a lot more expensive than a Uni Joint.


Heres how I replaced my front uni
Take 1
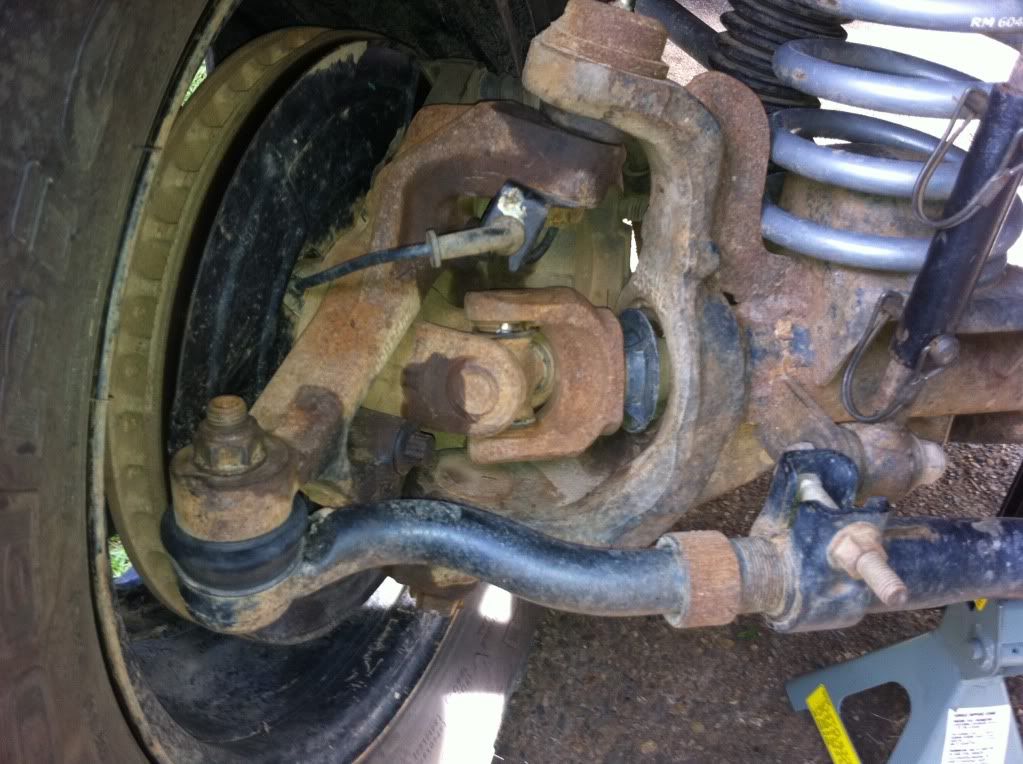
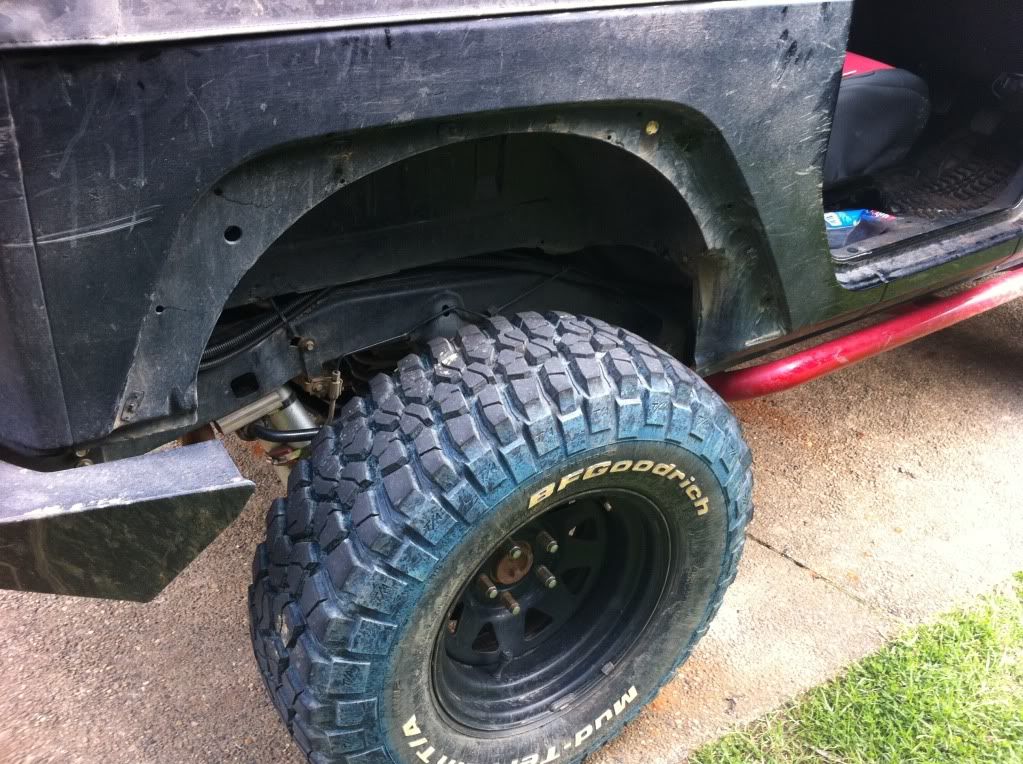
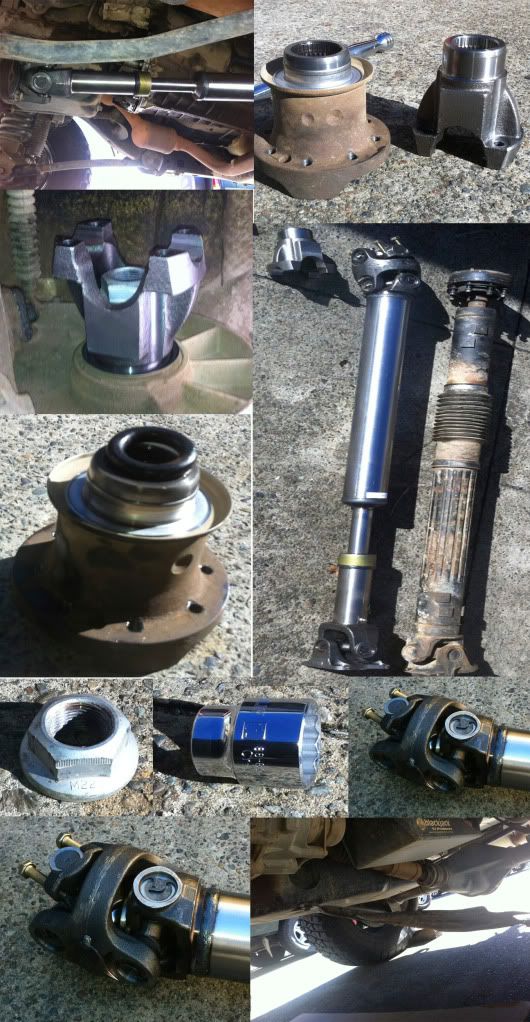
Started with a handful of smart@ss pills and decided that I could change it without removing the front wheel, disc brakes or hub, see pix below. Those of you with an ounce of mechanical expertise or have replaced a JK uni before - feel free to start laughing Now. Anyway 3 hours later 2 broken screwdrivers and a broken jimmy bar all I had managed to do was to remove the circlips!

Take 2 LoL
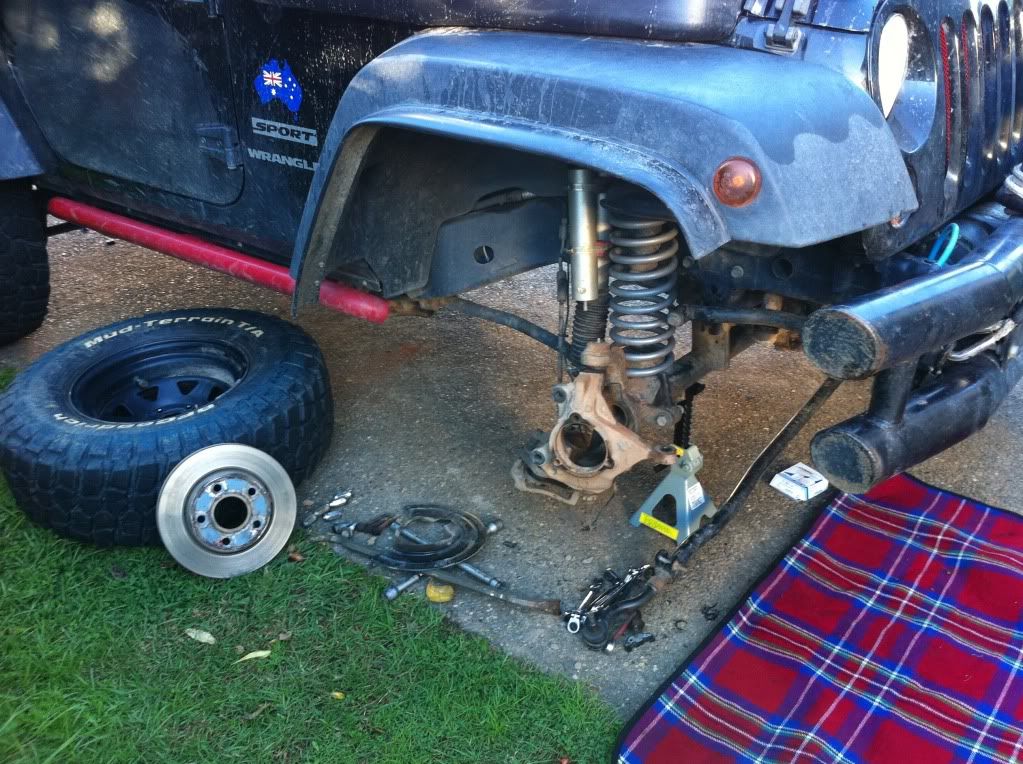
1. Jack up Jeep, chock wheels, insert jackstand, take off front wheel and slide it under the jeep as extra safety should the jack stand fail
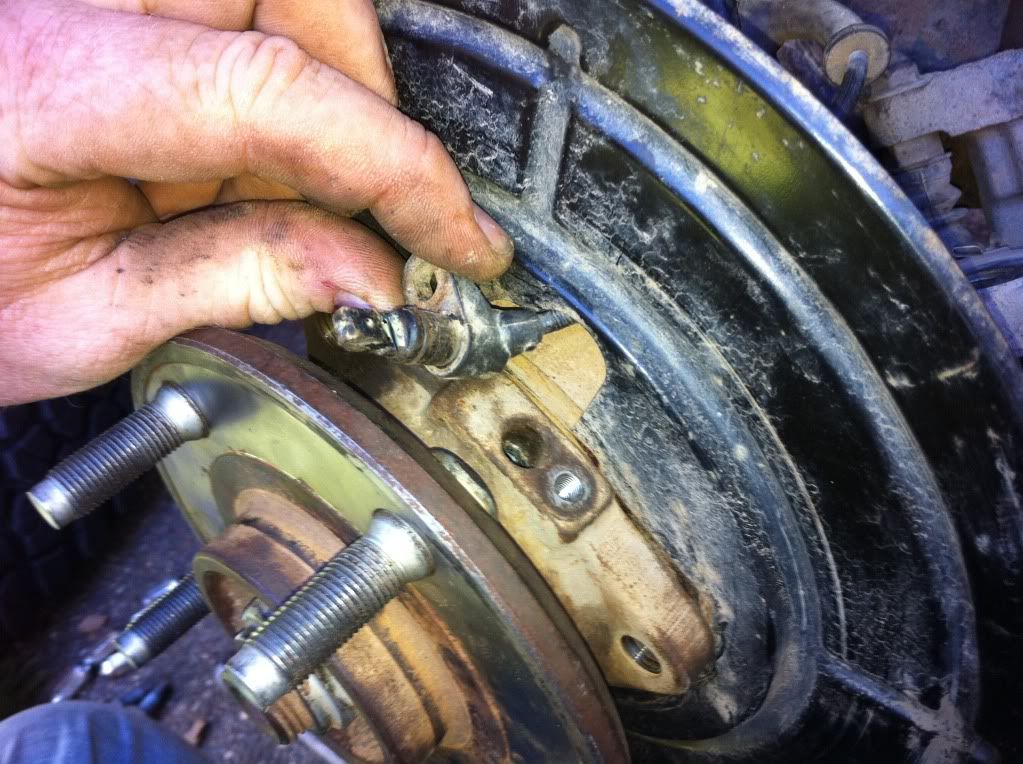
2. Remove the 2 bolts that secure the brake callipers, remove callipers and secure them out of the way.
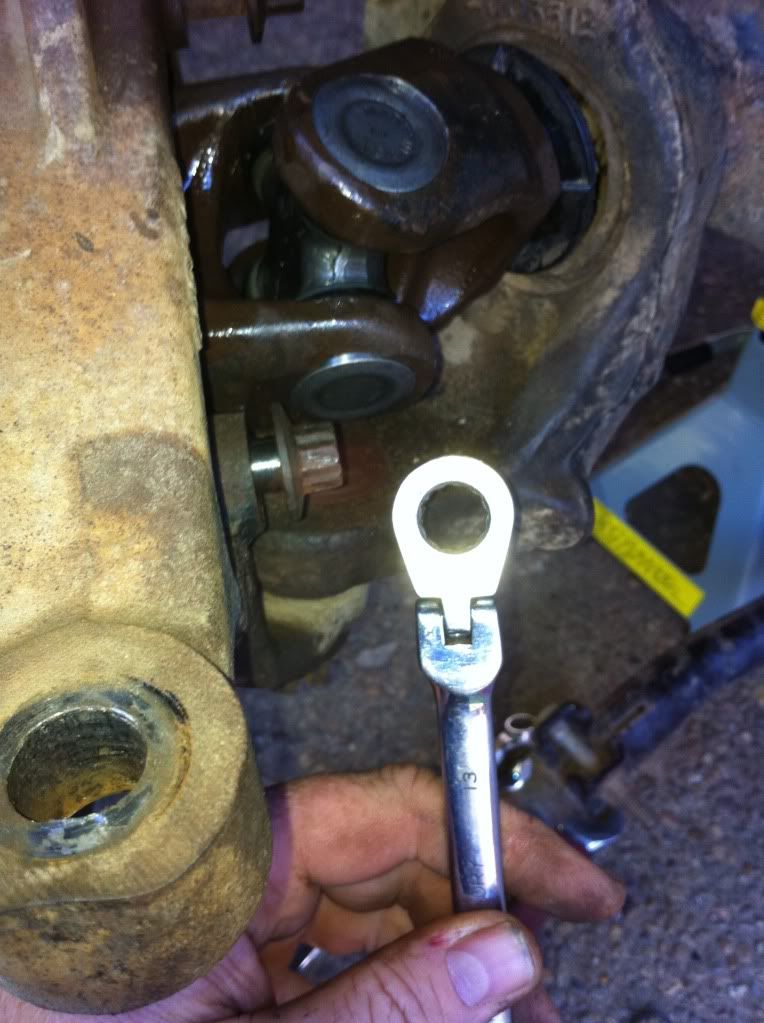
3. Remove the 3 unusually shaped bolts that secure the hub to the Knuckle
4. Very carefully remove the hex head bolt that secures the ABS / TC/ ESP sensor - its plastic so be very careful and unclip it from the 2 guides and secure it in a safe place.
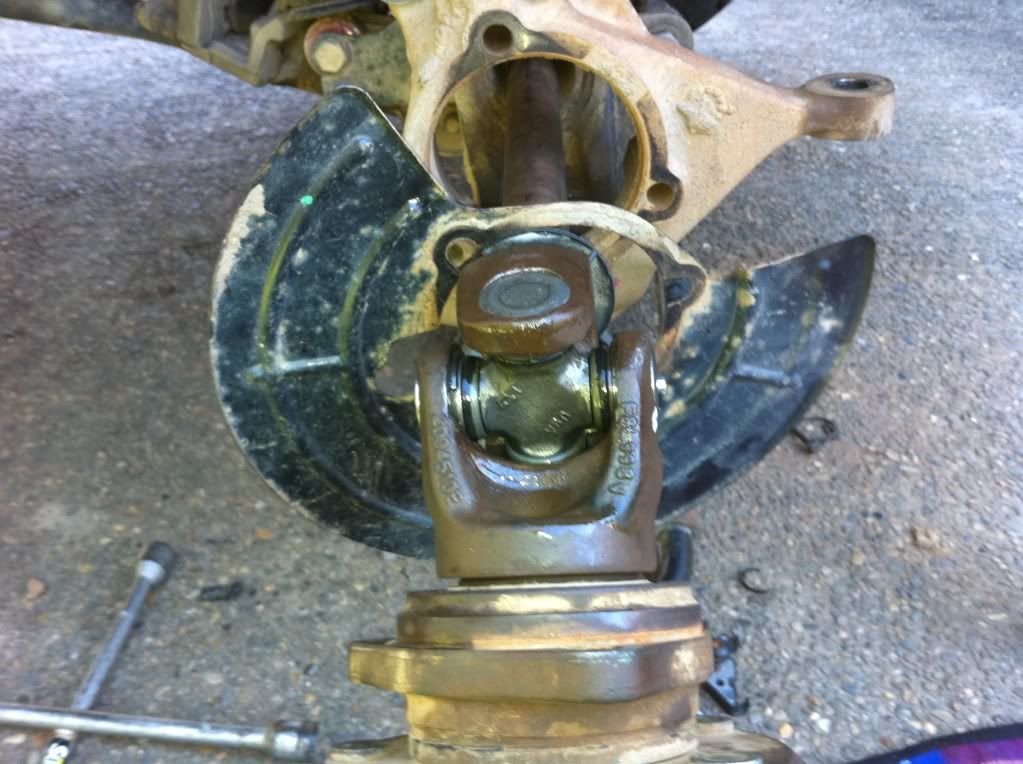
5. Carefully pry off the hub from the knuckle and slide out the hub, uni and axel.
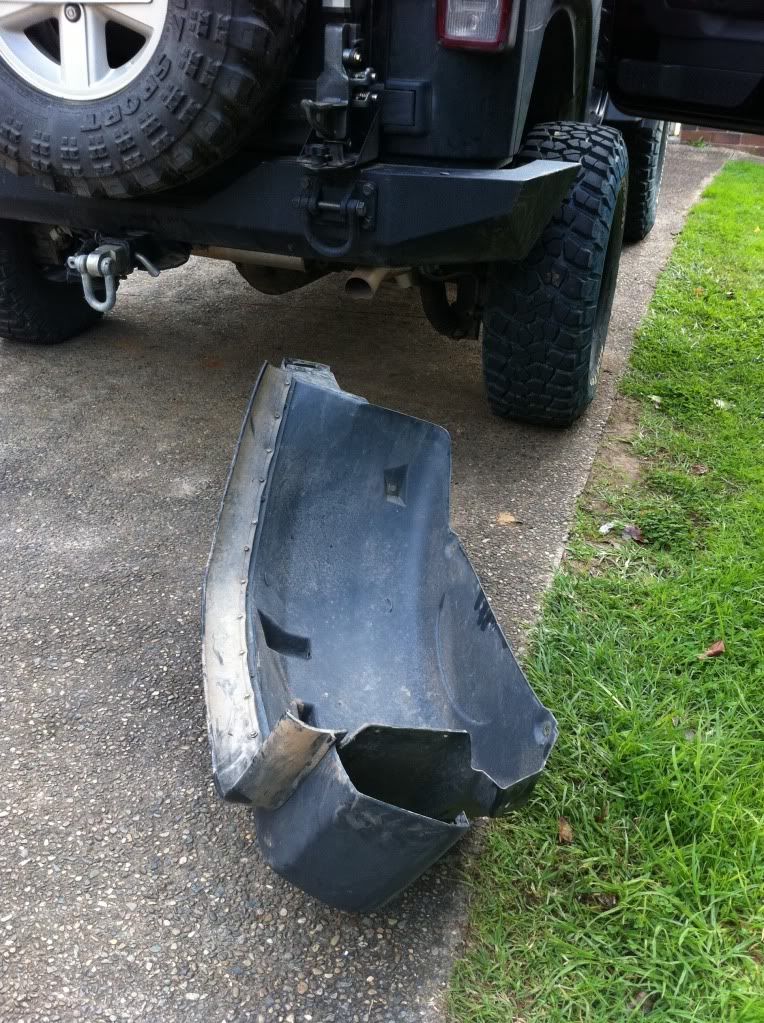
6. Optional - I removed the drag link to give me better access - probably wasted my time - D'oh - still feeling dumb from my first attempt LoL
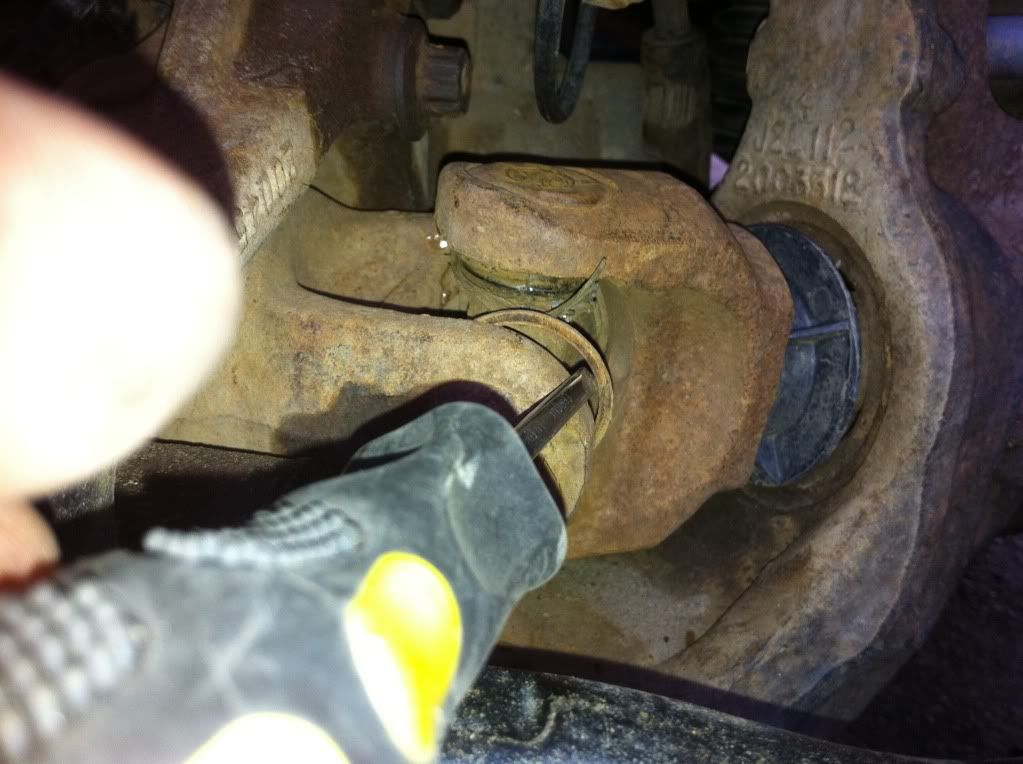
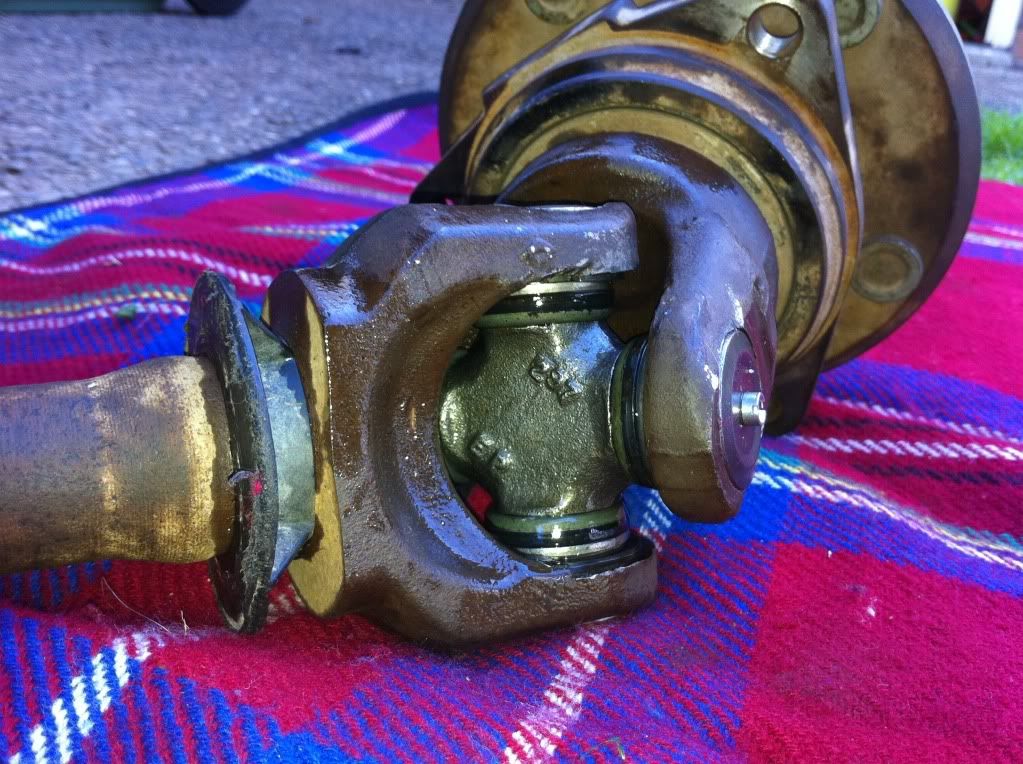
7 Place in a vice or similar and remove all 4 circlips then wearing suitable eye protection get an old useless socket and place it on the end cap of any of the unijoint end caps and beat on it neanderthal style hard until you pop the opposite end cap out. repeat 3 more times until all 4 end caps have been whacked out!
8. inspect all 4 ears for wear / damage and in my case burs - lightly sand with fine paper to clean out any surface blemishes and lubricate with a few drops of oil
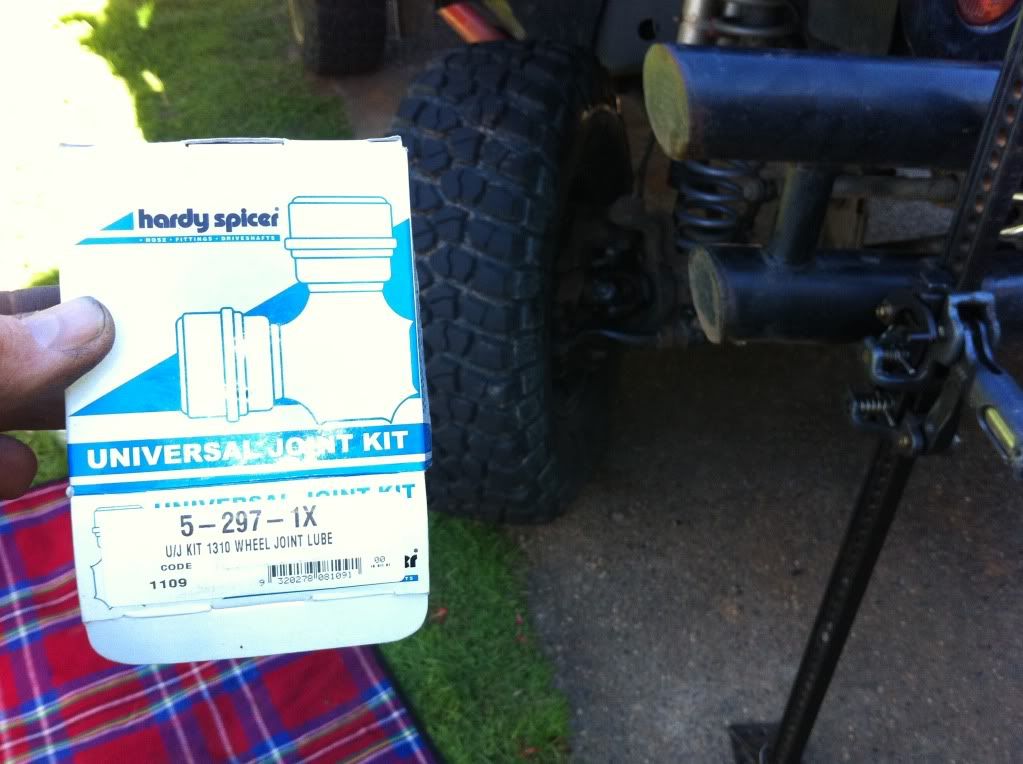
9 unpack new uni joint and extremely carefully remove all 4 end caps DO NOT DISTURB the needle bearings! . place the uni joint into the axel end first and insert 1st endocarp - gently tap it in place with a hammer - install the next end cap bearing - invert and gently tap in opposite end end cap bearing. I tried to use a G clamp - dumb idea - my mechanic told me just to tap them in gently and in the end that worked out to be the best solution.
10. install circlips - word of caution my circlips were to fat to insert so I put them on a diet (thicknesser) and reduced them to half their original thickness before inserting.
11. repeat process above for hub
12. reassemble - basically steps 1 to 5 in reverse LoL


Last edited by hunty; 12-05-2011 at 11:26 PM.
  #97  
Old 12-05-2011
brenttj's Avatar
brenttj  brenttj is offline
Lowranger Shocker
 
Join Date: Mar 2010
Location: Geraldton W.A
Age: 33
Posts: 1,617
What Jeep do I drive?: TJ
Likes: 0
Liked 0 Times in 0 Posts
Default

did my tj uni on the weekend using 2 decent sized blocks of wood work well if you dont have a vice
  #98  
Old 14-06-2011
hunty's Avatar
hunty  hunty is offline
Full Flexer
 
Join Date: Dec 2009
Location: Sid den knee
Posts: 1,011
What Jeep do I drive?: JK
Likes: 2
Liked 22 Times in 13 Posts
Smile Caution Dumb@ss at work! - Front drive shaft replacement

Funny Story; well I wore out a front drivers side UNI (see my dumb@ss yet successful attemp to repair - earlier post) and after I replaced it I went out for a test drive on the grass field behind my office, as I was "testing" aka performing the technical manoeuvre know as grass D'ohnuts when I heard a new noise - sounded like a dead / dying CV. sure enough I had just killed my front driveshaft CV at the transfer case.

After much research I decided to replace my factory shaft with a Double Cardan from Wooders Garage, much stronger and should last more Km's.

Thankfully the old shaft gave me plenty of notice! - infact I went wheelin several times with it complaining whilst I waited for the replacement to arrive.

Replacing the front shaft is a pretty easy / straight forward job.

To make the repair you will need;
1 x small socket to remove the million little bolts that hold the CV to the transfercase adapter
1 x Large Socket to remove the M22 nut in the centre of the flange / adapter see pic

My 2 cents / hopefully helpful advice.
Firstly you will need to remove the bash plate, I did this repair as I do everything, (without a hoist in the driveway) I removed 3 of the 4 bolts that hold it in place then grabed a handful of smart@ss pills, and just loosened the 4th bolt enough to swivel the bash plate out of the way - I did this because I did not want to have to lift it back in place.

Disconnect / Drop the front driveshaft uni first by removing the 4 bolts then put your transfer case in neutral - this will allow you to remove one of the millions of little bolts before you rotate the shaft to remove the next little bolt and so on until they are all out

When removing the centre nut from the adapter flange put the transfer case back into 4L so you can swing on it to loosen it and get it off.

When swapping out flanges be sure to carefully remove the fat little rubber Oring / seal and carefully install it into your new flange - As a total dumb@ss I missed this important step , and as I was packing away all my tools and feeling well pleased with my efforts I noticed the "stupid" little Oring was still embedded in my old flange D'oh, so back on the jack stands, remove the bash plate remove front uni.........blah blah blah....... dumb@ss LoL

If you have any mechanical aptitude you should be able to do the job in around 90min's (unlike me who took a little bit longer, ok a lot longer - LoL)
Cheers Hunty
Post New Thread  Reply


Posting Rules
You may not post new threads
You may not post replies
You may not post attachments
You may not edit your posts

BB code is On
Smilies are On
[IMG] code is On
HTML code is On


All times are GMT +10. The time now is 03:34 PM.


Advertisements


AJOR does not vouch for or warrant the accuracy, completeness or usefulness of any message, and are not responsible for the contents of any message. The messages express the views of the author of the message, not necessarily the views of AJOR or any entity associated with AJOR, nor should any advice be substituted as technical advice replacing that of a mechanic. You agree, through your use of this service, that you will not use AJOR to post any material which is knowingly false and/or defamatory, inaccurate, abusive, vulgar, hateful, harassing, obscene, profane, sexually oriented, threatening, invasive of a person's privacy, religious, political or otherwise violative of any law. You agree not to post any copyrighted material unless the copyright is owned by you or by AJOR. The owner, administrators and moderators of AJOR reserve the right to delete any message or members for any or no reason whatsoever. You remain solely responsible for the content of your messages, and you agree to indemnify and hold harmless AJOR, the administrators, moderators, and their agents with respect to any claim based upon transmission of your message(s). The use of profile signatures to intentionally mislead or misdirect any member on this forum is not acceptable and may result in your account being suspended. Any trip that is organised through the AJOR forum is participated at your own risk. If you or your vehicle is damaged it is your responsibility, not that of the person that posted the thread, message or topic initiating the trip, nor the organisers of AJOR or moderators of any specific forum. This forum and associated website is the property of AJOR. No user data is harvested and no information supplied in your registration will be sold for profit.


Powered by vBulletin® Version 3.8.7
Copyright ©2000 - 2024, vBulletin Solutions, Inc.

AJOR © 2002 - 2024 AUSJEEPOFFROAD.COM. All corporate trademarked names and logos are property of their respective owners. Ausjeepoffroad is in no way associated with DaimlerChrysler Corporation or Fiat Jeep.
www.ausjeep.com www.ausjeep.com.au www.midlifemate.com ausjeepforum.com www.r9kustoms.com
vB Ad Management by =RedTyger=