Grand Willys Project - Page 178 - AUSJEEPOFFROAD.COM Jeep News Australia and New Zealand

Go Back   AUSJEEPOFFROAD.COM Jeep News Australia and New Zealand > JEEP GARAGE > Jeep build up
Register Forums Trading Your Jeep My Garage Mark All Read

Post New Thread  Reply
 
Thread Tools Search this Thread
  #1240  
Old 07-08-2016
Gazzo's Avatar
Gazzo  Gazzo is offline
Established Member
 
Join Date: Jul 2015
Posts: 126
Likes: 0
Liked 35 Times in 28 Posts
Check out my Ride(s)
Default

I saw that and started imagining a "detail" permanently inserted much like they do now in all the new "Jeeps" like logos deep inside the headlights and so on.
Great work by the way.
Likes: (2)
  #1241  
Old 07-08-2016
SeaComms's Avatar
SeaComms  SeaComms is offline
MonsterMoose
 
Join Date: Jun 2010
Location: Noosa QLD.
Age: 58
Posts: 7,940
What Jeep do I drive?: WK2
Likes: 1,432
Liked 809 Times in 466 Posts
Check out my Ride(s)
Default

Easter eggs

Sent from my SM-G900I using Tapatalk
__________________
Cheers, Dave :)

2010 JK, then a 2015 KL Trailhawk, now a 2017 GC Trailhawk!

Over 5000 Club
Likes: (1)
  #1242  
Old 07-08-2016
bruggz351's Avatar
bruggz351  bruggz351 is offline
DetroitDemon
 
Join Date: Jun 2009
Location: Casino
Posts: 4,801
What Jeep do I drive?: XJ
Likes: 5,510
Liked 1,325 Times in 717 Posts
Default

I'm still blown away by the ultra sanitary workshop.

My shed is like 'Pigpen'. I tidy it up, turn around and WW111 has been!!!

As always Marcus, superlative. I just wish the updates were longer...

BTW, the lead working bat, you mentioned. Is that similar in the way it works as a deadblow hammer??

I'm just as interested in the tools, and the use of them, as the project itself.

This is one massive learning experience, as well as an informative piece of someones project.

cheers
__________________
Likes: (2)
  #1243  
Old 07-08-2016
Gojeep's Avatar
Gojeep  Gojeep is offline
LokRinger
 
Join Date: Jul 2002
Location: Victoria
Posts: 6,869
Likes: 788
Liked 1,754 Times in 556 Posts
Default

Quote:
Originally Posted by Stressball View Post
Nice work as always Marcus, why am I not surprised that your camera work gets the same exceptional level of detail as your fabrication skills.. I appreciated the wall hung chromed grill captured perfectly centred and aligned in the gap above the rear window in one of the above photos...its the little things
Well spotted. I like to keep an eye on the backgrounds too.

Quote:
Originally Posted by bruggz351 View Post
I'm still blown away by the ultra sanitary workshop.

My shed is like 'Pigpen'. I tidy it up, turn around and WW111 has been!!!

As always Marcus, superlative. I just wish the updates were longer...

BTW, the lead working bat, you mentioned. Is that similar in the way it works as a deadblow hammer??

I'm just as interested in the tools, and the use of them, as the project itself.

This is one massive learning experience, as well as an informative piece of someones project.

cheers
Works the same way but spreads the impact over a larger area so you don't have to go back and forth to get it all even. Thats takes far more time then any part of the process.
I use steel versions too to smooth out panels and they are called flippers here or slappers in the US.
For aluminium work they use a wooden version with leather on the face so removes any marking for jobs that are going to be polished.
Can make them yourself easily enough.
__________________
Cheers, Marcus.

My web site:
http://willyshotrod.com Over 5'000 Club
  #1244  
Old 13-08-2016
Gojeep's Avatar
Gojeep  Gojeep is offline
LokRinger
 
Join Date: Jul 2002
Location: Victoria
Posts: 6,869
Likes: 788
Liked 1,754 Times in 556 Posts
Default


The upper frame work has an extra strap that runs underneath everything. So I first welded this to each side to make sure I could get to it. Level is clamped in to keep everything straight as the glass won't bend!


Made a new upper piece for the window and this was folded over the strap and spot welded to it like factory.


Next was the very top piece that is also part of the gutter that the roof skin sits in. It sits in a channel so I made one for it.


Added the other folds it needed and hammered over the gutter edge over my smallest diameter T dolly.


All three layers are spot welded together and did both rows with the same spacing as factory. I spot welded it in before the inner window frame was finished to be able to get to it.


Inner window frame pieces are all welded in as well now. Actually drilled out the upper factory spot welds and rewelded it as it hadn't been put on level at the factory.


Rear window and wall all finished for now. I'm glad I made the window wider and did not shorten the height at all. Looks nice and chopped as it is and actually have more window area than stock!
__________________
Cheers, Marcus.

My web site:
http://willyshotrod.com Over 5'000 Club
Likes: (10)

Last edited by Gojeep; 14-08-2017 at 03:48 AM.
  #1245  
Old 14-08-2016
Tyvokka's Avatar
Tyvokka  Tyvokka is offline
Jedi Master
 
Join Date: Jan 2011
Location: WJ JK Jeep Trailer Jeep R/C Sydney
Age: 79
Posts: 2,550
What Jeep do I drive?: WJ
Likes: 1,088
Liked 919 Times in 625 Posts
Check out my Ride(s)
Default

Holy moly guacamole! In my dreams....

No words!!
__________________
Grand Wookie Jedi
Rrrrrrrr-aghhhh!
http://youtu.be/e8aEDaeBMyI
Likes: (1)
  #1246  
Old 20-08-2016
Gojeep's Avatar
Gojeep  Gojeep is offline
LokRinger
 
Join Date: Jul 2002
Location: Victoria
Posts: 6,869
Likes: 788
Liked 1,754 Times in 556 Posts
Default


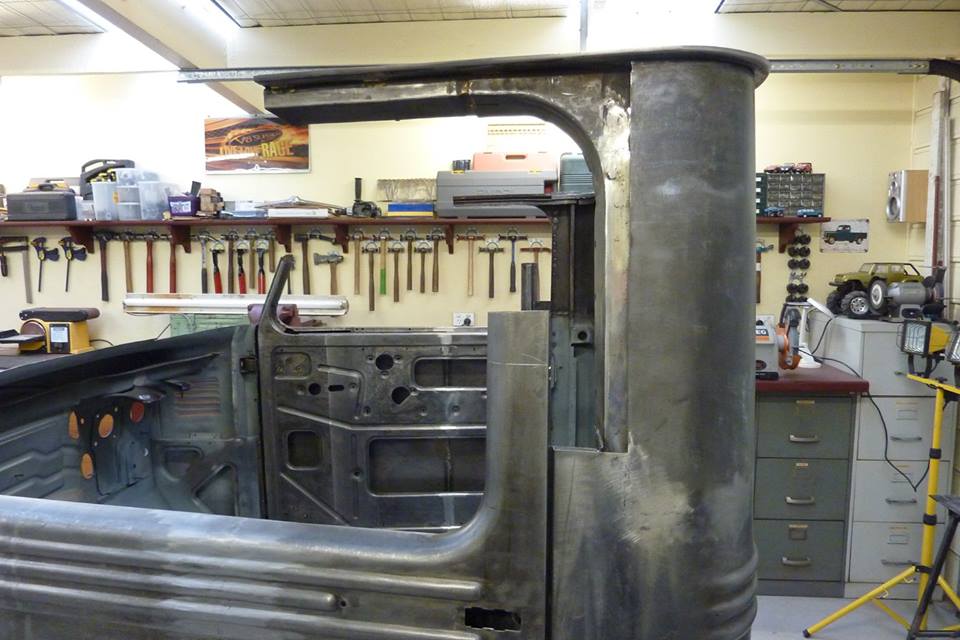
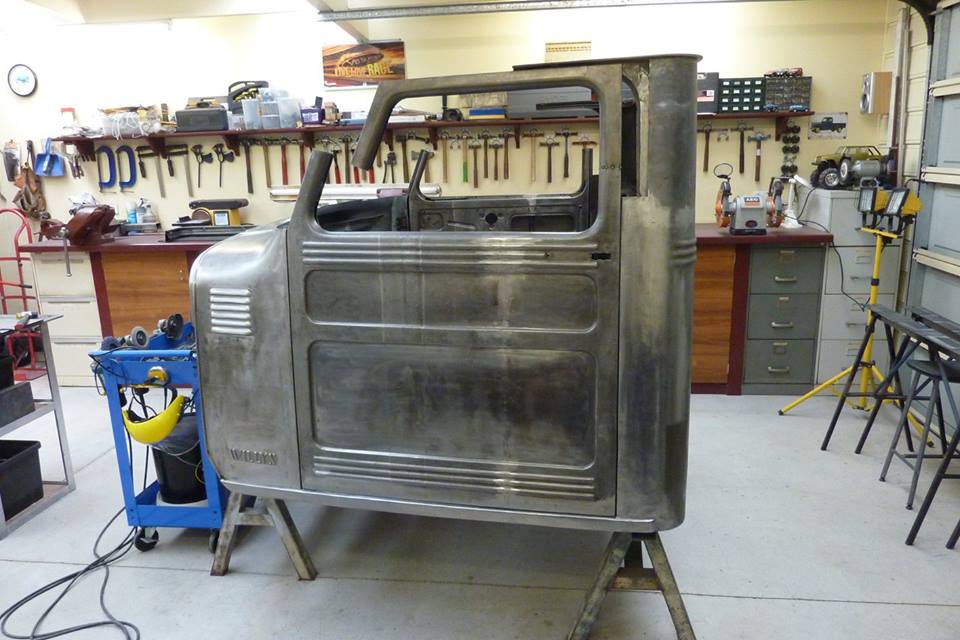
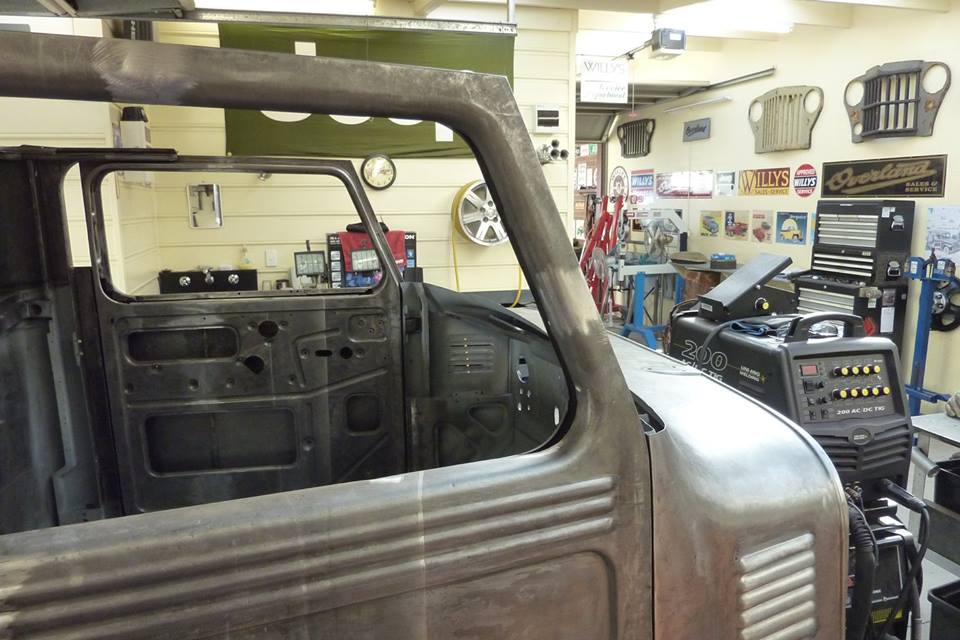
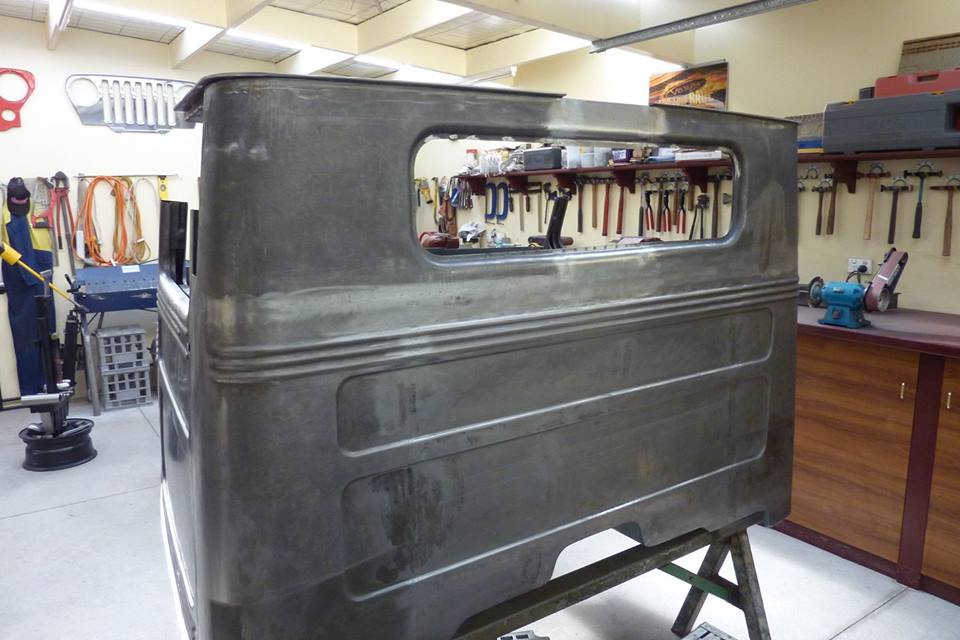
Time to start chopping 2" out of the door window frames.


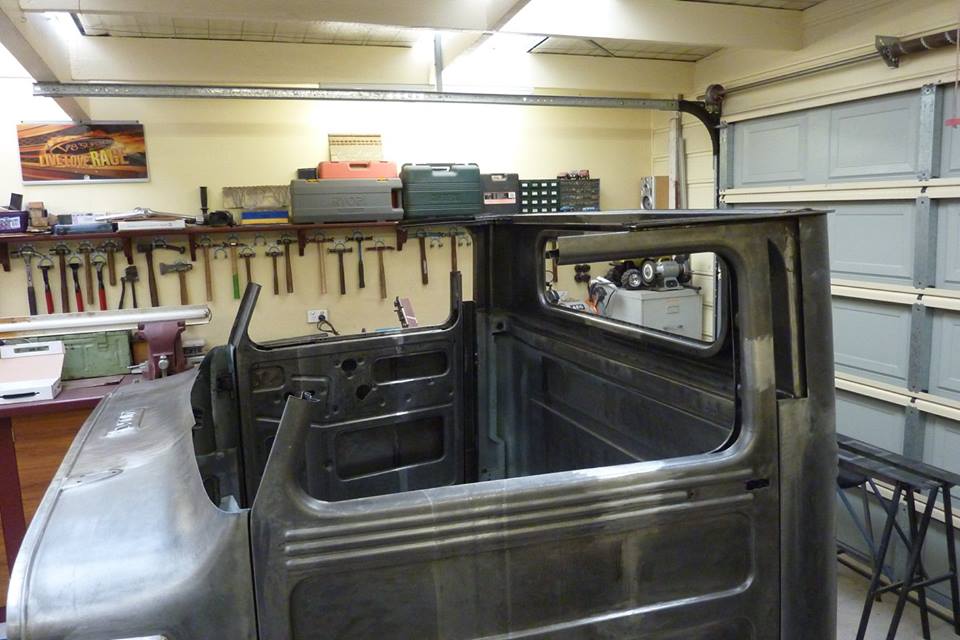
With the rear wall cut lower down than the cut in the window frame, I will have to address the angle so it bends in the same spot. If I should ever do one again, I will line the cuts up from the start.


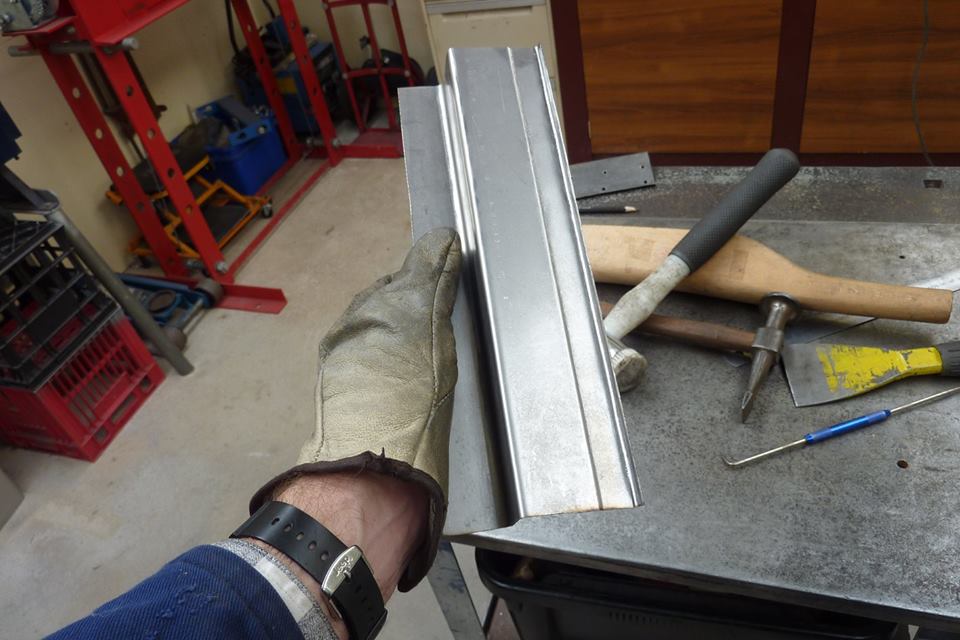
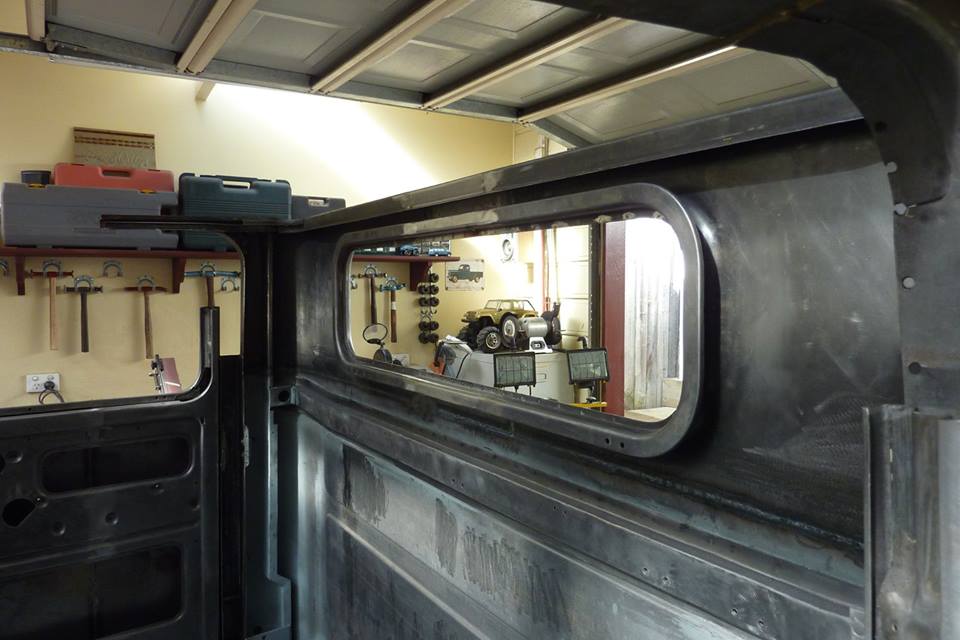
At the same height as where the rear wall was sectioned, I cut into the window frame. Didn't go all the way through so I would get a smoother bend.


Now the window frame lines up perfectly.


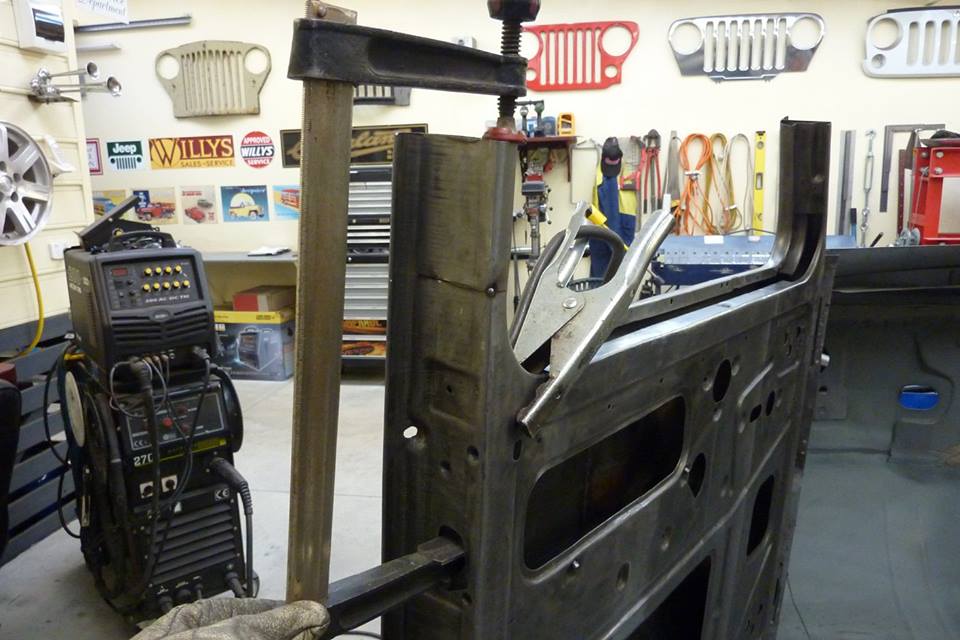
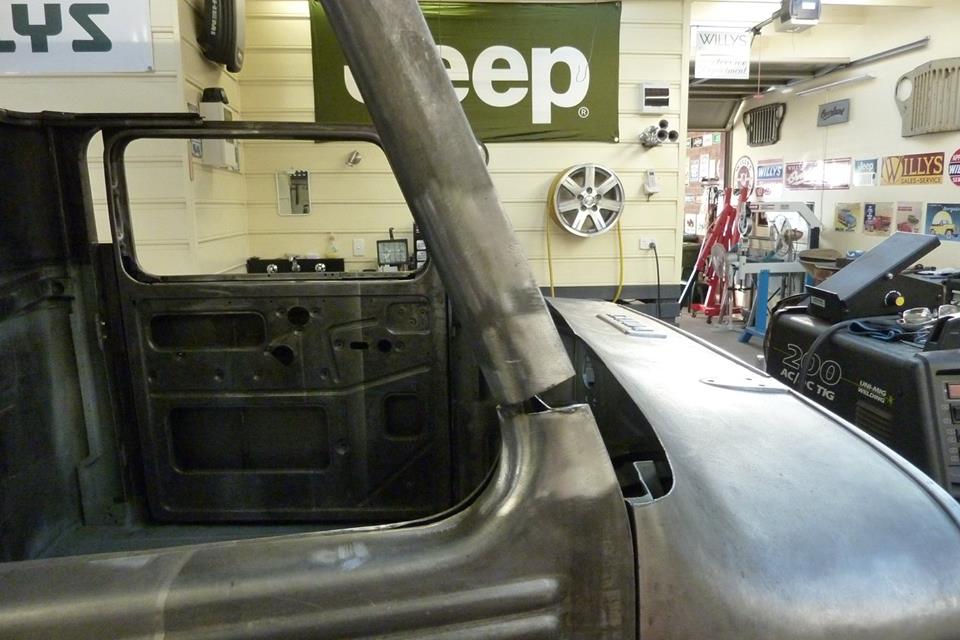
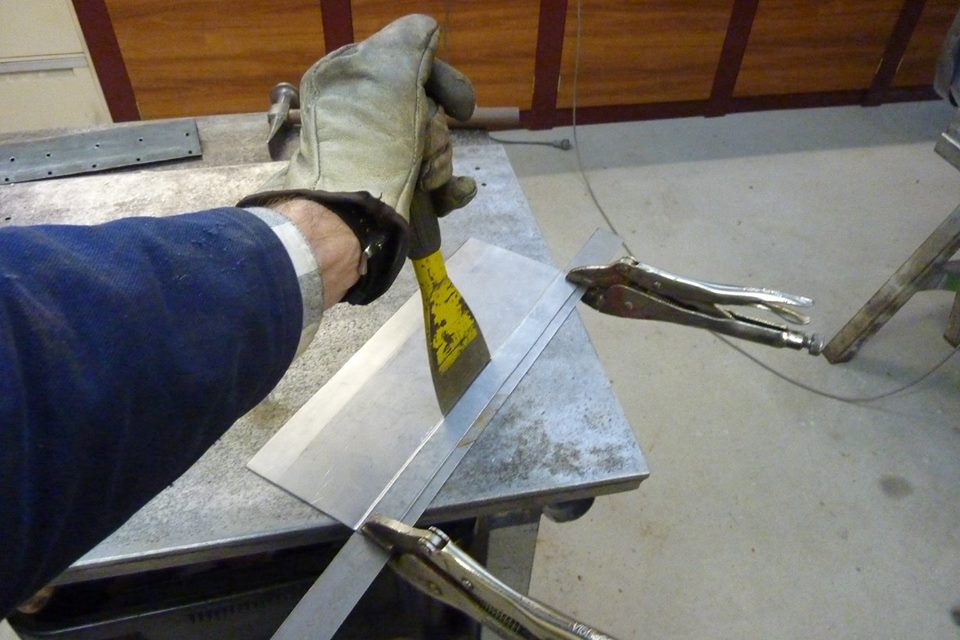
There was a slight taper to the window frame, so rather than cut slots to shrink the wider section, I stretched out the upper narrow section to match by hammering against the T dolly.


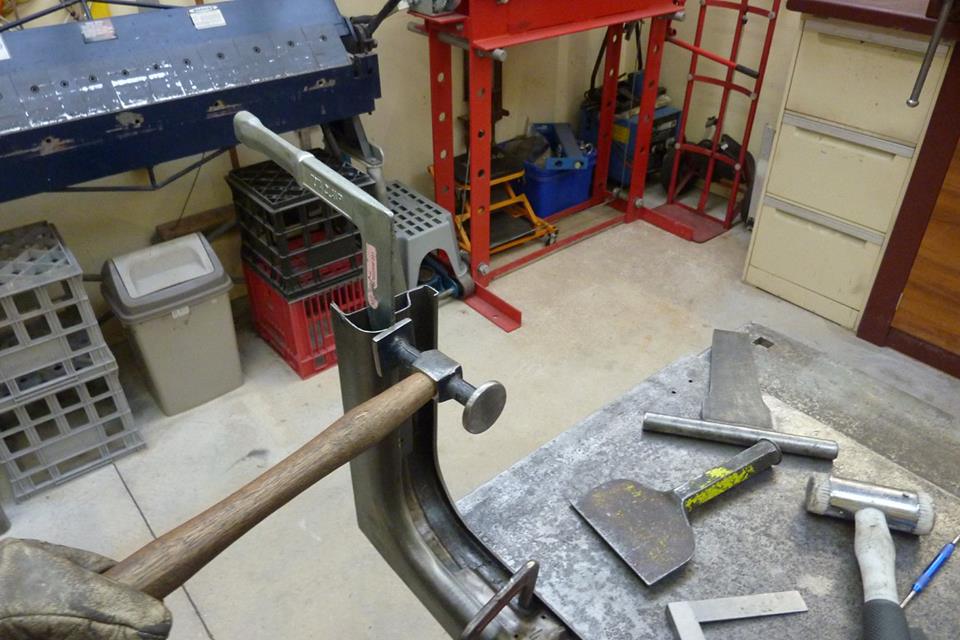
Used a offset bolster to move the fold to match and stretch the corners as well.


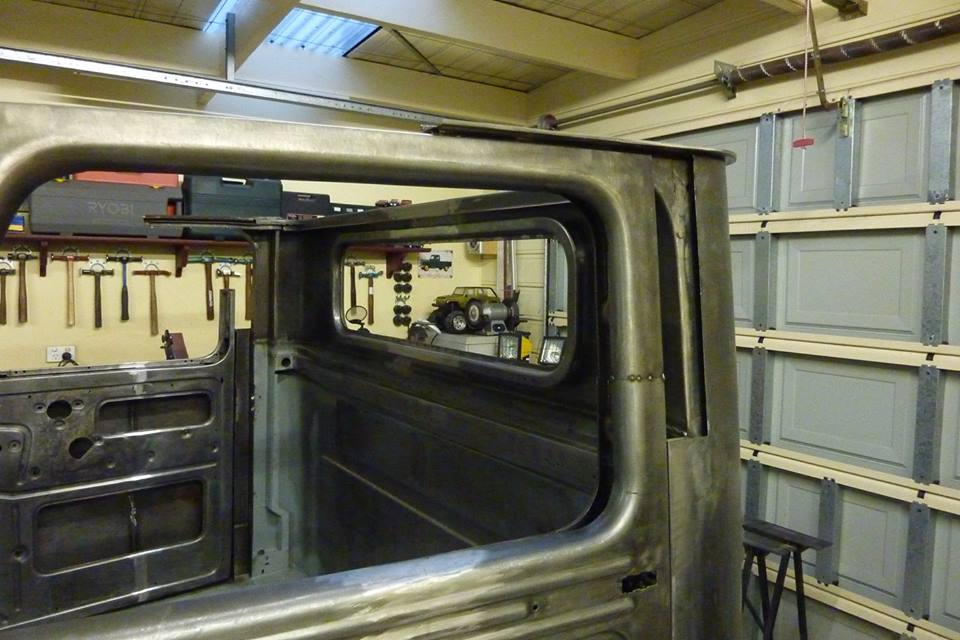
Lines up well enough now to blend in.


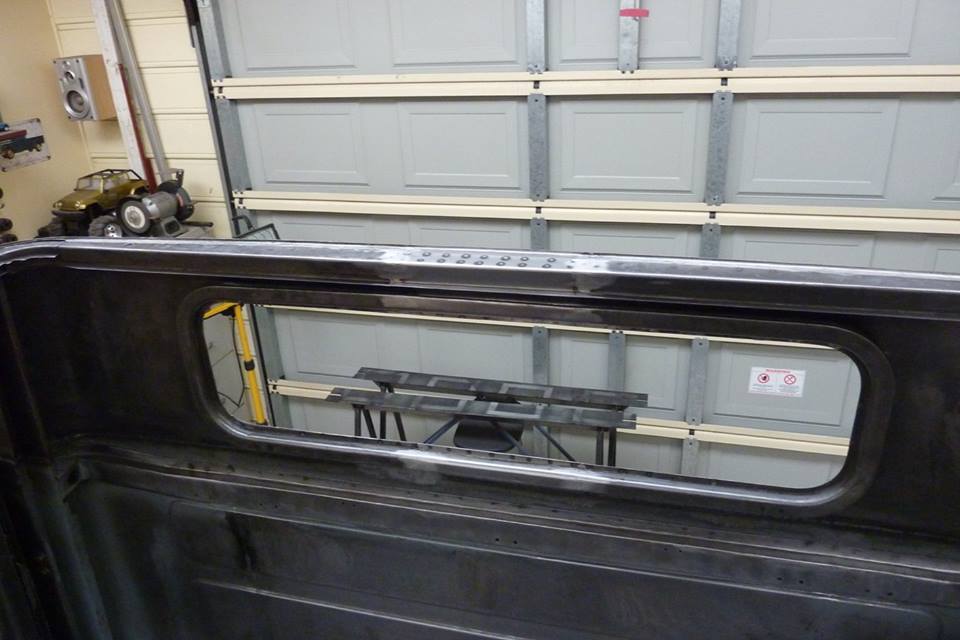
Was able to weld all the way around to get full strength.


Angle matches the rear corner as well.


Now weld it up and then to extend it forward to meet the front of the door. Not only have to add the 4.5" that I made the door longer, but extra due to the chop as well.


Due to the curve in the door, but flat on the inside, I had to pick the best place to cut it through that it would still match up with the new front section without ending up with two widest points!


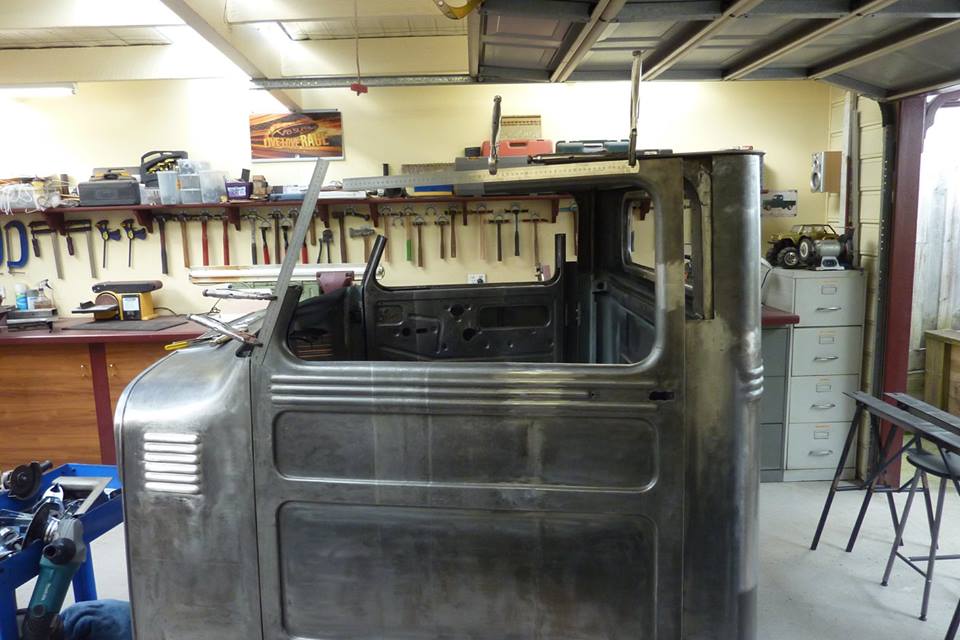
With the edges being straight, I could slowly trim up the new piece until it all lined up with the rulers. The backside will be checked as well to make sure that stays flat and true.


Fortunately it worked out well that differences in the age of the pressings of the door top worked in my favour and was able to match the 1948 rear section with the 1958 front section with the extra length needed. Nearly there in this shot. Doing it this way saves having an extra join in the top of the frame.


The other side was completed as well. Thought I was finished but noticed below where I had made my join that there was some lead fill there.


Removed the lead and found a bad repair job that only had a few tacks holding it together!


Cut the whole affected area out as had been ground quite thin previously. Also my digital level gauge showed this was tilting at the different angle to the back of the window frame. That would be bad for the glass as would jam up and not run smoothly.


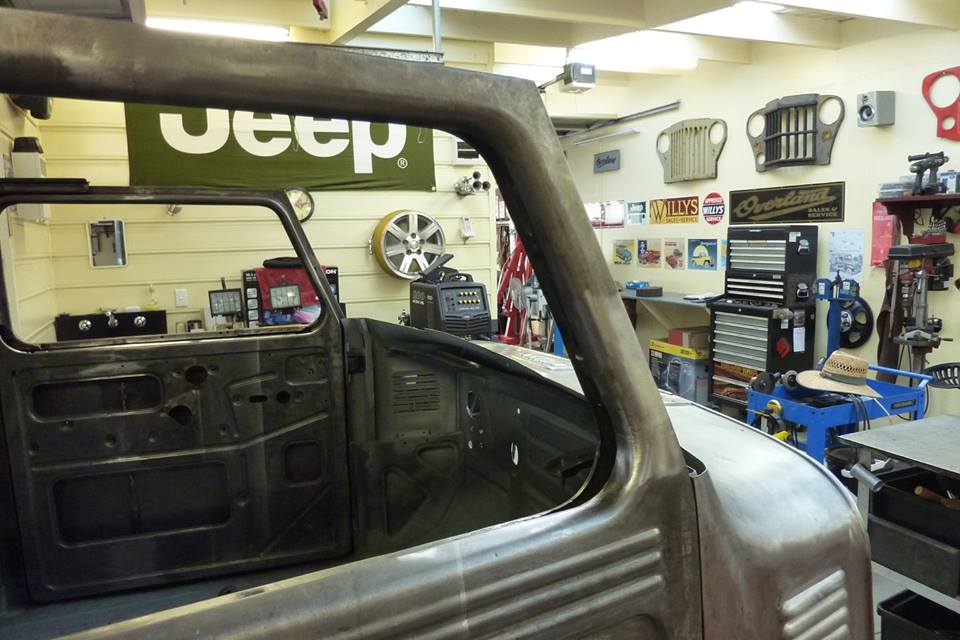
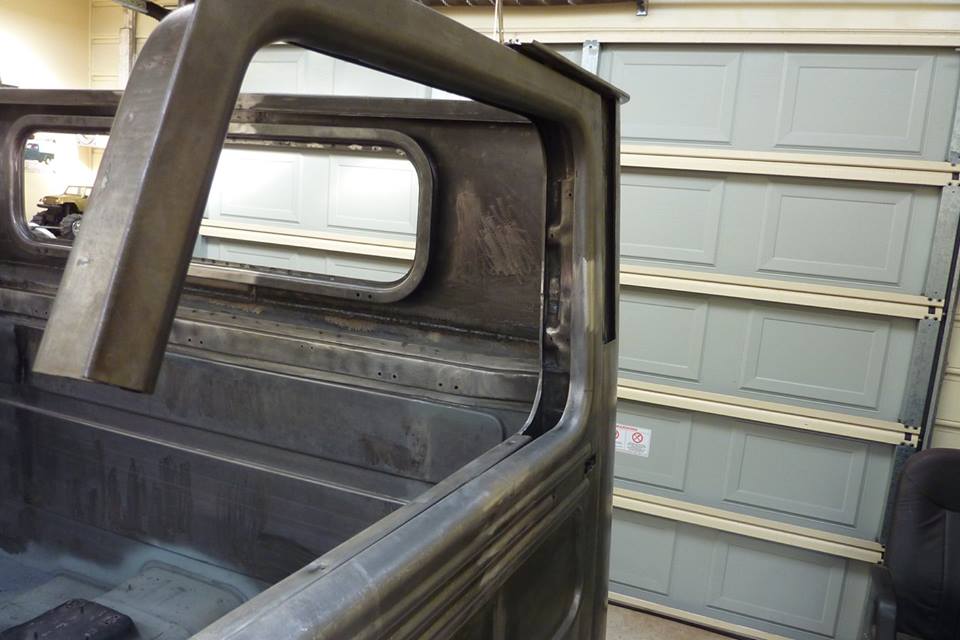
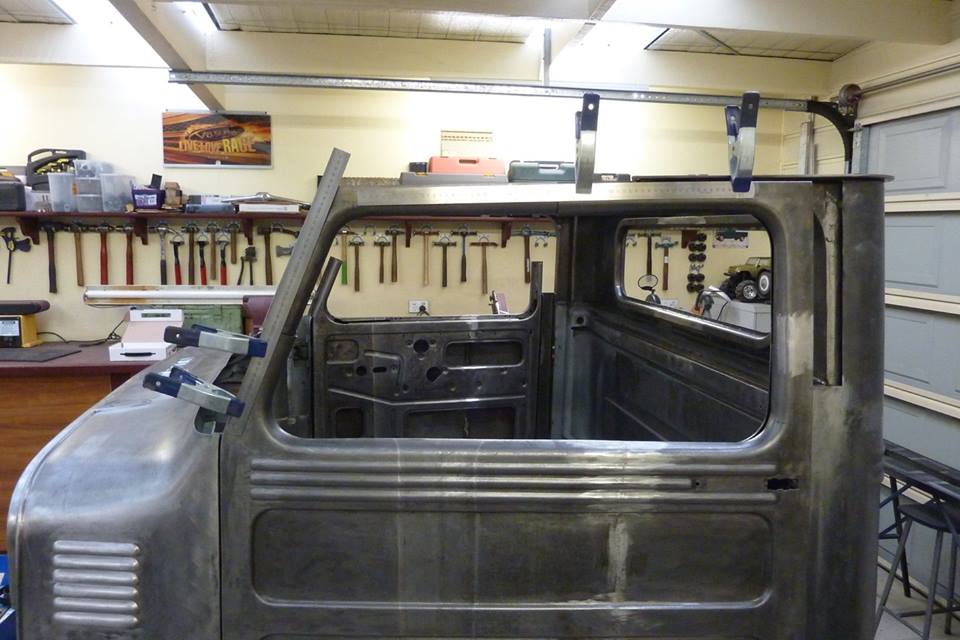
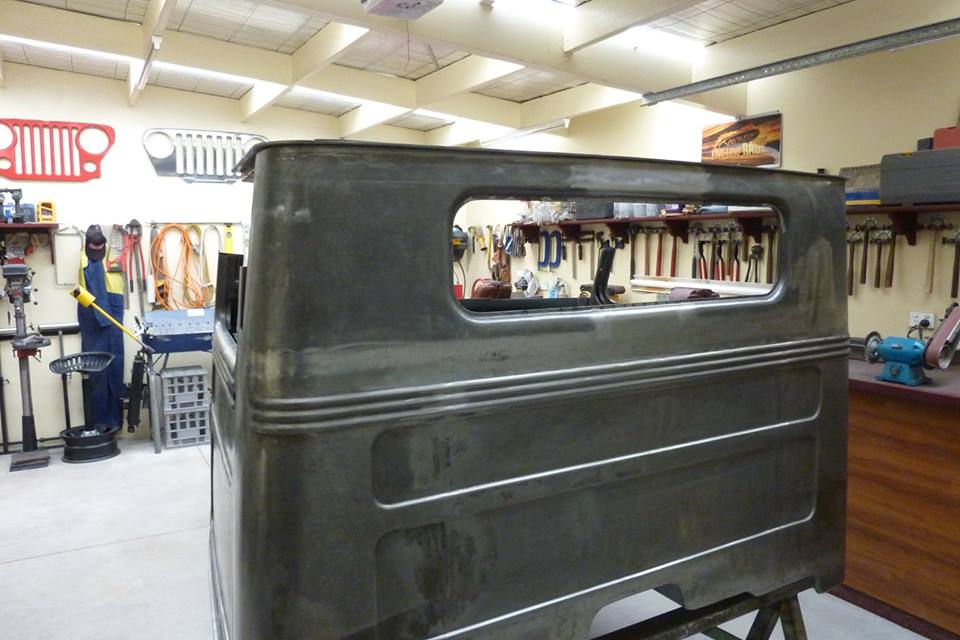
Welded in a new piece and got the angle to match so all 4 window frame sides were exactly the same.


Now with the window frames done I will have something to line the A pillar up against to get even door gaps.


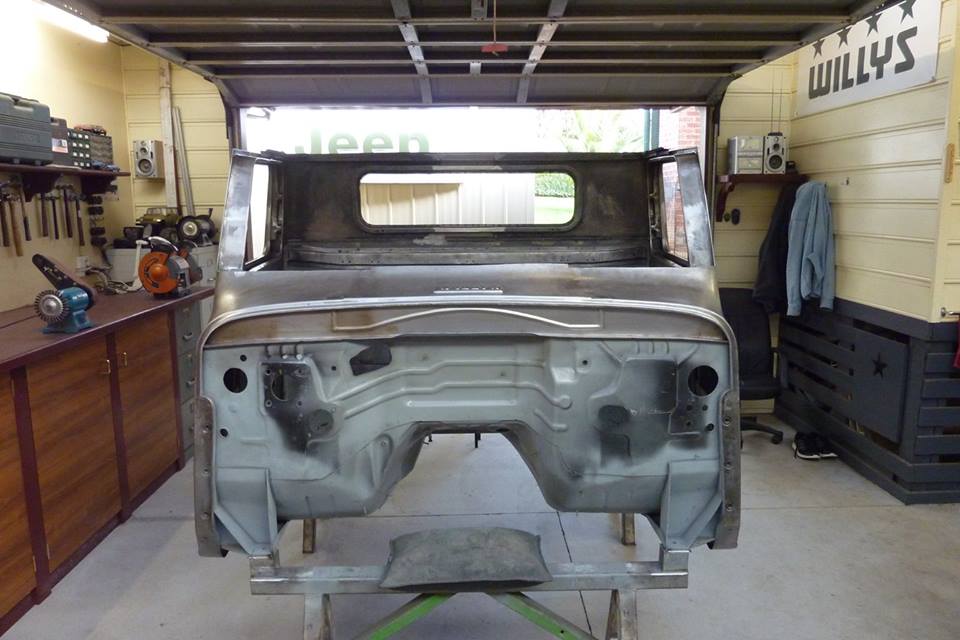
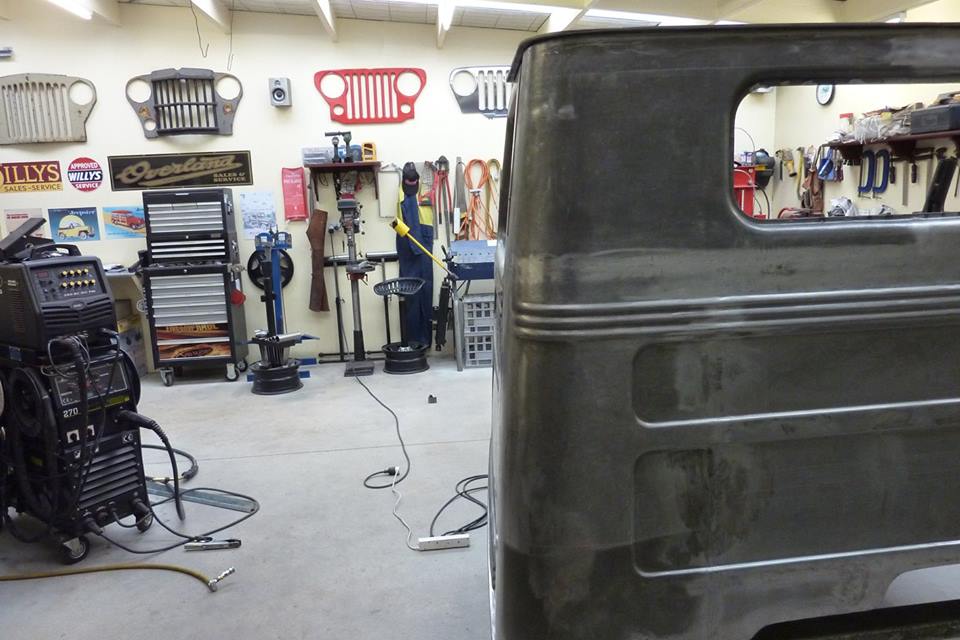
Starting to get a bit of an idea how it all will turn out.
__________________
Cheers, Marcus.

My web site:
http://willyshotrod.com Over 5'000 Club
Likes: (8)

Last edited by Gojeep; 14-08-2017 at 03:53 AM.
Post New Thread  Reply


Posting Rules
You may not post new threads
You may not post replies
You may not post attachments
You may not edit your posts

BB code is On
Smilies are On
[IMG] code is On
HTML code is On


All times are GMT +10. The time now is 02:18 PM.


Advertisements


AJOR does not vouch for or warrant the accuracy, completeness or usefulness of any message, and are not responsible for the contents of any message. The messages express the views of the author of the message, not necessarily the views of AJOR or any entity associated with AJOR, nor should any advice be substituted as technical advice replacing that of a mechanic. You agree, through your use of this service, that you will not use AJOR to post any material which is knowingly false and/or defamatory, inaccurate, abusive, vulgar, hateful, harassing, obscene, profane, sexually oriented, threatening, invasive of a person's privacy, religious, political or otherwise violative of any law. You agree not to post any copyrighted material unless the copyright is owned by you or by AJOR. The owner, administrators and moderators of AJOR reserve the right to delete any message or members for any or no reason whatsoever. You remain solely responsible for the content of your messages, and you agree to indemnify and hold harmless AJOR, the administrators, moderators, and their agents with respect to any claim based upon transmission of your message(s). The use of profile signatures to intentionally mislead or misdirect any member on this forum is not acceptable and may result in your account being suspended. Any trip that is organised through the AJOR forum is participated at your own risk. If you or your vehicle is damaged it is your responsibility, not that of the person that posted the thread, message or topic initiating the trip, nor the organisers of AJOR or moderators of any specific forum. This forum and associated website is the property of AJOR. No user data is harvested and no information supplied in your registration will be sold for profit.


Powered by vBulletin® Version 3.8.7
Copyright ©2000 - 2024, vBulletin Solutions, Inc.

AJOR © 2002 - 2024 AUSJEEPOFFROAD.COM. All corporate trademarked names and logos are property of their respective owners. Ausjeepoffroad is in no way associated with DaimlerChrysler Corporation or Fiat Jeep.
www.ausjeep.com www.ausjeep.com.au www.midlifemate.com ausjeepforum.com www.r9kustoms.com
vB Ad Management by =RedTyger=