Grand Willys Project - Page 286 - AUSJEEPOFFROAD.COM Jeep News Australia and New Zealand

Go Back   AUSJEEPOFFROAD.COM Jeep News Australia and New Zealand > JEEP GARAGE > Jeep build up
Register Forums Trading Your Jeep My Garage Mark All Read

Post New Thread  Reply
 
Thread Tools Search this Thread
  #1996  
Old 24-10-2022
Gojeep's Avatar
Gojeep  Gojeep is offline
LokRinger
 
Join Date: Jul 2002
Location: Victoria
Posts: 6,870
Likes: 789
Liked 1,754 Times in 556 Posts
Default


Came up with a sign for the Truck for when it is at an event. Wanted something that told what it was about at a casual glance, and not be put off by too much information. The QR codes I created goes to the website of the build and the YouTube playlist on it if people want to know more.


Had it printed on some aluminium composite material so will last a while. Was able to use my wife's experience in making scientific posters for doing the layout for me.
__________________
Cheers, Marcus.

My web site:
http://willyshotrod.com Over 5'000 Club
Likes: (5)
  #1997  
Old 30-10-2022
Gojeep's Avatar
Gojeep  Gojeep is offline
LokRinger
 
Join Date: Jul 2002
Location: Victoria
Posts: 6,870
Likes: 789
Liked 1,754 Times in 556 Posts
Default


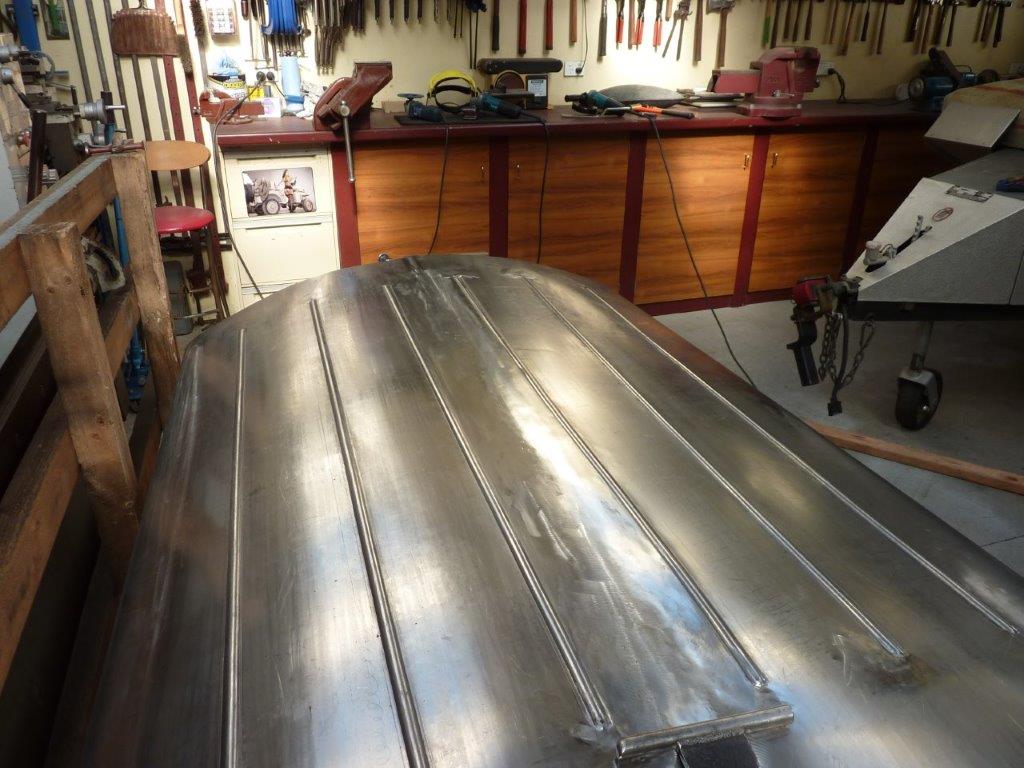
Getting the centre weld looking like this took twice as long as normal! Probably 12 hours all up from cutting, tacking together, welding, planishing, grinding, and sanding this 6 foot join. I couldn't reach into the centre with the dolly in one hand while seeing what my hammer was doing on the topside at the same time. I ended up balancing the dolly on a trestle underneath while hammering from the top. Moved it forward a little and repeated. Problem was I couldn't really 'feel' how the metal was responding and often overstretched the area. Then had to shrink it and then fine tune once again. Live and learn.
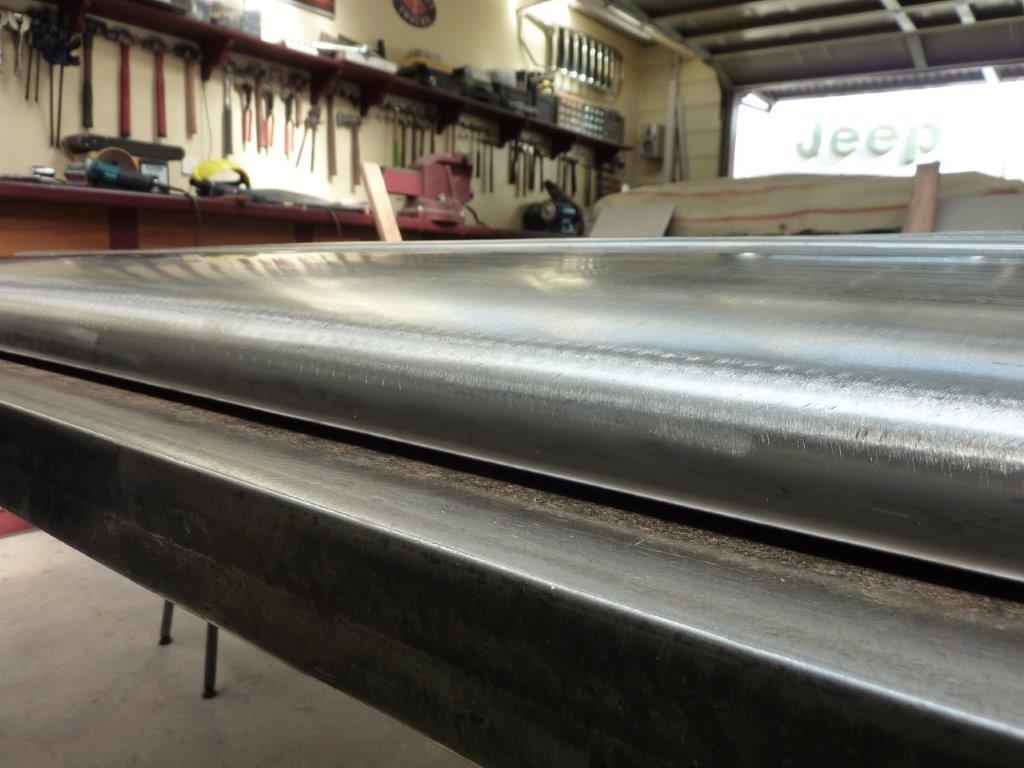

Another thing I made the mistake of doing on the first rolled side was not adding packers under the bolts for the half round die the same thickness as the sheet. What happened was that the die bent upwards when tightened and the sheet followed the arc when I pulled it over to make the rounded edge. I used a shrinking disc across the top which got it down to this gap, but that is still too much.
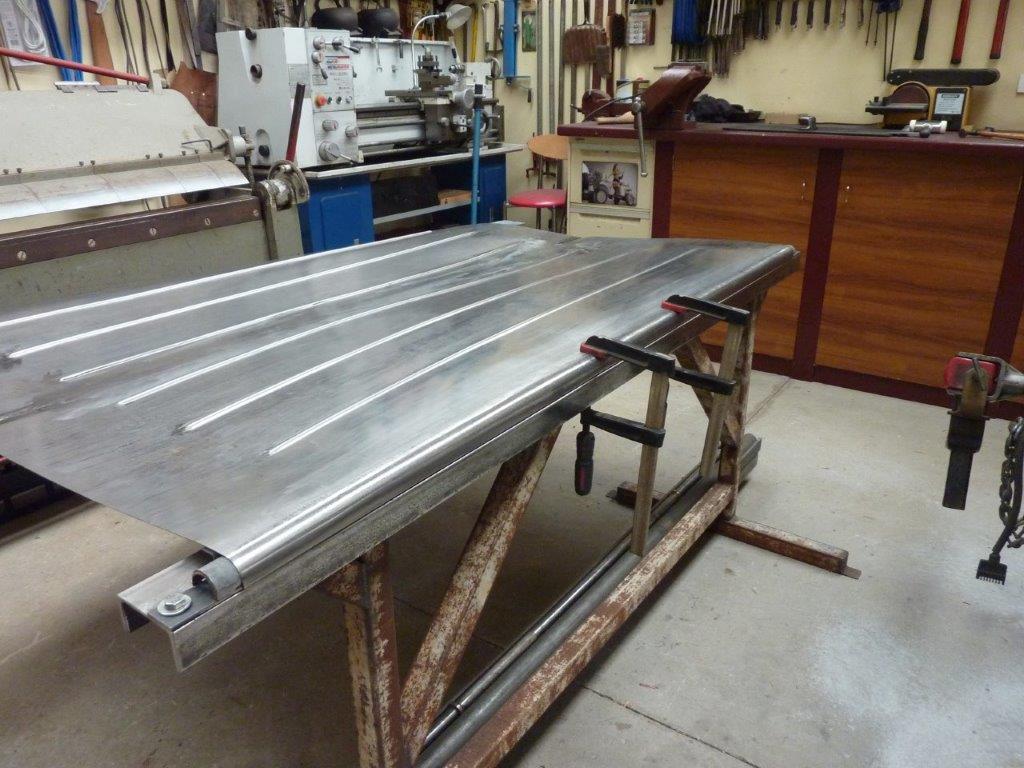

Next thing I tried was clamping it down and then stretching along the bottom edge to help pull it down some more.
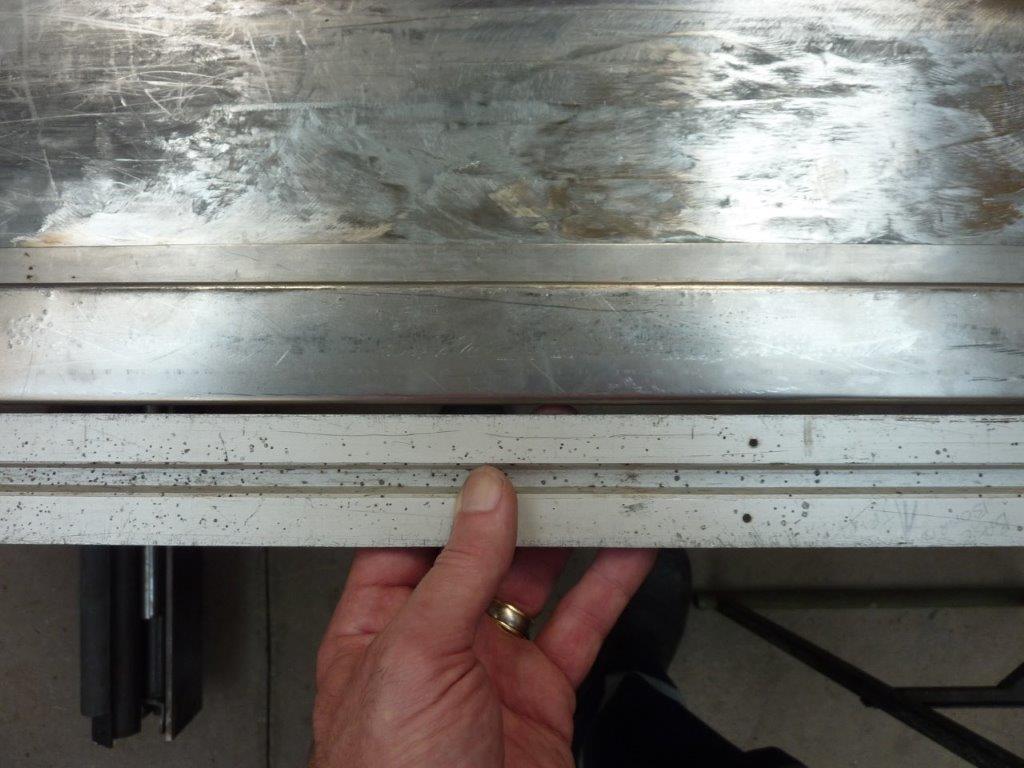

That worked but it pulled it sideways instead!
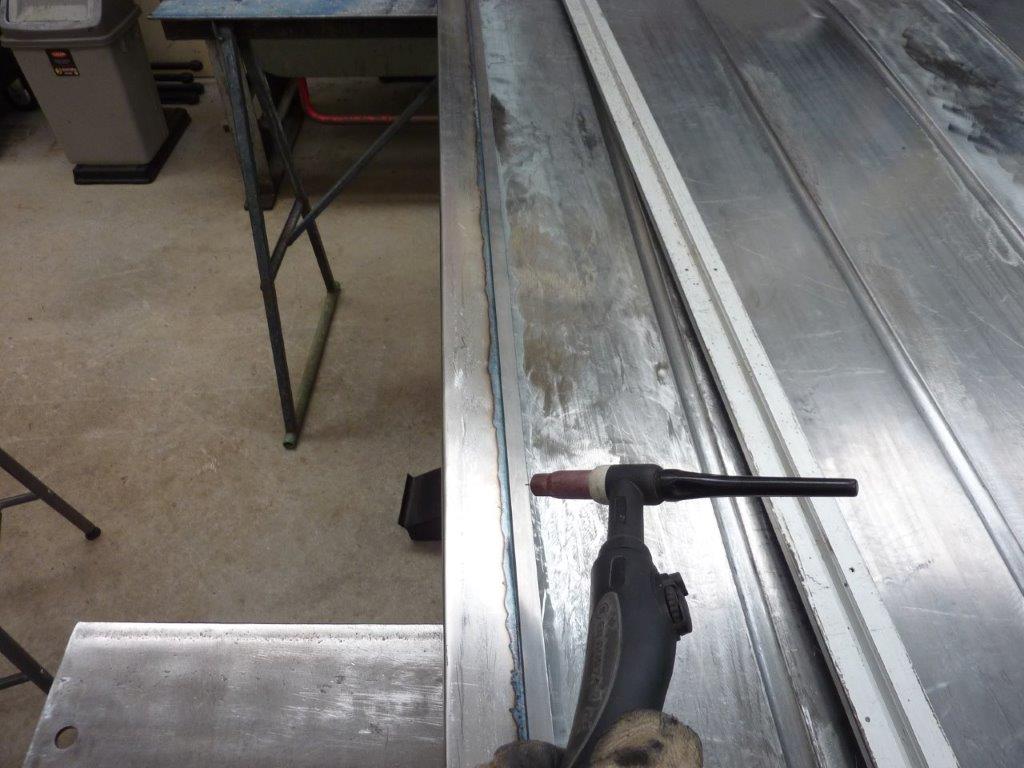

So to fix the sideways inwards pull, I carefully heated the edge of the fold to move it back straight again. I used a tig torch for this as it gives great localised heat. As soon as the arc was established, I quickly moved the torch along in little circles stopping a weld pool from forming.
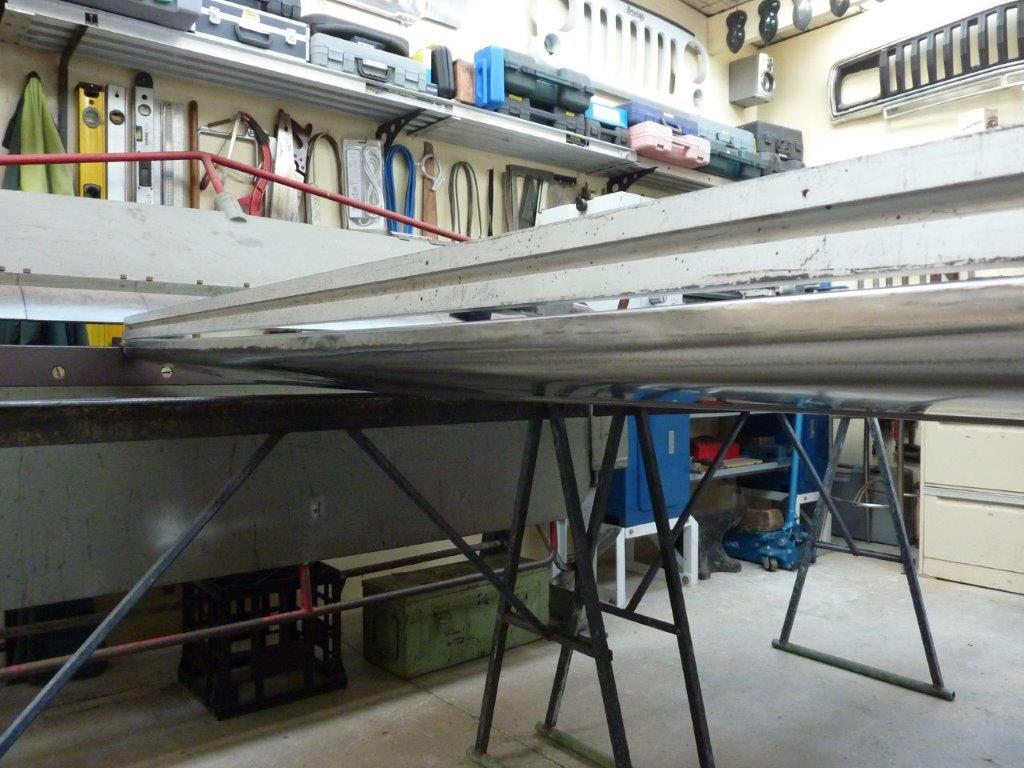

Got is straight but now the other bend is back even worse!!!
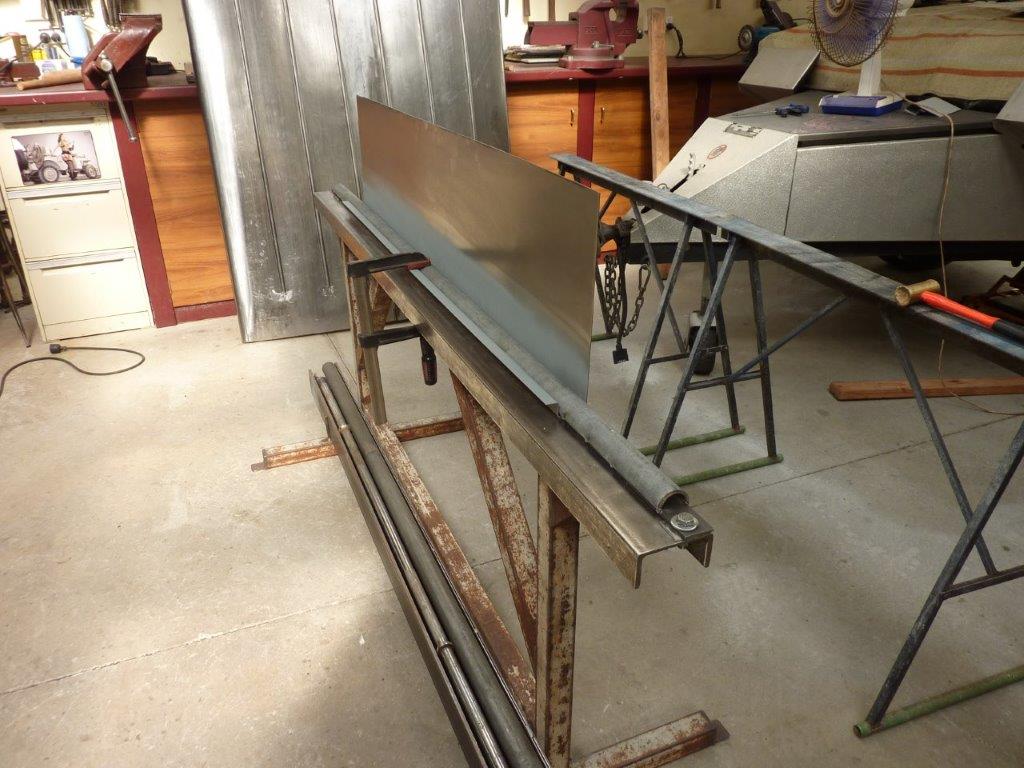

After the first bend I found clamping down the centre until the sheet started to touch the clamp head at about 45 degrees, I could then pull the rest of the sheet over without it lifting. One of the end sections shown being done here.
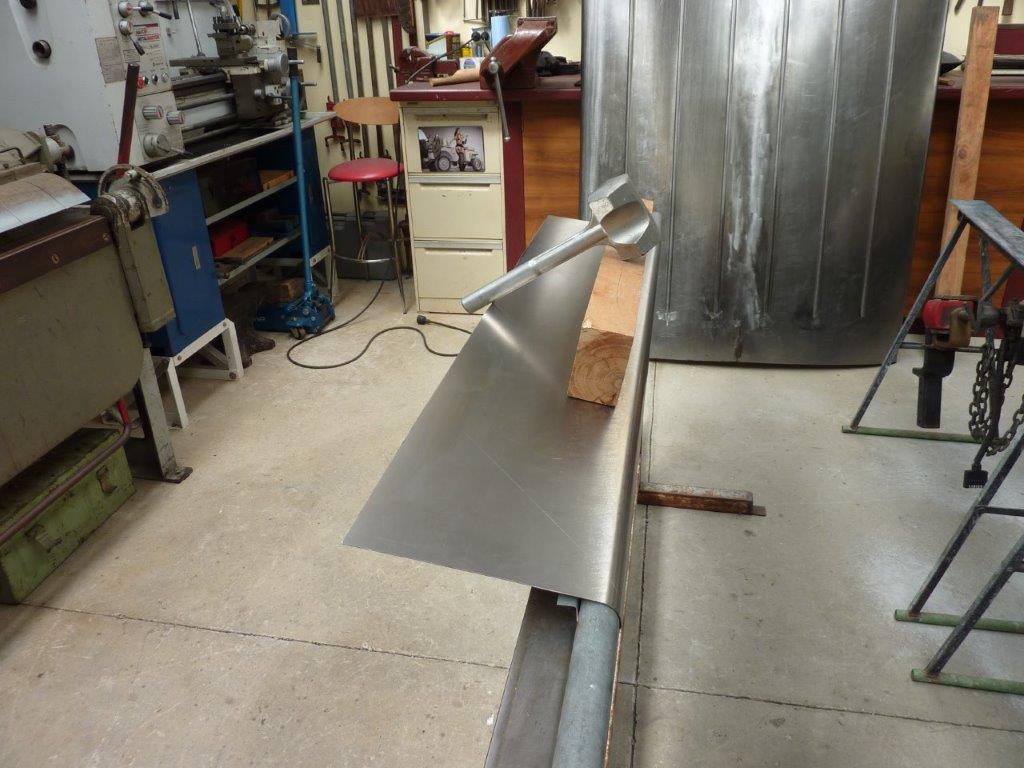

Also completing the bend by pelting down on a fence post with a 4lb mallet kept it straight and made the bend tighter.
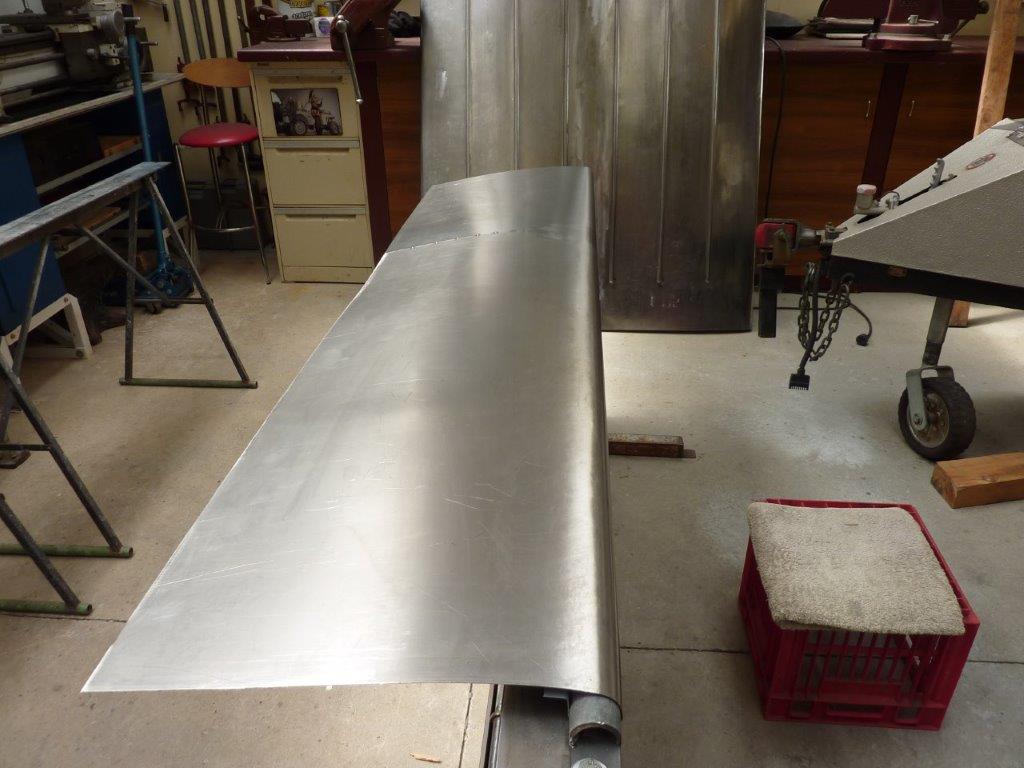

So I started making a new side but had used up all my long lengths of the sheet. So welded a piece on to the end to make it long enough. Only the part that will be used was fully welded with the rest tacked so I could use it for leverage.
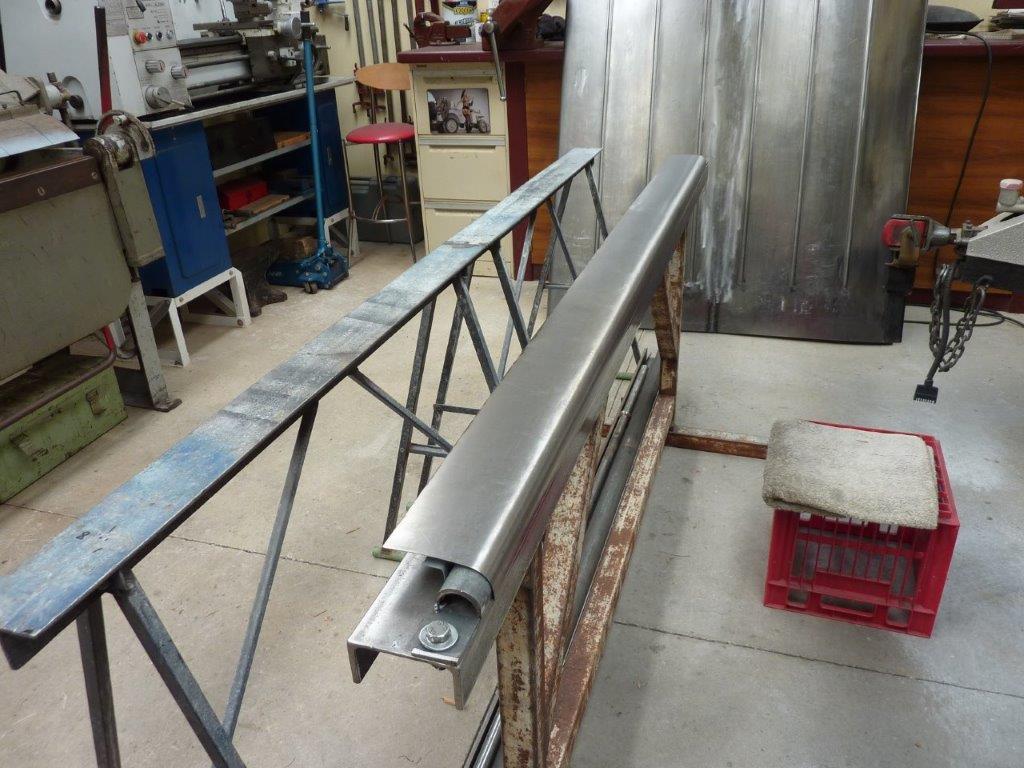

Cut the excess off ready to replace the bowed side.
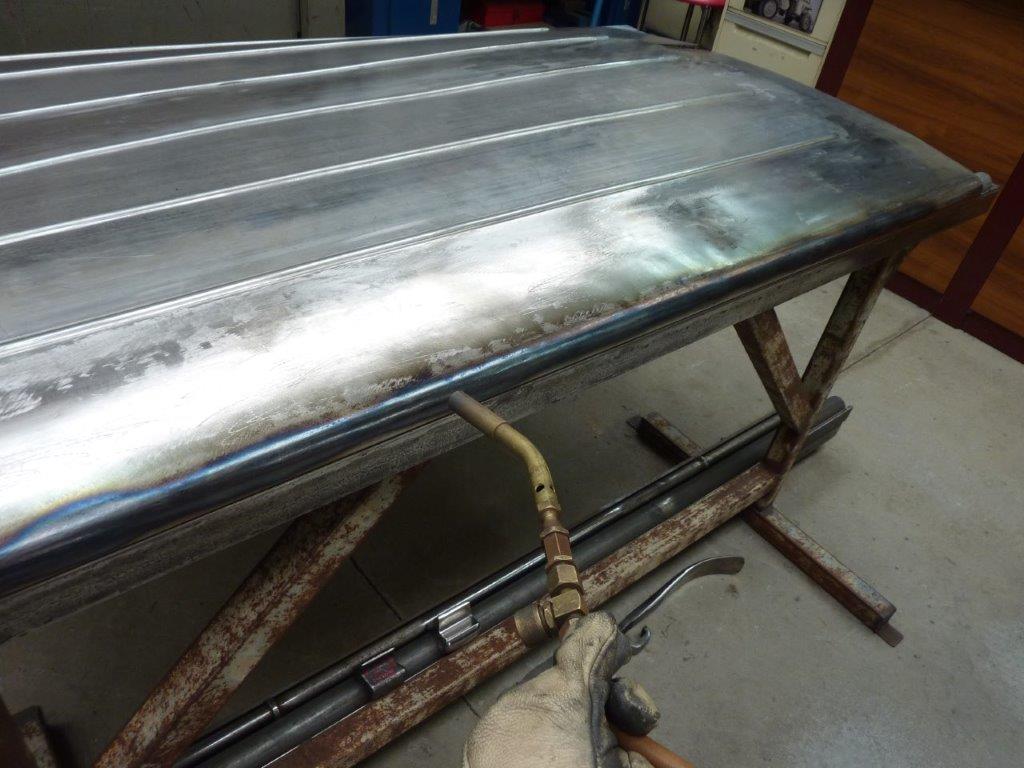

Now that I had a replacement ready to go, I thought I would give straightening it one more go by using a torch instead of the shrinking disc this time.
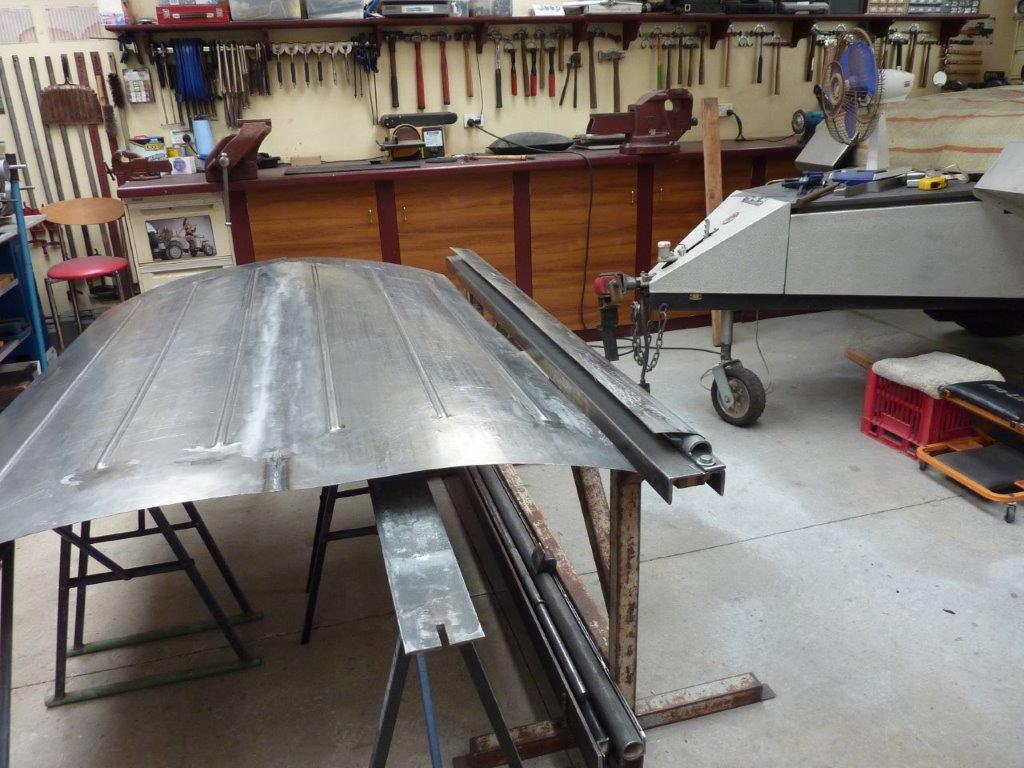

Well it went too far and pulled sideways again! At least I gave it my best shot, so cut it free ready to replace it.
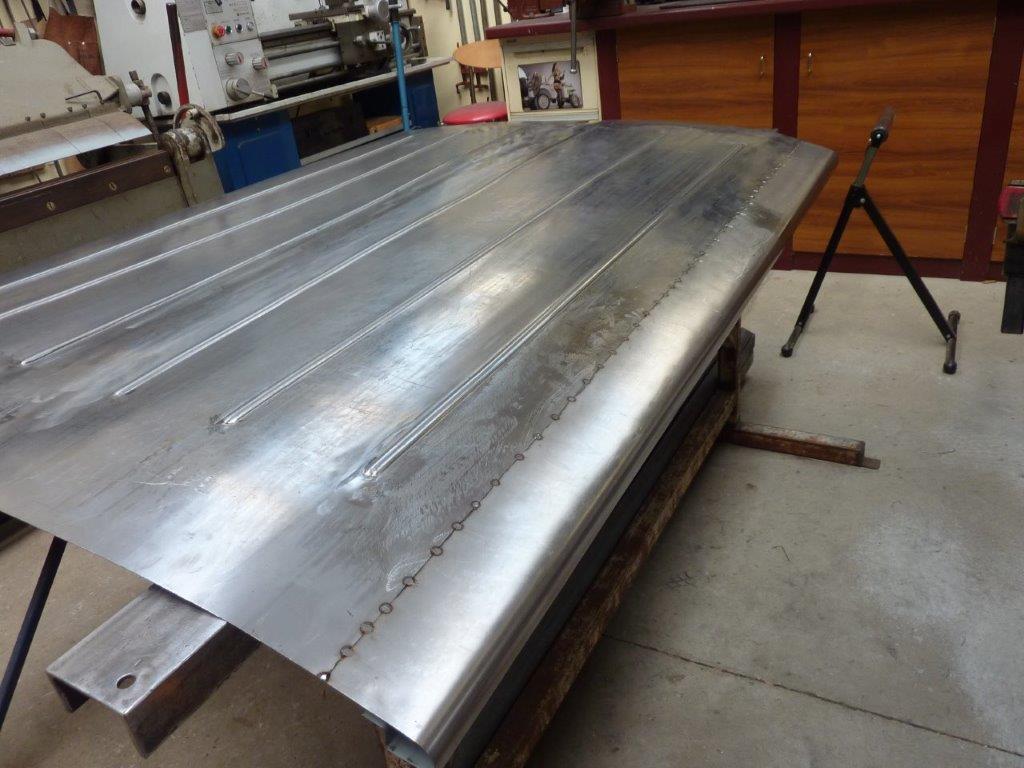

This turns out to be the biggest redo I have had to do for the whole Willys Truck build. Not bad considering that I am learning as I go along.
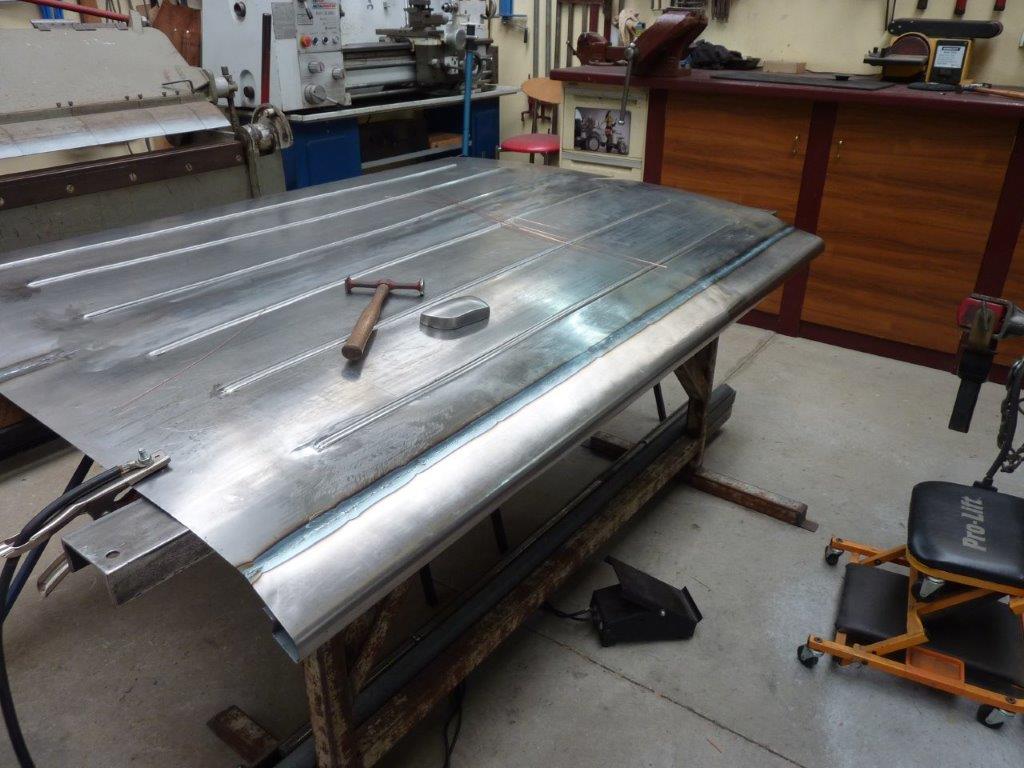

Here is the sheet fully welded in one go, apart from repositioning myself and needing more filler wire. No planishing has taken place yet.
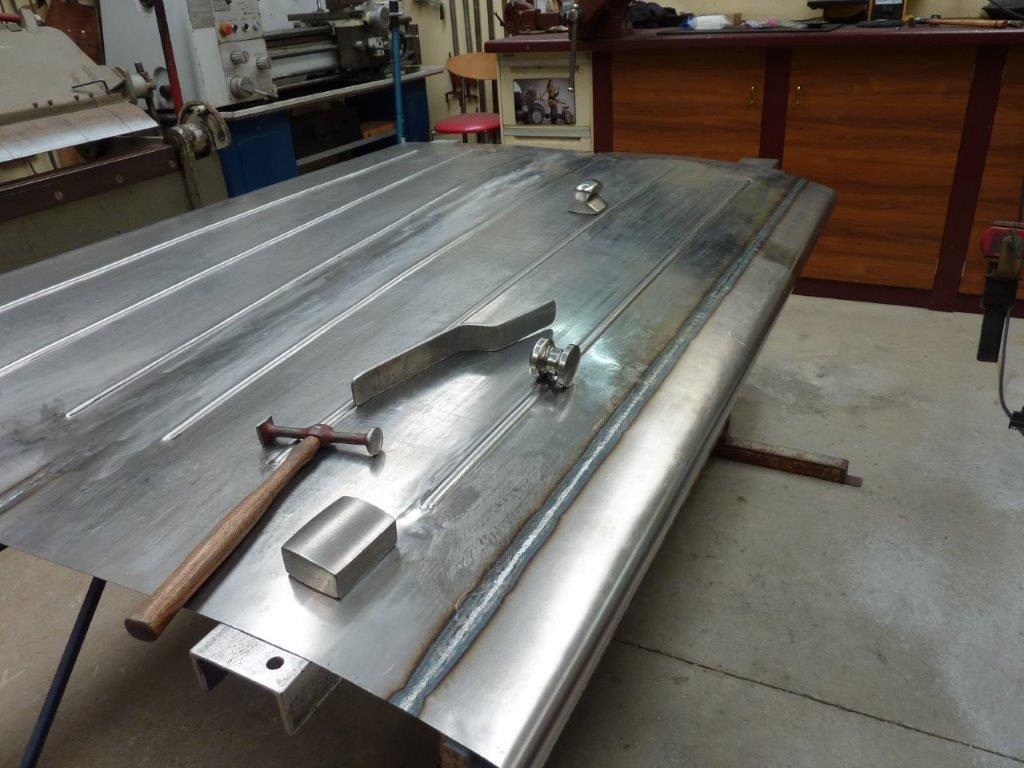

All stretching of the weld was done using the tools shown. Being a tig weld that is softer than mig and very little build up, I did my stretching without any grinding first.
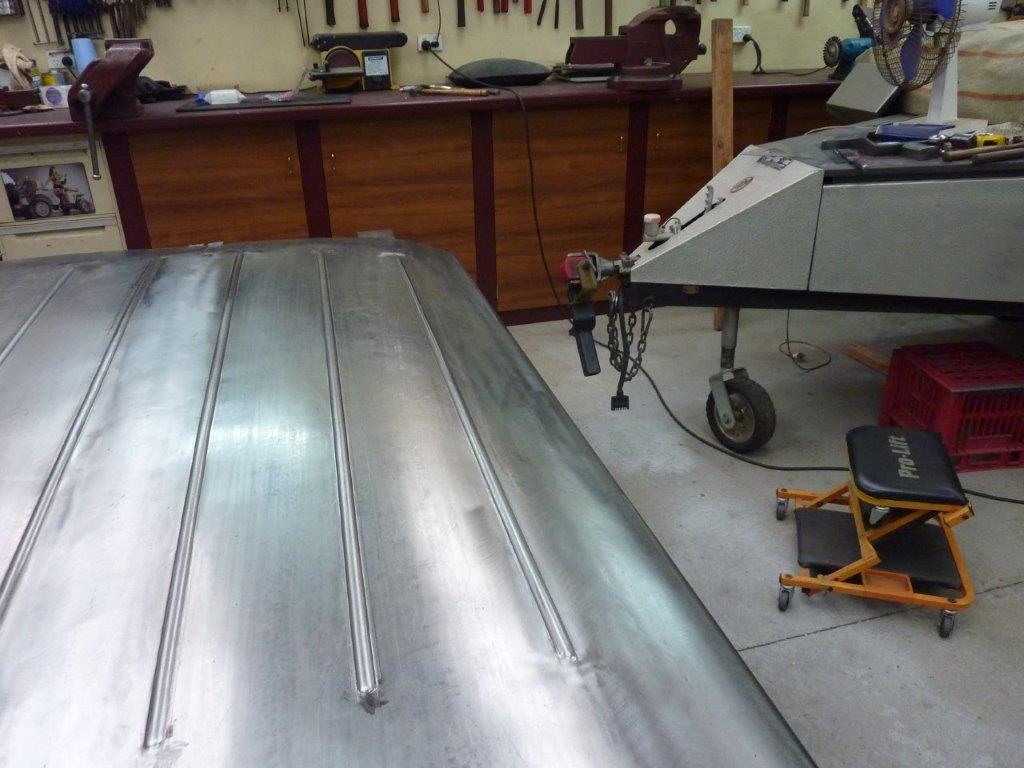

All ground down, sanded and run over with a Scotchbrite disc.
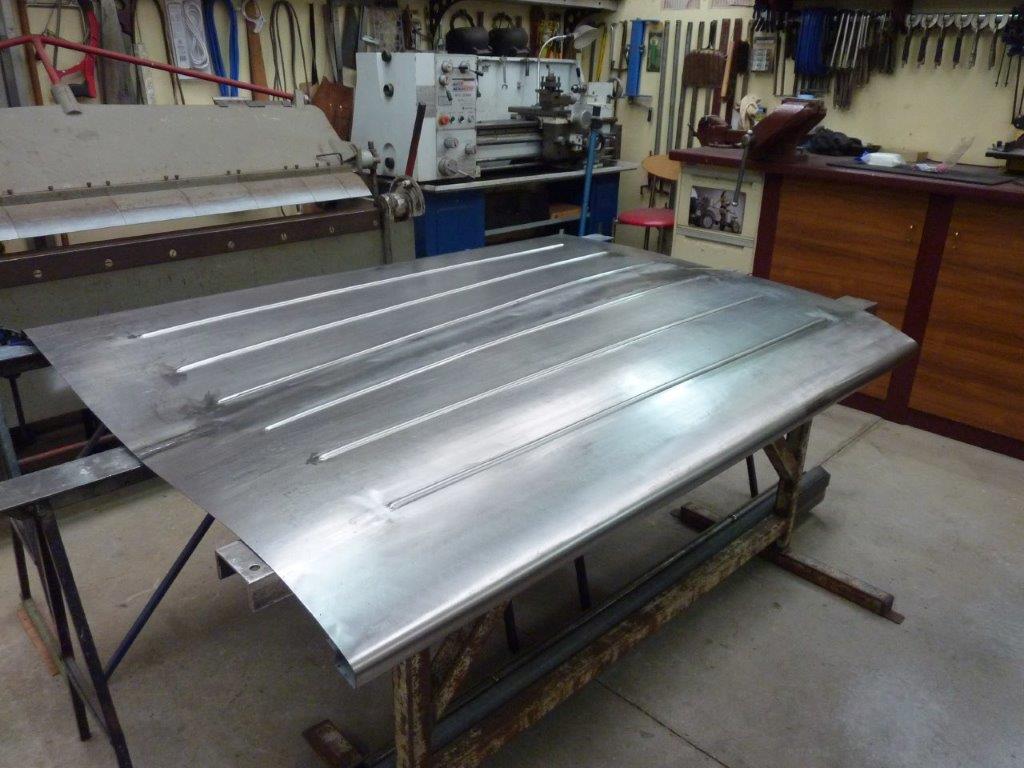

Now I can cut away the ends and weld in the rounded sections so all four sides will look the same. I will then work out the distortion you can see left that is from the un-wheeled areas at the ends.
__________________
Cheers, Marcus.

My web site:
http://willyshotrod.com Over 5'000 Club
Likes: (3)
  #1998  
Old 01-11-2022
Gojeep's Avatar
Gojeep  Gojeep is offline
LokRinger
 
Join Date: Jul 2002
Location: Victoria
Posts: 6,870
Likes: 789
Liked 1,754 Times in 556 Posts
Default

https://youtu.be/FitOGCKDNw4
Video on starting the hard tonneau cover.
__________________
Cheers, Marcus.

My web site:
http://willyshotrod.com Over 5'000 Club
Likes: (2)
  #1999  
Old 04-11-2022
Gojeep's Avatar
Gojeep  Gojeep is offline
LokRinger
 
Join Date: Jul 2002
Location: Victoria
Posts: 6,870
Likes: 789
Liked 1,754 Times in 556 Posts
Default

Just a hard tonneau update on welding the 6' join for the replaced first side.
Lots of 'maybe' useful tips on straightening out the sheet after the weld.

https://youtu.be/xI_A7IZirgI

I normally don't film this much and have already cut the content in half, but still came out long.
Learning new software too as was only a couple of years ago that I would just do my videos in a single take, as didn't even know then how to join two pieces of footage!
So slowly improving on this, but this is not my wheel house.
__________________
Cheers, Marcus.

My web site:
http://willyshotrod.com Over 5'000 Club
Likes: (2)
  #2000  
Old 08-11-2022
Gojeep's Avatar
Gojeep  Gojeep is offline
LokRinger
 
Join Date: Jul 2002
Location: Victoria
Posts: 6,870
Likes: 789
Liked 1,754 Times in 556 Posts
Default

Went to my first cars and coffee just 10 minutes from my house.


It got a bit of interest.


I had the sign in the back of the bed and many took the time to read it.


My wife posing with it.
__________________
Cheers, Marcus.

My web site:
http://willyshotrod.com Over 5'000 Club
Likes: (5)
  #2001  
Old 08-11-2022
FARWEST's Avatar
FARWEST  FARWEST is online now
Rock Munki
 
Join Date: Aug 2022
Location: West Coast SA
Posts: 2,399
What Jeep do I drive?: WK
Likes: 2,162
Liked 1,318 Times in 758 Posts
Default

Good to see ya's out n about enjoying it !!!!
__________________
WK2 MY13 CRD LIMITED

Only dumb people think their smart...rest of us learn everyday
Likes: (1)
  #2002  
Old 30-11-2022
Gojeep's Avatar
Gojeep  Gojeep is offline
LokRinger
 
Join Date: Jul 2002
Location: Victoria
Posts: 6,870
Likes: 789
Liked 1,754 Times in 556 Posts
Default


Time to add the ends for the hard tonneau cover.


Test fit showed it should work out well enough.


Turned the cover upside down so I could jack the cover to the right width. The cover sagged after the end was cut away and lost all its support.


I marked the exact centre of both pieces and made sure those lines matched before tack welding. One tack at a time and then stretching it to keep things in alignment before the next tack, otherwise it will overlap itself with the shrinkage.


Can see how much support the end gives!


I had the cover upside and was planishing away and did not notice this side was moving. It fell off the trestle straight down on to the support legs!


This gives you an idea of how I have to work inside the cover behind where the dent is using one of my spoons.


I did it like paintless dent removal where you massage the back of the dent and lightly tap around the edge of it from the outside. Came out pretty well considering how sharp the crease was.


Also going around using my large profile gauge to make sure it is identical left to right and end to end etc. If you spin it 180* and you have a gap under it like shown, it needs to be altered. Stretching up the left side made it the same in this case.


I made up this adjustable stake stand using the bottom of a scaffolding tower leg. This will help my back in the hard to reach places.


Nearly all my homemade stakes will fit into it including the die that matches the ribs etc.


The adjustment is great as the cover has different heights due to the crown as you move left to right, front to rear etc. Just wind it up or down to suit.
__________________
Cheers, Marcus.

My web site:
http://willyshotrod.com Over 5'000 Club
Likes: (5)
Post New Thread  Reply


Posting Rules
You may not post new threads
You may not post replies
You may not post attachments
You may not edit your posts

BB code is On
Smilies are On
[IMG] code is On
HTML code is On


All times are GMT +10. The time now is 08:07 AM.


Advertisements


AJOR does not vouch for or warrant the accuracy, completeness or usefulness of any message, and are not responsible for the contents of any message. The messages express the views of the author of the message, not necessarily the views of AJOR or any entity associated with AJOR, nor should any advice be substituted as technical advice replacing that of a mechanic. You agree, through your use of this service, that you will not use AJOR to post any material which is knowingly false and/or defamatory, inaccurate, abusive, vulgar, hateful, harassing, obscene, profane, sexually oriented, threatening, invasive of a person's privacy, religious, political or otherwise violative of any law. You agree not to post any copyrighted material unless the copyright is owned by you or by AJOR. The owner, administrators and moderators of AJOR reserve the right to delete any message or members for any or no reason whatsoever. You remain solely responsible for the content of your messages, and you agree to indemnify and hold harmless AJOR, the administrators, moderators, and their agents with respect to any claim based upon transmission of your message(s). The use of profile signatures to intentionally mislead or misdirect any member on this forum is not acceptable and may result in your account being suspended. Any trip that is organised through the AJOR forum is participated at your own risk. If you or your vehicle is damaged it is your responsibility, not that of the person that posted the thread, message or topic initiating the trip, nor the organisers of AJOR or moderators of any specific forum. This forum and associated website is the property of AJOR. No user data is harvested and no information supplied in your registration will be sold for profit.


Powered by vBulletin® Version 3.8.7
Copyright ©2000 - 2024, vBulletin Solutions, Inc.

AJOR © 2002 - 2024 AUSJEEPOFFROAD.COM. All corporate trademarked names and logos are property of their respective owners. Ausjeepoffroad is in no way associated with DaimlerChrysler Corporation or Fiat Jeep.
www.ausjeep.com www.ausjeep.com.au www.midlifemate.com ausjeepforum.com www.r9kustoms.com
vB Ad Management by =RedTyger=