Grand Willys Project - Page 253 - AUSJEEPOFFROAD.COM Jeep News Australia and New Zealand

Go Back   AUSJEEPOFFROAD.COM Jeep News Australia and New Zealand > JEEP GARAGE > Jeep build up
Register Forums Trading Your Jeep My Garage Mark All Read

Post New Thread  Reply
 
Thread Tools Search this Thread
  #1765  
Old 25-03-2021
Gojeep's Avatar
Gojeep  Gojeep is offline
LokRinger
 
Join Date: Jul 2002
Location: Victoria
Posts: 6,870
Likes: 789
Liked 1,754 Times in 556 Posts
Default

Quote:
Originally Posted by WHHEMI View Post
Amazing work as always Marcus, I have been following this build since the start and always look forward to updates, cant wait to see it in real life once finished.
Glad to hear it. I'm not far from you either.
__________________
Cheers, Marcus.

My web site:
http://willyshotrod.com Over 5'000 Club
Likes: (1)
  #1766  
Old 25-03-2021
dik64  dik64 is offline
I just registered
 
Join Date: Sep 2016
Posts: 11
What Jeep do I drive?: TJ
Likes: 0
Liked 13 Times in 9 Posts
Default

So how much to commission build no.2 ?[emoji41]

Sent from my SM-N950F using Tapatalk
Likes: (2)
  #1767  
Old 26-03-2021
Gojeep's Avatar
Gojeep  Gojeep is offline
LokRinger
 
Join Date: Jul 2002
Location: Victoria
Posts: 6,870
Likes: 789
Liked 1,754 Times in 556 Posts
Default

Quote:
Originally Posted by dik64 View Post
So how much to commission build no.2 ?[emoji41]

Sent from my SM-N950F using Tapatalk
Wife has claimed that one years ago.
__________________
Cheers, Marcus.

My web site:
http://willyshotrod.com Over 5'000 Club
  #1768  
Old 27-03-2021
Gojeep's Avatar
Gojeep  Gojeep is offline
LokRinger
 
Join Date: Jul 2002
Location: Victoria
Posts: 6,870
Likes: 789
Liked 1,754 Times in 556 Posts
Default


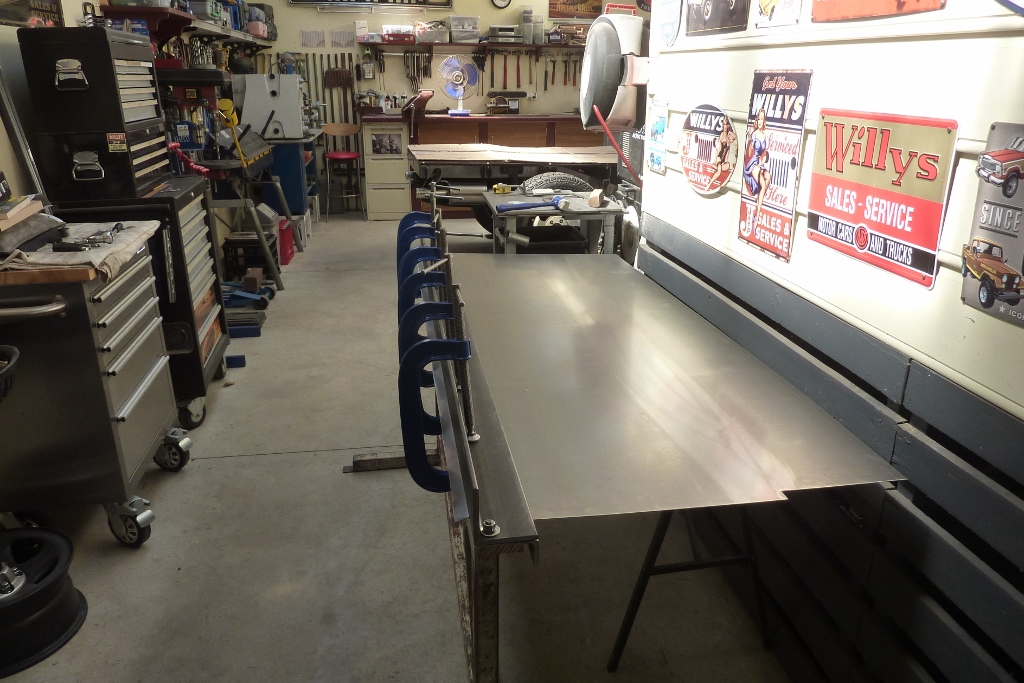
So to improve my handmade folds I bought some 100x100x10mm, 4"x4"x3/8", angle iron to better clamp down the sheet and extra forged G clamps. Another little thing not shown was I clamped a Vicegrip to the sheet directly behind the angle as well to stop it from getting pulled forward. Marked the sheet next to it so I could quickly see if it moved or not. Then placed the flipper on the edge and hitting it with the mallet worked well. No beadroller used this time.
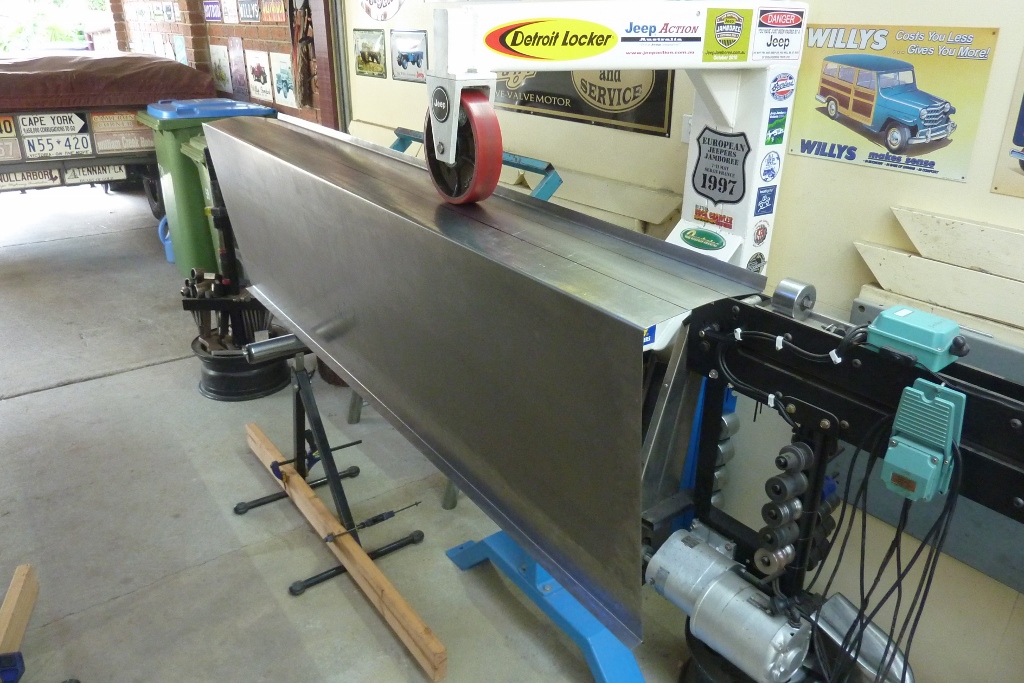

As I didn't have a helper this time, I used a roller stand with a piece of timber clamped to the legs to stop them folding and it tipping over. Because it is not a compound curve, it worked well.
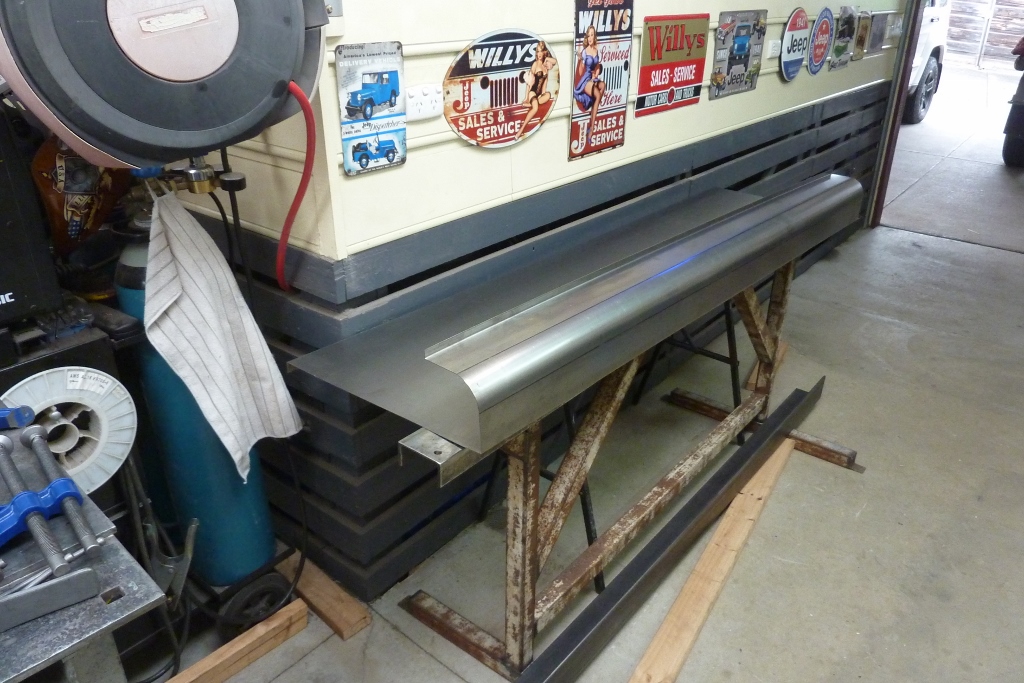

Got the same 90* roll again with no tracking outside the prescribed area. Got caught a few times on the test piece by the edge of the lower anvil causing a crease when the sheet curved enough that it would hit the adjuster causing the sheet to tilt.
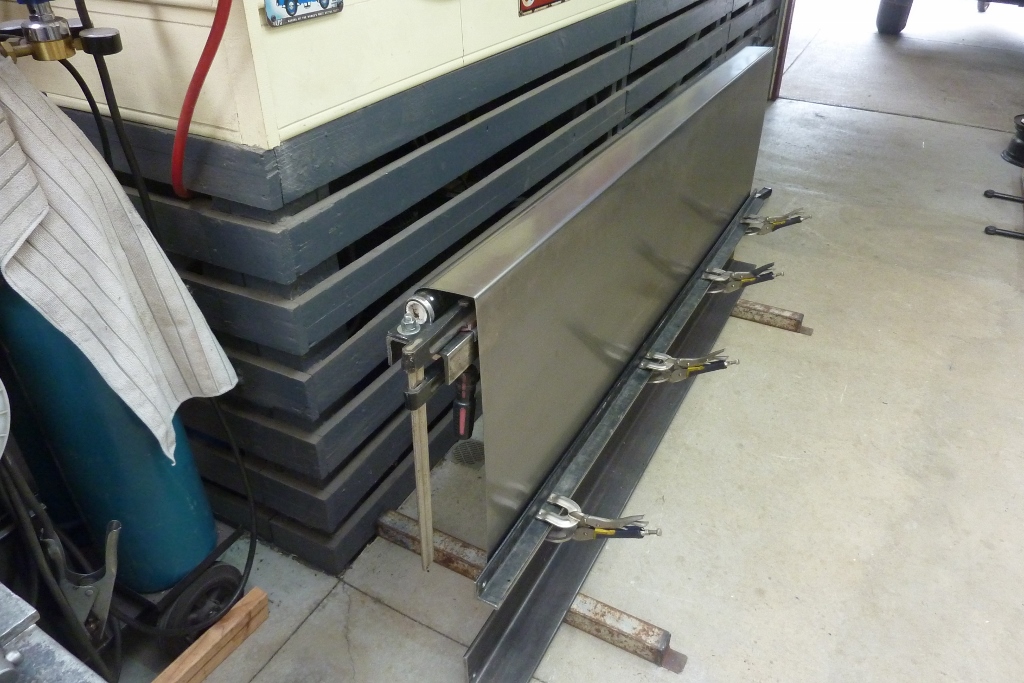

I found the weight of the angle iron helped it pull over easier while still protecting the lower flange when I had my foot pushing down on it while hitting a block of timber with a 4 lb dead blow along the top all at once!
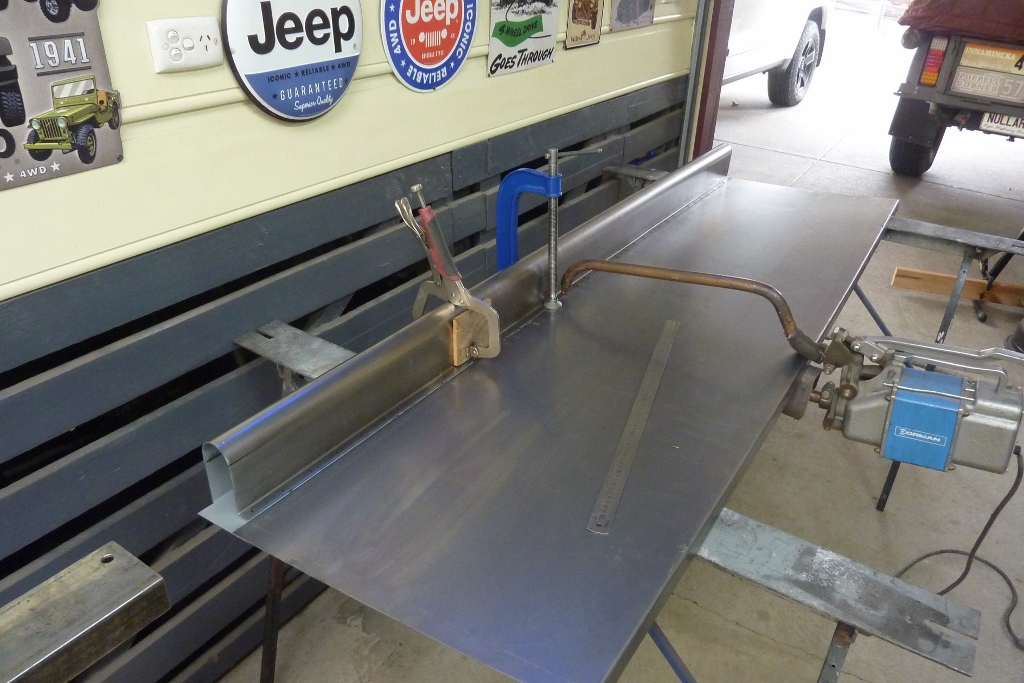

The last few millimeters were clamped down with the G clamp while the other clamp gives you adjustment in and out. Can see the inside was painted with weld through zinc primer.


The pipe I pulled it over was 32NB which has a 42.4mm outside diameter. I chose a smaller diameter than the inside of the roll to allow for spring back. It does stop you making it perfectly round though so I put in some 40NB pipe which is 48.3mm outside which is near on the 48.6mm inside the roll I was after. I drove in some box tubing that took up the exact space left while stopping and hitting around the pipe with the lead beating bat.
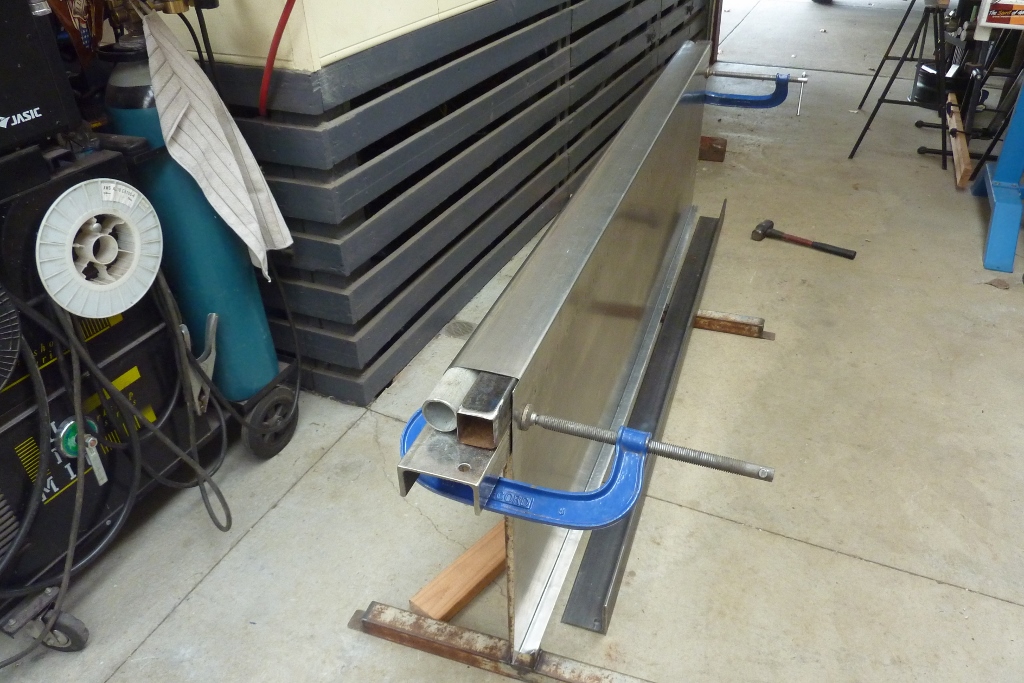

The tube was lubed and the inside sprayed with lanolin to help it go through but it still required using a short handled sledge hammer to drive it in.
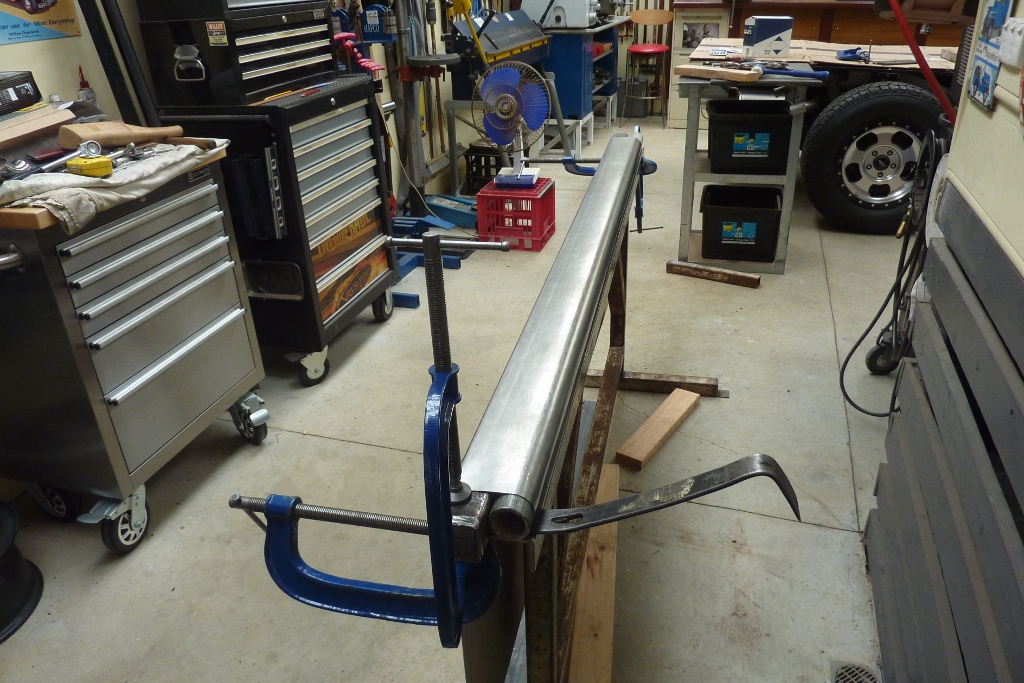

There was a bit of a twist in it so I was able to force it out by clamping down opposite corners and levering up on the low corner. Had to switch to a tyre lever after this shot to get it perfect.
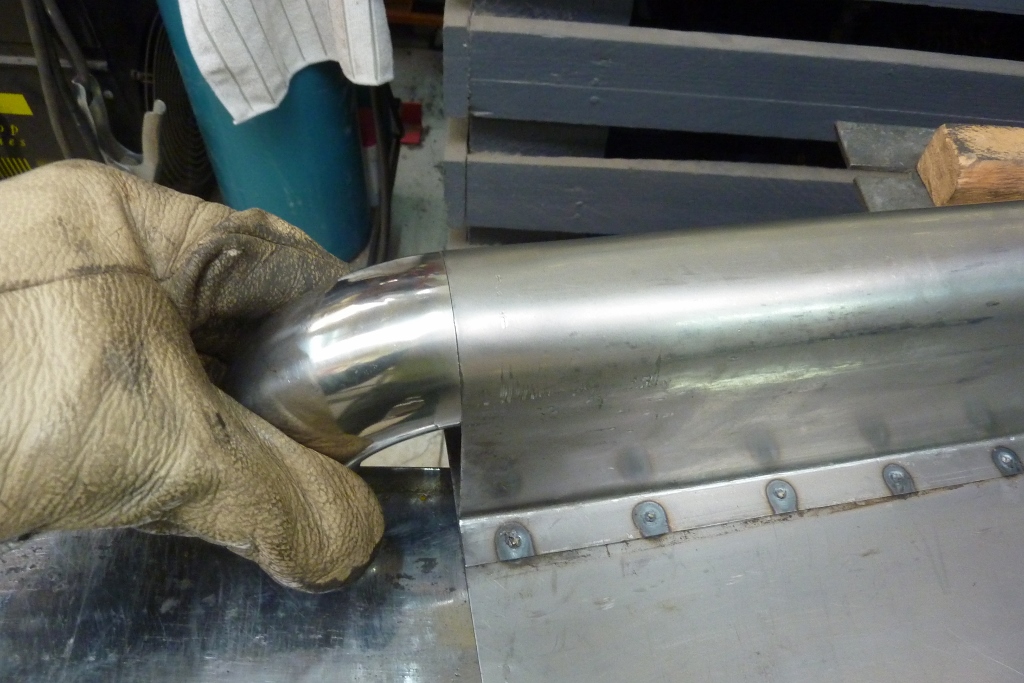

This is how well it came out after the pipe was removed and no other alterations were done.
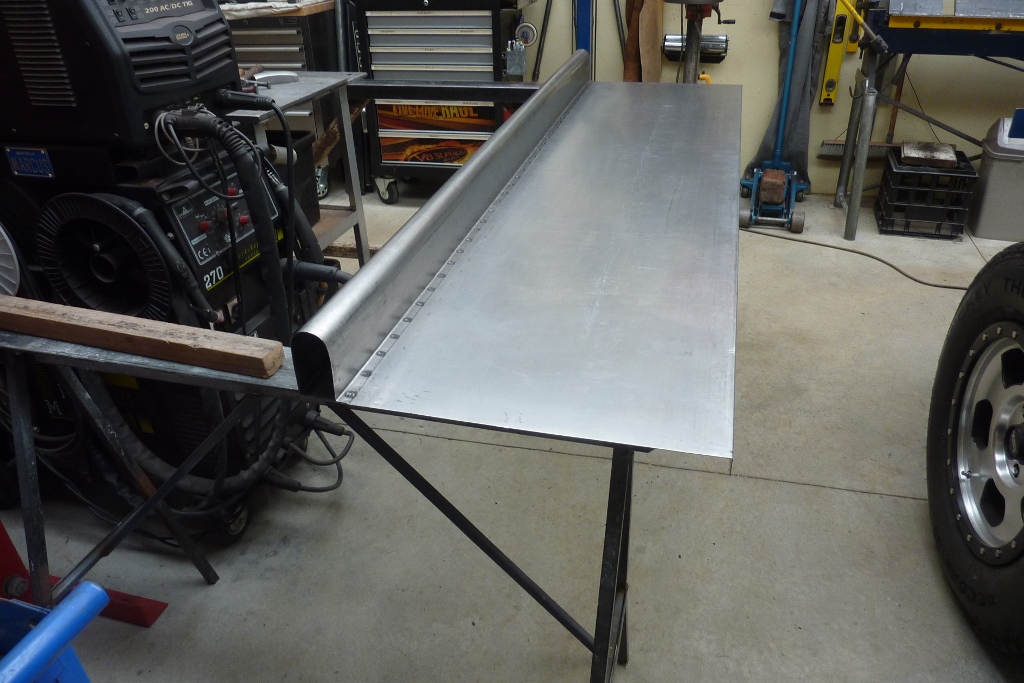

I have done this three times now, test piece plus left and right sides, and it gets quicker with less effort and a better result.


The cab end gets a return flange folded over towards the inside. One side of the stake pocket will get spot welded to this and then the front bed panel will bolt through both thicknesses.
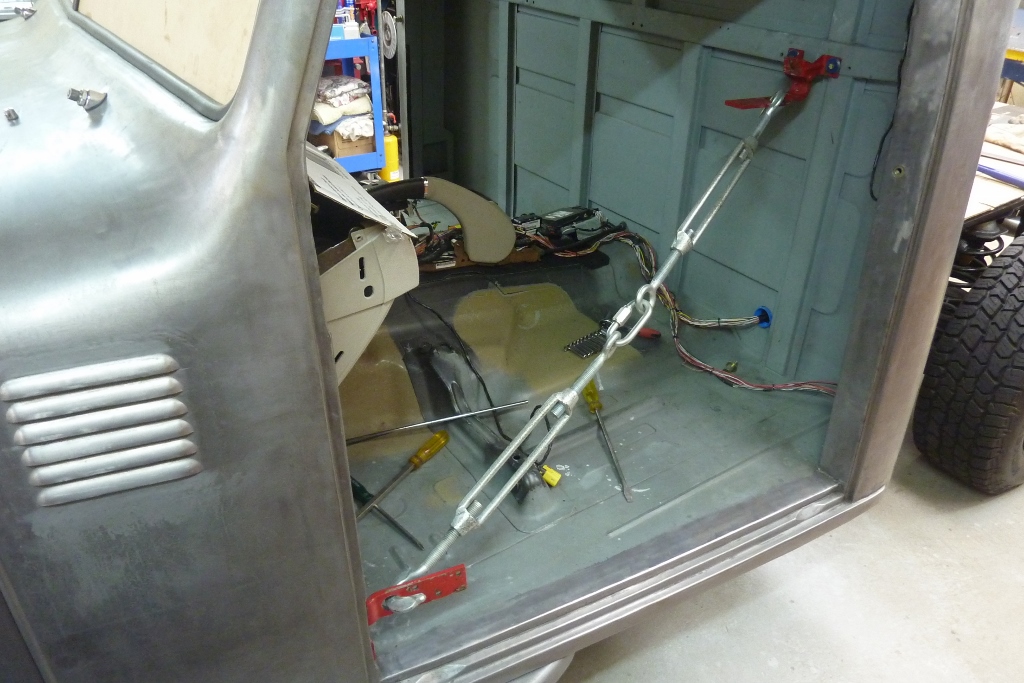

I found a bow in the back wall on one side right where the top of the front panel will run along. I could not shift it with a dead blow at all as the reinforcement is too strong. Bolted an old Willys door hinge to the hinge pocket and another to some threaded holes from the old back seat mount in the rear wall. Used these heavy duty turnbuckles to slowly pull it back into line and it came out millimeter perfect!
__________________
Cheers, Marcus.

My web site:
http://willyshotrod.com Over 5'000 Club
Likes: (2)
  #1769  
Old 28-03-2021
almiaman  almiaman is offline
I just registered
 
Join Date: Mar 2021
Posts: 2
What Jeep do I drive?: TJ
Likes: 0
Liked 1 Time in 1 Post
Default Jeep Pick up

Hi,
I like your project and will be very interested as it progresses.
Regards, Al
Likes: (1)
  #1770  
Old 30-03-2021
Gojeep's Avatar
Gojeep  Gojeep is offline
LokRinger
 
Join Date: Jul 2002
Location: Victoria
Posts: 6,870
Likes: 789
Liked 1,754 Times in 556 Posts
Default

Quote:
Originally Posted by almiaman View Post
Hi,
I like your project and will be very interested as it progresses.
Regards, Al
Thanks Al.
__________________
Cheers, Marcus.

My web site:
http://willyshotrod.com Over 5'000 Club
  #1771  
Old 03-04-2021
Gojeep's Avatar
Gojeep  Gojeep is offline
LokRinger
 
Join Date: Jul 2002
Location: Victoria
Posts: 6,870
Likes: 789
Liked 1,754 Times in 556 Posts
Default


Little details. Just putting in a small step to go over a flange. I just have a scrap piece of the same thickness I need to clear under this angle.


Good hard whack and one step created.


Neat and does the job.


Can see how it now goes over the mounting flange I spot welded to the sides. This piece is to take a seal for the tailgate to close against. It is not the finished width as I wont know that until I have the thickness of the tailgate stays installed.


Trying out different profiles for the stake pockets. Steel rulers give a good fair curve.


The blue steel that comes through the side is part of the floor mount. I designed the rear ones to extend through it so they can end up inside the stake pocket and they will be drilled and tapped to take bolts to reinforce the bed sides to stop them moving about. The front is secured to the front bed panel so doesn't require them.


This is the shape I decided on and just want it subtle and looking more professional than a piece of straight hat channel or box tubing.


Just trying out the shape and beading on a piece of scrap. When I make the final ones the flanges will be wider.


The curve shows up more once the face was added.


Just have a simple single bead running up the middle to match the ones I added to the grille extensions. It is the same size as the ones running across the back of the cab and the doors.
__________________
Cheers, Marcus.

My web site:
http://willyshotrod.com Over 5'000 Club
Likes: (6)
Post New Thread  Reply


Posting Rules
You may not post new threads
You may not post replies
You may not post attachments
You may not edit your posts

BB code is On
Smilies are On
[IMG] code is On
HTML code is On


All times are GMT +10. The time now is 02:40 PM.


Advertisements


AJOR does not vouch for or warrant the accuracy, completeness or usefulness of any message, and are not responsible for the contents of any message. The messages express the views of the author of the message, not necessarily the views of AJOR or any entity associated with AJOR, nor should any advice be substituted as technical advice replacing that of a mechanic. You agree, through your use of this service, that you will not use AJOR to post any material which is knowingly false and/or defamatory, inaccurate, abusive, vulgar, hateful, harassing, obscene, profane, sexually oriented, threatening, invasive of a person's privacy, religious, political or otherwise violative of any law. You agree not to post any copyrighted material unless the copyright is owned by you or by AJOR. The owner, administrators and moderators of AJOR reserve the right to delete any message or members for any or no reason whatsoever. You remain solely responsible for the content of your messages, and you agree to indemnify and hold harmless AJOR, the administrators, moderators, and their agents with respect to any claim based upon transmission of your message(s). The use of profile signatures to intentionally mislead or misdirect any member on this forum is not acceptable and may result in your account being suspended. Any trip that is organised through the AJOR forum is participated at your own risk. If you or your vehicle is damaged it is your responsibility, not that of the person that posted the thread, message or topic initiating the trip, nor the organisers of AJOR or moderators of any specific forum. This forum and associated website is the property of AJOR. No user data is harvested and no information supplied in your registration will be sold for profit.


Powered by vBulletin® Version 3.8.7
Copyright ©2000 - 2024, vBulletin Solutions, Inc.

AJOR © 2002 - 2024 AUSJEEPOFFROAD.COM. All corporate trademarked names and logos are property of their respective owners. Ausjeepoffroad is in no way associated with DaimlerChrysler Corporation or Fiat Jeep.
www.ausjeep.com www.ausjeep.com.au www.midlifemate.com ausjeepforum.com www.r9kustoms.com
vB Ad Management by =RedTyger=