Grand Willys Project - Page 267 - AUSJEEPOFFROAD.COM Jeep News Australia and New Zealand

Go Back   AUSJEEPOFFROAD.COM Jeep News Australia and New Zealand > JEEP GARAGE > Jeep build up
Register Forums Trading Your Jeep My Garage Mark All Read

Post New Thread  Reply
 
Thread Tools Search this Thread
  #1863  
Old 09-09-2021
CJ6np435's Avatar
CJ6np435  CJ6np435 is offline
Lowranger Shocker
 
Join Date: Oct 2003
Location: Hobart TAS
Age: 62
Posts: 1,679
What Jeep do I drive?: CJ
Likes: 41
Liked 133 Times in 100 Posts
Default

Well done Gojeep!!
__________________
Not another V8!
Likes: (1)
  #1864  
Old 09-09-2021
Gojeep's Avatar
Gojeep  Gojeep is offline
LokRinger
 
Join Date: Jul 2002
Location: Victoria
Posts: 6,870
Likes: 789
Liked 1,754 Times in 556 Posts
Default

Many thanks guys for all the support on reaching the milestone.
__________________
Cheers, Marcus.

My web site:
http://willyshotrod.com Over 5'000 Club
  #1865  
Old 10-09-2021
Gojeep's Avatar
Gojeep  Gojeep is offline
LokRinger
 
Join Date: Jul 2002
Location: Victoria
Posts: 6,870
Likes: 789
Liked 1,754 Times in 556 Posts
Default

Thanks guys.

Ran a very high concentrate of fuel injector cleaner through it today and now it purrs and no check engine light!

I let it idle for 20 minutes or so and the temp started to climb. The hydraulic fan was barely moving so was worried but knew there would be air in the system too. Suddenly it ramps up speed and a lot of air came into the reservoir as I moved the steering from lock to lock. All connected to the same system. Noticed water wasn't circulating either with a cold top hose so must be a stuck thermostat. Was about to shut it down as getting nearer the red zone and heard a click and it released itself and temperature plummeted. Tried several more runs and just sits at the correct temp perfectly now and the fan speed varies accordingly to need. Most of the time not needed at all.

Very happy it fixed itself.

Only problem I have is when trying to accelerate, while on the jack stand without wheels on, the traction control is kicking in madly and triggering the ABS. Not sure if it is because I still have to bleed the pump using the scan tool or it is getting confused without any wheels on and no road speed?
__________________
Cheers, Marcus.

My web site:
http://willyshotrod.com Over 5'000 Club
Likes: (1)
  #1866  
Old 11-09-2021
SeaComms's Avatar
SeaComms  SeaComms is offline
MonsterMoose
 
Join Date: Jun 2010
Location: Noosa QLD.
Age: 58
Posts: 7,940
What Jeep do I drive?: WK2
Likes: 1,432
Liked 809 Times in 466 Posts
Check out my Ride(s)
Default

So nice to hear I running smoothly after so long not running!

Mine has no issue revving when in neutral or park without ABS kicking in. Is there something not connected so it doesn't realise it's not in drive?

Sent from my SM-N975F using Tapatalk
__________________
Cheers, Dave :)

2010 JK, then a 2015 KL Trailhawk, now a 2017 GC Trailhawk!

Over 5000 Club
Likes: (1)
  #1867  
Old 11-09-2021
Gojeep's Avatar
Gojeep  Gojeep is offline
LokRinger
 
Join Date: Jul 2002
Location: Victoria
Posts: 6,870
Likes: 789
Liked 1,754 Times in 556 Posts
Default

Quote:
Originally Posted by SeaComms View Post
So nice to hear I running smoothly after so long not running!

Mine has no issue revving when in neutral or park without ABS kicking in. Is there something not connected so it doesn't realise it's not in drive?

Sent from my SM-N975F using Tapatalk
It revs up perfectly in park or neutral.
I think it is the rust sections of the rotors dragging compared to the areas under the pads that are clean. Can hear the swish swish noise as they are running. That is going to upset the traction control enough. Might clean them up on the lathe.
__________________
Cheers, Marcus.

My web site:
http://willyshotrod.com Over 5'000 Club
  #1868  
Old 11-09-2021
Gojeep's Avatar
Gojeep  Gojeep is offline
LokRinger
 
Join Date: Jul 2002
Location: Victoria
Posts: 6,870
Likes: 789
Liked 1,754 Times in 556 Posts
Default


I had to wait positioning the fuel filler until I knew exactly how long I was going to make the rear guards and where they sat on the bedsides. So I have to go from the flush fuel filler in my hand, under the cross member and then into the white inlet in the tank you see facing the rear of the vehicle.


This is the stainless steel stock filler from the Grand Cherokee. It starts at 50mm-2" and steps down to 25mm-1" for the rest of the way. It used to fill from behind the axle line and I need it to go in front of it.


I need a very short run from the filler before it turns 90* under the cross member. I trimmed both sides of the reducer as much as possible and formed a bead around the end of it to stop the hose slipping off.


I made my own bead tool from an old pair of cheap locking plies. Just built weld up and ground it to suit. The top jaw that goes inside the tube the raised part has a convex arc and the bottom two parts concave for the outside.


The advantage of using locking plies is that you can set the tension so it will always clamp the same depth as you go around bit by bit. I just went around a few times increasing the depth until it was what I was after.


Quick clean up with the finger sander with a scotch-brite belt and it is ready to go. The other end the weld seam will do the same thing.


The filler is 38mm-1.5" and it then goes to the original filler neck of 50mm-2" using a fuel filler hose for a Fiat that had those sizes and even the bend I needed. I will then use the universal Z fuel filler/oil hose for the other bends as well as one from the original filler tube. Never use radiator hose as it is different type of rubber and will break down over time.


The bead plies work just as well with the 25mm-1" stainless tube. I found it easier to clamp the plies into the vice so I could just use them one handed while slowly rotating the tube and re-clamping. The smaller the increments the better the bead. Didn't even have to clean this up afterwards. Be great for radiator and intake tubing as well.


Using the original part of the filler gave me the vent tube as well. I kept the run as short as possible to give a good fall. It drops 150mm-6" and I tested it emptying a full jerry can as quickly as the flexible spout on it allowed. Didn't even burp! Not the cleanest look but none will be visible once the bed goes back on. I'd rather this than the impracticality of a in the bed floor filler.
__________________
Cheers, Marcus.

My web site:
http://willyshotrod.com Over 5'000 Club
Likes: (4)
  #1869  
Old 24-09-2021
Gojeep's Avatar
Gojeep  Gojeep is offline
LokRinger
 
Join Date: Jul 2002
Location: Victoria
Posts: 6,870
Likes: 789
Liked 1,754 Times in 556 Posts
Default

I like to go around and finish off any details before moving on to the next stage of the build. Otherwise they may never get done!
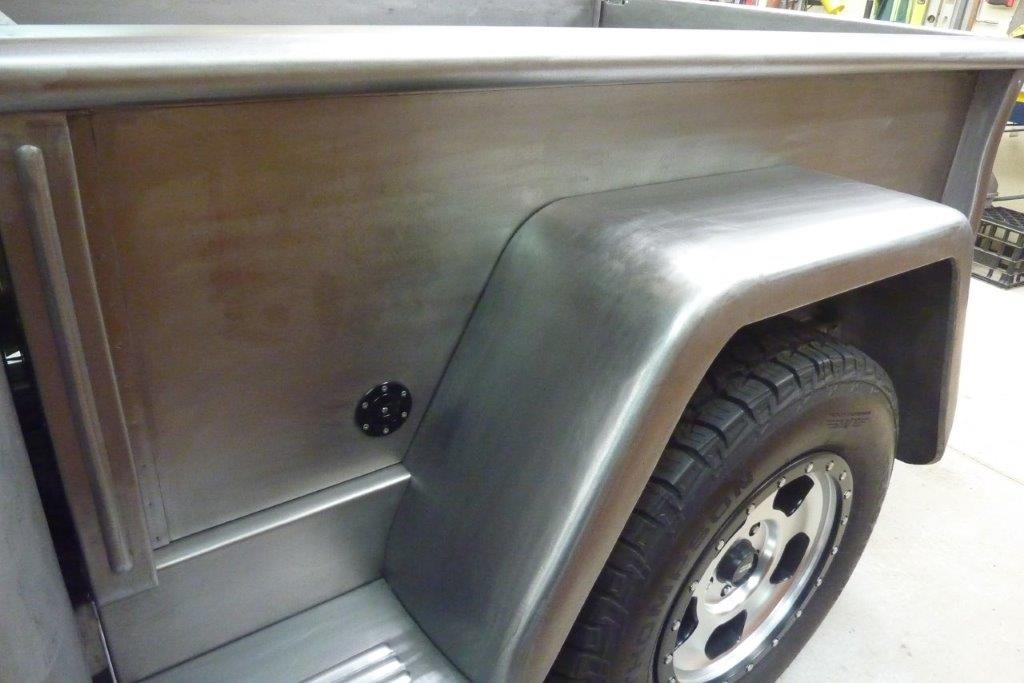

The fuel filler now in place. Not 100% happy on the all black though.
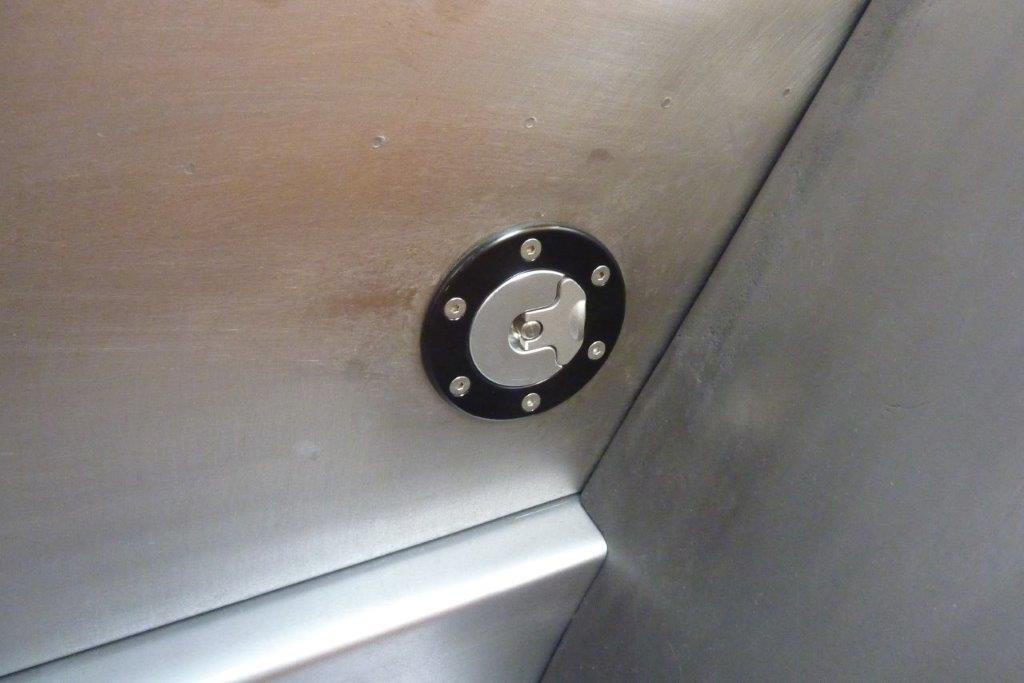

So I bought another clear anodised one and swapped in the cap.
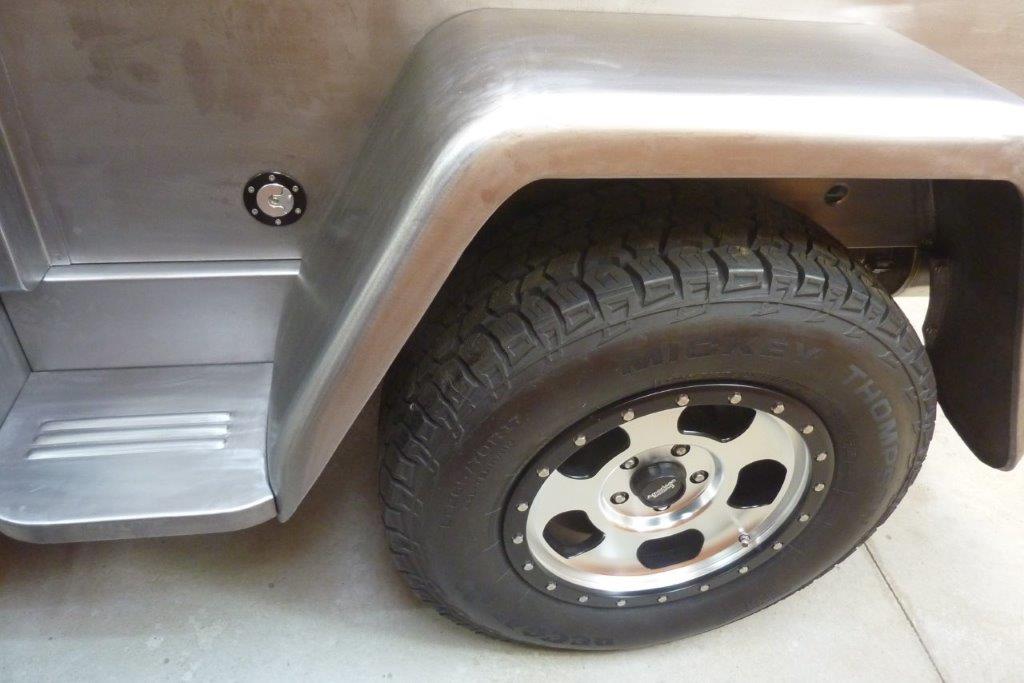

Now I think it ties in which the wheels with the alloy centre, black ring and stainless steel bolts.


When I first ran the engine for 20 minutes to get it up to full temperature, I noticed the floor under the drivers seat got quite hot. Not above the cat mind you, as I had already welded a heat shield over that, but the left bank 3" stainless pipe running next to it. So I made a stainless heat shield to be above both pipes and sits 20mm-3/4" off the floor. I put the ribs in to give it some strength.
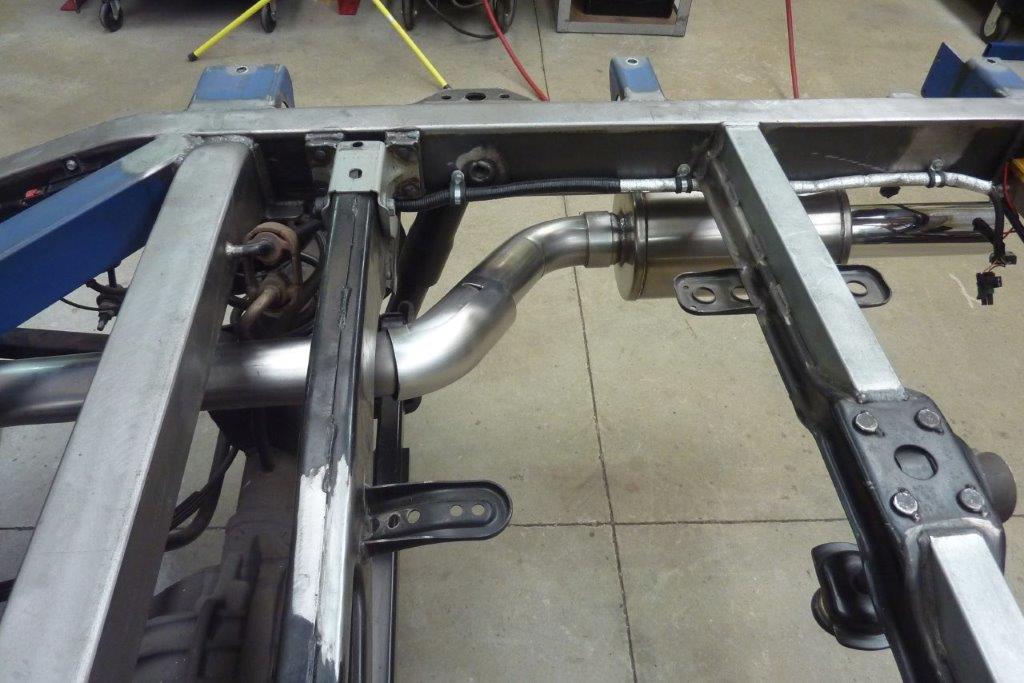

Also turned a stainless bend from a roll bar into a heat shield where the exhaust was closest to the spare tyre.
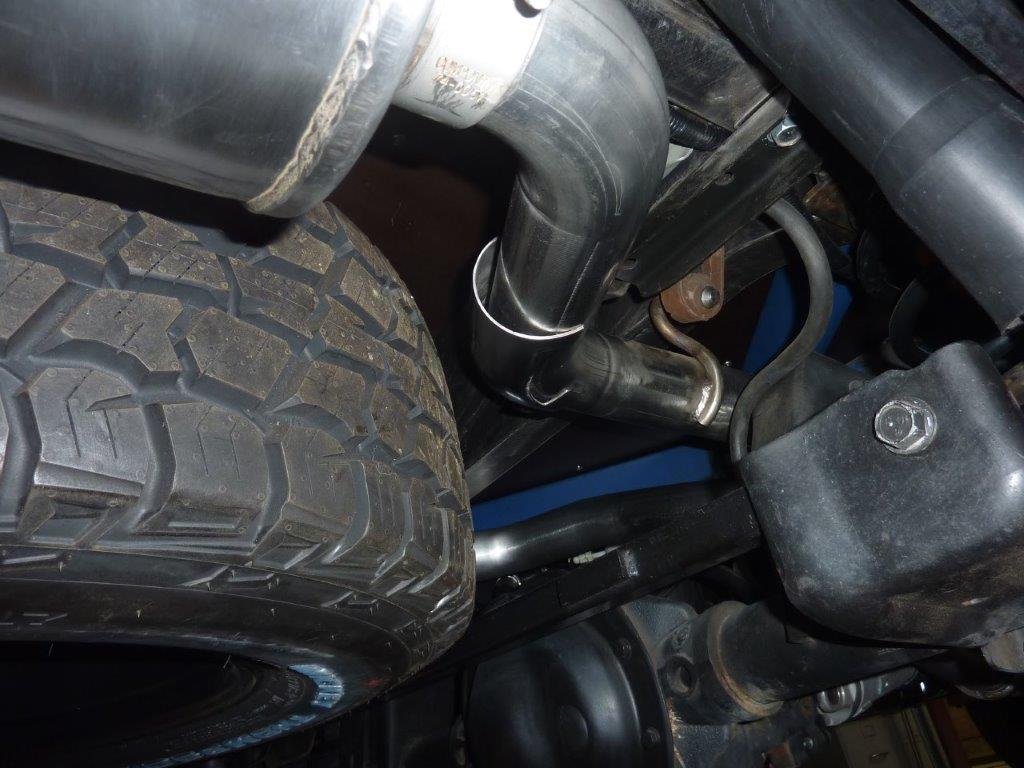

The gap was around 50mm-2" but rather give some more protection. The resonator, being of the glass pack type was much cooler on the outside, and has an even bigger gap to the tyre.
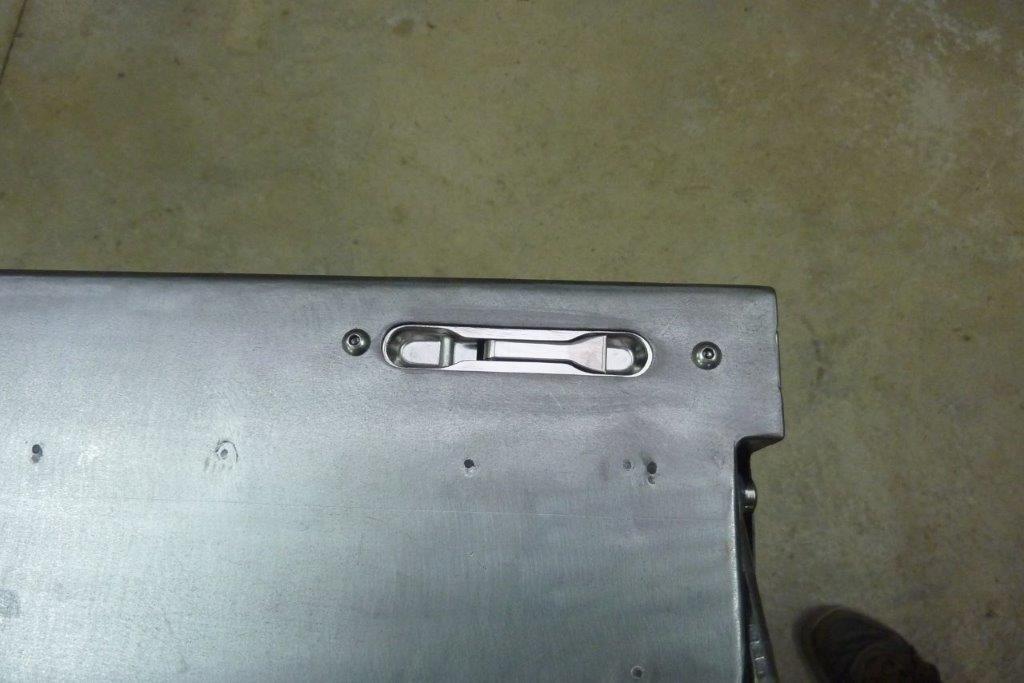

Simplified the slot for the tailgate catches as well. Polished the brushed look they had so it now matches the bed strips and chrome etc.
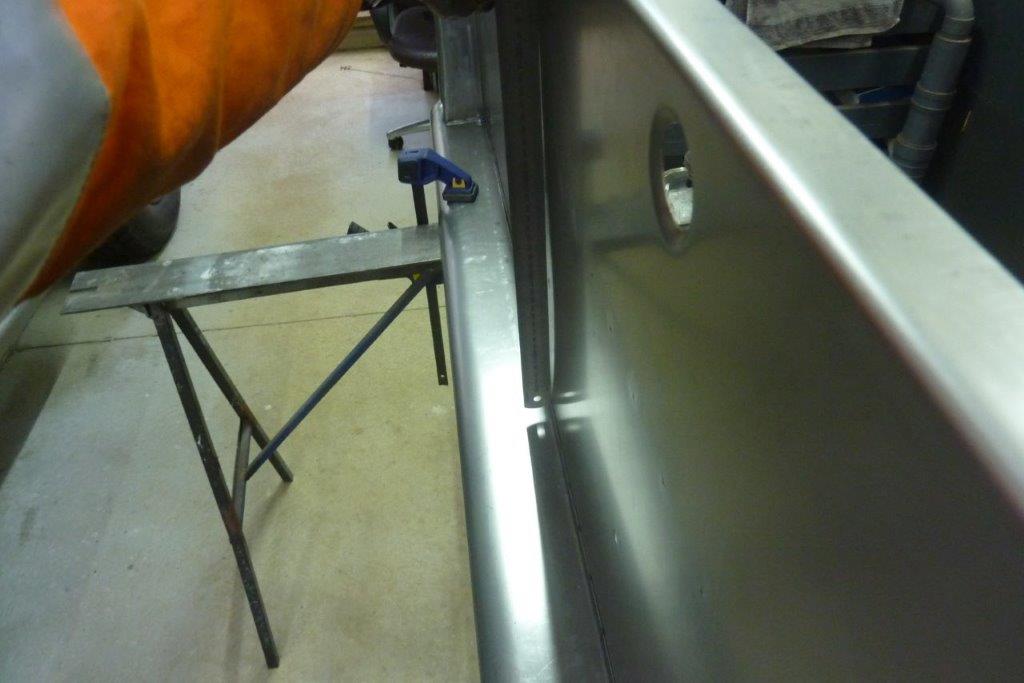

Another thing I noticed was the rear guard-fender bolts were getting pulled inwards. It also created gaps between the bolts on the outside where the guard bolted on. Found there was excess material right along the bedside, but not at each end where it is supported by the stake pockets. I had already stretched all the spot welds but this still remained.
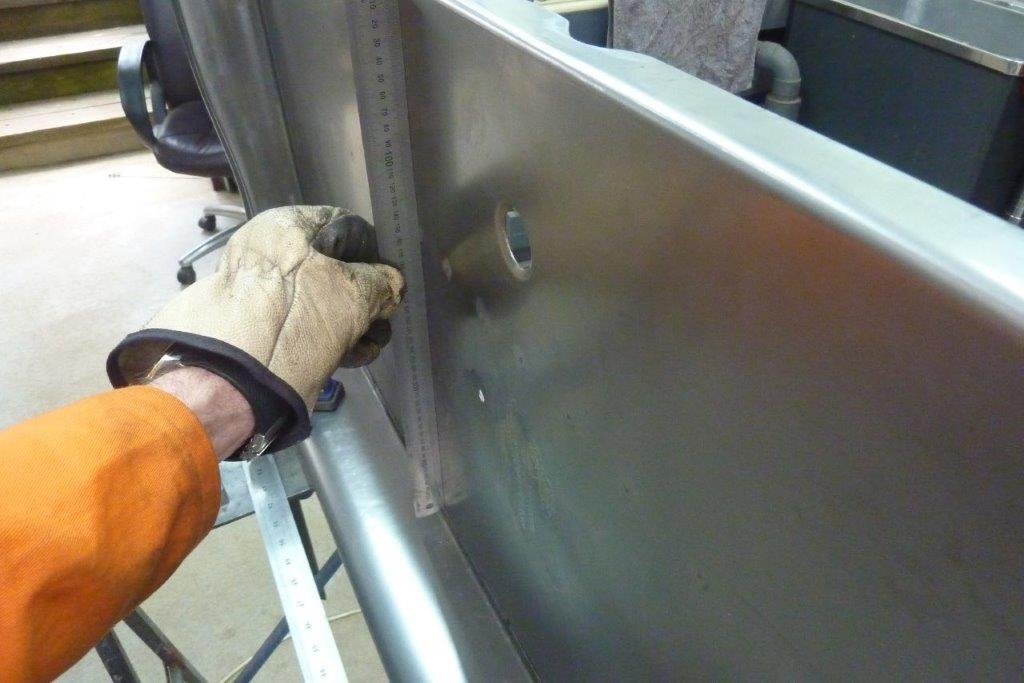

Spent some time with just a 5" shrinking disc on my grinder shrinking the panel all the way along on the inside. No air or water was used to cool it. Used a long straight edge in the other direction too to check the panel that way. Takes some patience to get it nice and flat again. I did it with the panel vertically as having it horizontally would have changed the way the panel lay.
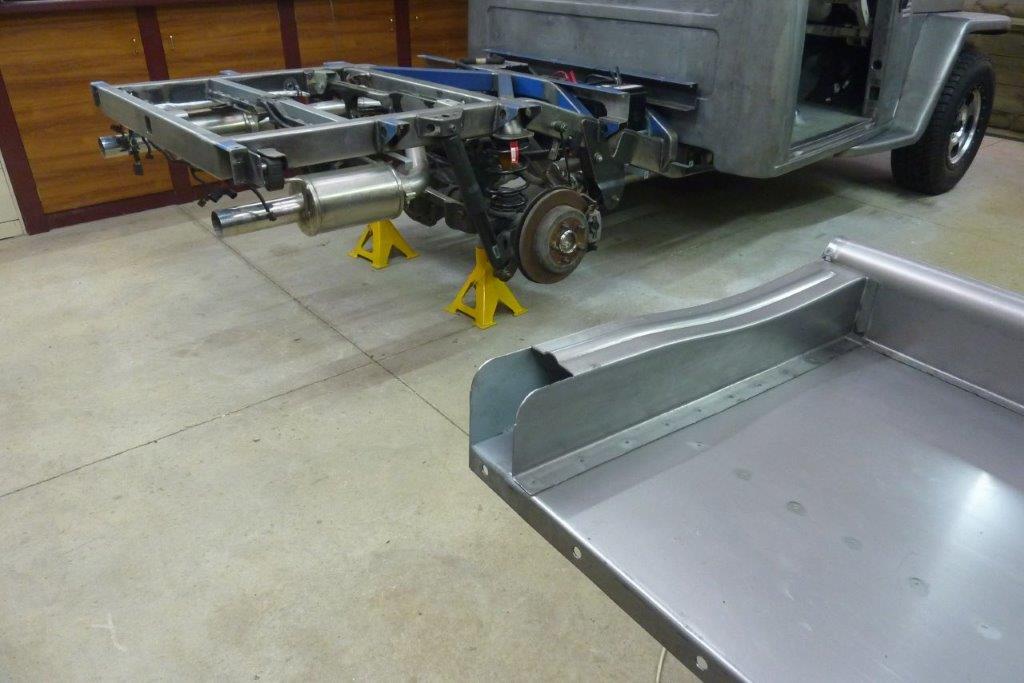

Another detail I attended too was changing the ends of the stake pockets from just being squared off. I decided to give them the same 50mm-2" radius as all the other rounded corners on the bed. I cut higher than where the bead ended to maintain the same amount of flat area at each end of the bead.


Can see how it matches the radius of the rolled top.
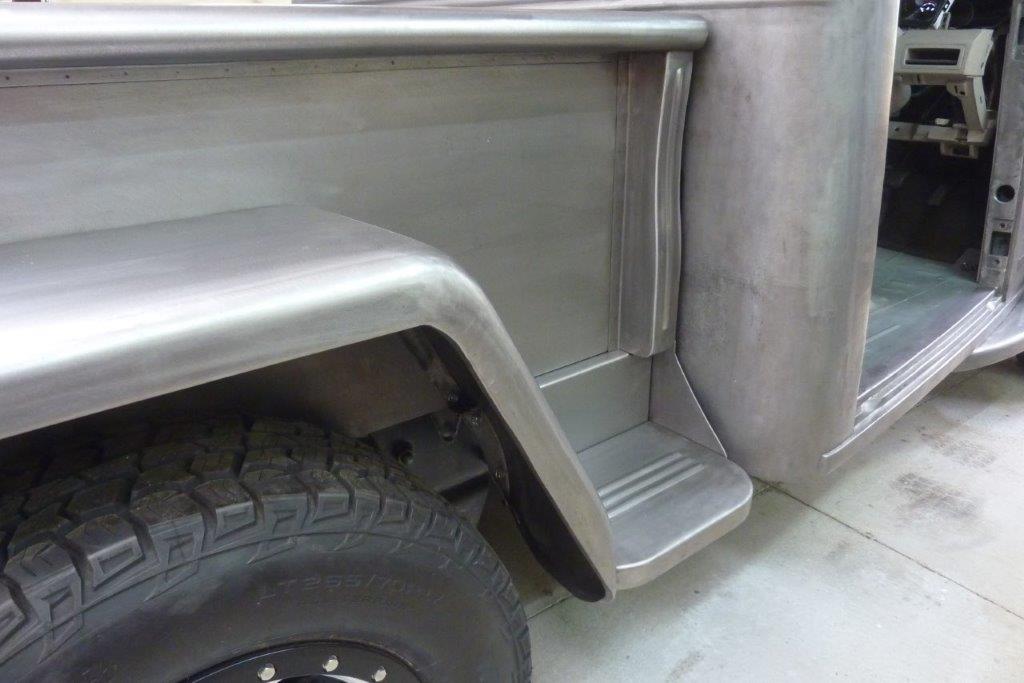

I was worried how it would look with the step gusset, but think it looks fine.
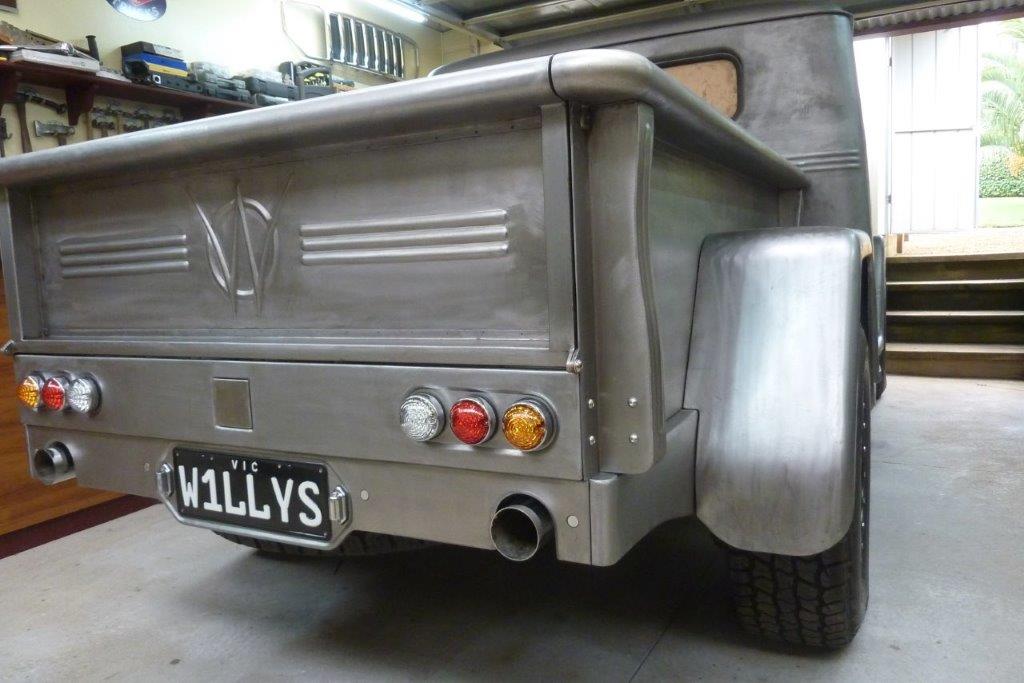

Blends in better with the skirt end as well.


I'm calling the bed now finished! Well at least until I build my hard cover later on.
__________________
Cheers, Marcus.

My web site:
http://willyshotrod.com Over 5'000 Club
Likes: (7)
Post New Thread  Reply


Posting Rules
You may not post new threads
You may not post replies
You may not post attachments
You may not edit your posts

BB code is On
Smilies are On
[IMG] code is On
HTML code is On


All times are GMT +10. The time now is 04:48 PM.


Advertisements


AJOR does not vouch for or warrant the accuracy, completeness or usefulness of any message, and are not responsible for the contents of any message. The messages express the views of the author of the message, not necessarily the views of AJOR or any entity associated with AJOR, nor should any advice be substituted as technical advice replacing that of a mechanic. You agree, through your use of this service, that you will not use AJOR to post any material which is knowingly false and/or defamatory, inaccurate, abusive, vulgar, hateful, harassing, obscene, profane, sexually oriented, threatening, invasive of a person's privacy, religious, political or otherwise violative of any law. You agree not to post any copyrighted material unless the copyright is owned by you or by AJOR. The owner, administrators and moderators of AJOR reserve the right to delete any message or members for any or no reason whatsoever. You remain solely responsible for the content of your messages, and you agree to indemnify and hold harmless AJOR, the administrators, moderators, and their agents with respect to any claim based upon transmission of your message(s). The use of profile signatures to intentionally mislead or misdirect any member on this forum is not acceptable and may result in your account being suspended. Any trip that is organised through the AJOR forum is participated at your own risk. If you or your vehicle is damaged it is your responsibility, not that of the person that posted the thread, message or topic initiating the trip, nor the organisers of AJOR or moderators of any specific forum. This forum and associated website is the property of AJOR. No user data is harvested and no information supplied in your registration will be sold for profit.


Powered by vBulletin® Version 3.8.7
Copyright ©2000 - 2024, vBulletin Solutions, Inc.

AJOR © 2002 - 2024 AUSJEEPOFFROAD.COM. All corporate trademarked names and logos are property of their respective owners. Ausjeepoffroad is in no way associated with DaimlerChrysler Corporation or Fiat Jeep.
www.ausjeep.com www.ausjeep.com.au www.midlifemate.com ausjeepforum.com www.r9kustoms.com
vB Ad Management by =RedTyger=